Access Management
Access Management
This section allows you to provide access to a user to read or edit your application in PIES Studio.
When you click on View button of the desired Application, you will be navigated to explorer page.
On left pane, click on Settings icon to open the Settings section. Now, click on Access management in left pane. Below options can be found under access management.
Add Access
You can provide access to a user by clicking on Add Access button. Add Access pop-up window will appear to enter email Id of user and to select the type of access such as Read, Write and Maintain. Click Save button after providing desired information or click Close to close/cancel the Add Access pop-up window. The user will be added & provided access upon saving.
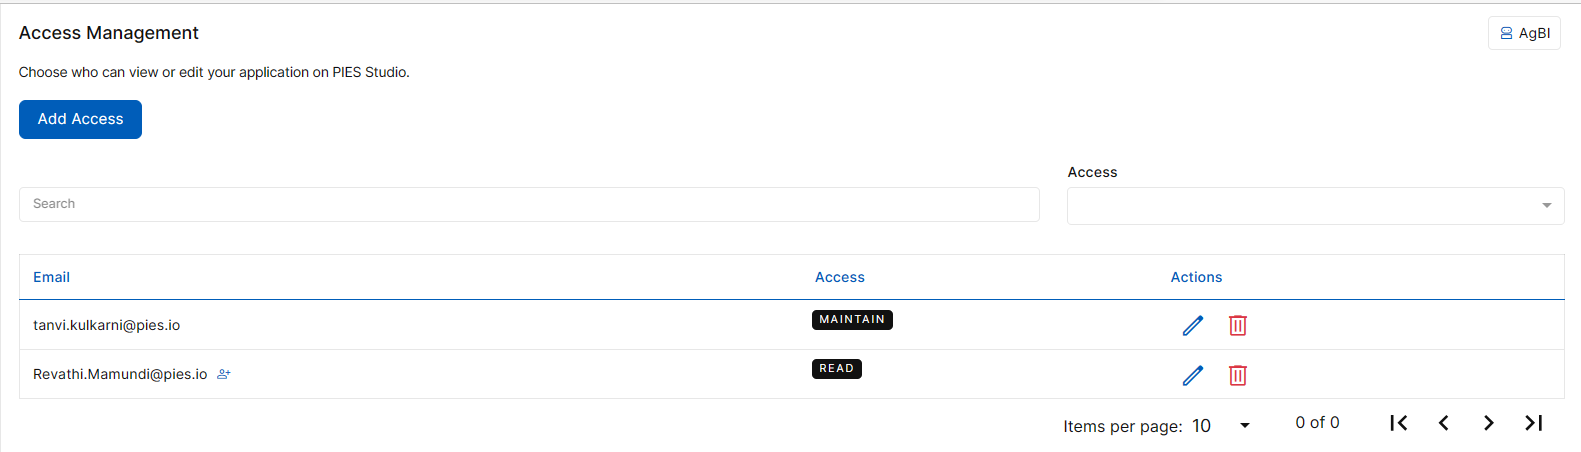
Fig 1: Access Management Section
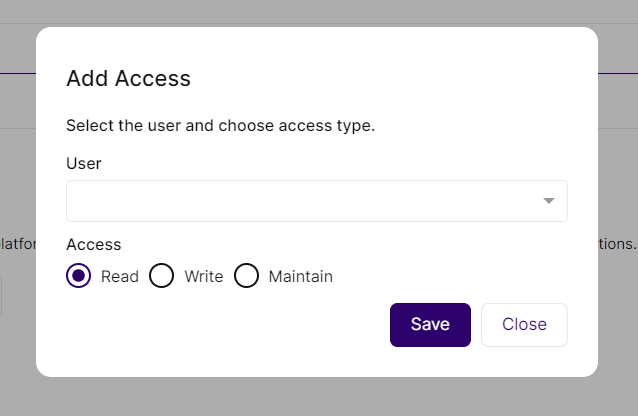
Fig 2: Add Access Pop up window
Edit Access
You can also edit the access of the added user by clicking on the pencil icon under Actions. When you click on this icon Edit Access pop-up window opens. You can select the user email and edit the access type and click Save to update. Access type will be updated for the user and a success message will be displayed as “Success “. Click Cancel to close the pop-up window & go back.
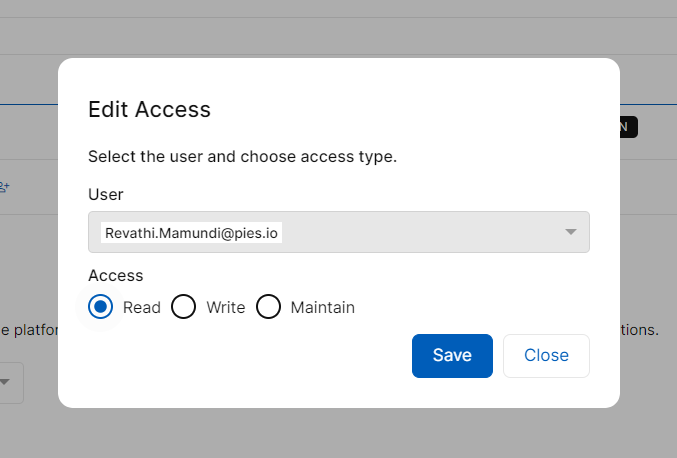
Fig 3: Edit Access Pop up
Delete Access
You can also delete the added user by clicking on the delete icon under Actions. When you click on this icon, Delete access pop up window will open. Click Confirm to delete the user from the list. User will be removed from the list and success message will be displayed as “Access deleted successfully “. Click Cancel to close the Pop-up window.
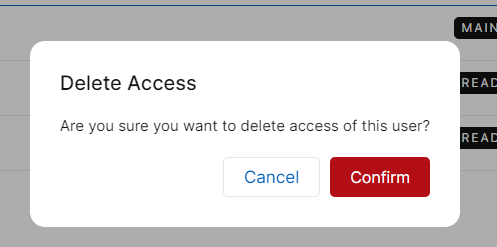
Fig 4: Delete Access Pop up
You can search for users using their access type by selecting Access type as Read, Write or Maintain from the dropdown.
Visibility
Access Management has another sub-section called Visibility. Your application's visibility on the platform can be set as 'Public' or 'Private'. This can be set by selecting Public or Private from dropdown. All users will have read access to public applications. Once you select the type of visibility, click on Change Visibility button. A pop-up window will appear to confirm selection. Click Yes, I am aware to change visibility and a success message will be displayed as “Visibility changed to public/private successfully. “
Or, click Cancel to Close the Visibility Window.

Fig 5: Visibility Section