Deploy
Build & Preview
At any point in the application development phase, you can build your application in PIES studio. Building an application means that you can identify inconsistencies or errors in the current application before it is taken up for deployment. Build helps in saving valuable resources and developers time as any inconsistencies or issues in the application objects (Database, Screens, Events, Functions) can be identified and rectified.
Once you login and navigate to any created application, on the top right corner of your screen, you will be able to see an option called Build. On clicking build, a build console will open up on your screen and system will start generating code and check for errors.
In this console you will get three icons on the extreme right - 1. Bug icon 2. Collapse icon 3. Close icon. Build will run for all the modules in your application and you will be able to see the status of Database, Screens & Functions separately under respective modules in build console. Events are not a part of build as they connect screens & functions and if there are any errors in screens or functions it automatically relates to its respective event as well.
Once build is complete, if there are any errors in your current application, you will be able to see that under Bug section. You can click on bug icon to check and analyze errors. Each error will be reported individually with an icon right next to each error which upon clicking will take you directly to the respective data table, screen or function. Sometimes, you will also see Warnings under each module. These warnings are not blockers for application deployment, but it is always good to check these warnings and take action if needed. If there are no errors in your application, you will be able to see a message stating No errors reported under each module. You will get a reload option which upon clicking will start the build process all over again. You can use this option if you have made any changes after the first build. Clicking collapse icon will minimize the build console and clicking close icon will close the build console.
You can also download the application code from this console using Download Code option. Note: You can either download from here or you can also from the Download section. Download process is the same

Fig 1: Build
In case of zero errors, you will also get an option called Live Preview in the build console to preview your application. Clicking on Live Preview will open up a new window where you will be able to see a preview of deployed application. Once a preview session has started, it will be active for 15mins. After 15mins, current preview will end and you can start a new session from build console if needed. You will be able to access the preview just like deployed application and verify if the application functionality is as expected. In preview, you can also change user roles and verify access controls. This can be achieved by changing roles under Previewing As field. In preview, you can also switch between light & dark theme by clicking on the icon right before Previewing As field.
You can zoom in and zoom out of preview screen by increasing or decreasing zoom percentage on top left corner. Clicking on reset button will revert the set screen size to 100%. When you click on End Session, you will get a popup stating, “Are you sure you want to end this preview session?” Upon confirmation, current preview will be ended. You can click on Live Preview again in build console to start a new session.
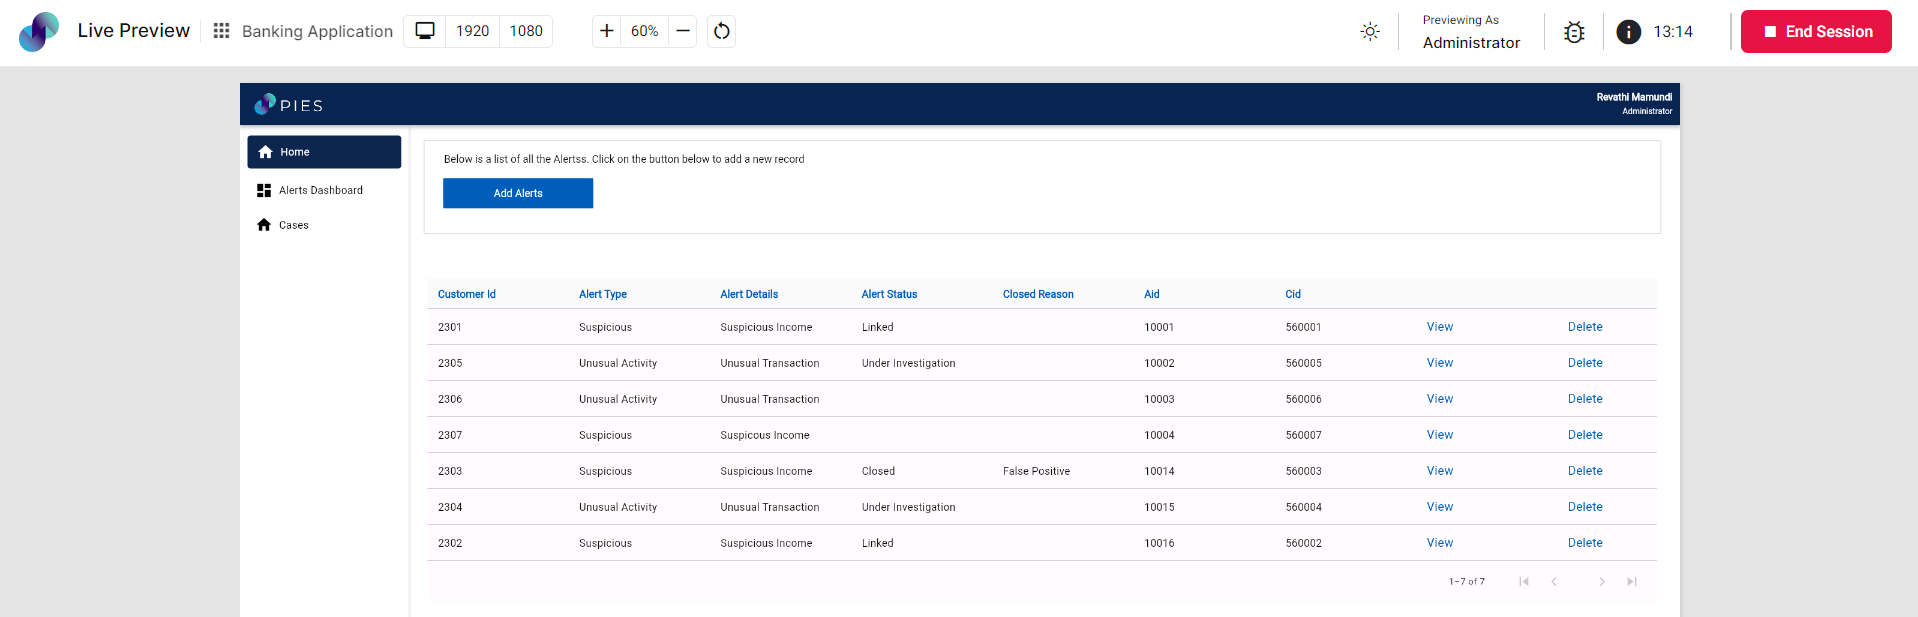
Fig 2: Preview
Preview errors can be debugged using a feature called Preview Debugger. When you click on Preview Debugger icon, a debugger console will open. You will get the application logs with input & execution result in this console, as you navigate through the preview screen. You can refresh the debugger console or clear all the current logs using the reload and clear icons present on the right side of console (refer Fig 3). Clicking collapse icon will minimize the preview debugger console and clicking close icon will close the console.

Fig 3: Preview Debugger
Create Deployment
When you have developed & successfully built the application, you can go ahead and deploy the application. The following section explains how to deploy your application on the Host (PIES) cloud server or on a different cloud/data center server.
Go to Deploy & Export section on the left pane of desired application
Under New Deployment, click Create Deployment
You will get two types of deployment - Testing & Production. Select the type of deployment from dropdown based on your requirement. You can only have one active deployment in each type. If you want to redeploy the same type, you need to shutdown or delete the existing deployment.
Once you click on Create, application build will start running. You will be able to deploy the application only when build is successful without any errors. If build fails, you need to fix the reported errors and redeploy.
Deployment Form
When your application build is successful, you will get a Deployment form
Deployment Name is set to application name by default based on the name you provided during application creation process. You can also change the deployment name if required
Enter a version to your application deployment in Version field. This will come in handy if you would like to have version control
Currently, applications can only be deployed as a Web Application. When application is deployed successfully, you will get application URL through which you can access the application. You can access the URL as long as the deployment is not deleted or shutdown
Description field is set to application name by default. You can also modify the description if required
If you have not provided Admin Details in Access Control - Configurations section, you need to enter the Name & Email Address of user who will be the application's admin. If you have provided admin details in Access Control section, the same will automatically reflect in deployment form
SMTP details added under Email Servers will appear in SMTP Details dropdown. Select the desired SMTP details from dropdown. It is mandatory to provide email server SMTP details. If you have not provided SMTP details in Email Server section, you need to go back, provide the details & redeploy. Once the application is deployed, system will use the selected SMTP server to send emails
Select the preferred database option under Database Options. If you want the system to create a new database server for the deployed application, do not check Connect To Existing checkbox. If you want to connect to an existing database, click Connect To Existing checkbox.
If you check Connect To Existing checkbox, you need to enter the required Host, Port, Username, and Password in their respective fields. Make sure to enter valid details. After entering click on Test Connection to verify the connection. If the details entered are valid you will get a success message right next to Test Connection button. If the database details are invalid or if there is issue connecting to database, you will get a message stating Connection Failed. Double check the database details and try again in this case.
Under Deployment Options, select Deploy to Host Cloud if you want to deploy using PIES cloud infrastructure or choose Azure Cloud Deployment if you want to deploy application to Azure cloud environment or choose Google Cloud Deployment if you want to deploy to Google cloud environment
If you choose Azure Cloud Deployment, you need to provide the required Client ID, Subscription ID, Client Secret & Tenant ID
If you choose Google Cloud Deployment, you need to provide the required Project ID, Client ID, Client Email, Private Key ID & Private Key (in PEM format)
Click Start Deployment. Deployment Details page will appear
You can also see the deployment logs in deployment details page
Towards the end of deployment, admin will receive Set Your Password email to set password & can login to application from there
Ensure that the admin details are entered correctly in deployment form. Admin will not receive Set Your Password email if incorrect information is provided
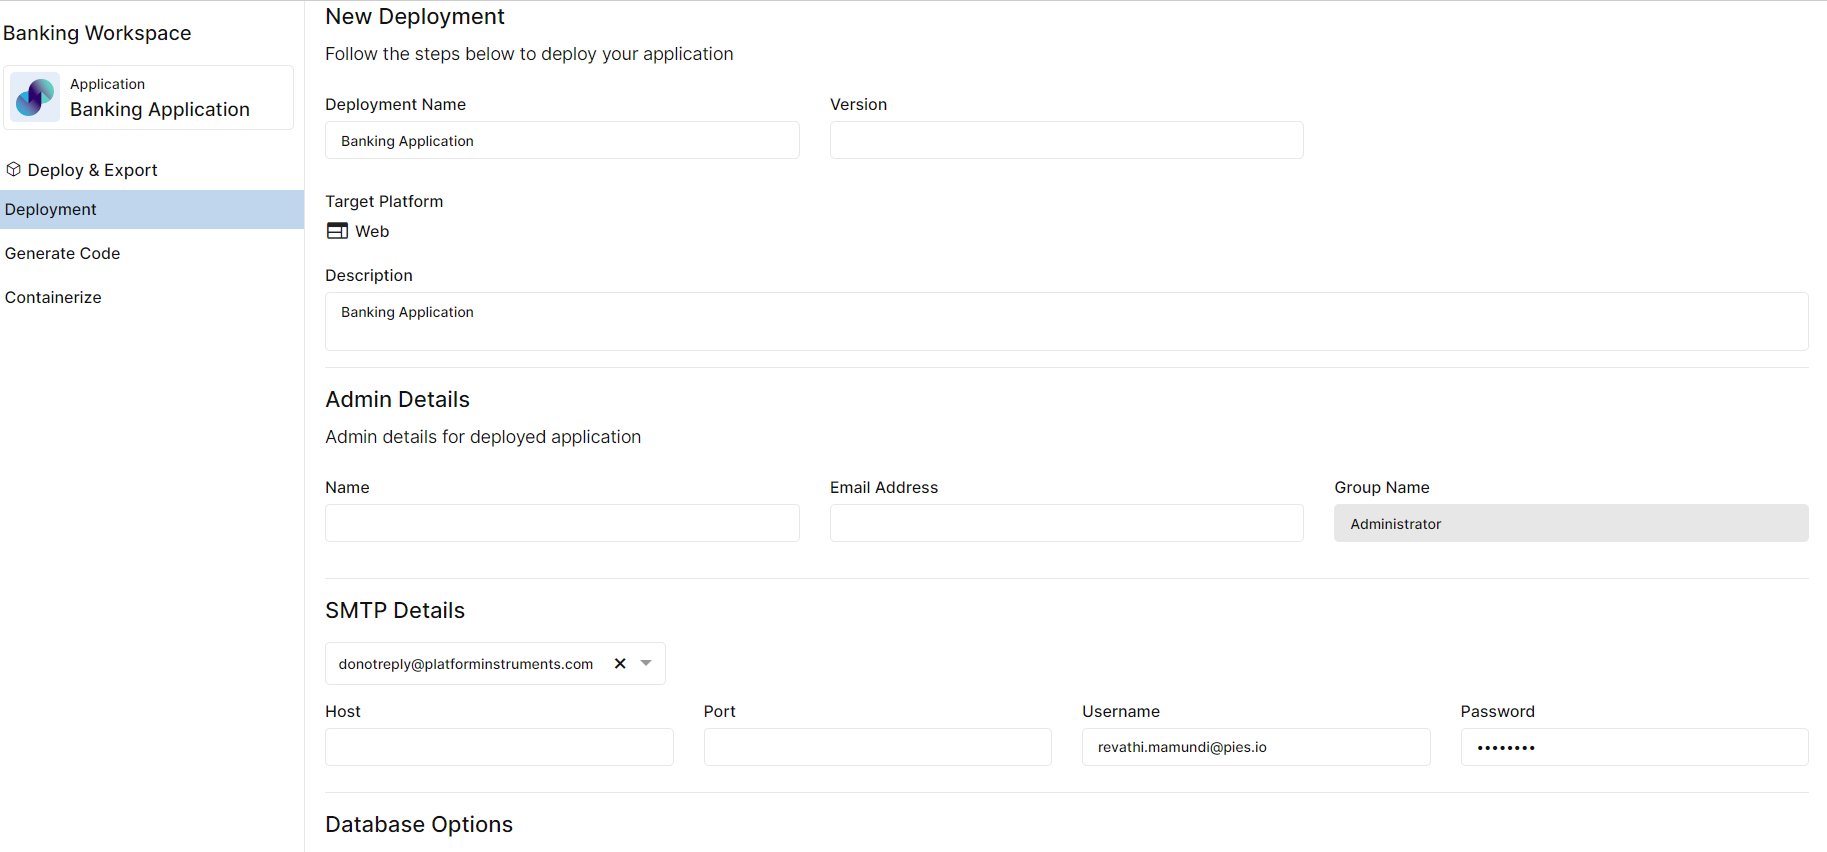
Fig 4: Deployment Form
Set Password & Login
Click on Set Password button or the link mentioned in email
Admin will be redirected to Set Your Password page
Provide a password that meets the specified criteria and click Set Your Password button, you will be taken to the application's login screen
Login screen is automatically generated. It is not developed as part of application builder in the development phase.
As Admin, enter the email address & enter the set password. Click Login
Landing screen will be the screen you have set during development phase under application settings
Admin can start adding users & assign them to created user groups via Admin Console
View Node IP List
If you wish to view the list of node IPs, you can use this section.
Go to Deploy & Export section and click View against desired deployment
Under Advanced section, click View Node IP List
Node IPs popup will appear where you will be able to see the list of IPs. If there are no node IPs found, you will get a message in the popup stating No Node IP found.
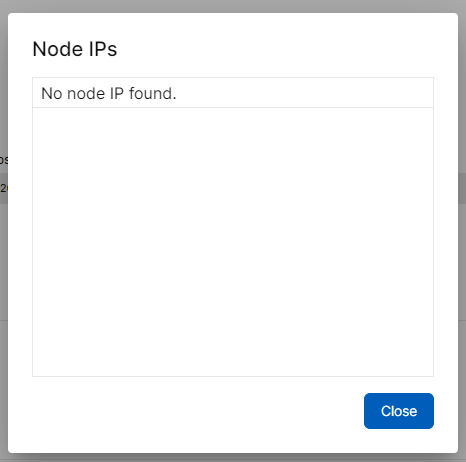
Fig 5: View Node IP List
Download SSH Key
If you wish to authenticate with remote server, you can download SSH key using this section.
SSH (Secure Shell) Keys are authentication credentials.
Go to Deploy & Export section and click View against desired deployment
Under Advanced section, click Download SSH Key
A public key will be generated and downloaded
You can add the downloaded public key to server for authentication purposes
Manage Deployment
This section describes how to shut down or delete a deployed application when the deployment is not needed.
It is recommended that you take necessary back-ups for such applications before it gets shut down or deleted from the server.
Delete Deployment
To delete a deployment,
Go to Deploy & Export section
Under Actions, click View against the desired deployment
Under Manage Deployment, click Delete
Deletion Warning popup will appear. To confirm deletion, enter the full name of application as it is in the text box provided
Click Continue
Next, Deletion Confirmation popup will appear. You will be asked to enter your account password to confirm deletion
Once you enter the password, click Confirm. Deployment deletion will be initiated and the deployment will be deleted in few seconds
All the deleted deployments will be removed from Active Deployments and added to Past Deployments list
Shutdown Deployment
To shut an active deployment,
Go to Deploy & Export section
Under Actions, click View against the desired deployment
Under Manage Deployment, click Shutdown
You will get Shutdown Application popup. Read the content & click I understand checkbox. Click Shutdown to proceed or Cancel to go back
Upon confirmation, application shutdown process will be initiated and the deployment will be shutdown in few seconds
In Deployment Details page, you can see that the status of deployment has changed to Shutdown
All the shut deployments will be removed from Active Deployments and added to Past Deployments list
Start Deployment
You can only start an already shut deployment. Start button will not be enabled for an already active deployment. To start a deployment,
Go to Deploy & Export section
Under Actions, click View against the desired deployment
Under Manage Deployment, click Start
Start Application popup will appear. Click I understand, start the app to proceed or Cancel to go back
You will get a success message stating, Application started successfully. Started deployment will reflect under Past Deployments list with Starting status. The started deployment will appear under Active Deployments when the process is complete
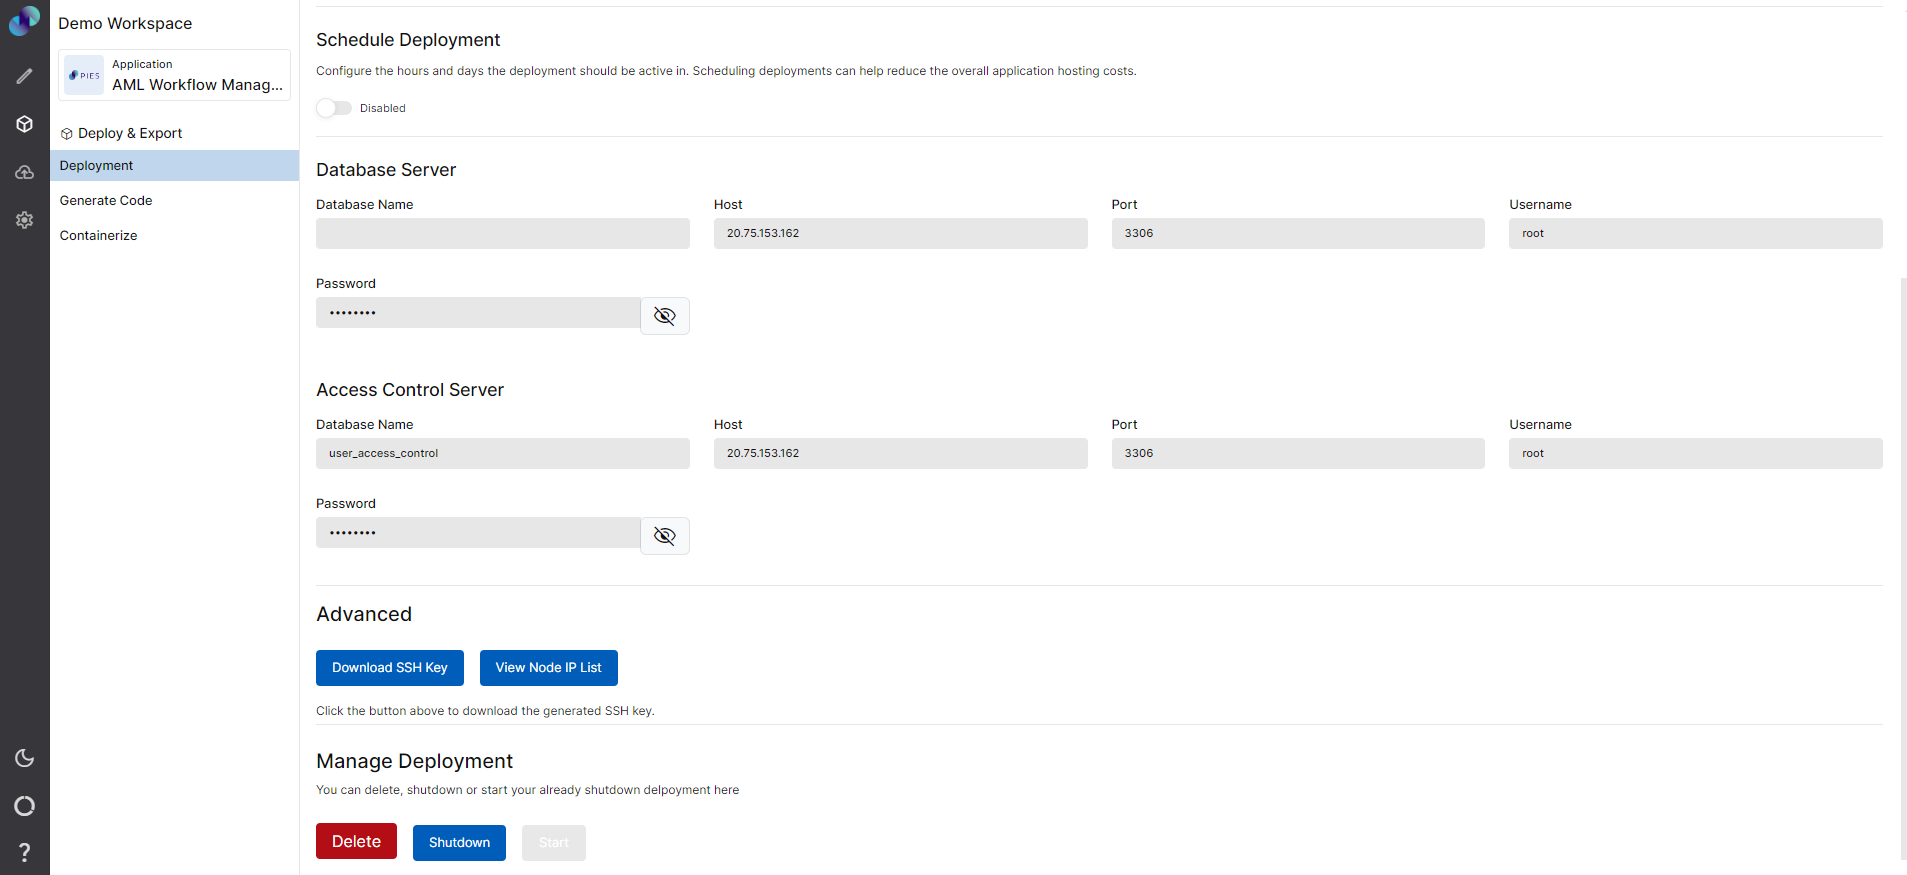
Fig 6: Deployment Details