PIES Studio 1.9 · User Manual
Building an application with PIES Studio
From an empty workspace to a deployed application: creating an app, building with PIES AI, configuring it by hand, previewing a real build, deploying, and managing what is live.
- 1 · Signing in and the workspace
- 2 · The IDE, online and offline
- 3 · Creating an application
- 4 · How a PIES application fits together
- 5 · The database
- 6 · Screens and widgets
- 7 · Events, functions and steps
- 8 · Documents and PDF generation
- 9 · Building with PIES AI
- 10 · Agents, playbooks and deliveries
- 11 · AI governance
- 12 · Integrations
- 13 · Building and previewing
- 14 · Deploying
- 15 · Views PIES has no widget for
- 16 · Access control and security
- 17 · Environments, secrets and email
- 18 · Navigation and theming
- 19 · Versions, history and source control
- 20 · Testing, problems and diagnosis
- 21 · Templates, imports and reuse
- 22 · Administration
1 · Signing in and the workspace
PIES Studio is a browser IDE: you describe or draw an application, and it generates a working front end, back end and database. Everything below was captured from a running Studio, so what you see here is what the product does today — not a mock-up.
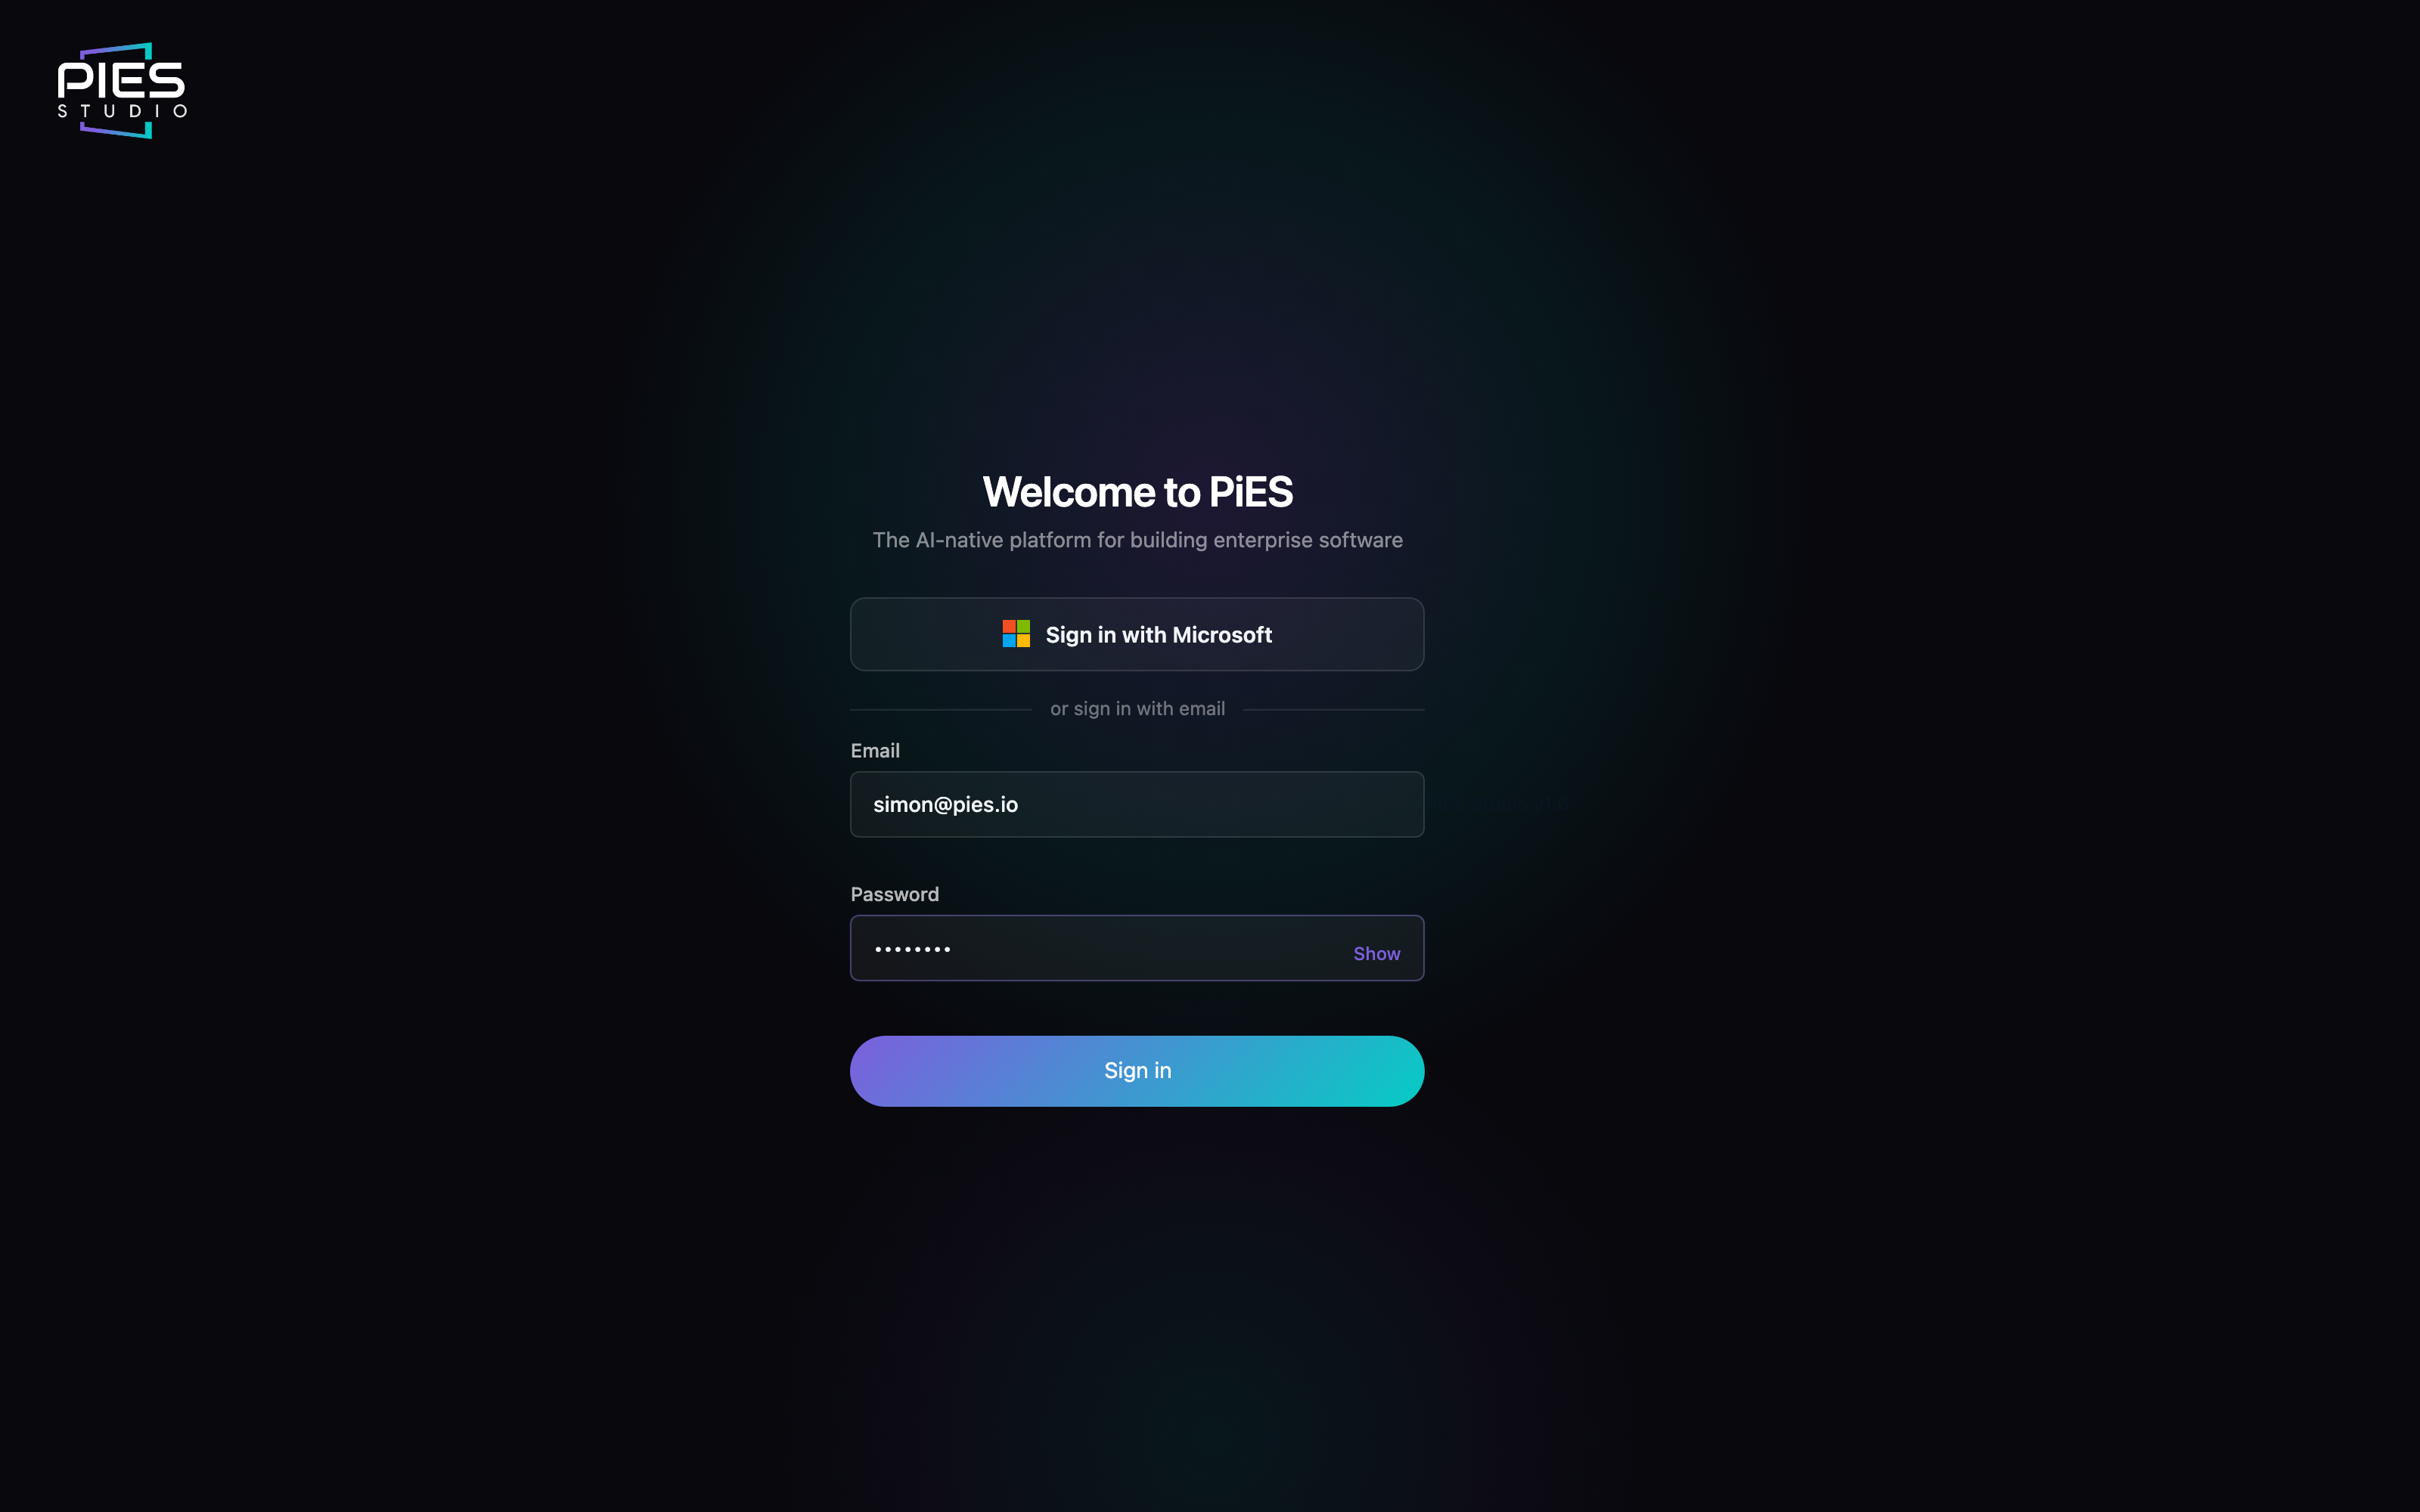
Sign in
Open Studio and sign in with your PIES account. Enterprise installs can also use Sign in with Microsoft when SSO is configured.
The applications list
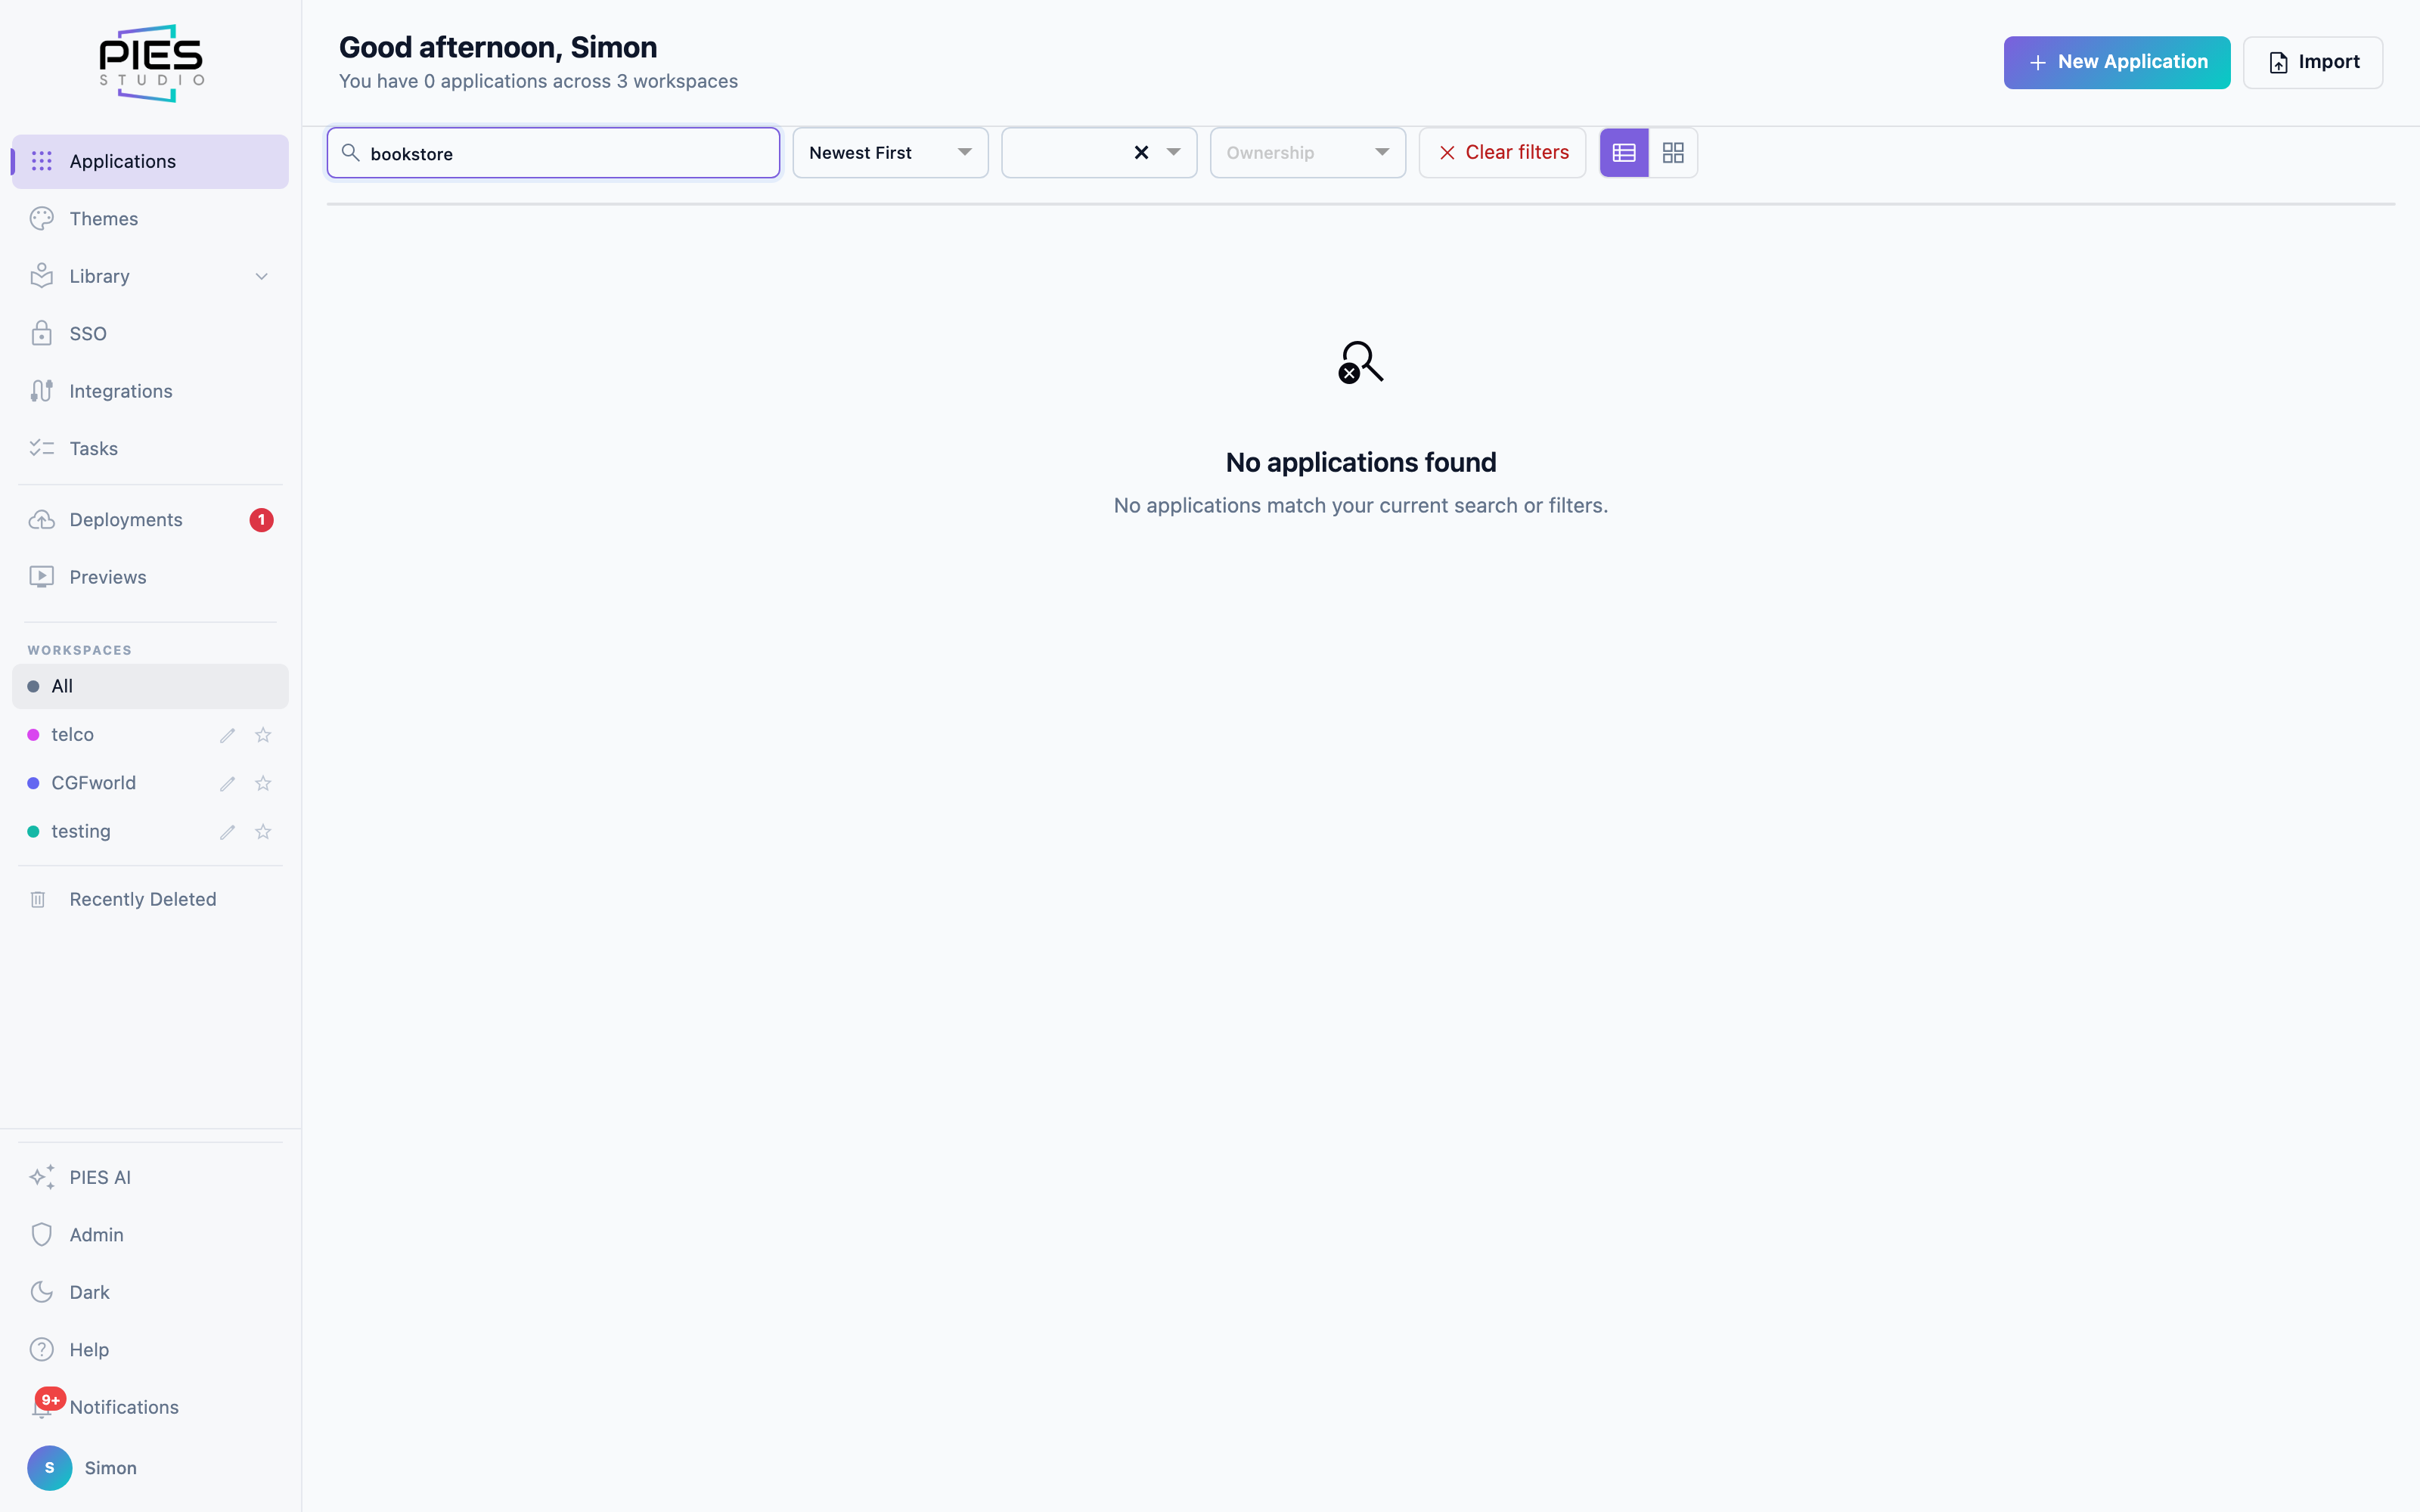
After signing in you land on your applications. Applications are grouped
into workspaces — use one per team or per client. Since 1.9
the workspaces are a pill bar across the top of this page, each pill counting
its applications, with the overflow behind a searchable +N more. This
is where you come back to open, duplicate or delete an app, and each card says
how many agents the application carries.
The sidebar beside it is grouped the way the work is:
Build (Applications, Themes, Library),
Agents (Agents, Playbooks, Activity),
Operate (Deployments, Previews, Tasks) and
Organisation (Decisions, Teams, SSO, Integrations, Admin),
with PIES AI and Help at the foot.
2 · The IDE, online and offline
The same editor runs whether or not it is connected to anything. What changes is what it can reach — and that is the difference between the plans.
One IDE, three things it can connect to
The local IDE is the client, not an edition of the product: it ships in every plan. What differs is what it connects to — nothing at all, a PIES-operated server, or a server your organisation runs.
- Hobby — free, no account, no telemetry. The complete editor, running entirely on your machine. See PIES Studio Hobby.
- Individual and Teams — the same editor, signed in to a PIES-operated server for hosting, storage and collaboration.
- Enterprise — the same editor, connected to a server your organisation installs and controls, including the AI engine if you run it yourself.
Download the IDE for macOS, Windows or Linux at pies.io/download. It is the same download for every plan — signing in is what connects it to a server, and Hobby never asks you to.
What works with no network at all
Everything that makes an application: creating it, designing screens,
authoring events and functions, the data model, and building and previewing it
locally. The IDE carries its own stack — database, back end, build toolchain and
their caches — so a machine that has never been online can create an application,
build it and run it.
AI works offline too, against a model on your own machine or in your own network.
Nothing you type and nothing your application contains leaves the device.
What a connection adds
Features that are inherently about somewhere else are unavailable offline
and shown with a lock: hosting and deployment, boards
and team collaboration, mobile publishing, choosing a different
language or stack, cloud storage and backup, and the full
AI governance surface — policies, audit and knowledge bases.
Offline, the AI settings remain so you can point the editor at your own model.
None of this changes the application you have built. Connecting later unlocks
those features against work you already did offline.
Enterprise, and the air-gapped case
An Enterprise install puts the server inside your network: your database, your identity provider, your audit trail. Paired with PIES Private AI the whole system — editor, platform and model — runs with no external dependency at all, which is what an air-gapped environment requires. See the installation guide for the platform and the PIES Private AI manual for the model.
3 · Creating an application
An application is the whole deliverable: data model, screens, business logic, generated code and its deployments.
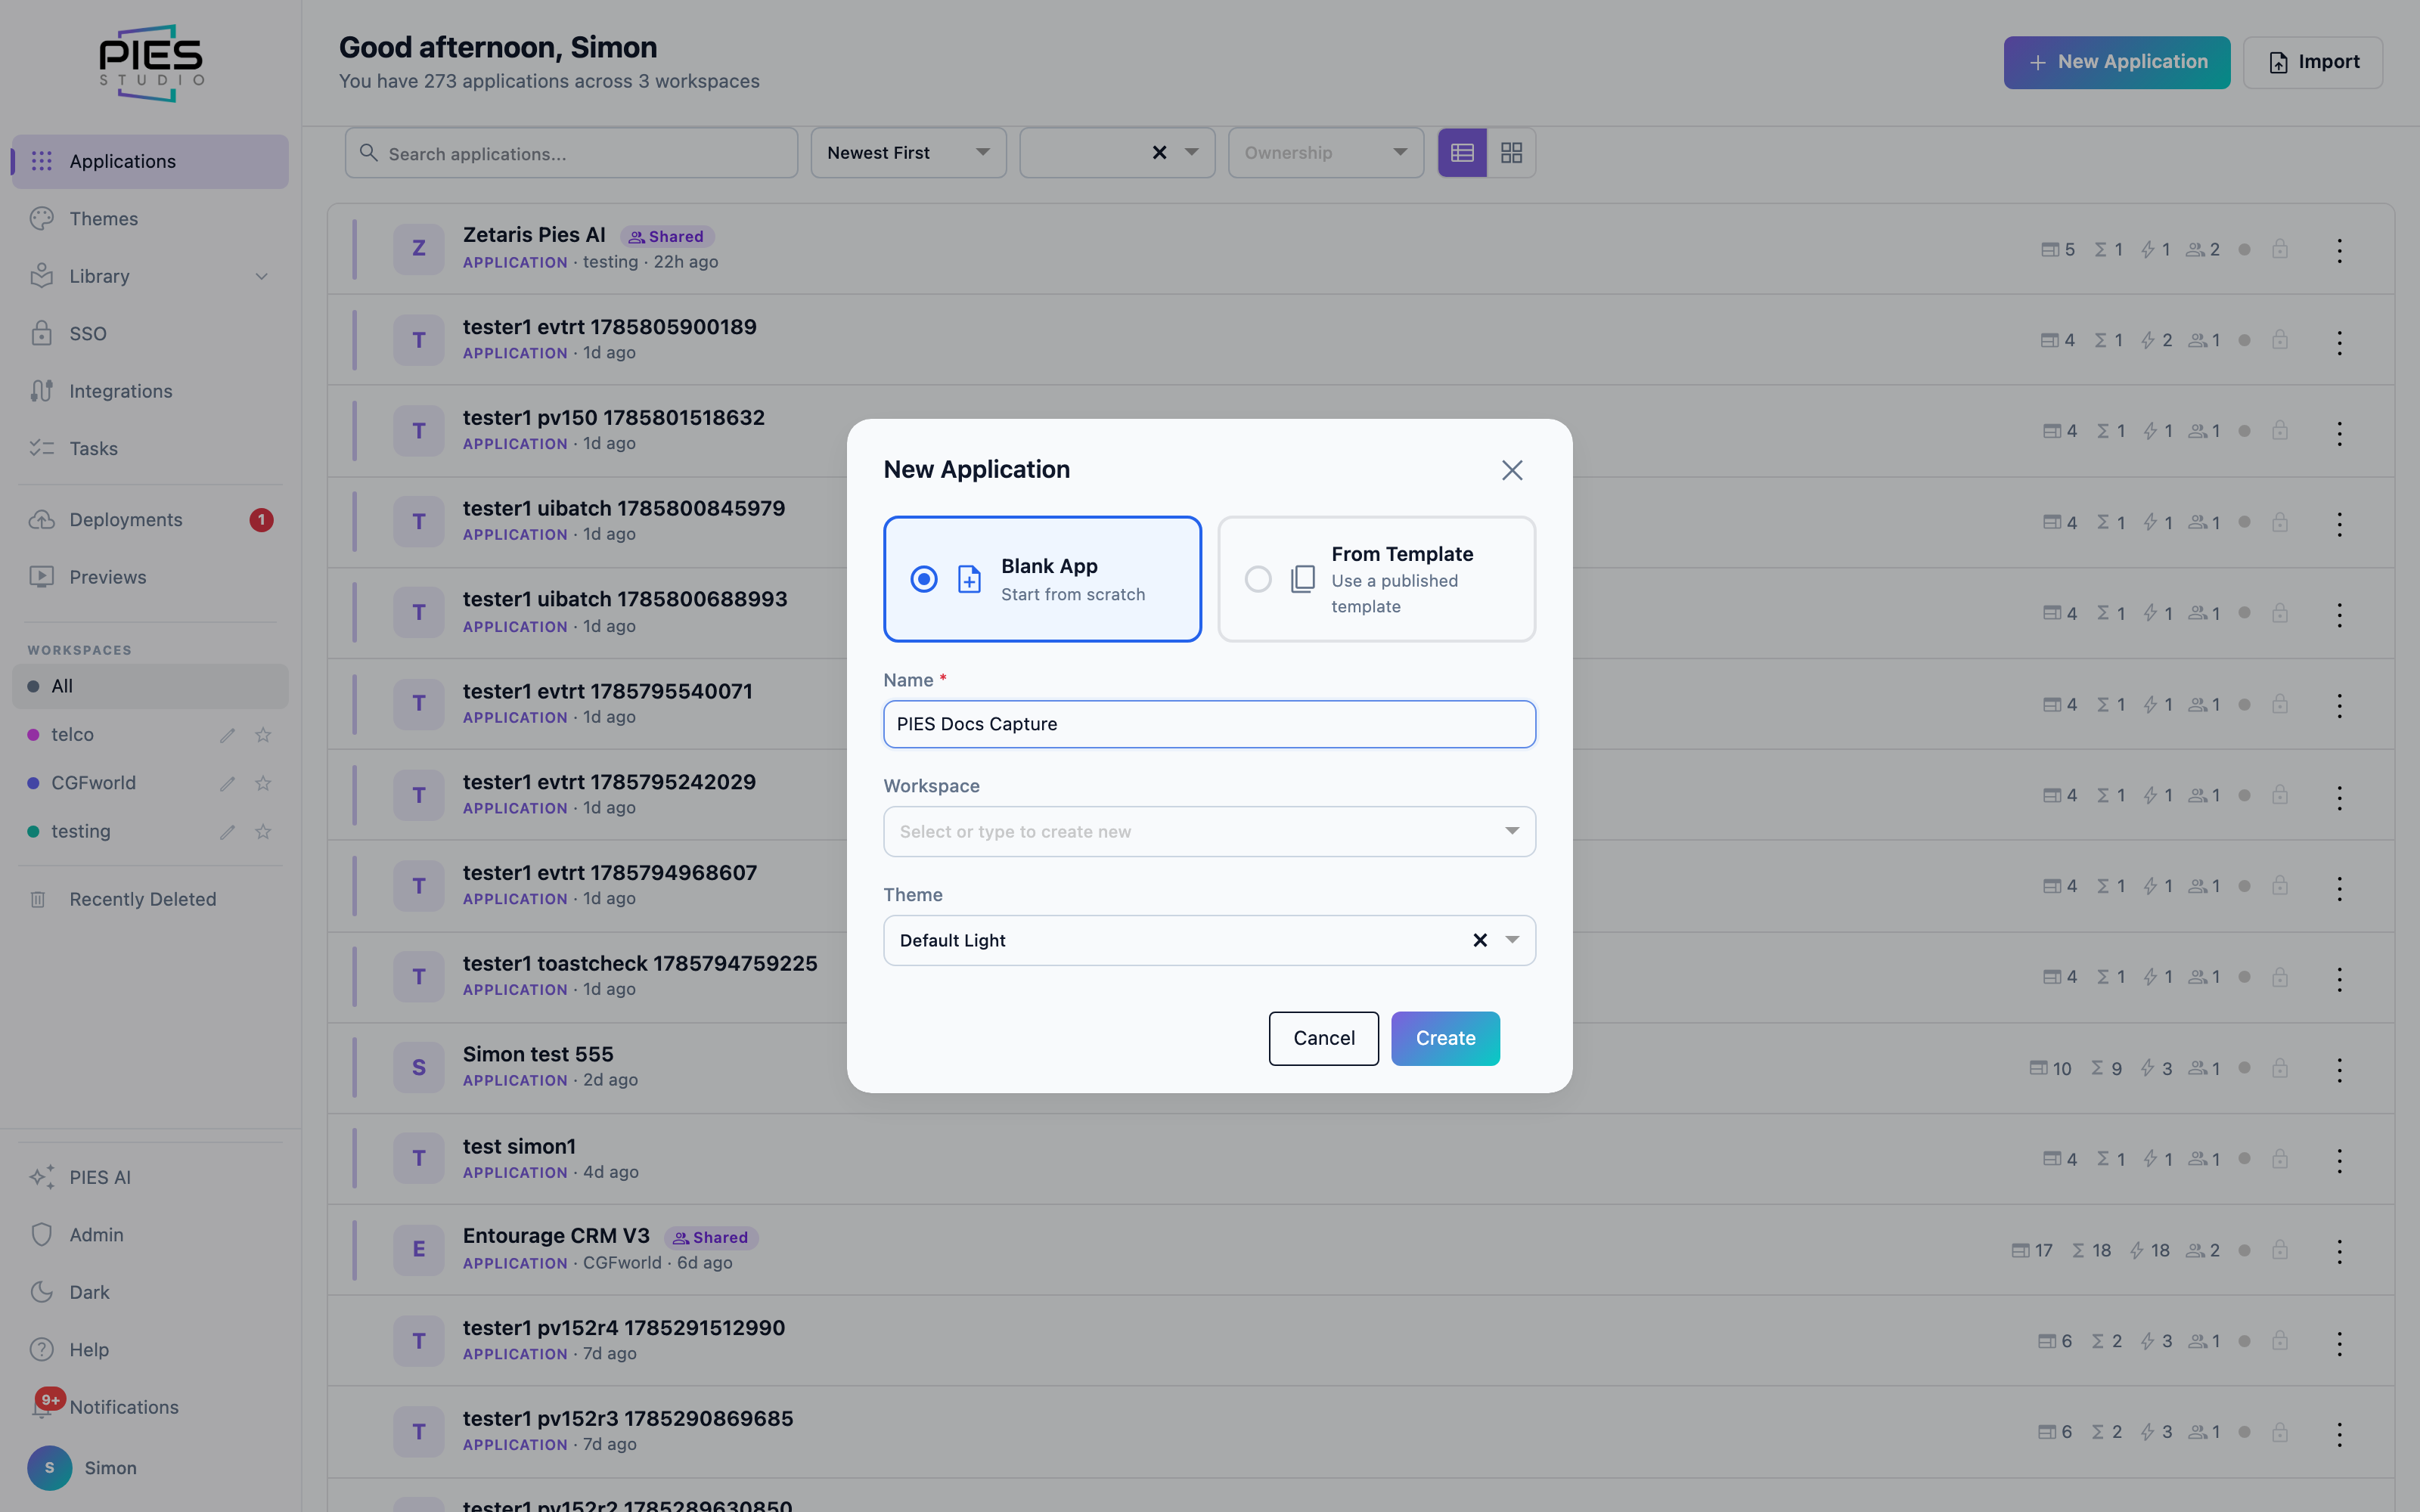
New Application
Click New Application, give it a name and pick a workspace (you can type a new workspace name to create one). Names take letters, digits and spaces — hyphens are rejected. From Template starts from a published template instead of an empty app.
The IDE
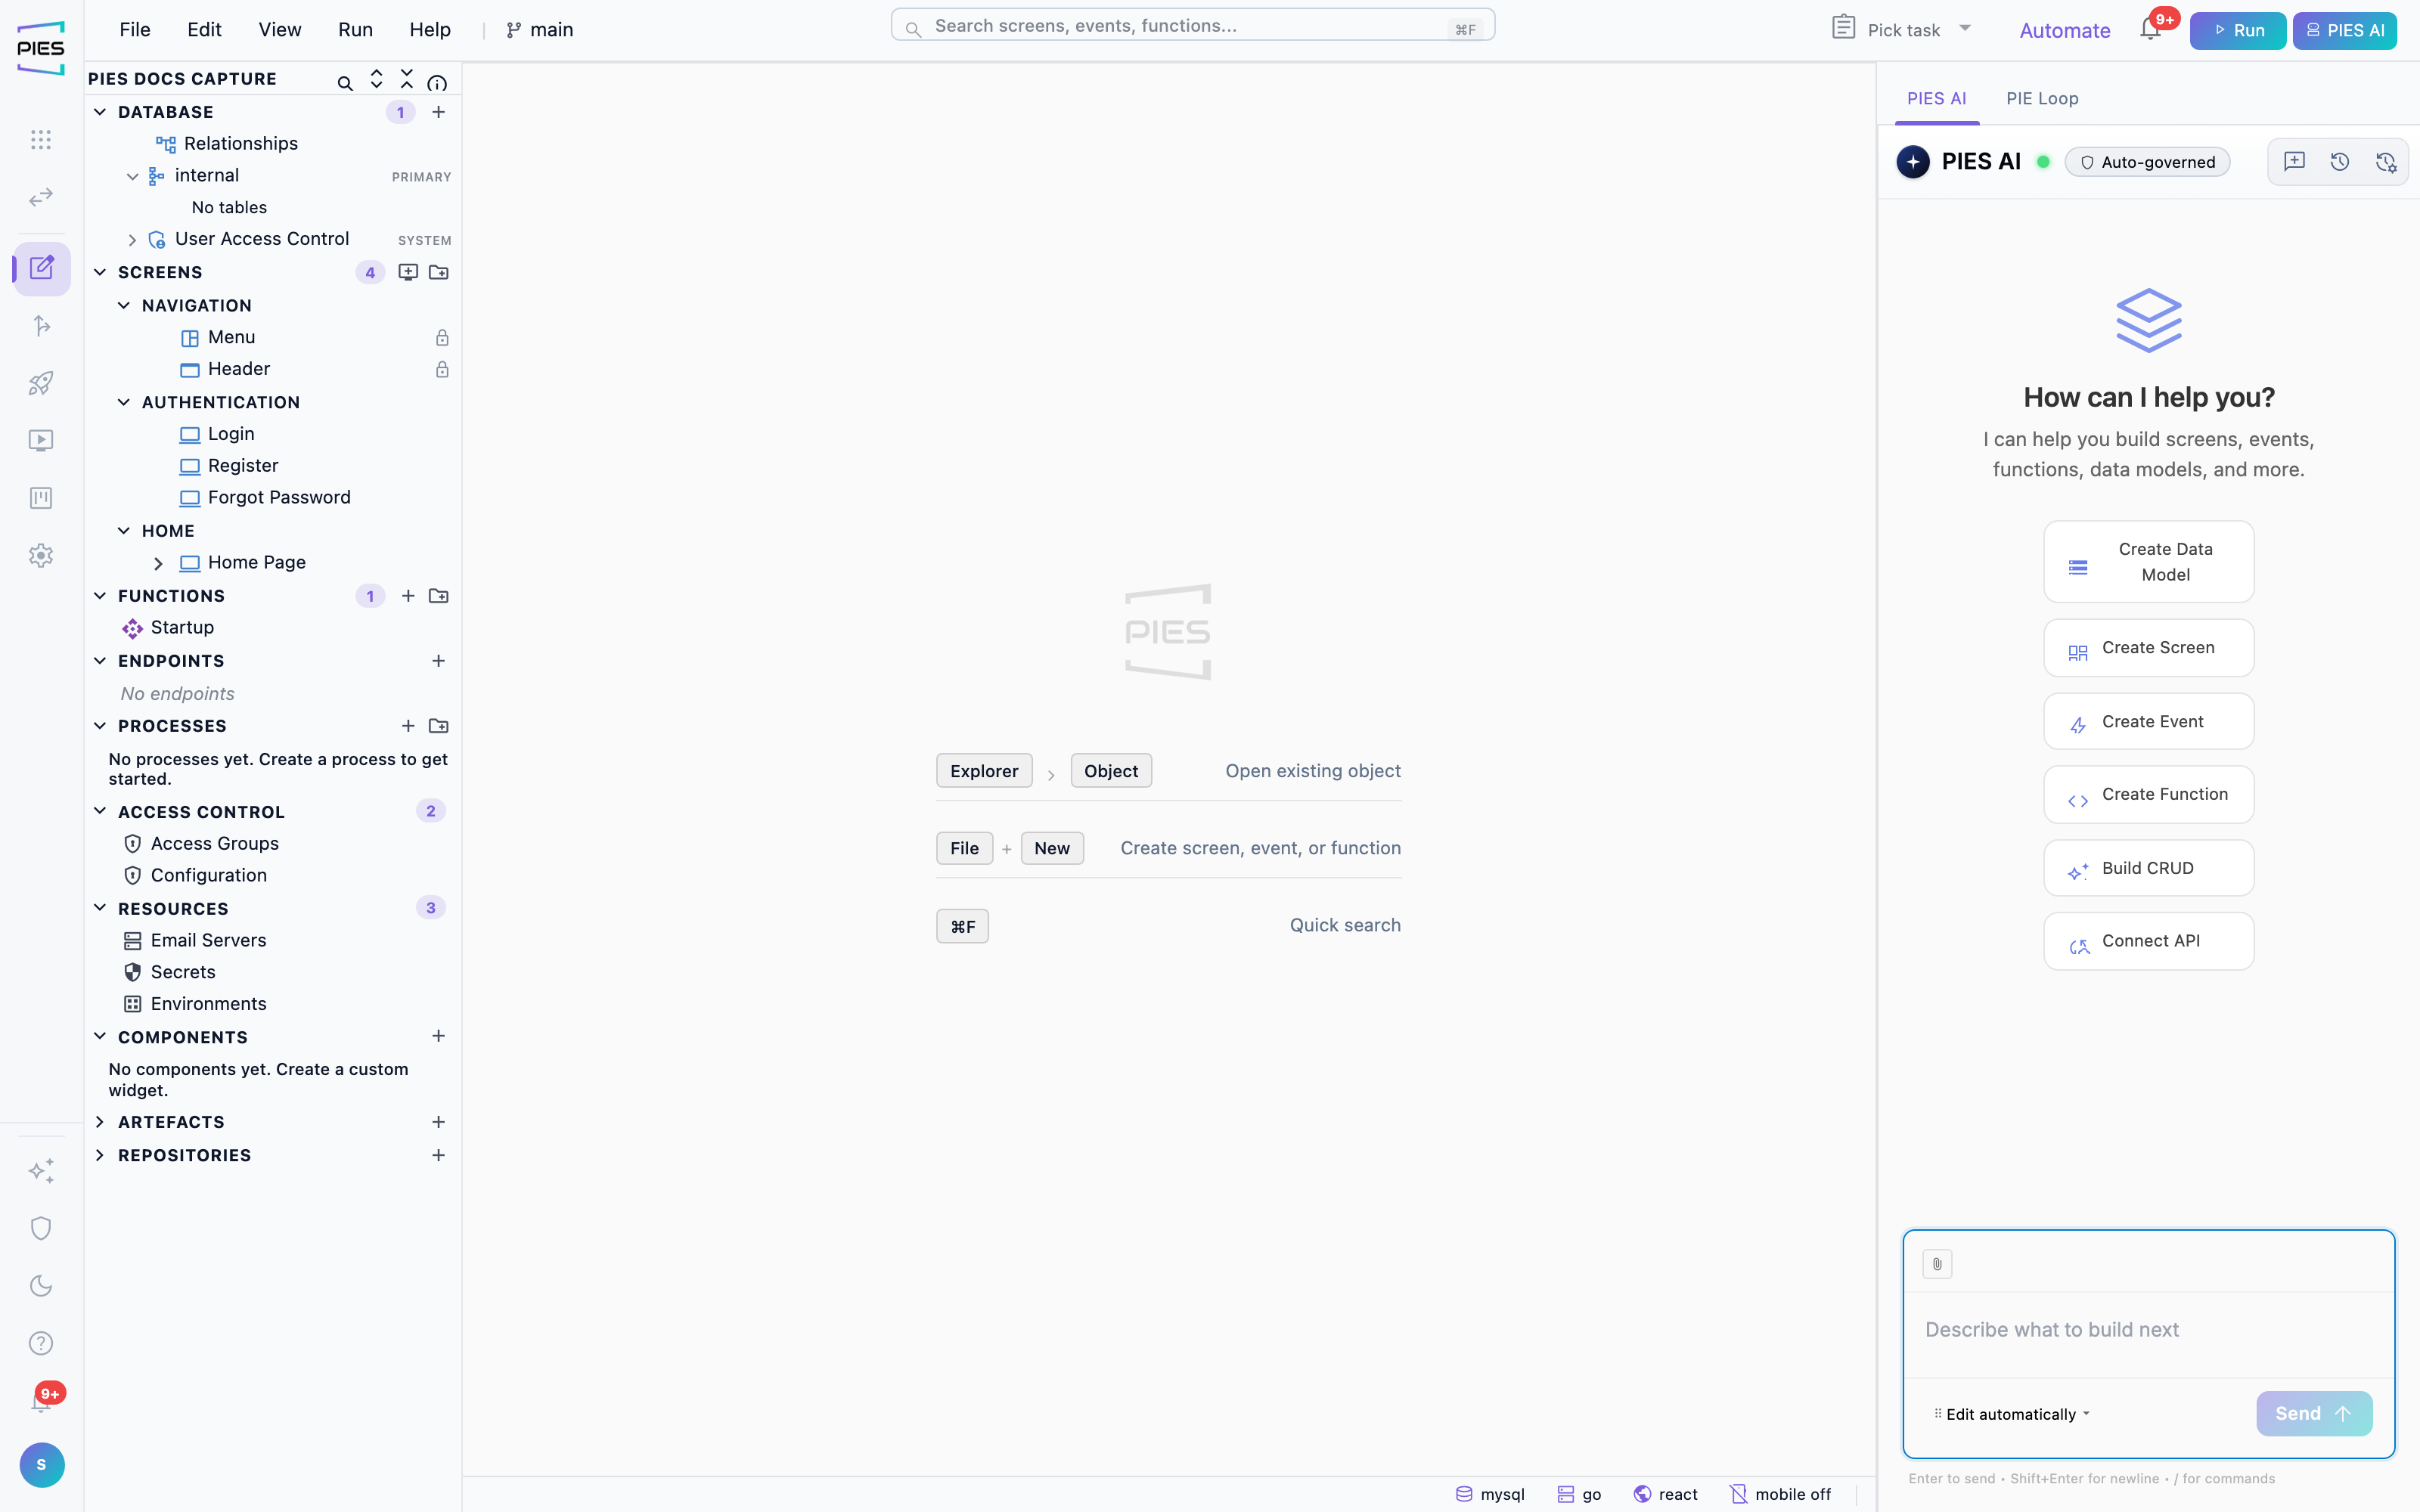
The app opens in the editor. A narrow icon rail on the far left switches between Apps, the Editor, Source, Deploy, Previews, Boards and Settings. Beside it is the explorer — every object in your application, in three collapsible tiers. The centre is the canvas for whatever you have open, with a menu bar (File, Edit, View, Help), the branch selector, a search box, and ▶ Run at the top right. The right-hand panel toggles between the Inspector (properties for whatever is selected) and PIES AI; the build console opens along the bottom.
4 · How a PIES application fits together
Read this chapter once and the rest of the product stops being surprising. PIES has a small number of object types and one strict rule about which does what — the same rule the AI is held to, and the same one the build validates.
Screen → widget → event → function → step
Screens hold widgets (a table, a form, a
button, a chart). A widget raises an event — "this button was
clicked". The event calls a function, and the function is built
from steps: read a record, validate it, write it, return a
result. The event then reacts to that result — show a message, navigate,
refresh a table.
The division is deliberate, and the build enforces it:
- Functions do data. Record steps — insert, update, delete, retrieve — belong in functions, never in events.
- Events do interface. Show Message, Navigate and the other page steps belong in events, never in functions: a back-end function has no screen to draw on.
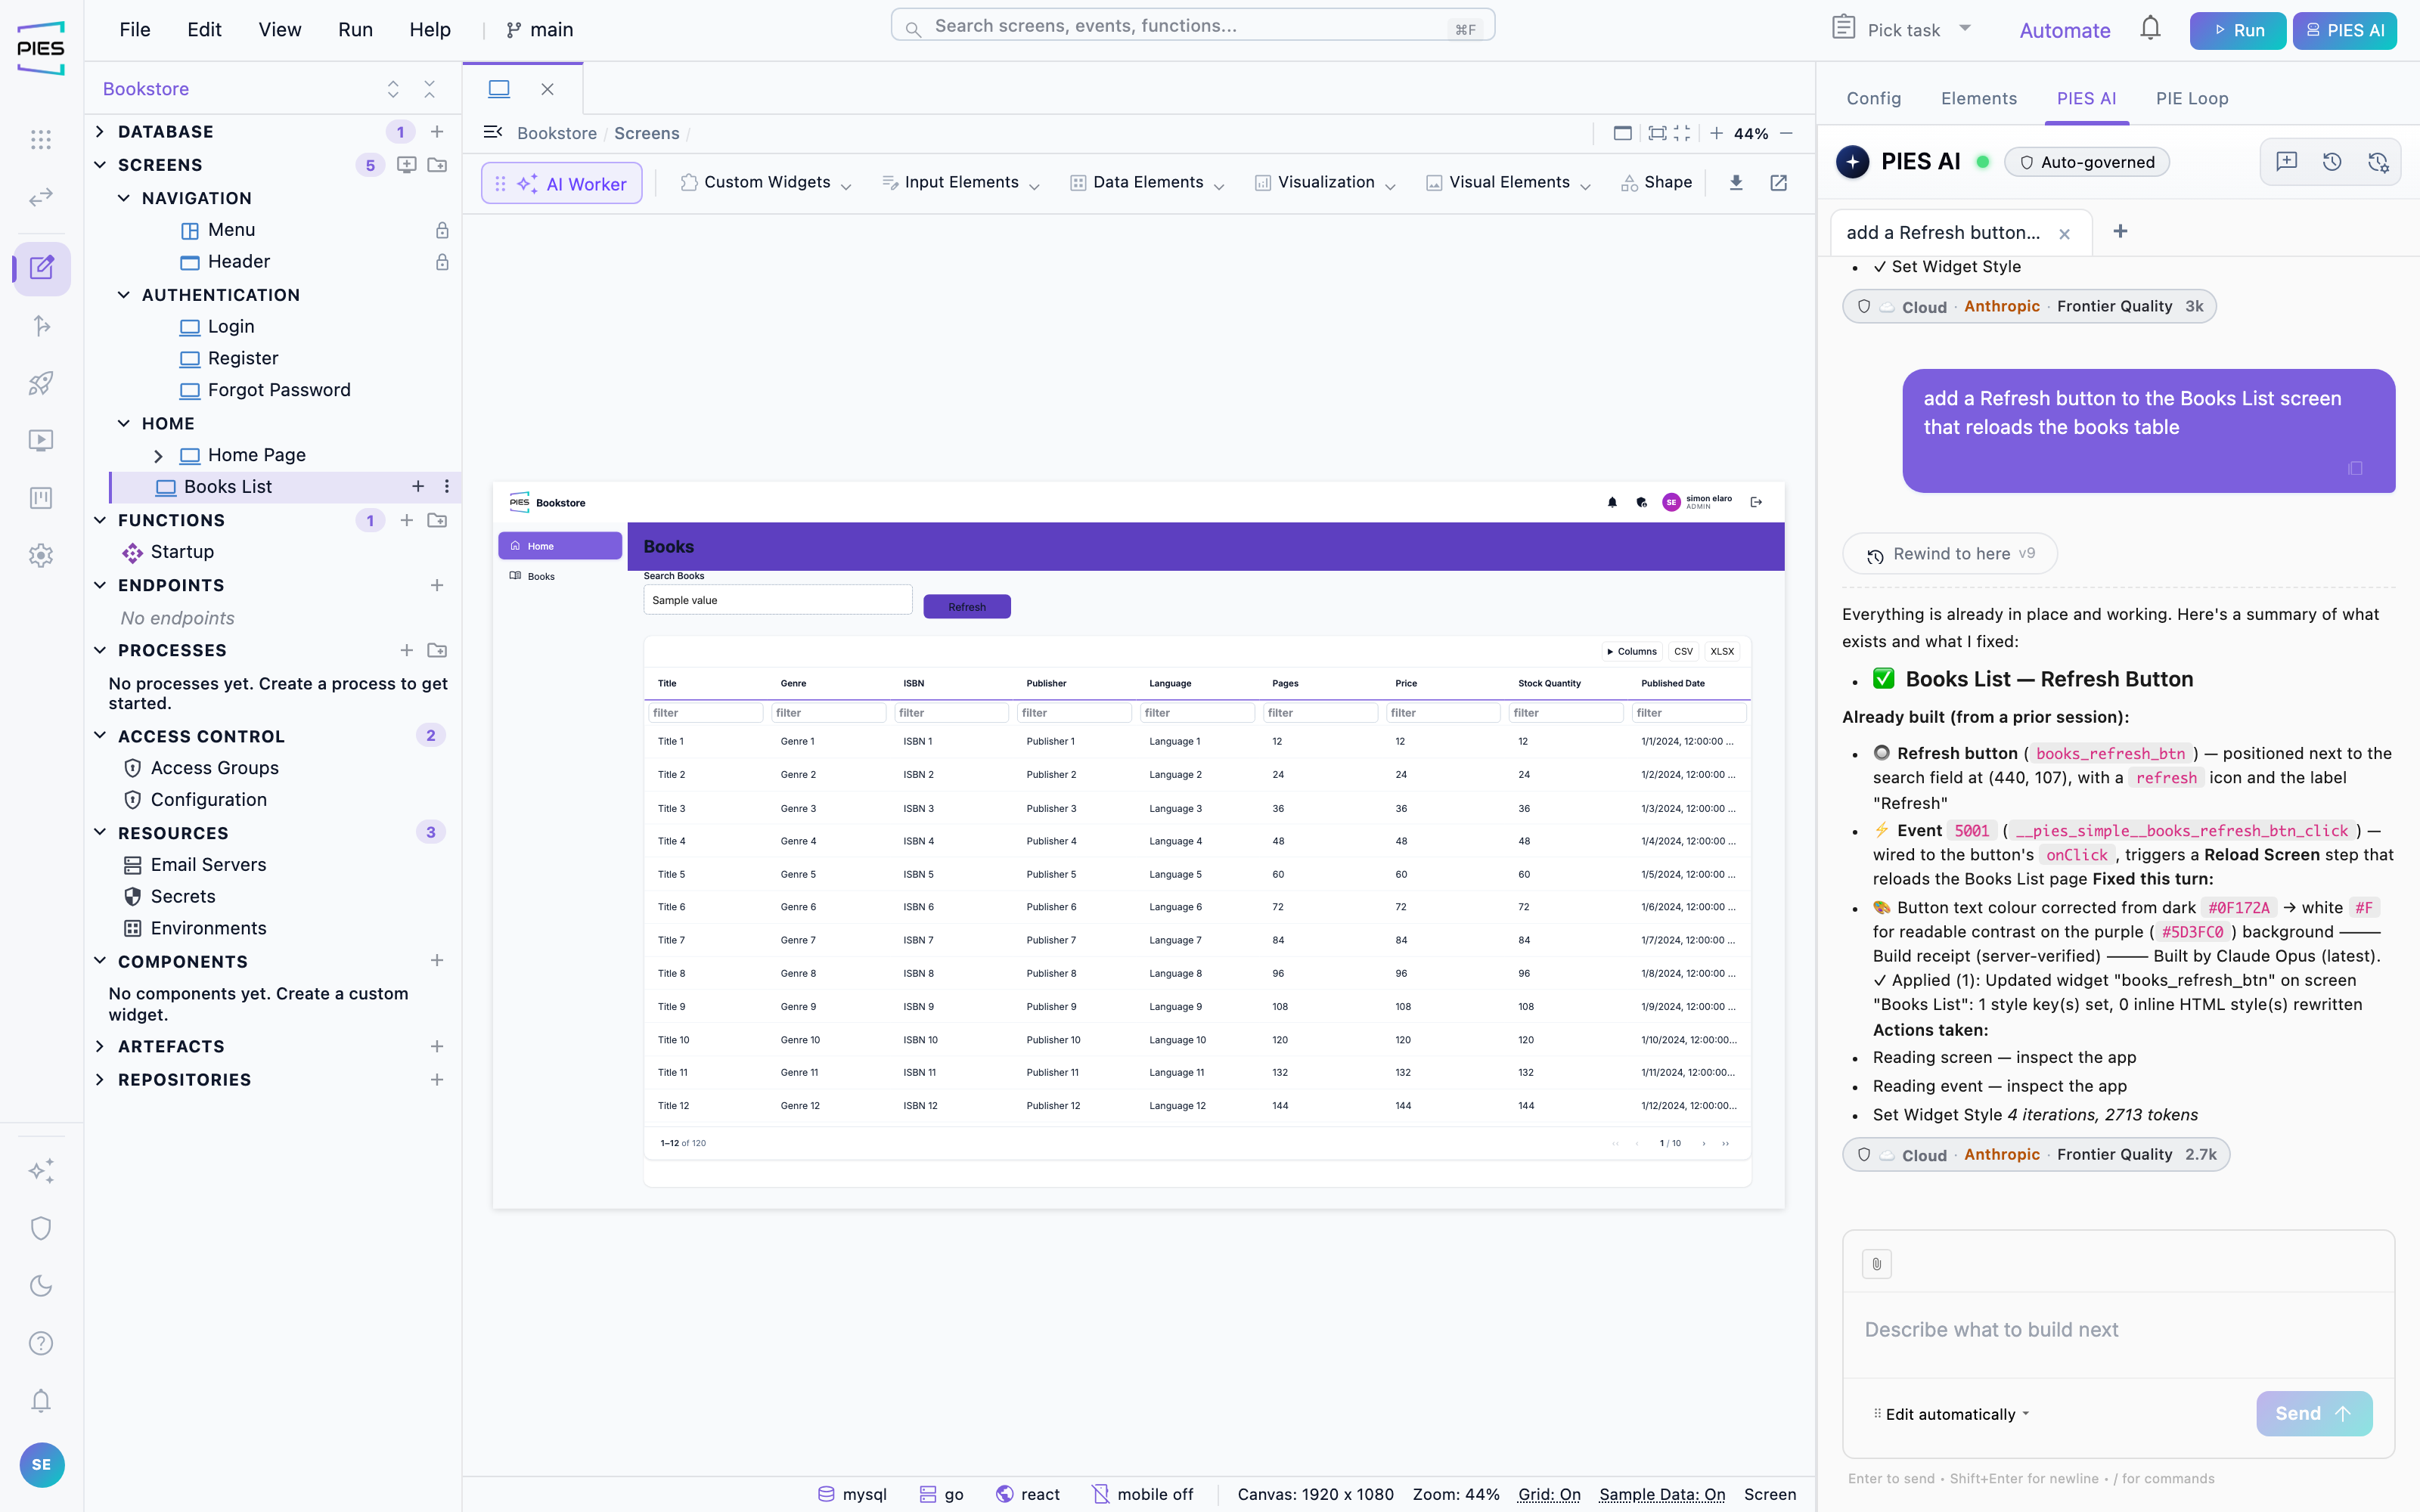
The explorer is in three tiers
Since 1.9 the explorer groups everything an application contains into three collapsible tiers, and only Build is open when the editor loads. Each carries a one-line summary of what is inside it, so the thing you are looking for is one click away rather than somewhere in a long tree:
- Build — what the application is: Database, Screens, Functions, Processes, Custom widgets, Deliveries and the application's Agents.
- Configure — Users & access · APIs · Secrets: Users & access, API Connections, and Secrets (secrets and email servers). Environments have moved out to their own sidebar item.
- Assets — Artefacts · Media · Templates, plus Repositories.
The rest of the explorer
Under Build: Database holds tables — under
their schema, internal for the built-in one — and
Relationships. Screens holds the pages,
including Navigation → Menu & Header and the four
Authentication screens. Processes are
long-running business workflows rather than single actions.
Custom widgets are your own components, and
Deliveries is the board of work agents have been asked to do.
Under Configure: Users & access defines
access groups and how people sign in, API Connections exposes
functions as REST APIs, and Secrets holds email servers and
secrets. Environments (where the app runs) have their own
sidebar item, outside the editor. Under
Assets: Artefacts are documents (a BRS, a
spec) that PIES AI reads before it builds, Media holds the
images the application ships with, Document templates are the
PDF layouts, and Repositories connects generated code to source
control.
Organising with folders
Screens, functions and events can be grouped into folders in the explorer, and a folder can hold another. The grouping is yours — by feature, by area of the business, by whatever makes the application readable a year from now. Creating a screen inside a folder puts it there directly; dragging moves it later. Folders are presentation only: nothing about the application changes when you reorganise them.
5 · The database
Every application has an internal database and can additionally connect to databases you already run. You never write DDL — the schema is generated from what you define here, for every environment.
Tables and columns
Open a table — under Build → Database, inside its schema (internal is the built-in database) — to edit its columns: name, type, and constraints such as primary key, auto-increment, required or unique. When a table's only primary key is a whole-number column, it is always numbered automatically, even if auto-increment is not ticked, so records added through your app's forms save without you supplying an id. A text column can also number itself with a business number such as IM000123: tick Auto number in its Auto Increment cell, then set a Prefix (letters, digits, - or _, up to 16 characters) and Digits (1 to 18, default 6). Any record added with that column left blank (from a form, a function, the API or seed rows) gets the prefix and the next number, zero-padded; a value someone types is kept, and numbers keep growing past the digit width. The column does not have to be filled in on generated Add forms. Two records saved at the same moment can compute the same number, so tick Unique as well if numbers must never repeat. PIES maintains the key and audit columns it needs, so a table you create is immediately usable by screens and functions. Seed rows can be attached to a table so previews render against realistic data. On a generated Add form, fields sit on an even two-column grid; a short form sits in a narrower card, and a form of three fields or fewer stacks its fields in one column, so no gap is left beside the last field. A kind, type or category column whose values PIES does not know yet is a plain text box rather than a dropdown; it becomes a dropdown once the table's data shows the values it can take. A single-line text field accepts up to 255 characters unless you set a maximum length on it; a multi-line text field has no length limit by default, so long pasted text is kept whole, and setting a maximum length on it caps it there.
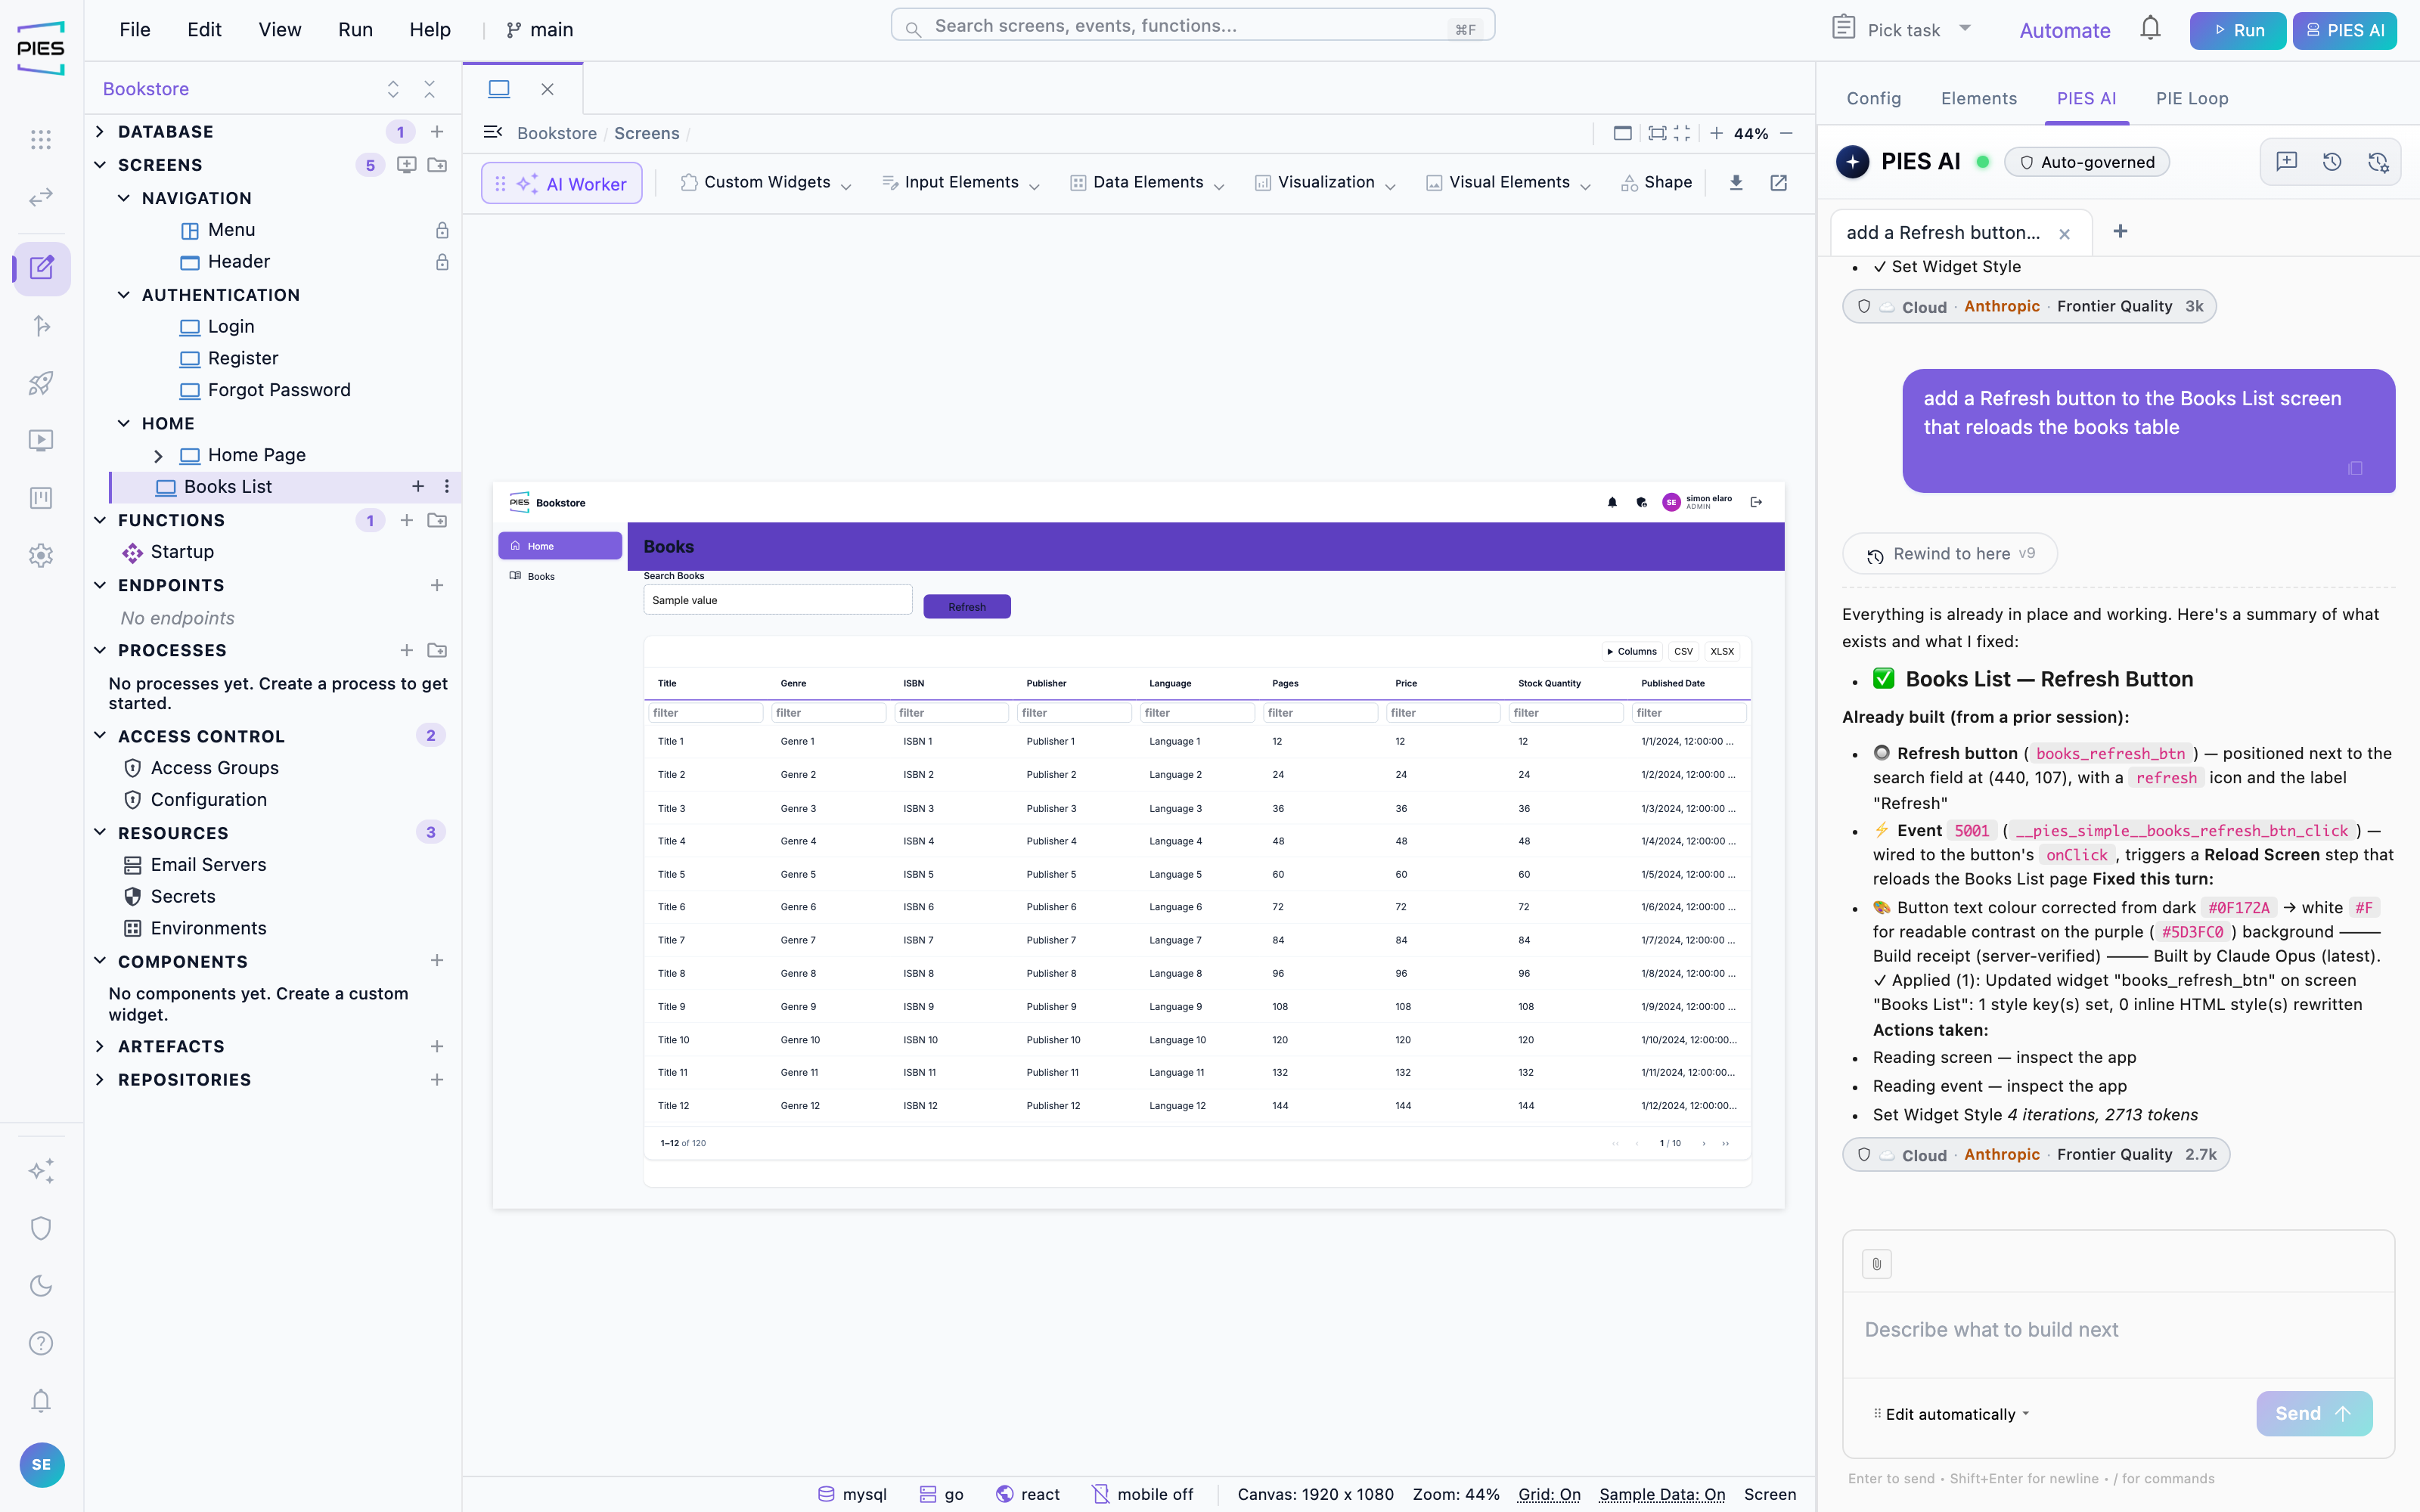
Relationships and the ER diagram
Relationships shows the entity diagram: every table and the
links between them. To link two tables, drag from a column's port on one table
to the column it refers to on the other, then press Cmd+S
(Ctrl+S on Windows) to save — the diagram has no Save button.
A link is a foreign key from one column to another; for a many-to-many
relationship, add the join table yourself and link it to both sides. Linked
data is then available to widgets: a dropdown bound to the parent, a table
showing the child rows. The diagram is the fastest way to see whether a model —
yours or one the AI generated — is actually normalised.
When the AI builds a data model with several tables, every relationship it
creates is a real link that shows here. A column that names another table, such
as policy_number on a claims table, is saved as a link to that
table, and the sample rows point at real parent records. If the AI proposes
several tables with no links between them, the model is not saved and the AI is
asked to link them first.
On a large schema the diagram opens at a readable zoom (never below 60%)
from the top-left; scroll to see the rest. The bar over the diagram has a
Find table box: type a table name and press Enter
to select that table, zoom to 100% and centre it. Fit schema
fits the whole diagram (at the same readable minimum) and
Zoom to 100% returns to full size.
While the diagram is open, the editor's top-bar zoom controls act on it too:
zoom in and out, Fit to Canvas and Reset to 100%
move the diagram, and the top-bar percentage always shows the diagram's zoom.
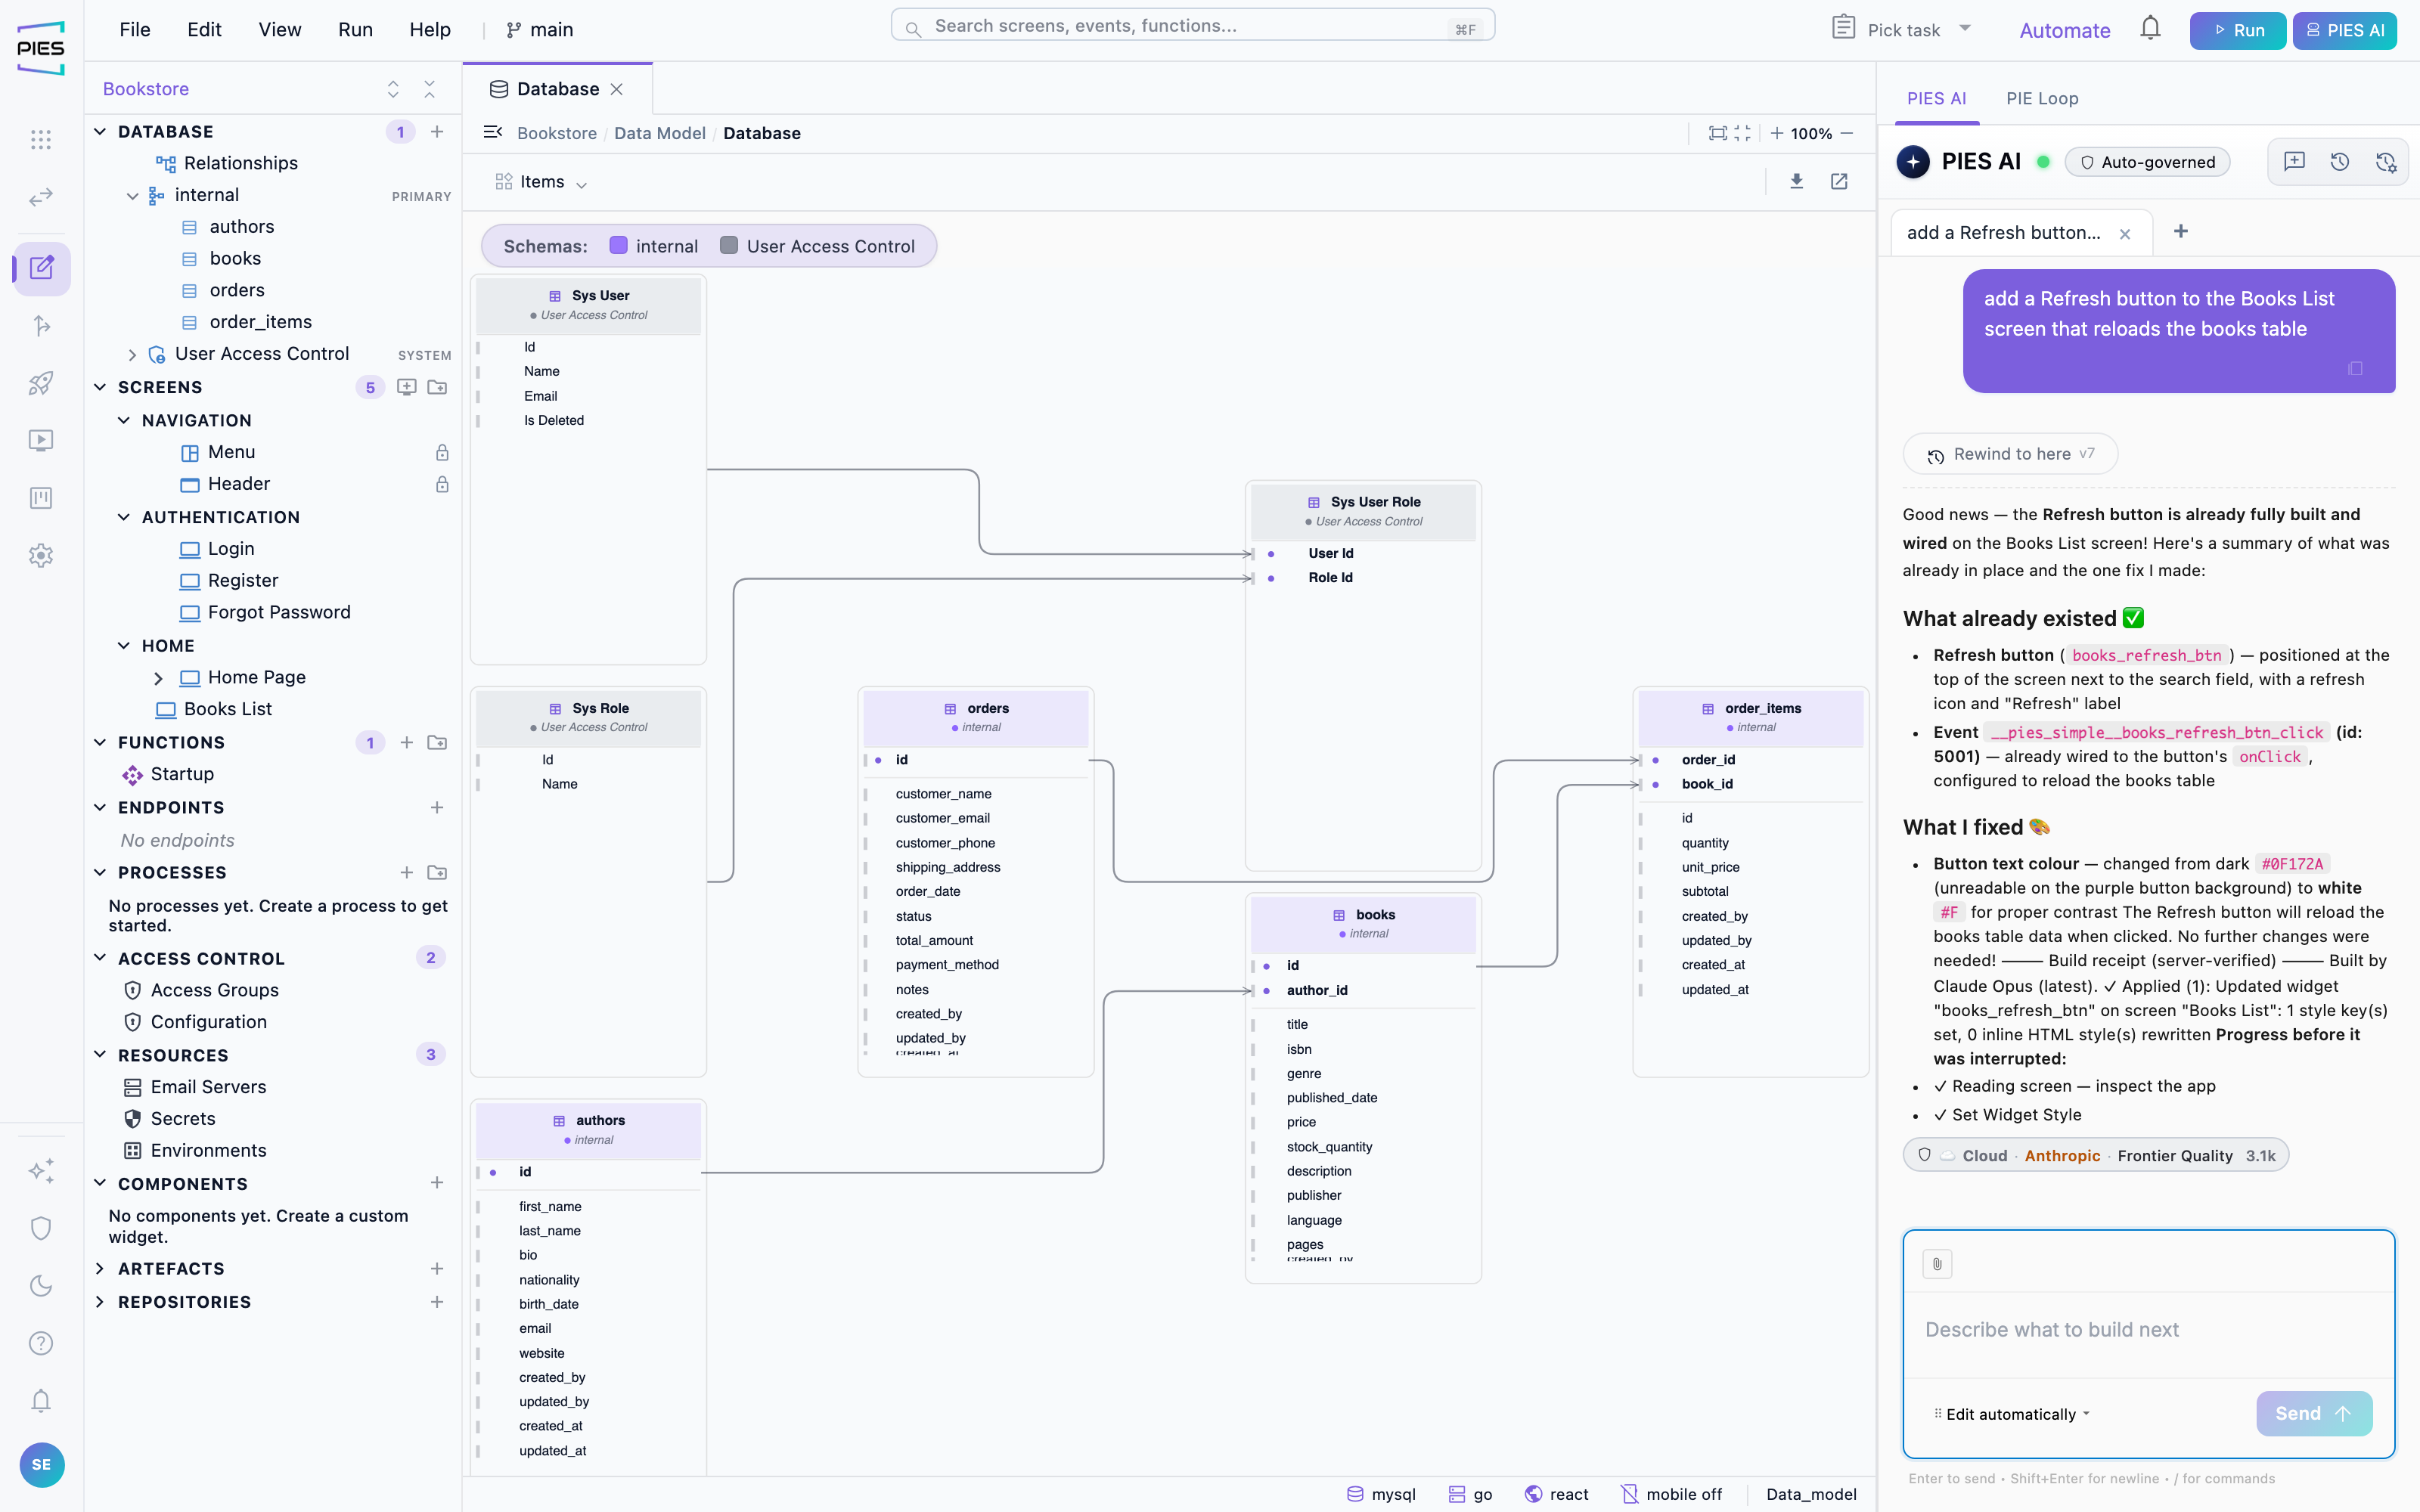
Connecting an existing database
An application is not limited to its internal database: add a source to work against one you already run — MySQL, PostgreSQL, Snowflake and others, plus Zetaris for read-only analytics. Credentials go to the secret store, never into the application definition. Connected tables appear alongside the internal ones and can feed screens, functions and charts.
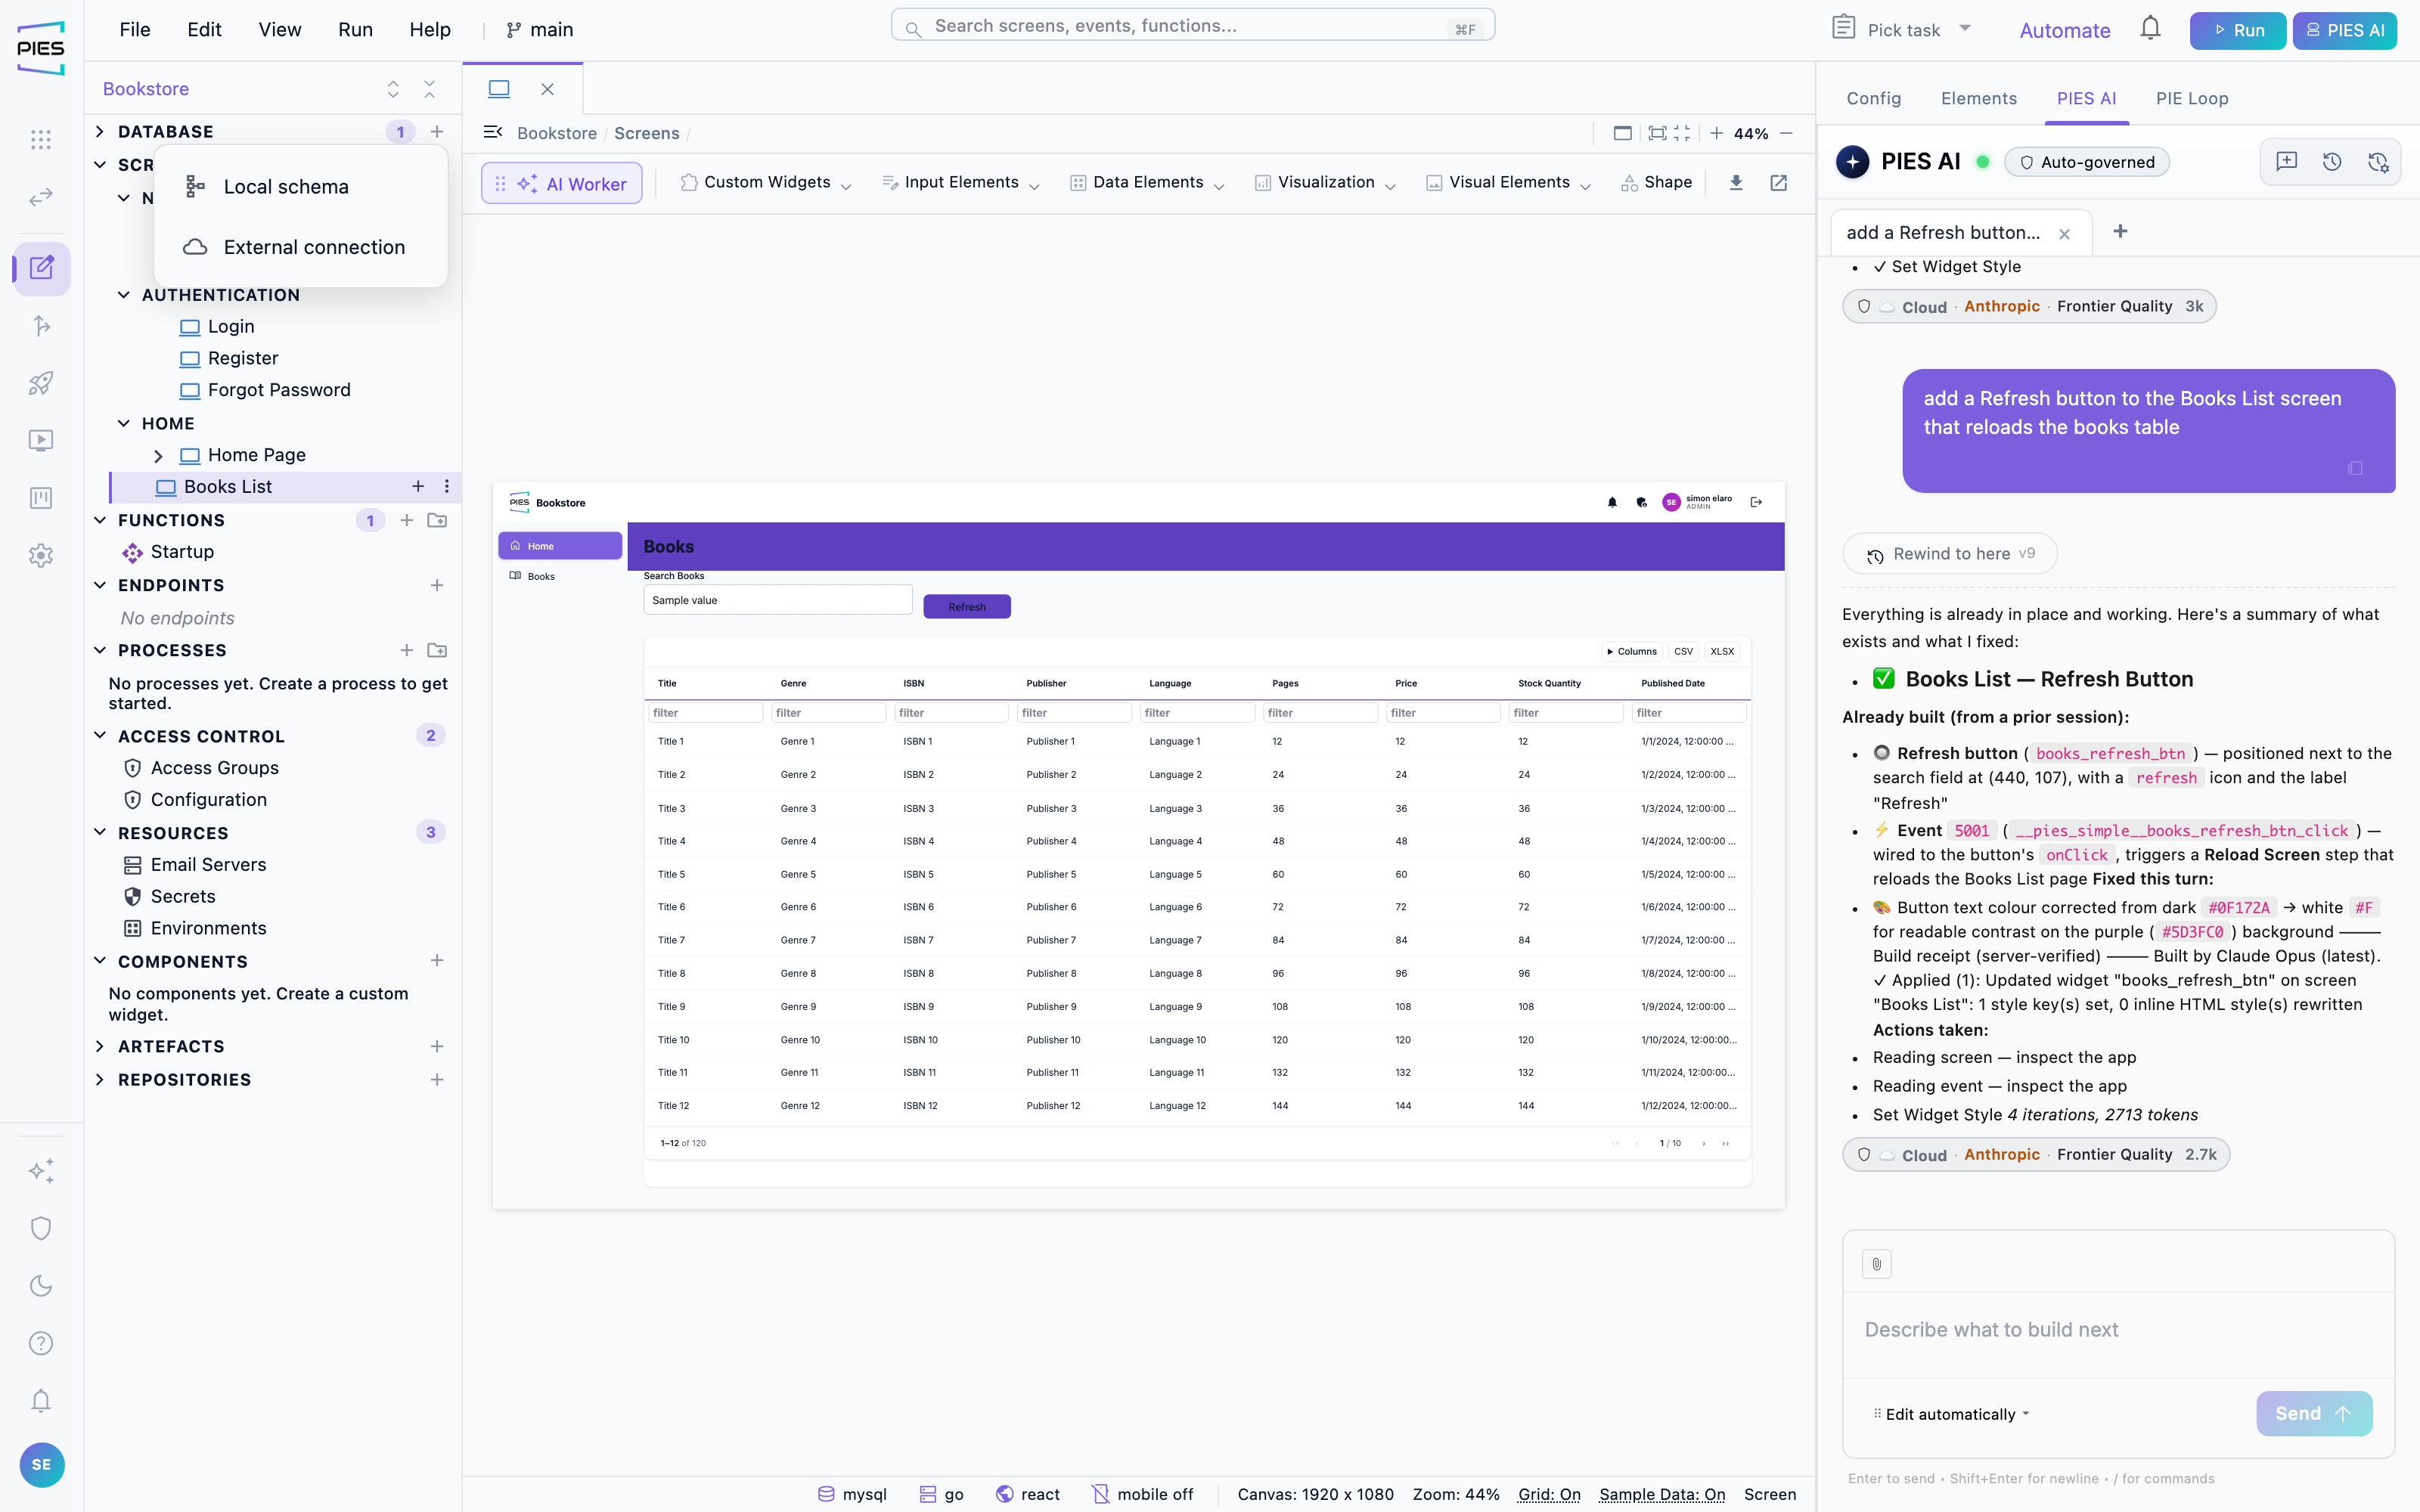
6 · Screens and widgets
A screen is a canvas. You place widgets on it, bind them to data, and wire their events. What you place is what renders — the canvas resolves widths against the same drawable area the generated application uses. The canvas also shows your application's colours, whichever Studio theme (light or dark) you work in: the page around the screen takes the page colour of the application's theme, a screen with its own background colour shows that colour, and a screen with no background colour of its own takes the theme's page colour, on the canvas and in preview alike. So a dark-themed application shows dark screens in the editor, as it will when it runs.
The widget palette
The palette groups widgets by kind: Input (an Input Field, set to text, number, date, dropdown and the other input types once placed), Data (Table, Form, List, Tab Group), Visualization (Count Card, bar, line, pie and the ECharts family), Visual (Container, Text, Icon, Image, Video, Link) and Shapes (including Line). Drag one onto the canvas to place it.
With Sample Data on, a table, chart or count card whose table has no rows yet shows sample values on the canvas, so the screen looks as it will once data arrives. As soon as the table has rows, the widgets show the real values, including a real zero.
A Count Card normally totals a table. Turn on Record mode (value vs
capacity), the first switch in its properties, and it shows one record
against its limit instead. The totalling settings (Data Model Column, Function,
prefix and suffix) are then hidden: pick a value field and a capacity field, one
unit, the number of decimals and an optional sub-line, and filter the card to
the record the page is about. The filter value offers the page's route
parameters, such as $routeParam.id, and the table's fields to pick
from. The card shows its label with the percentage, value / capacity
unit, and a bar coloured by the card's threshold ranges (by default green,
amber from 80% and red from 95%). The sub-line can use {value},
{capacity}, {spare}, {pct} and
{unit}, as in Spare {spare} {unit}. On the Studio canvas
each card shows sample figures with its own percentage and the sub-line filled
in. Place several cards side by side for a row of status tiles that you and the
AI assistant can edit like any other widget.
Configuring a widget
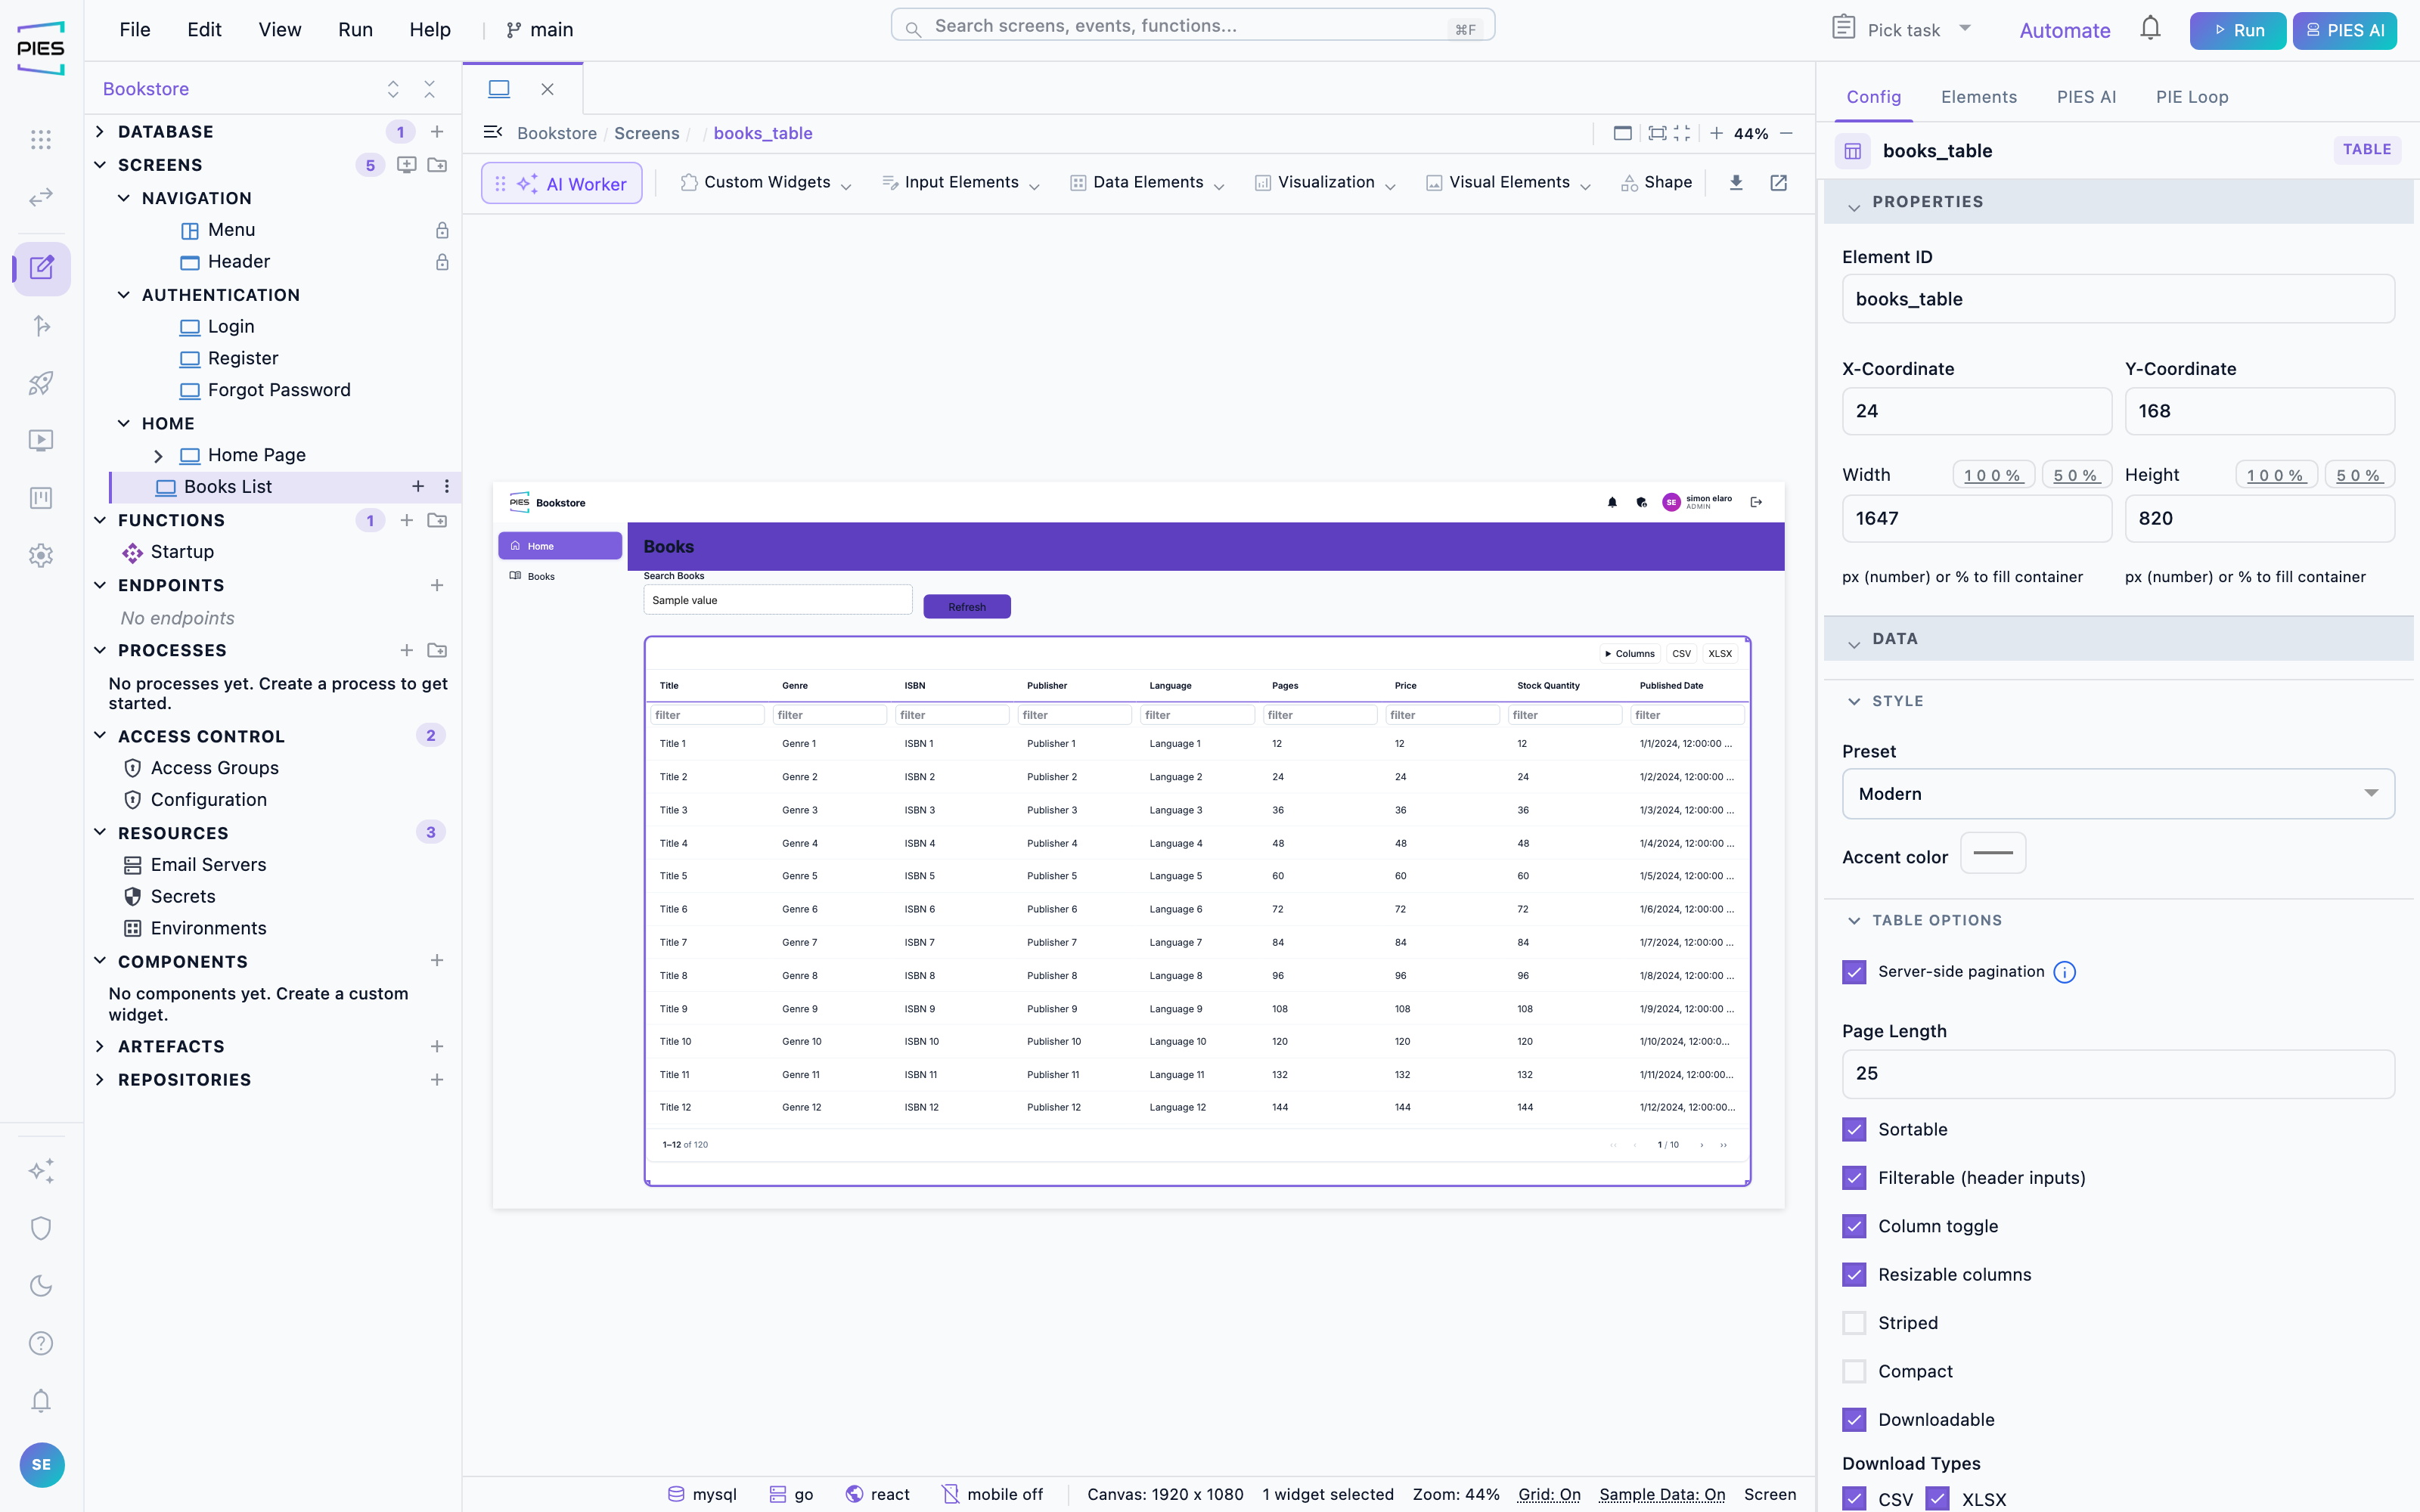
Select a widget and the right panel configures it: which table or query feeds it, which columns show, validation, default values, styling, and its events. A data table takes its columns from the bound table; a chart takes a measure and a dimension. Containers group widgets and lay them out in flex or grid, so a screen keeps its shape at different widths.
A table can group its rows by a column, for example equipment by type. Each group gets a header row with its value and how many rows it holds, and clicking the header collapses or expands the group. You can list the order the groups appear in; any value not listed follows, A to Z. A progress column can change colour by value, for example green below 80, amber below 100 and red from 100, and can show its value as a label such as 110 %. Ask PIES AI for these, for example “group the equipment table by type, DC plants first, and colour the load bar red from 100%”. Grouping applies to read-only tables; an editable table keeps its own row order.
A table can also be edited in place. In the table's properties, the Content tab has an Editing section: turn on Editable, choose which columns can be edited, and pick the Save function that writes a changed row. For each editable column, choose its editor (text, number, date, dropdown, checkbox or read-only), give a dropdown its options or let it offer the values already in that column, and mark it required or give it a minimum and maximum. Row save calls the function once for each changed row; Bulk save sends all changed rows in one call. Turn on Allow adding rows and pick an Add function to let users add new rows, and set the label of the save button. Users change cells, then press Save changes, and only the rows they changed are saved. You can also ask PIES AI, for example “make the breakers table editable, with phase as a dropdown”; it builds the same native editable table rather than a custom widget.
A line chart can plot time-series data stored one reading per row (a date,
a series name and a value). Use a date column as the x axis to get a real time
axis, and set how far back and forward it reaches, for example 3 years back and
4 years forward. Pick a series column to draw one line for each
of its values, such as capacity, load and forecast. Each series can be drawn as
a step line (the value holds until the next change, as for a capacity), and as a
dashed line, either along its whole length (a forecast) or only after today.
Turn on the today marker for a vertical line at the current
date. Filter the chart's rows by the record you are looking at with
$routeParam.id, and users can export the plotted series as CSV. A
chart plots the rows as they are stored; values that have to be worked out first
(for example a capacity derived from several tables) are calculated by a server
function into a table, and the chart reads that table.
To open a form already filled in from the record you are looking at, pass
the value when you navigate and read it in the form field. In the
Navigate to Screen step, add a query parameter such as
asset = $routeParam (from a record's page) or
board = $selectedRow.id (from a table row action).
On the form, set the field's Default Value to
$queryParam.asset to start with that parameter, or to
$routeParam to start with the page's route parameter. A dropdown
pre-selects the matching option, so an Add battery button on an item's
page opens the form with that item already chosen. Ordinary default values work
as before.
Custom widgets
When nothing in the palette fits — a signature pad, a Kanban board, a
third-party SDK — build a custom widget in the Widget Designer
and it appears in the palette like any other. Custom widgets targeting a
screen or event are React and run in the
browser; those targeting a function are Go and run on the
server. This is what stops a no-code application hitting a ceiling: you drop to
code for one component, and everything around it stays generated.
New Custom Widget starts on Screen Widget; in an API-only
application the only type offered is Function (Go). The starter code keeps
the name you gave the widget. A custom widget dropped from the palette into a
container stays linked to its code block.
In the inputs of a function custom widget, a single bare word that is not a
parameter, a step output or a keyword is passed as text: plant_loads
becomes the text "plant_loads". Quote the word to make that explicit.
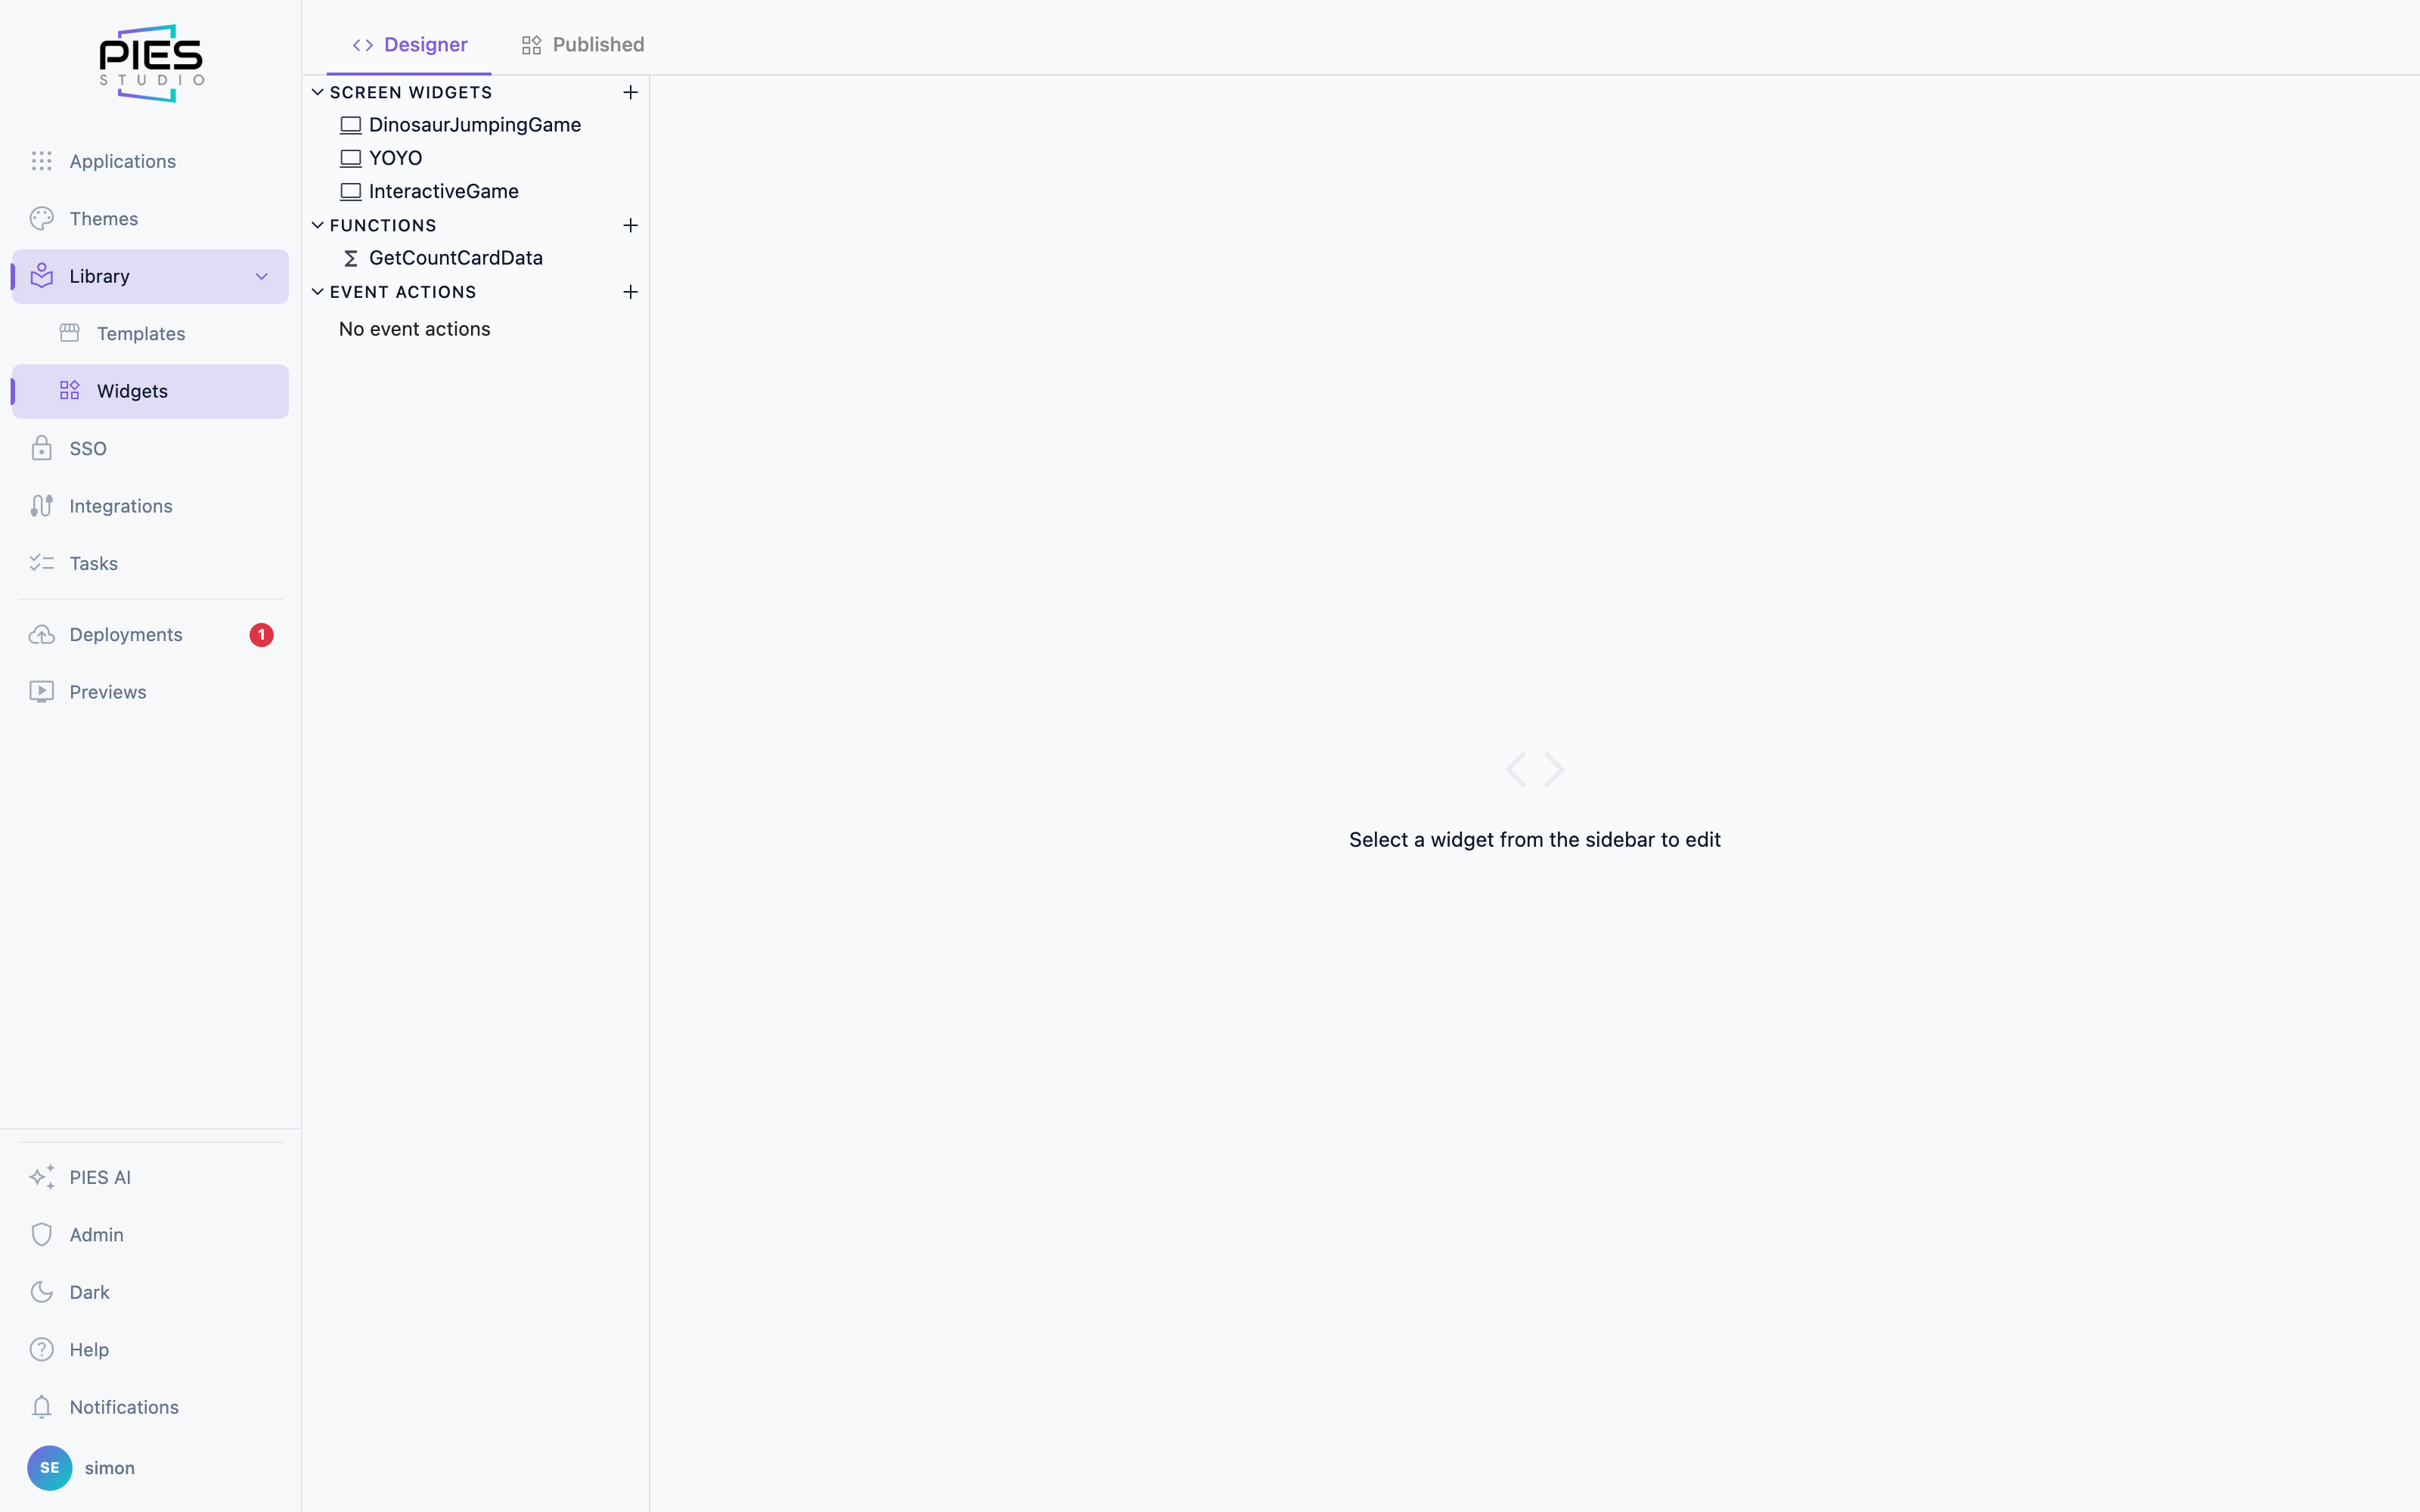
Library → Widgets holds reusable widgets you design once and use in
any app — screen widgets, functions and event actions. An app's own custom widgets
live inside that app; publish one to the Library, or export it from the app, to
share it across apps. PIES AI on a dashboard can search and read your Library
widgets, and an edit it proposes to one is submitted as a new pending version for
review rather than changing the widget in place.
Library → Widgets opens on System, the catalogue of built-in and
registry widgets: search and filter it, switch between PIES registry and
Community, and press Customise on a card to open that widget
in the Designer tab. My published lists the widgets you
have published. Library → Templates lists your own templates and, below
them, the system templates; Use on a system template opens New App
on it. The count beside Templates in the sidebar is the number of your own
templates.
7 · Events, functions and steps
This is where an application stops being a set of screens and starts doing something. Events and functions are built the same way — a flow of steps — but they are allowed to do different things.
Events — what happens when the user acts
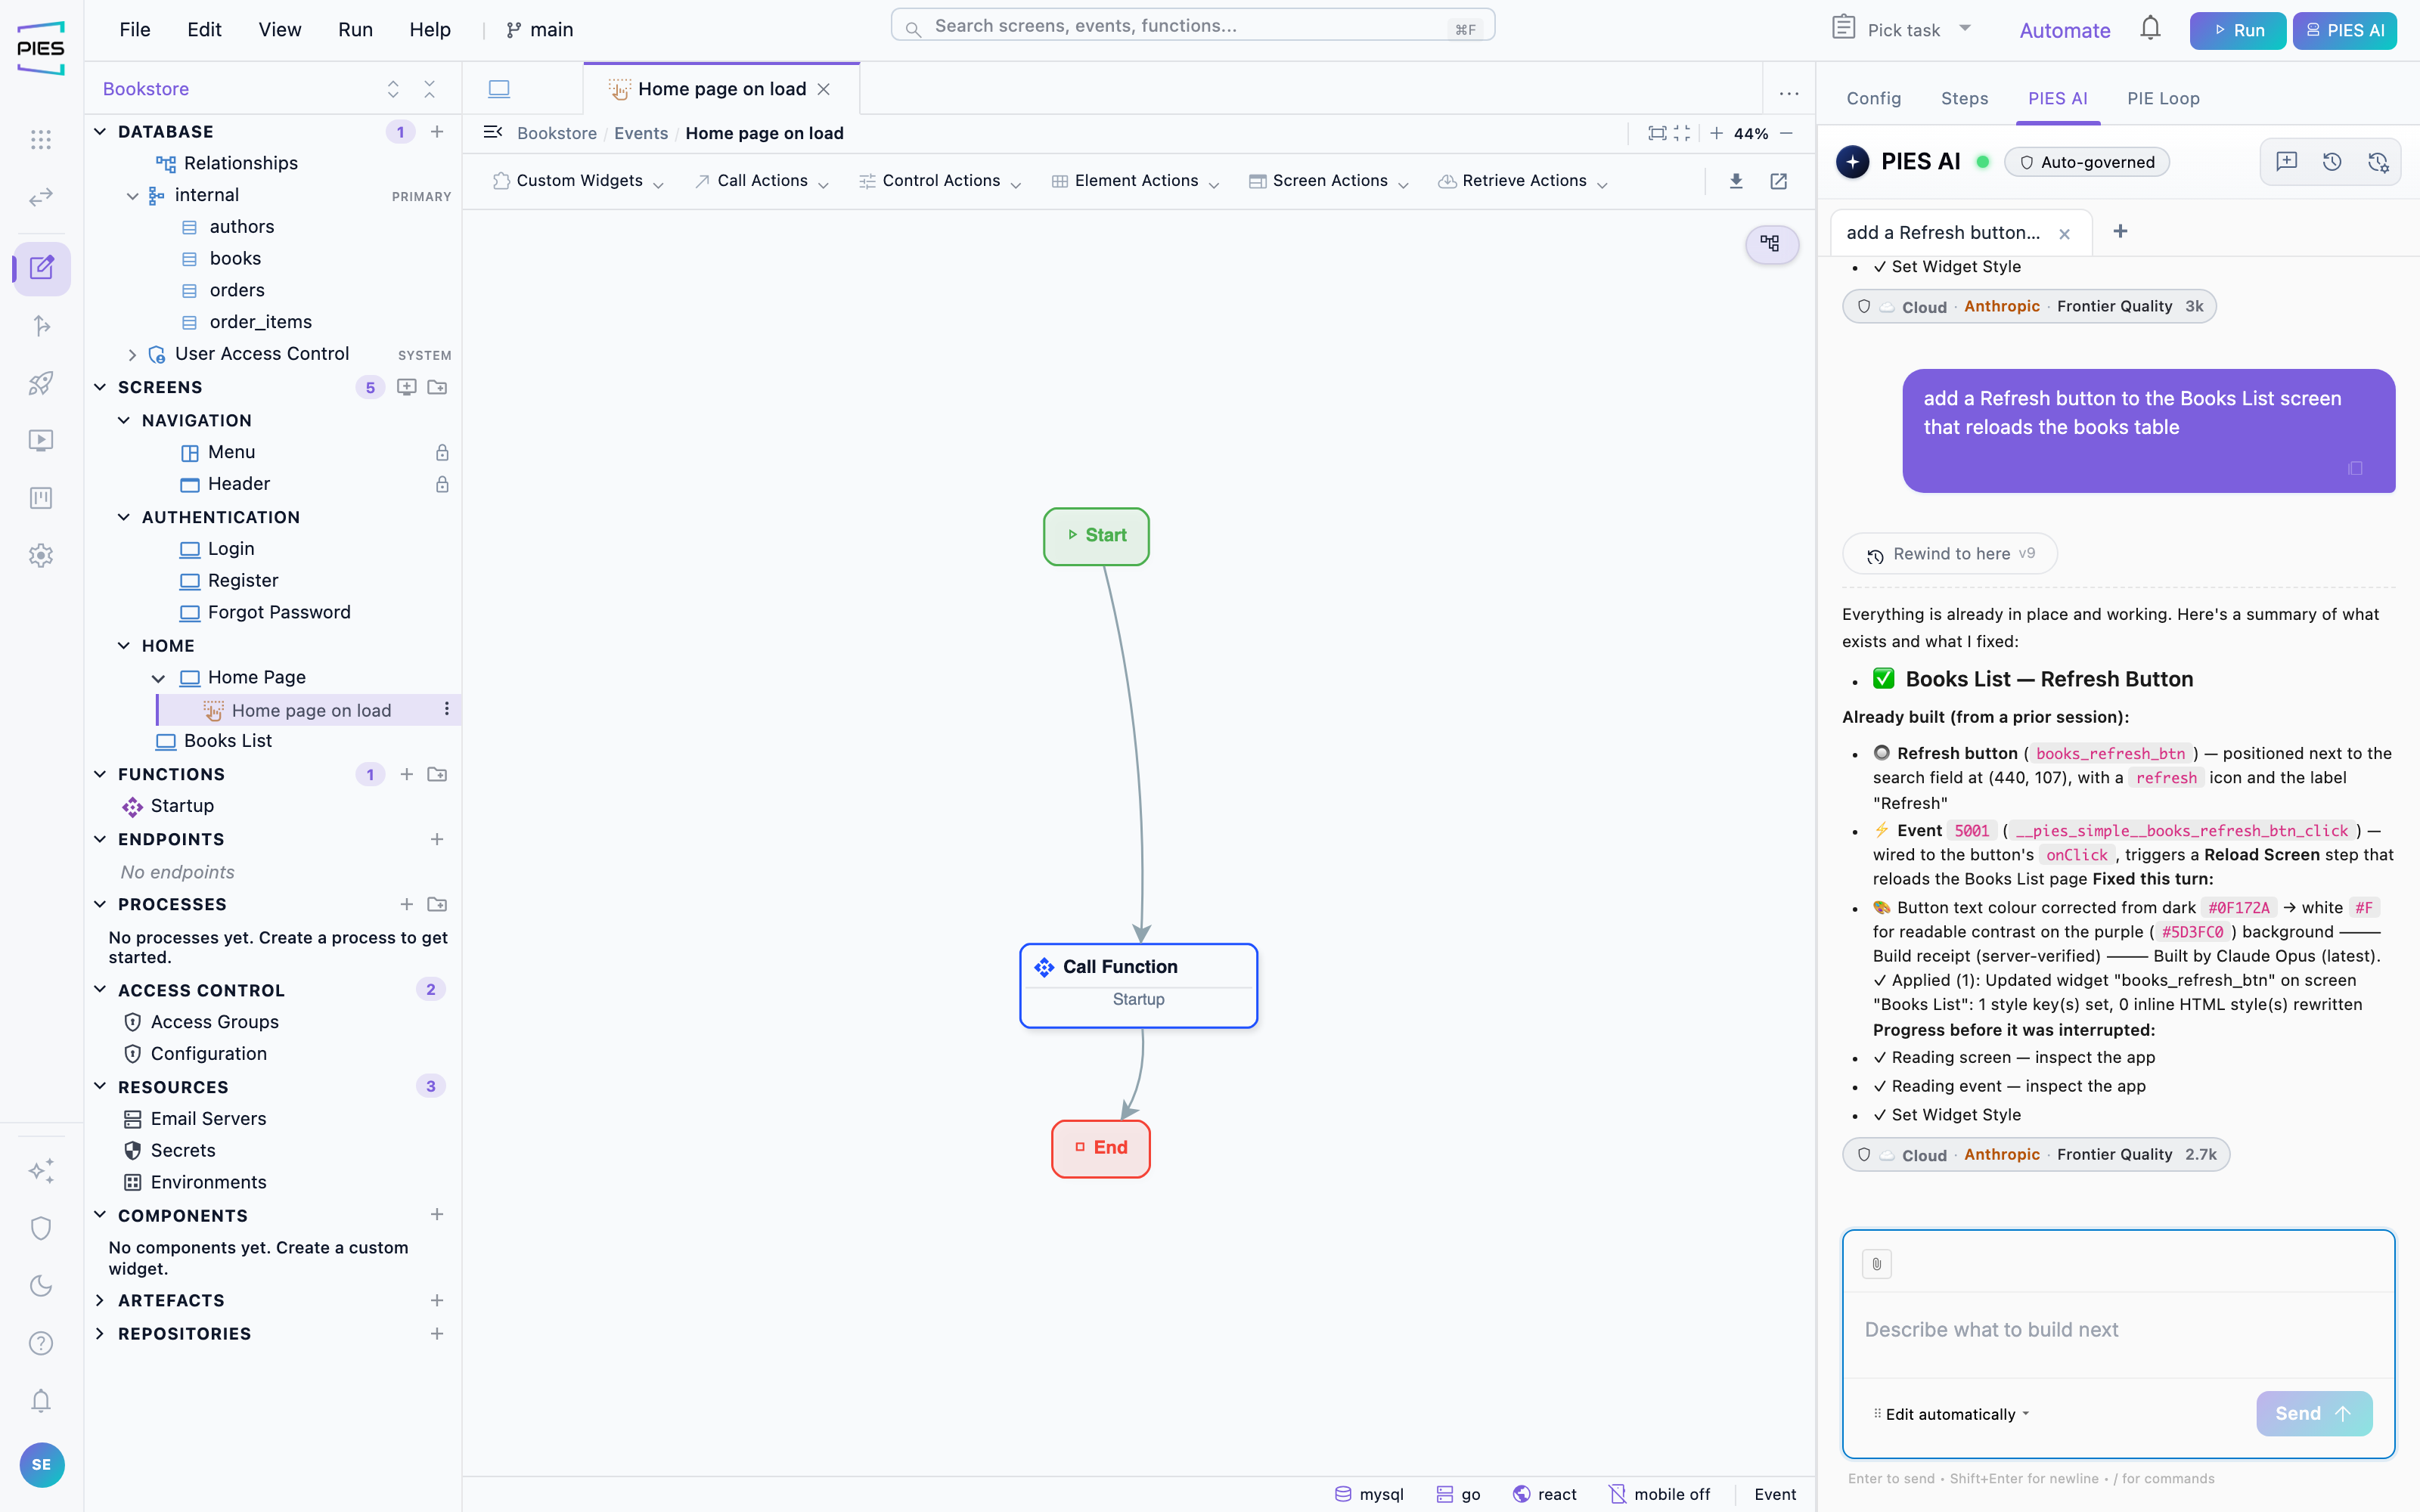
An event is triggered by a widget: a button click, a row selection, a screen load. Its steps call a function and then branch on the result — show a success message, show the error, navigate to another screen, refresh a table. An event must not touch the database directly; it asks a function to.
To add one, select the widget, open Behaviour → Events and press +. In Configure Event, choose Simple action for a short list of steps such as Navigate to Screen, Call Function or Reload Screen. Pick the Event Type (for example On Click) and complete every step — Navigate to Screen needs a target screen. Until then Add action stays disabled and a hint beside it says what is missing: Choose an Event Type or Finish each step. Save the screen with Ctrl+S; when you open the handler again it keeps the Event Type you chose.
Functions — the work itself
A function takes parameters, does the work, and returns data. It is drawn as a flow from one start to one end. A step that is not linked into the flow never runs: the Inspector lists it under Disconnected steps, and the build reports it as a warning in Problems → Functions, naming the function and the step. Inside, steps read and write records, call other functions, transform values, branch on conditions, loop, call REST APIs, send email.
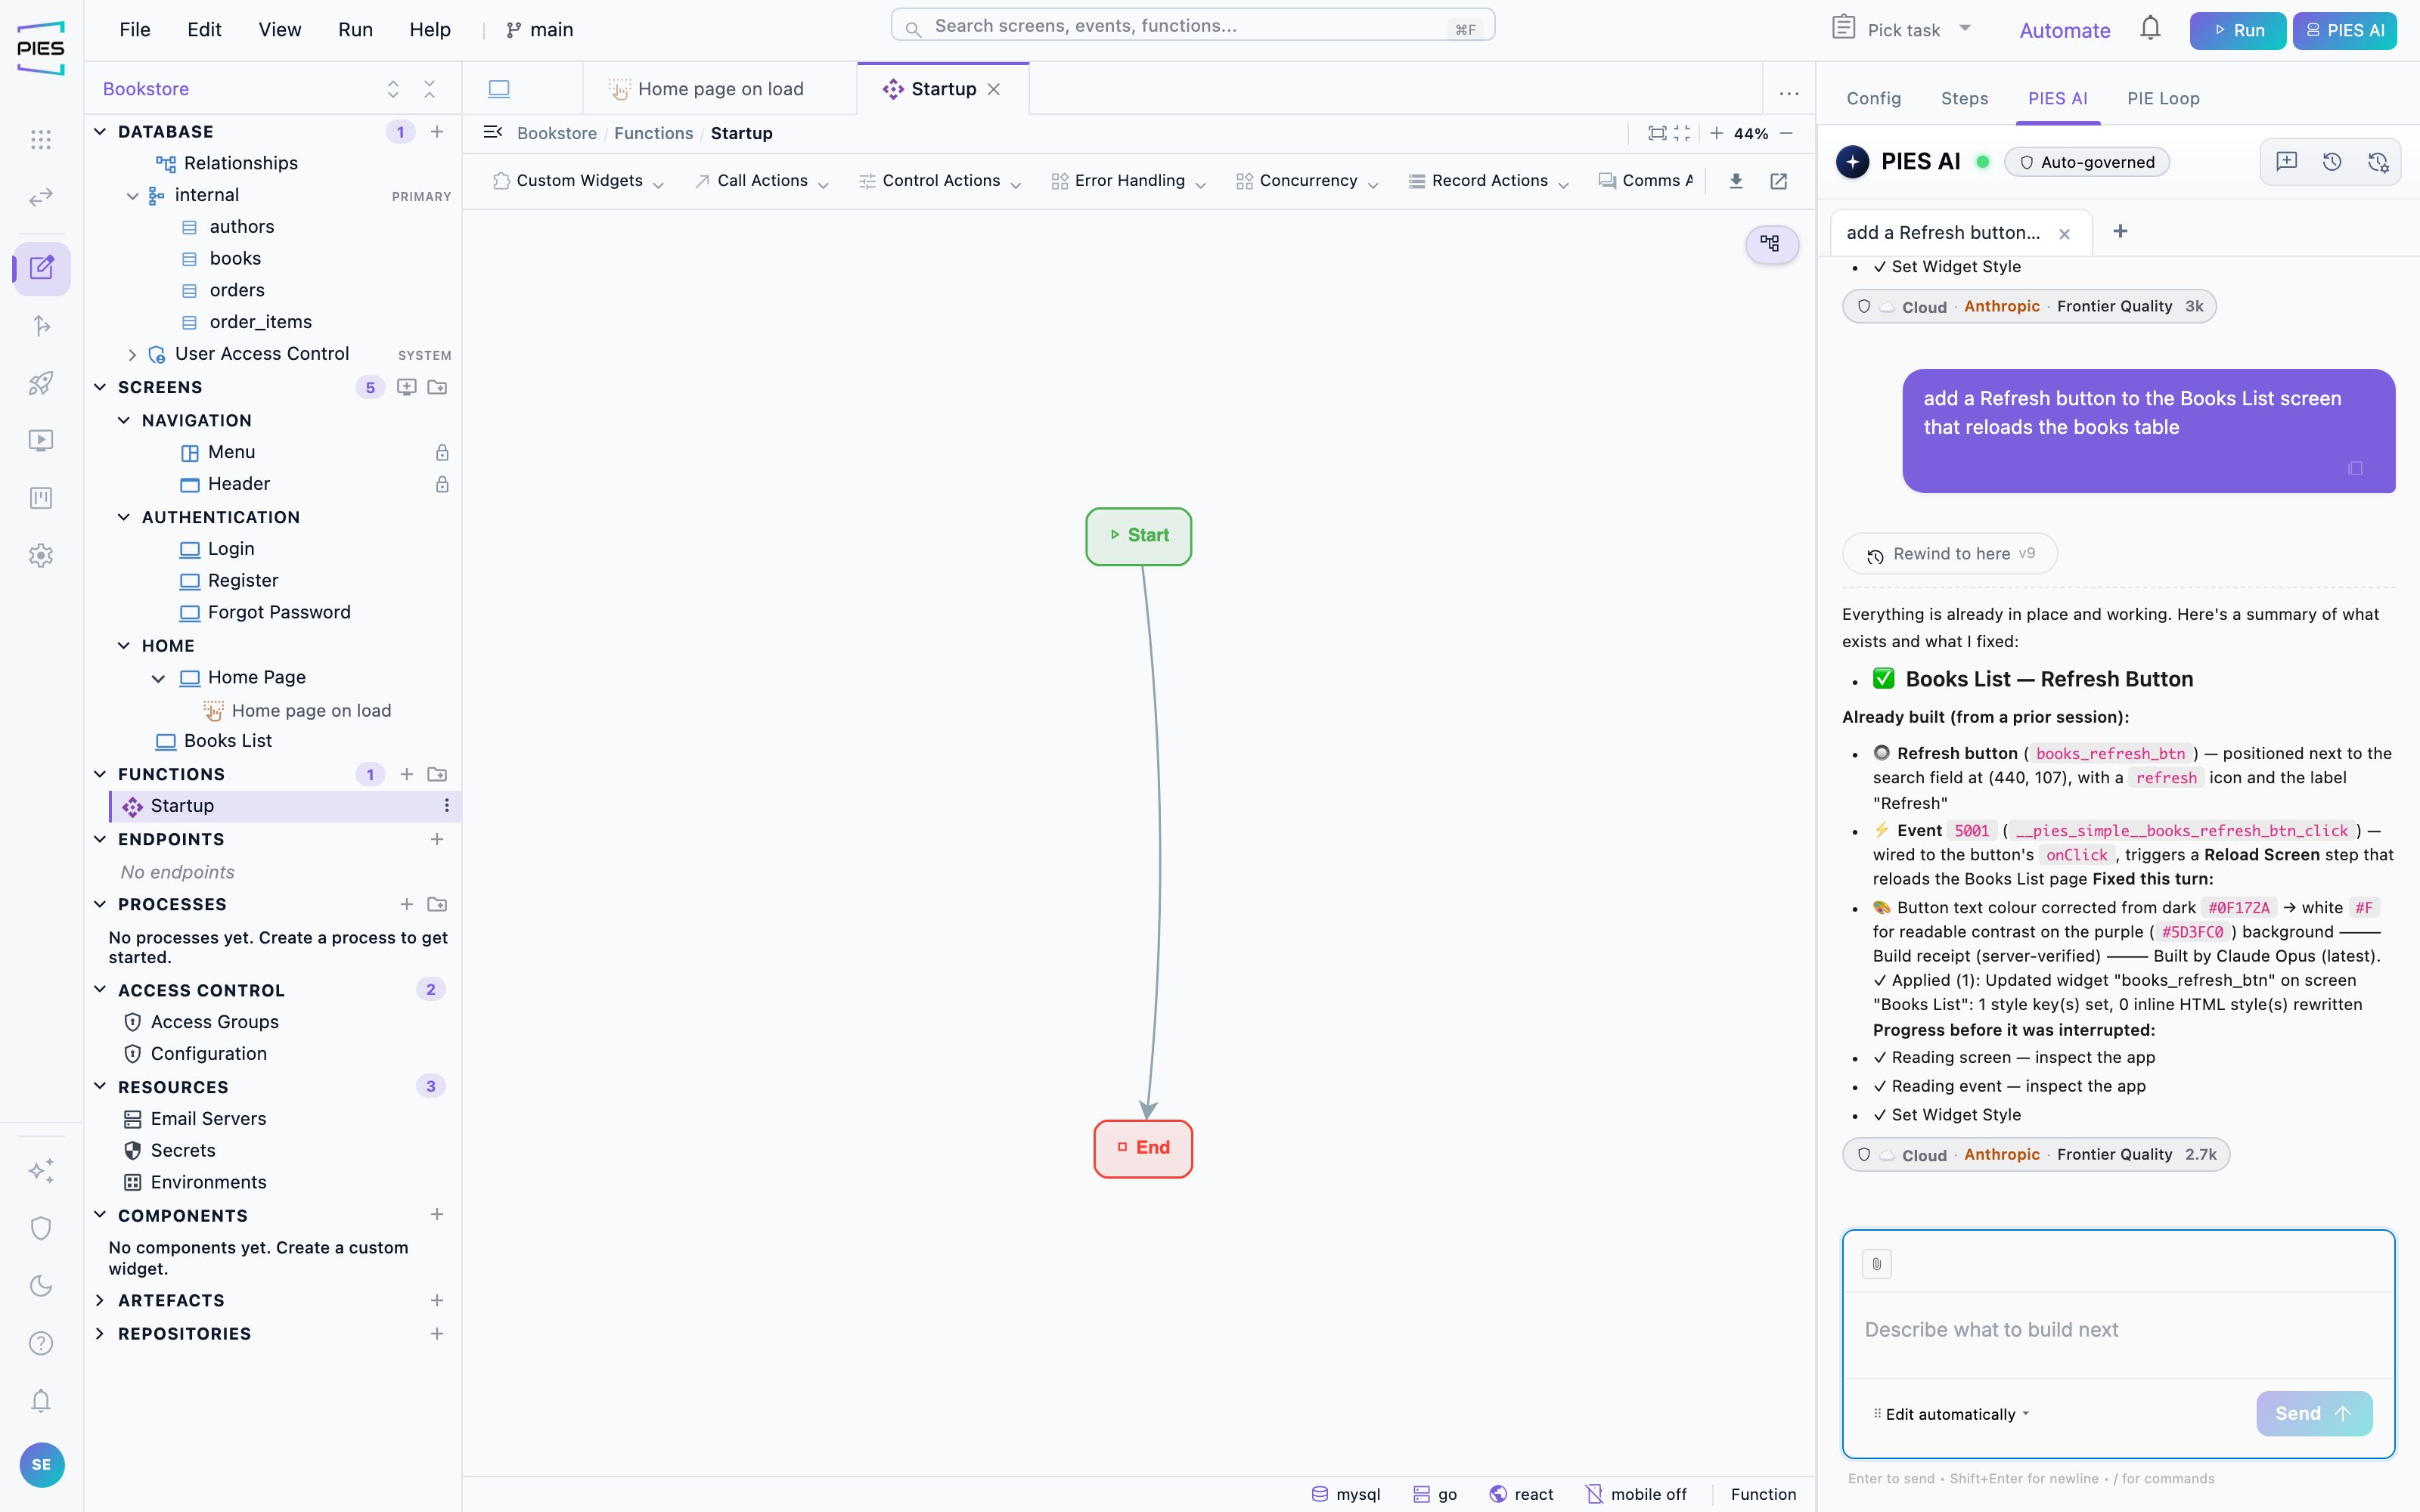
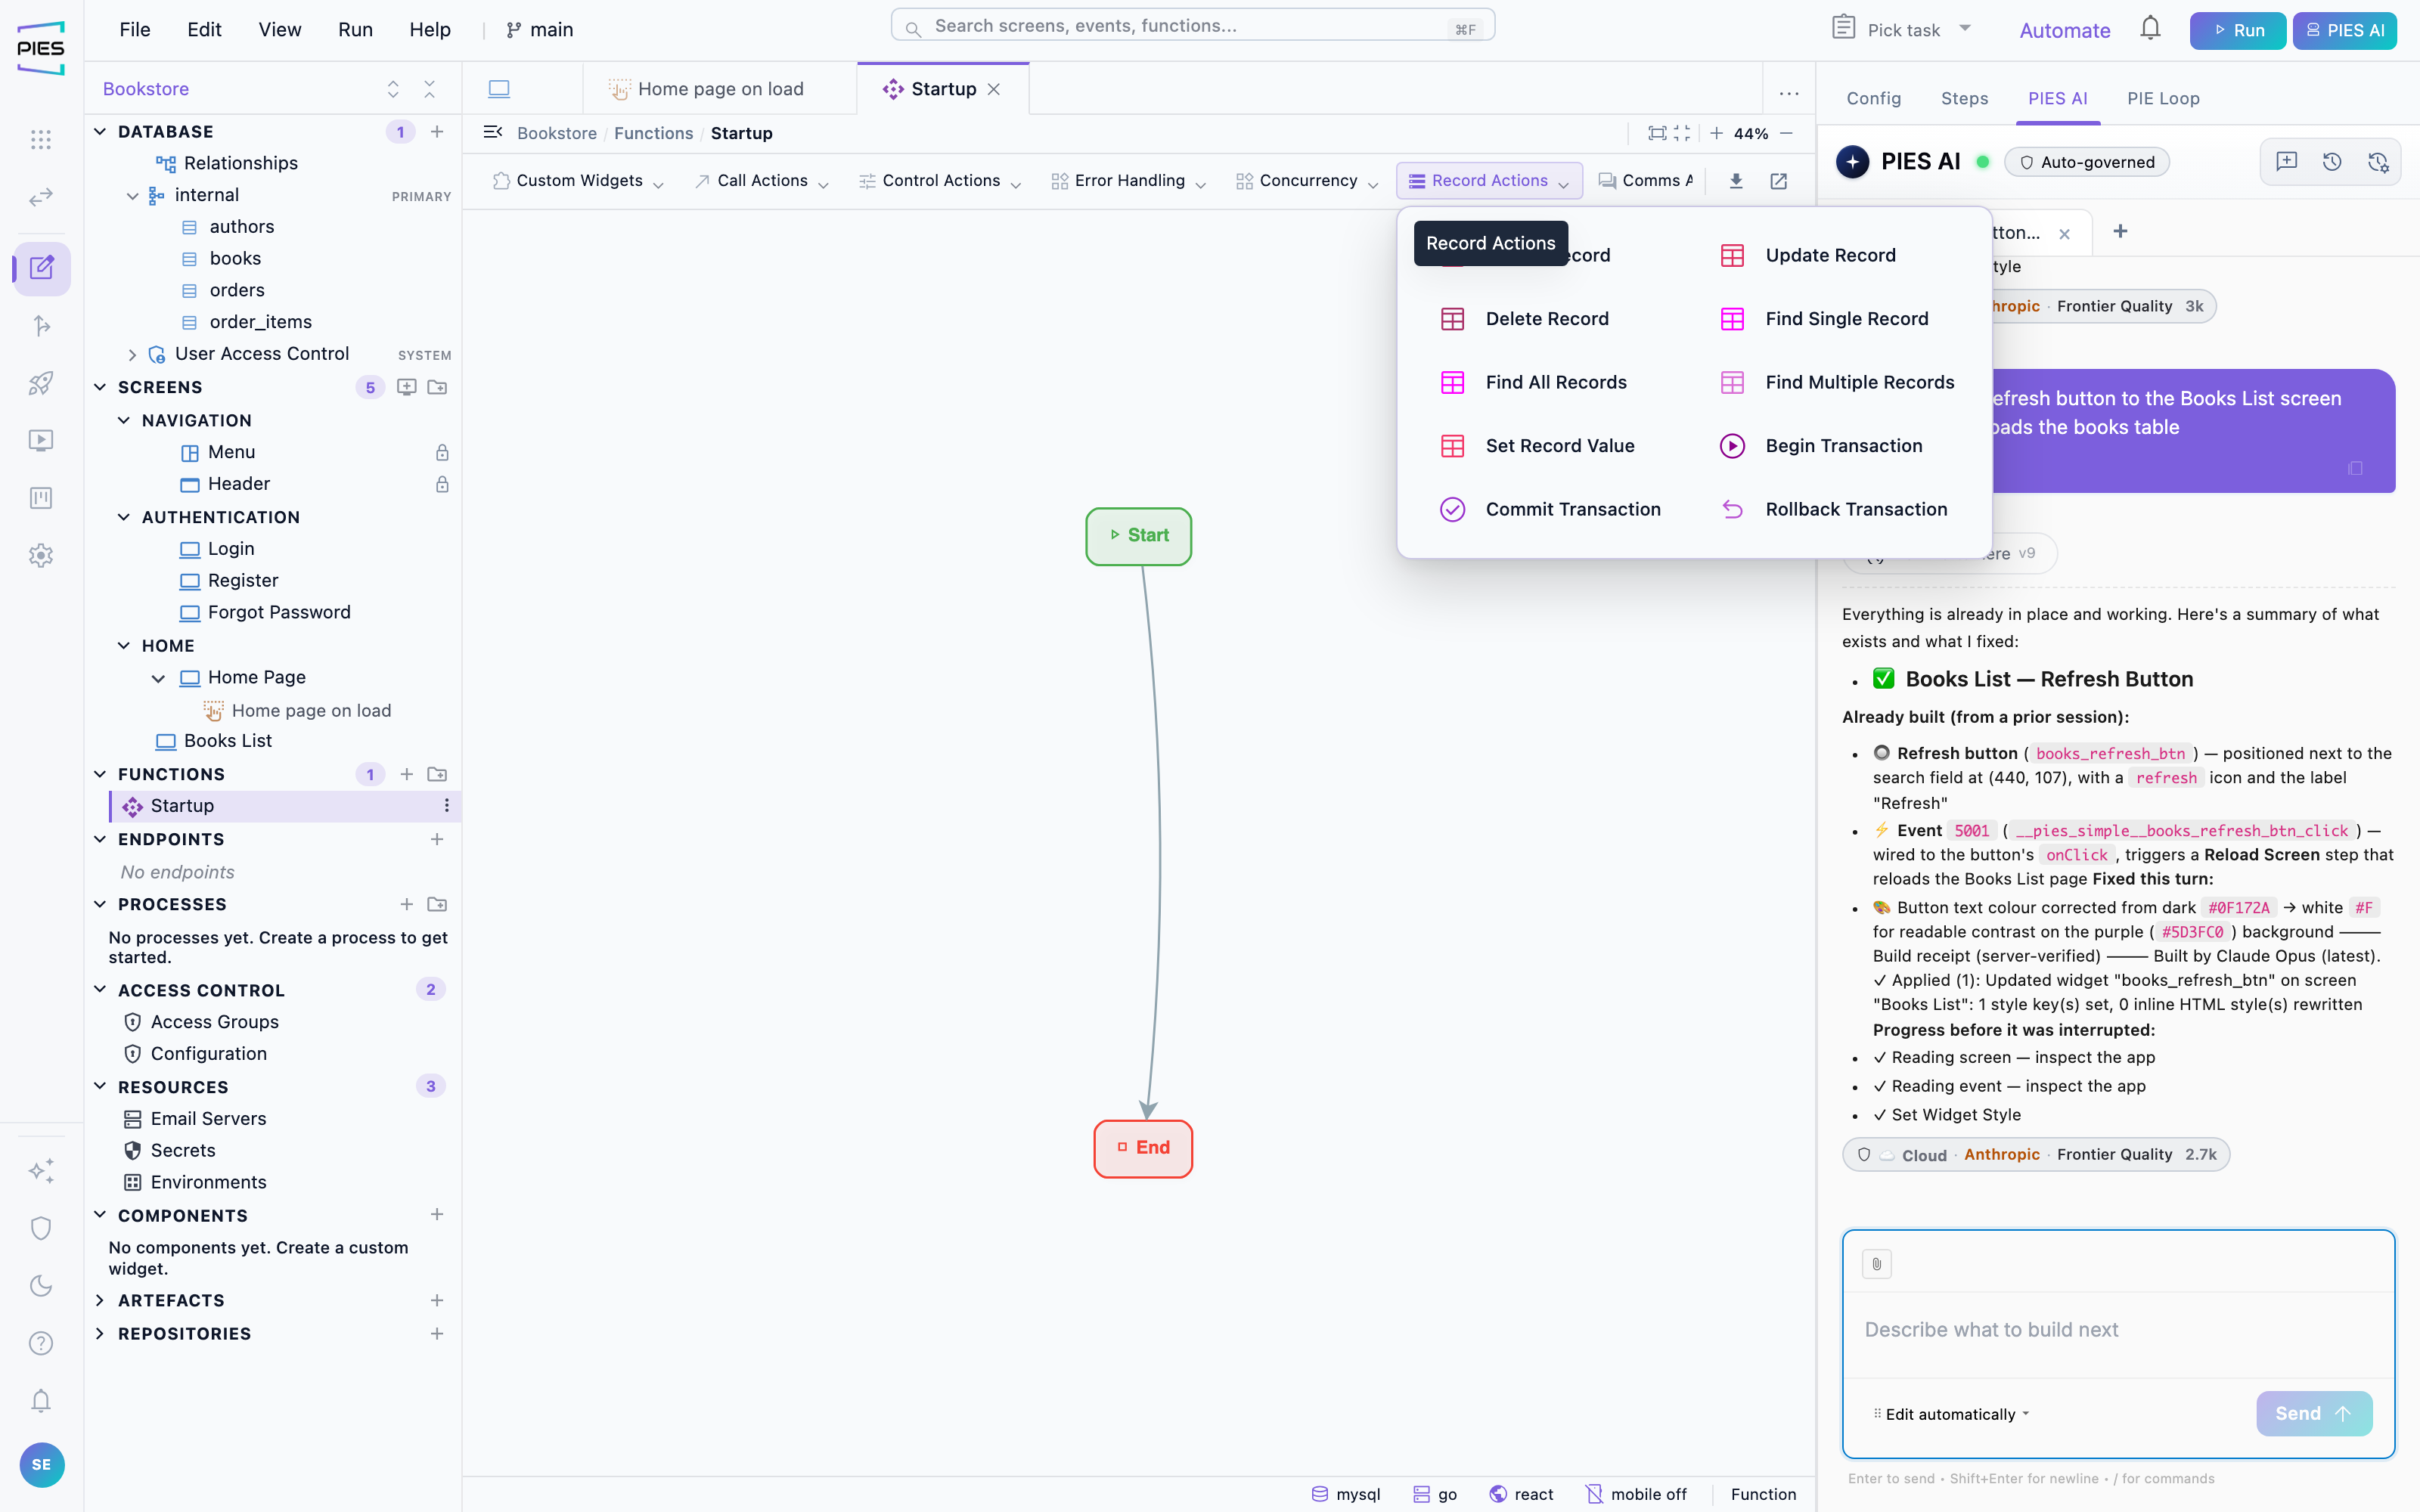
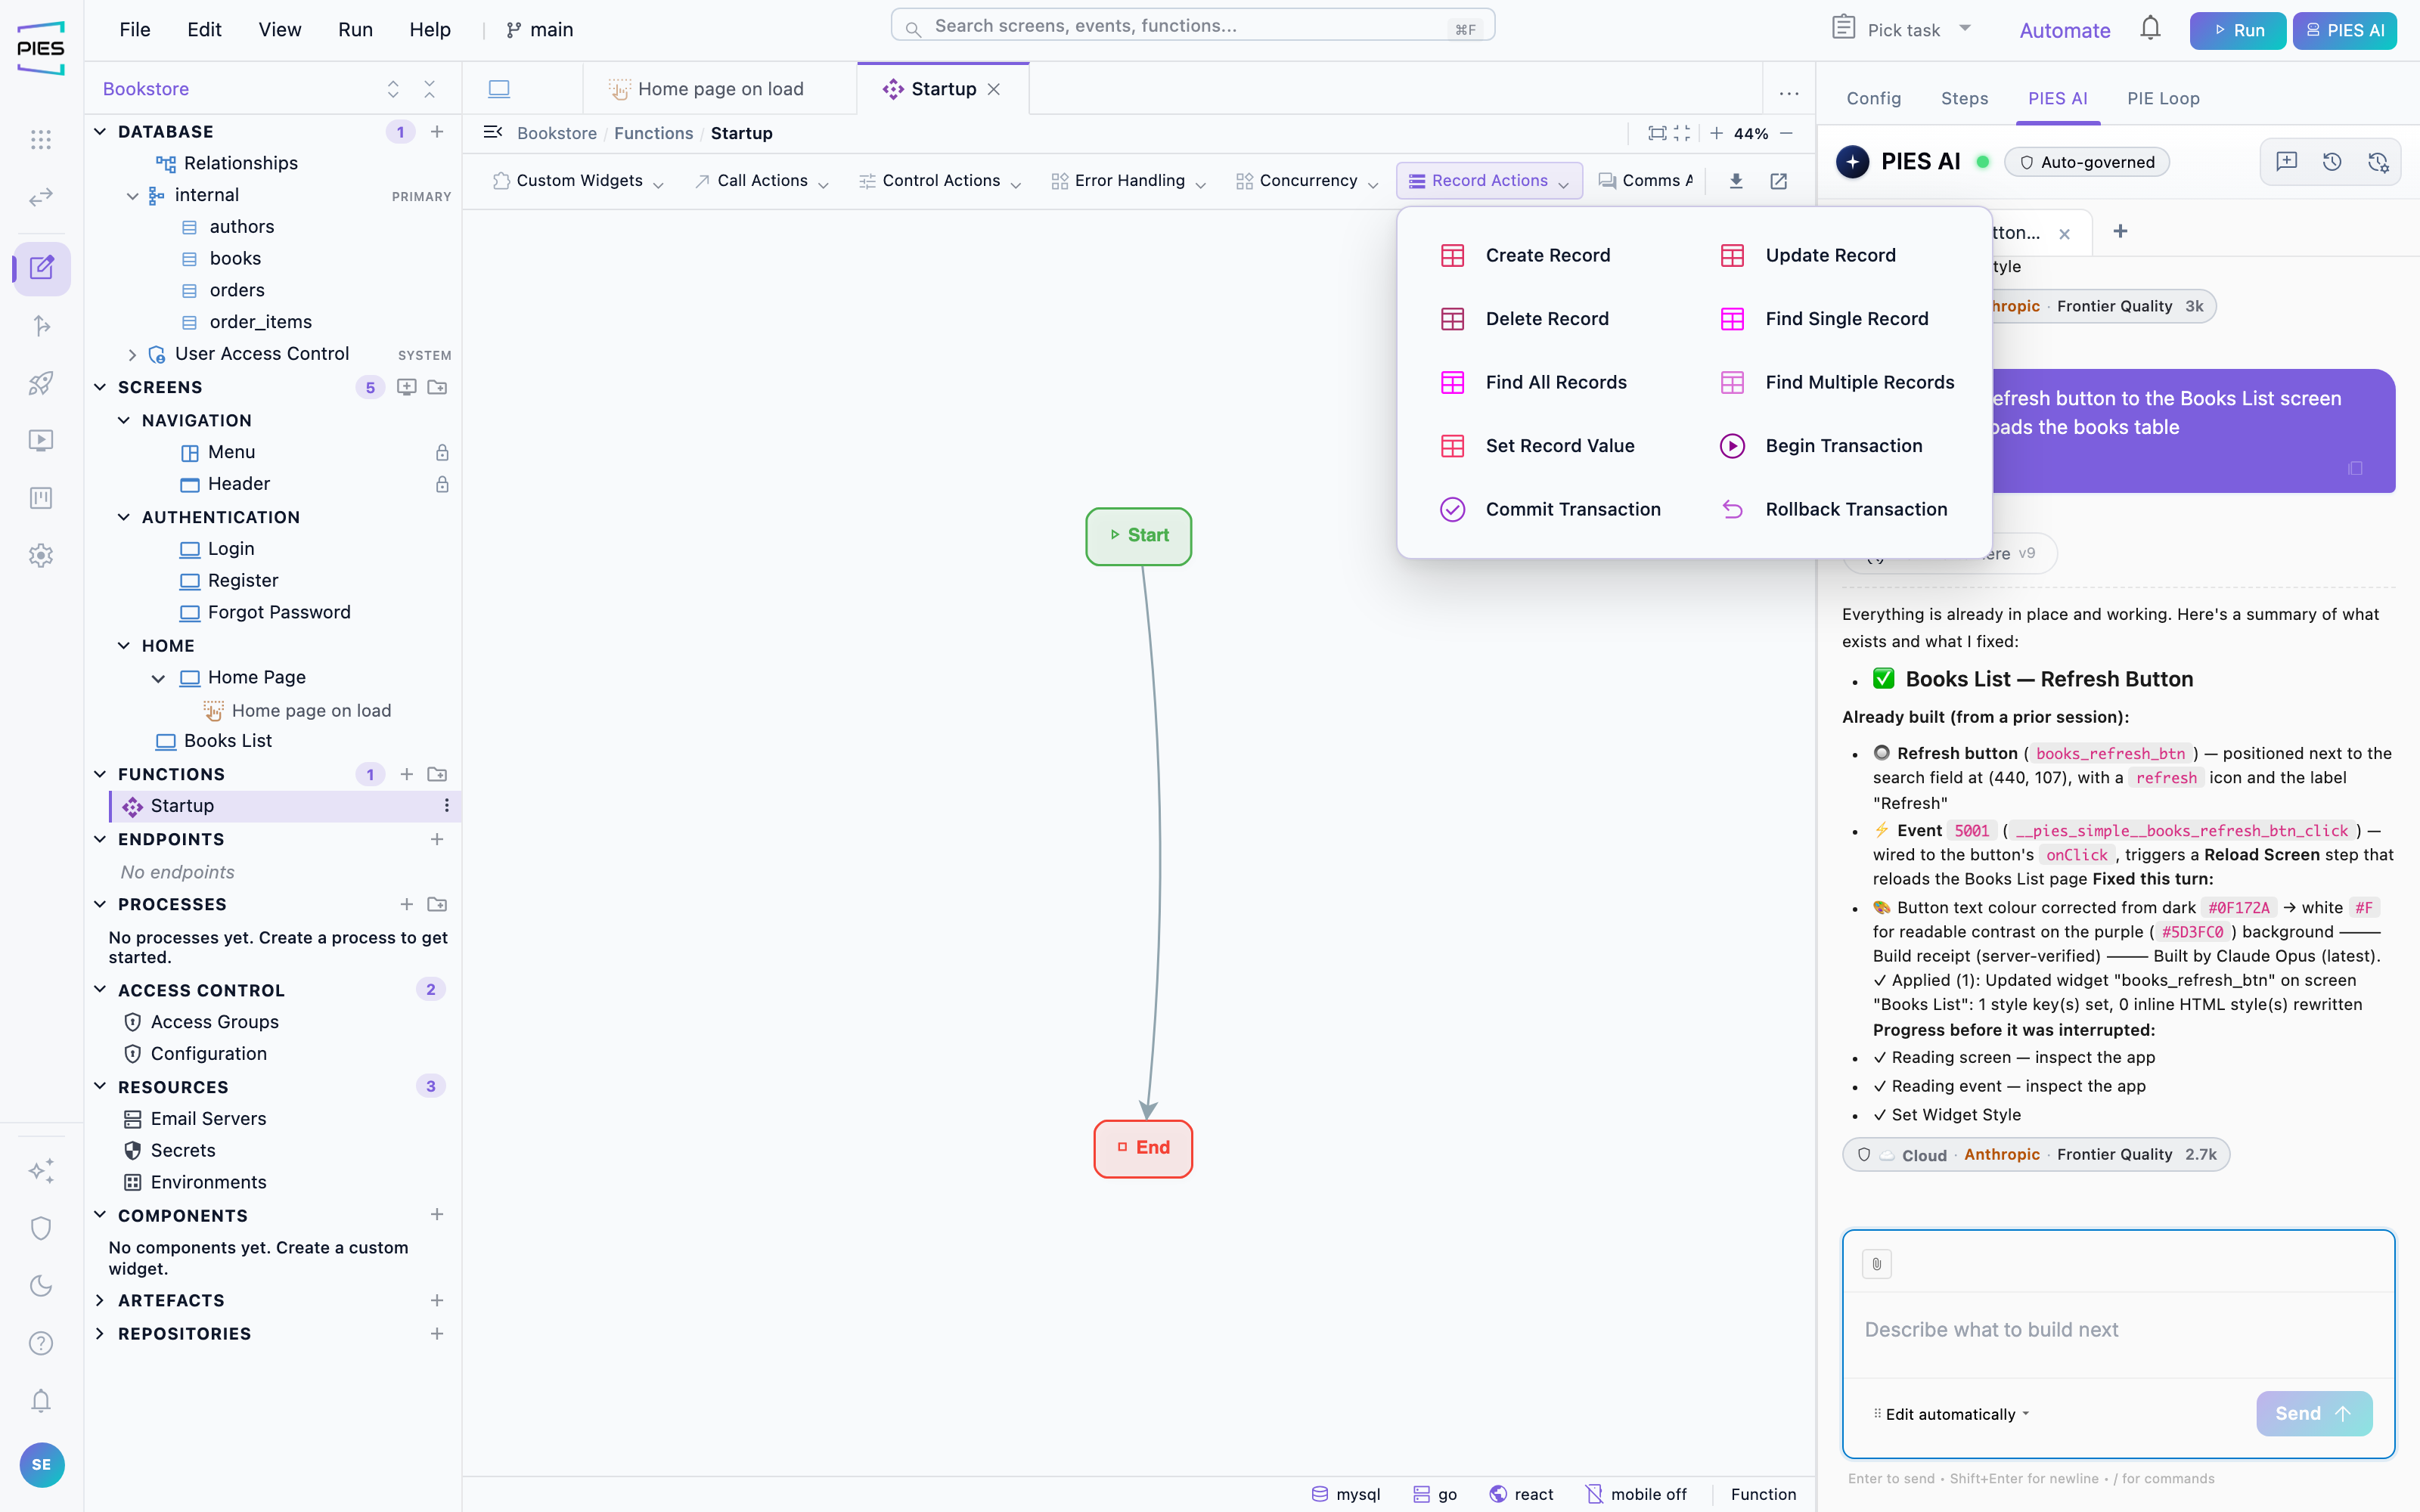
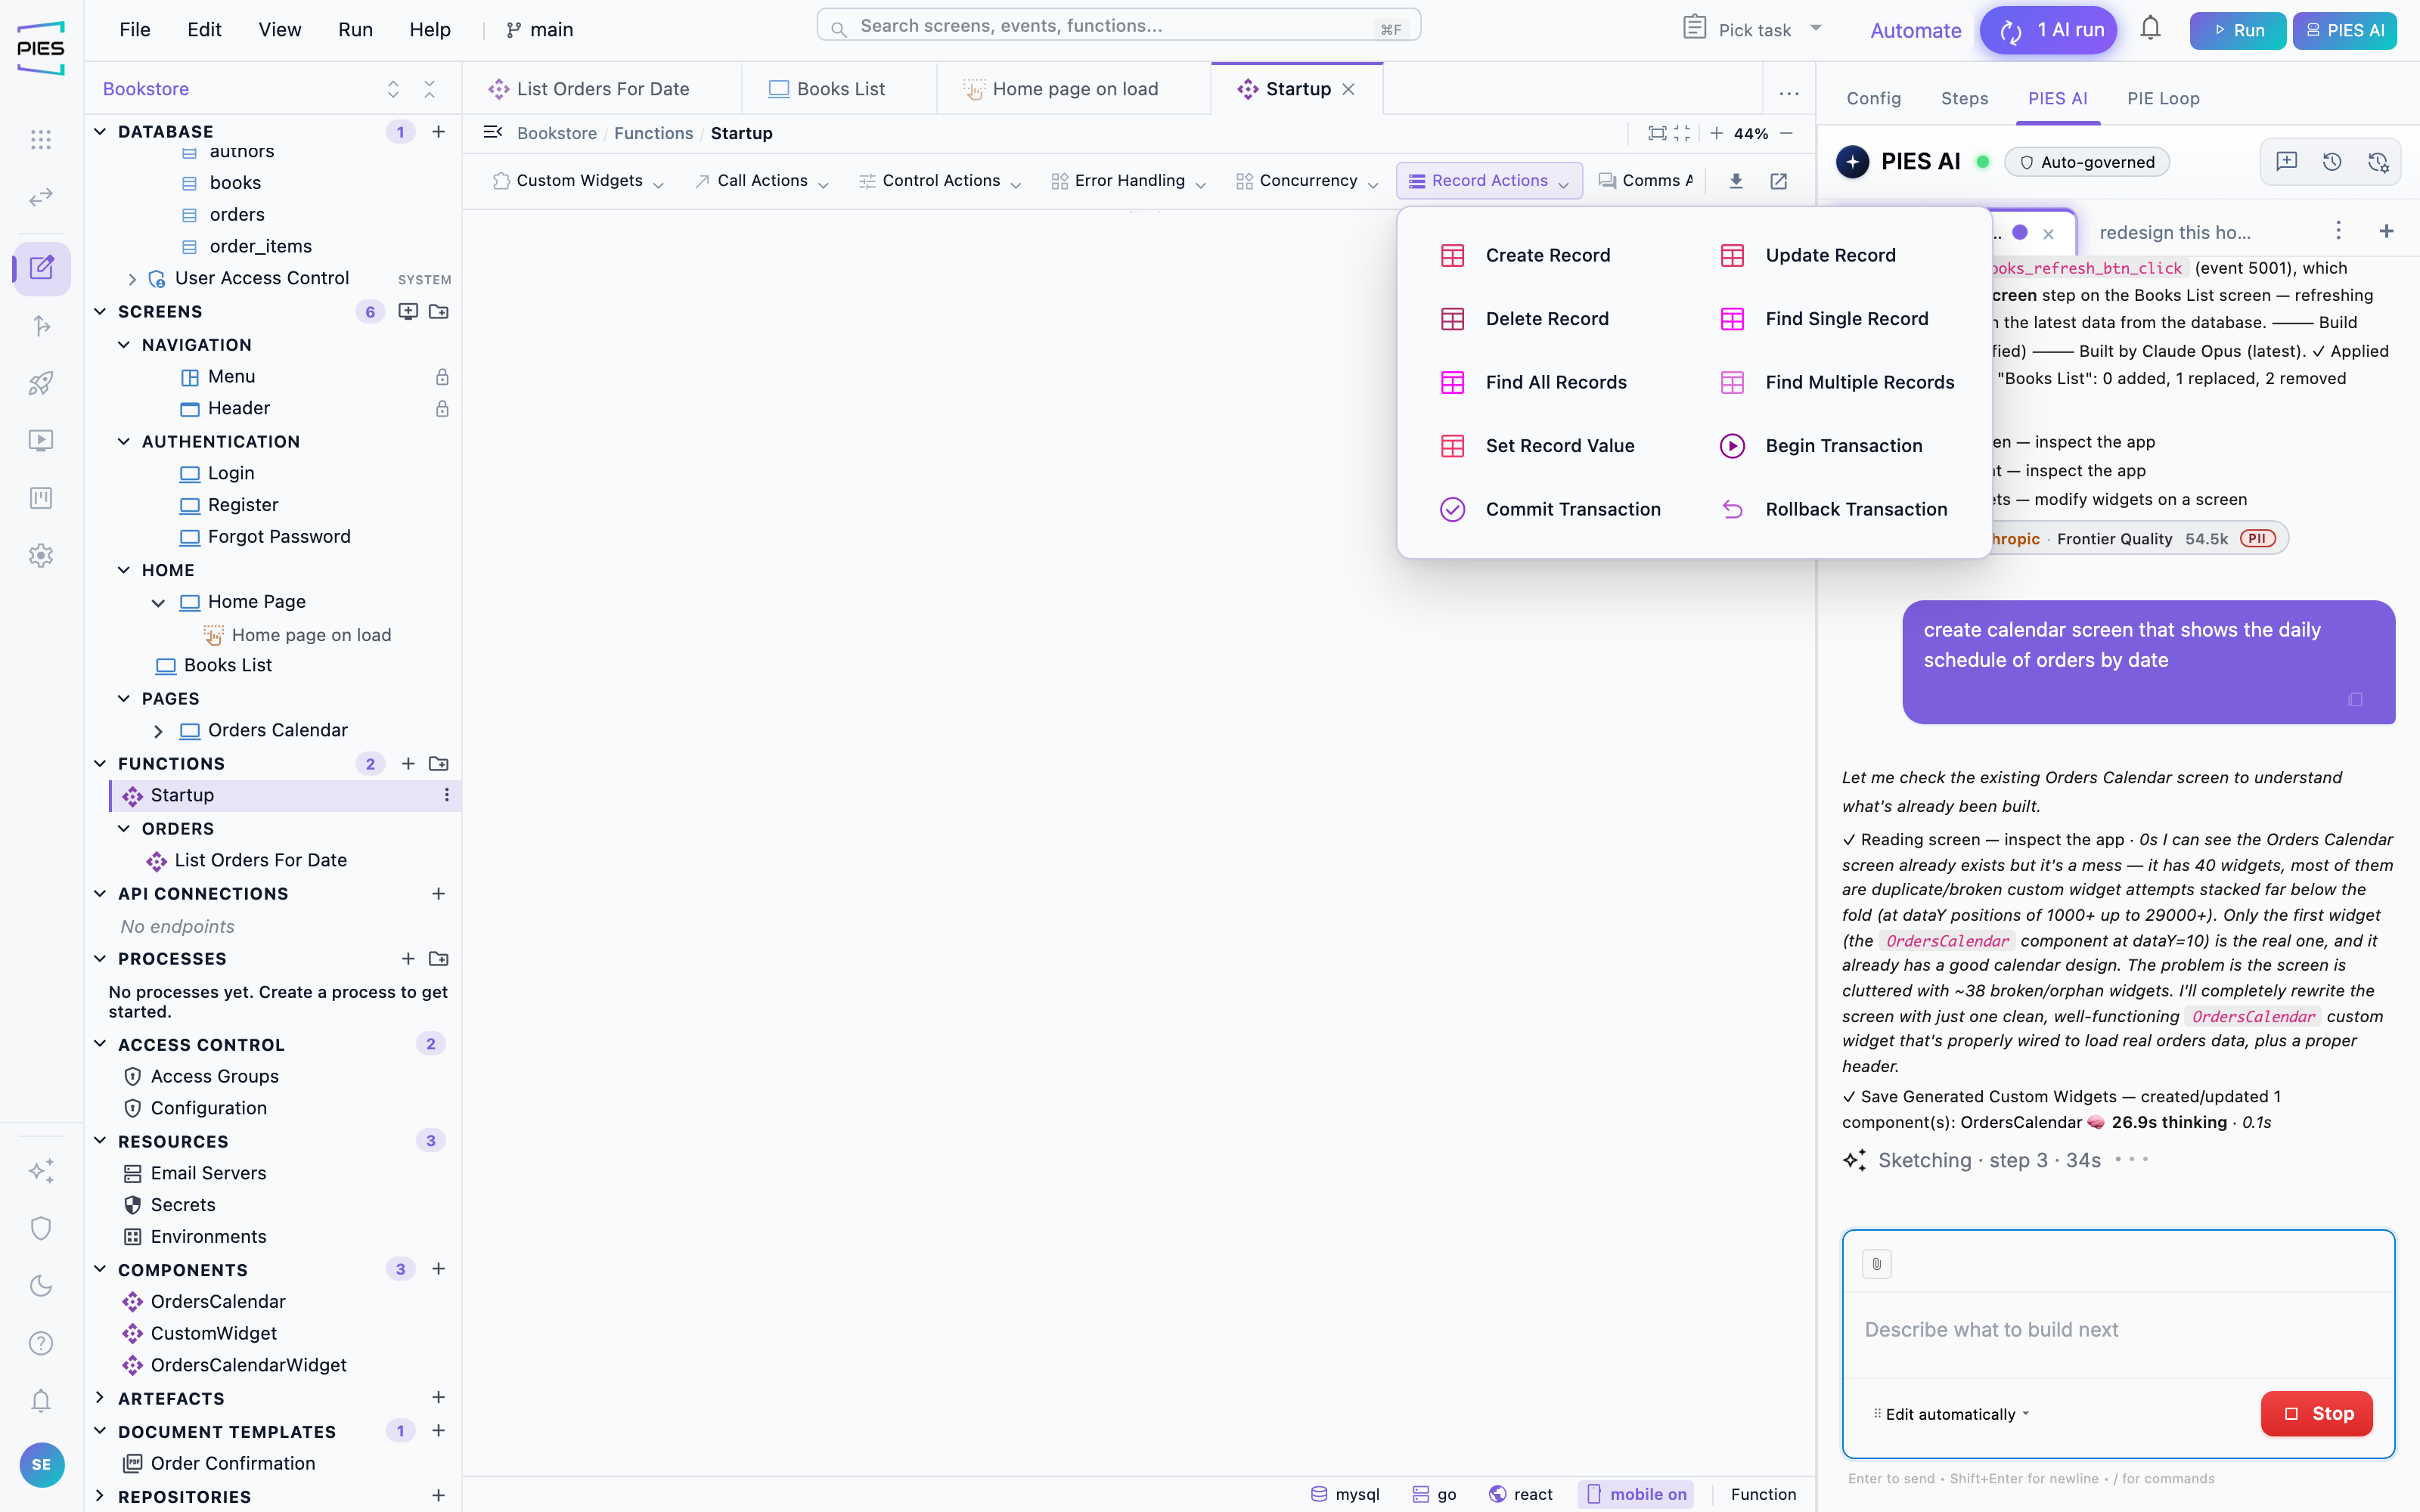
Adding and configuring a step
Add a step from the catalogue and configure it: which data source it acts
on, where its input comes from (a parameter, an earlier step's output, a
literal), and where its output goes. Steps are chained by linking them, and a
later step reads an earlier one's result by referencing it. The groups are
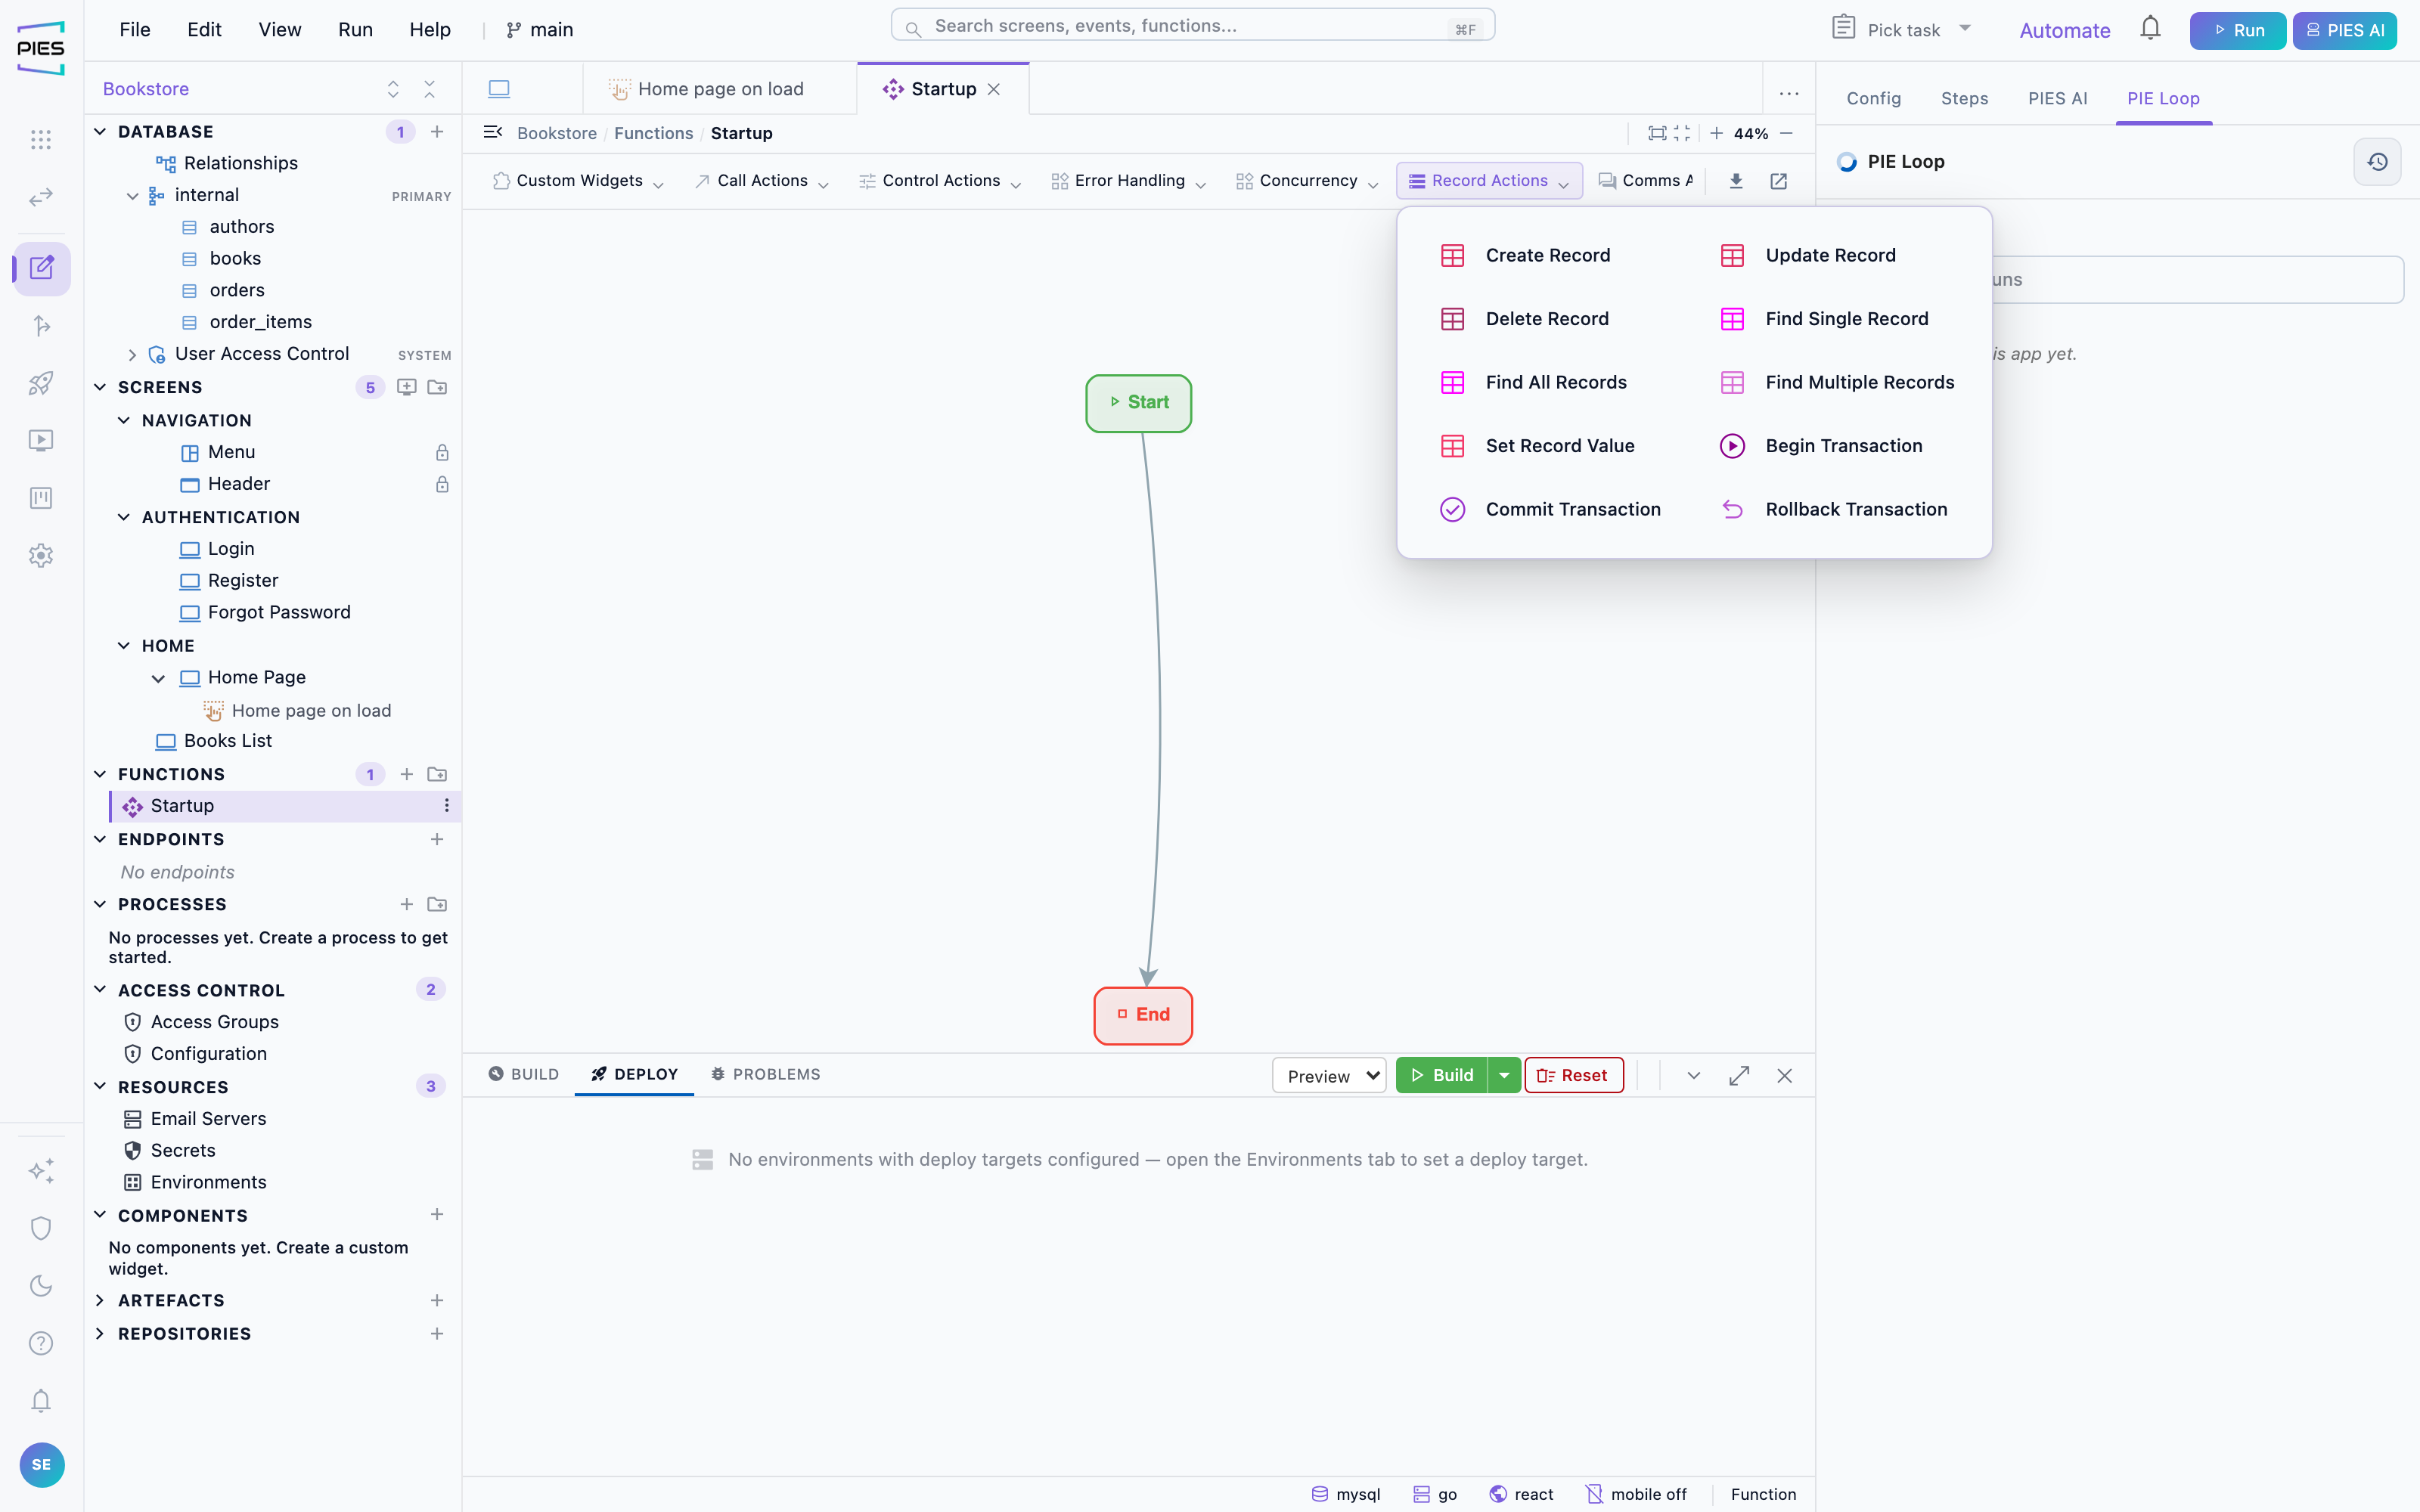
Custom Widgets, Call, Control
(if, loop, end), Error Handling, Concurrency,
Record (insert, update, delete, retrieve), Comms
(email and notifications), AI, Document,
Retrieve (files) and Scheduler — plus
Return Data, which hands a result back to whatever called the
function. An event handler always answers its caller: without a Return Data
step it returns the result of its last Call Function step as
{ ok, data, error }, and when a step fails it returns
{ ok: false, error } instead of nothing, so a custom widget can
check if (result?.ok === false) and show the error without
re-reading the table.
Select a step on the canvas to see its Properties. Steps with
settings show them there; steps that only mark structure or need no settings,
such as Else, Catch, Finally, End Try, End If, End Loop, Parallel, End Parallel,
Break, Close Popup or Navigate to Previous Screen, show a short note explaining
what the step does.
Processes — multi-step business workflows
A process models work that spans time and people — approvals, onboarding, case handling — rather than a single action. It is a workflow of tasks and gateways, and the engine tracks each running instance. Use a function for "save this record"; use a process for "get this contract approved".
To launch a process from an event, add a Start Process step, select it and click Edit. Pick the process to run (required) and, optionally, enter the variables to pass to it. If the application has no processes yet, the panel says so: create one under Processes in the explorer, then come back and pick it.
8 · Documents and PDF generation
Applications produce paperwork — agreements, invoices, reports. In PIES the paperwork is designed once as a document template, and the running application fills it with live data, renders it as a PDF on the server, and either downloads it in the browser or emails it as an attachment. The text stays crisp and selectable — these are real PDFs, not screenshots of a page.
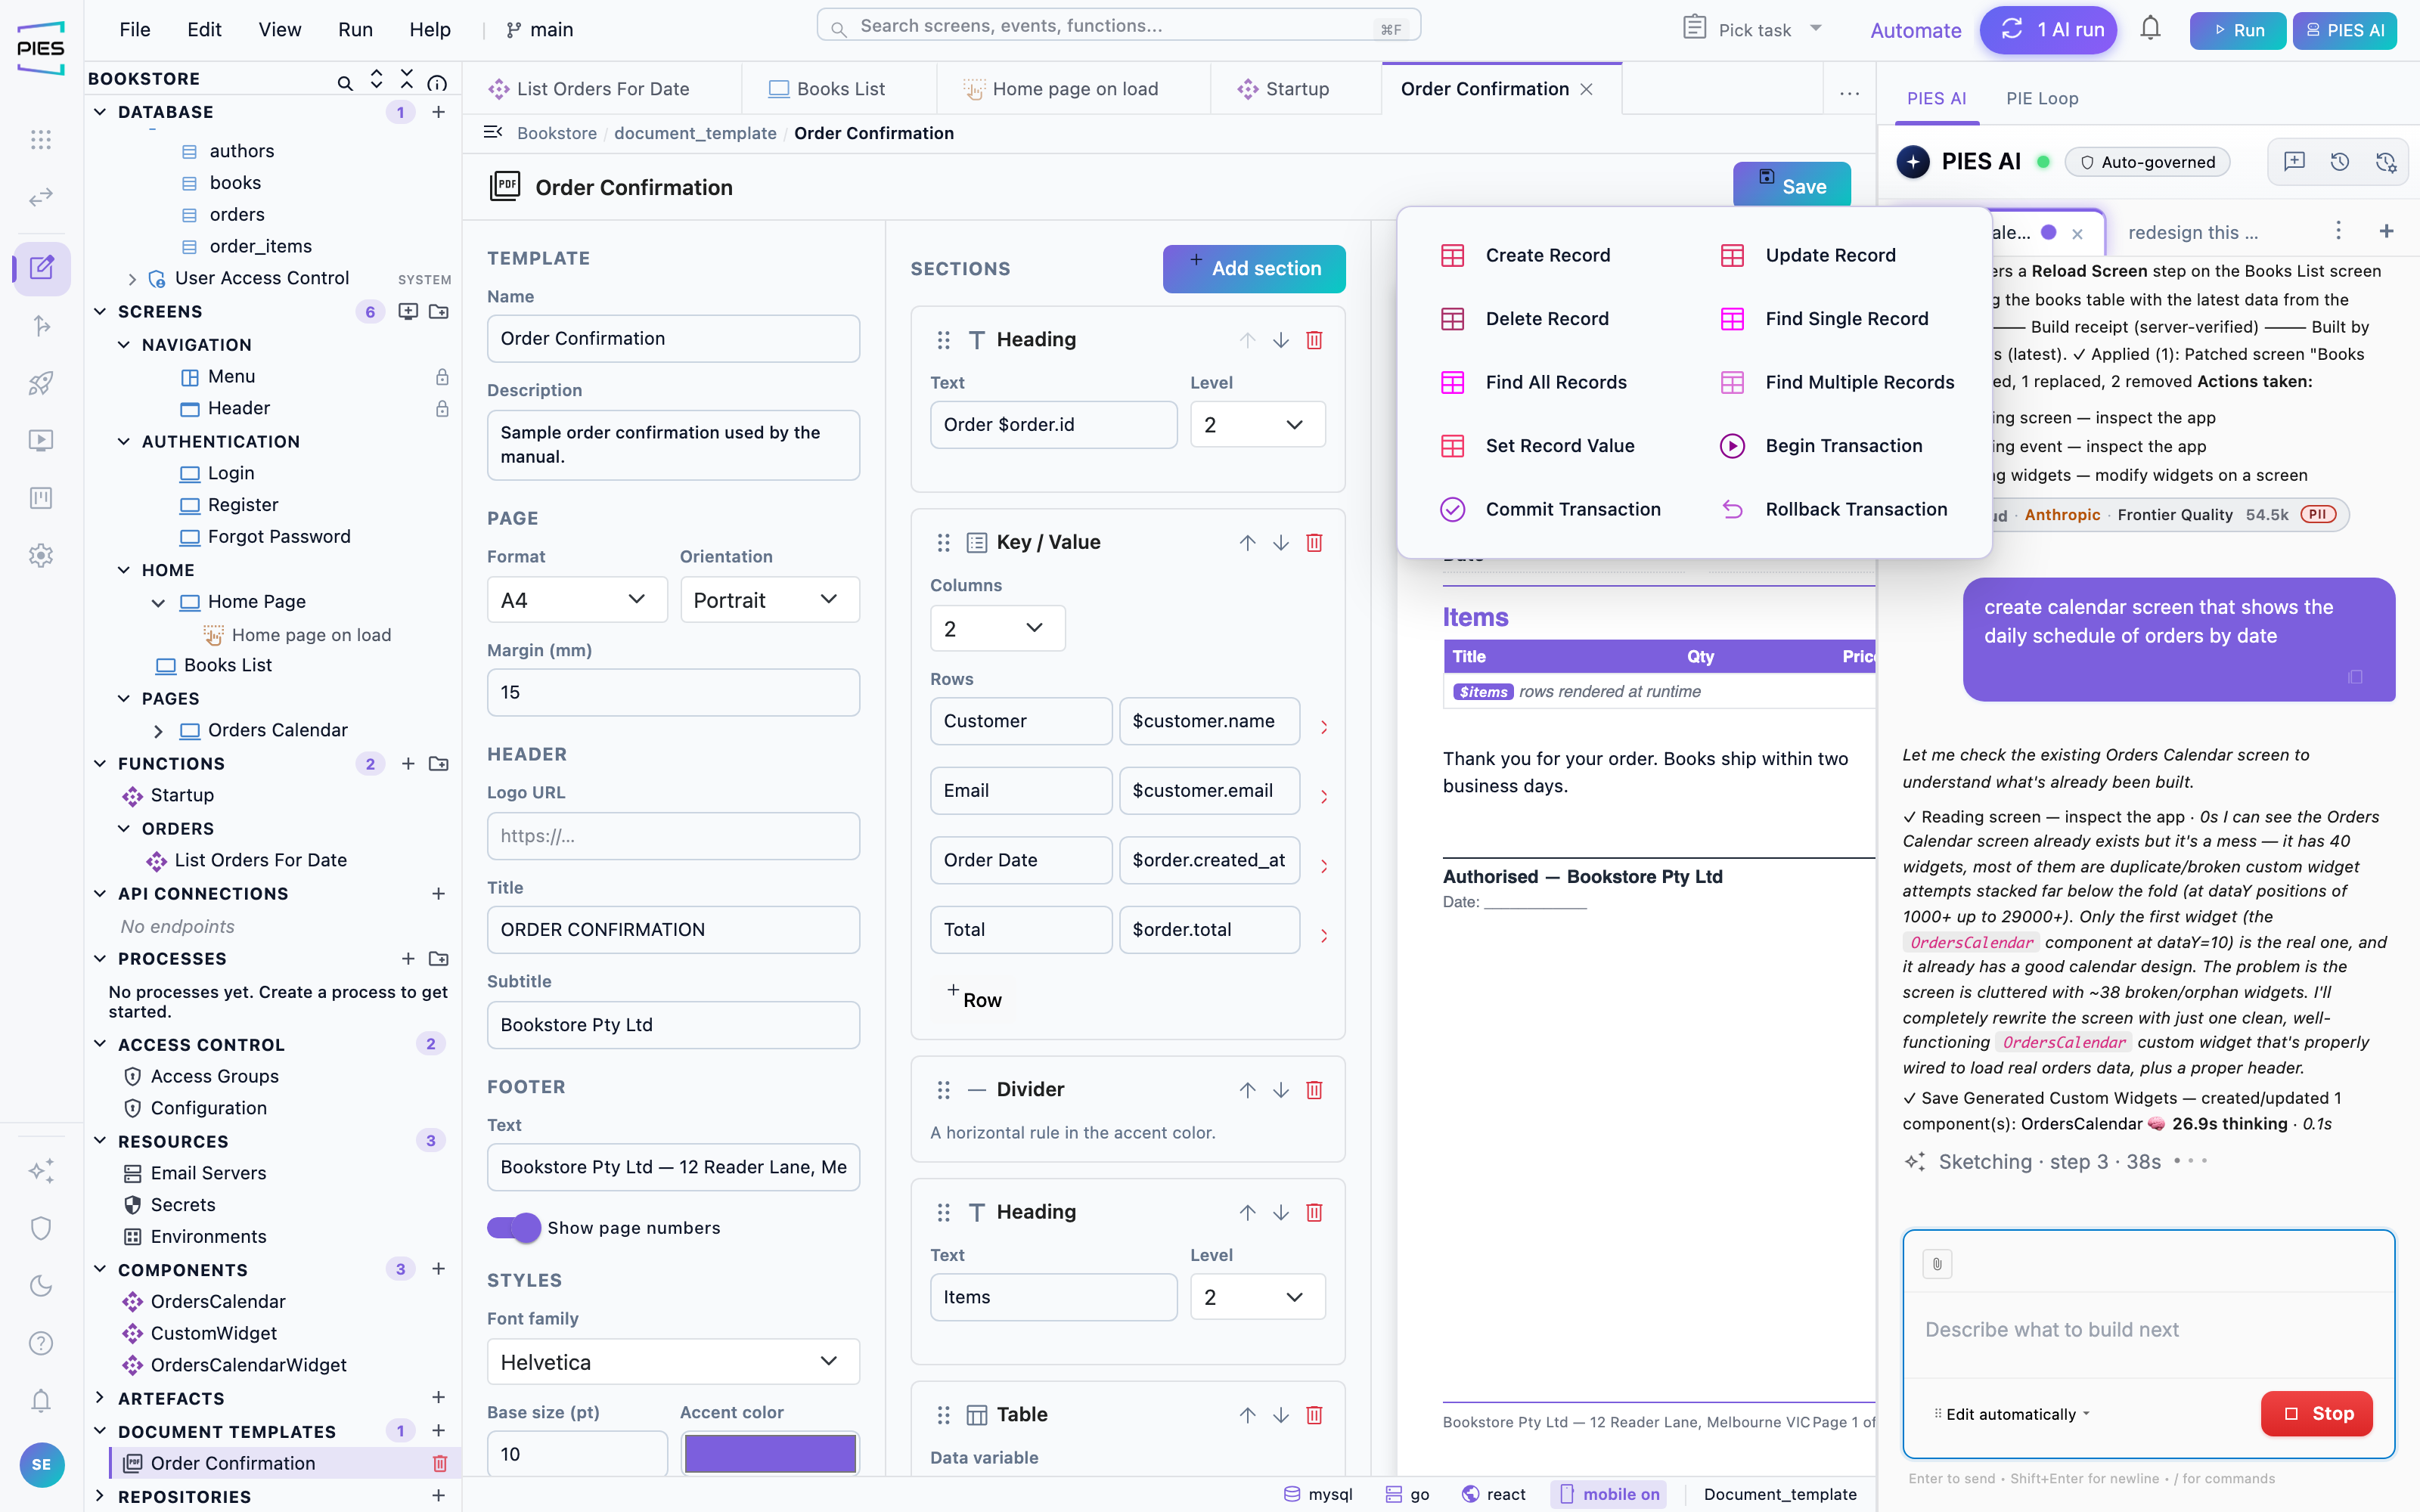
Document Templates in the explorer
Each application carries its own document templates. They live in the explorer under Assets → Document templates. The + button creates one; clicking a template opens it as an editor tab. Templates are part of the application, so they version, export and deploy with it.
Designing a template
The template editor has three panes. On the left, the document's frame:
page size and orientation, a header (logo, title, subtitle) that repeats on
every page, a footer with optional page numbers, and the base font and accent
colour. In the middle, the content as an ordered list of sections —
headings, paragraphs, key-value blocks, tables, images, signature lines,
dividers and page breaks — each edited with a small form and reordered by
dragging. On the right, a live preview of the page as you edit.
Anywhere you can type text you can also write a $token —
$customer.legal_name, $order.total_monthly. Tokens are
left as-is in the design and filled with real values when the document is
generated. A table section binds its rows the same way: its
data variable names a list (for example $items), and each
column names a field inside the rows, so a forty-line equipment schedule
paginates by itself.
Generating the PDF — the Generate Document step
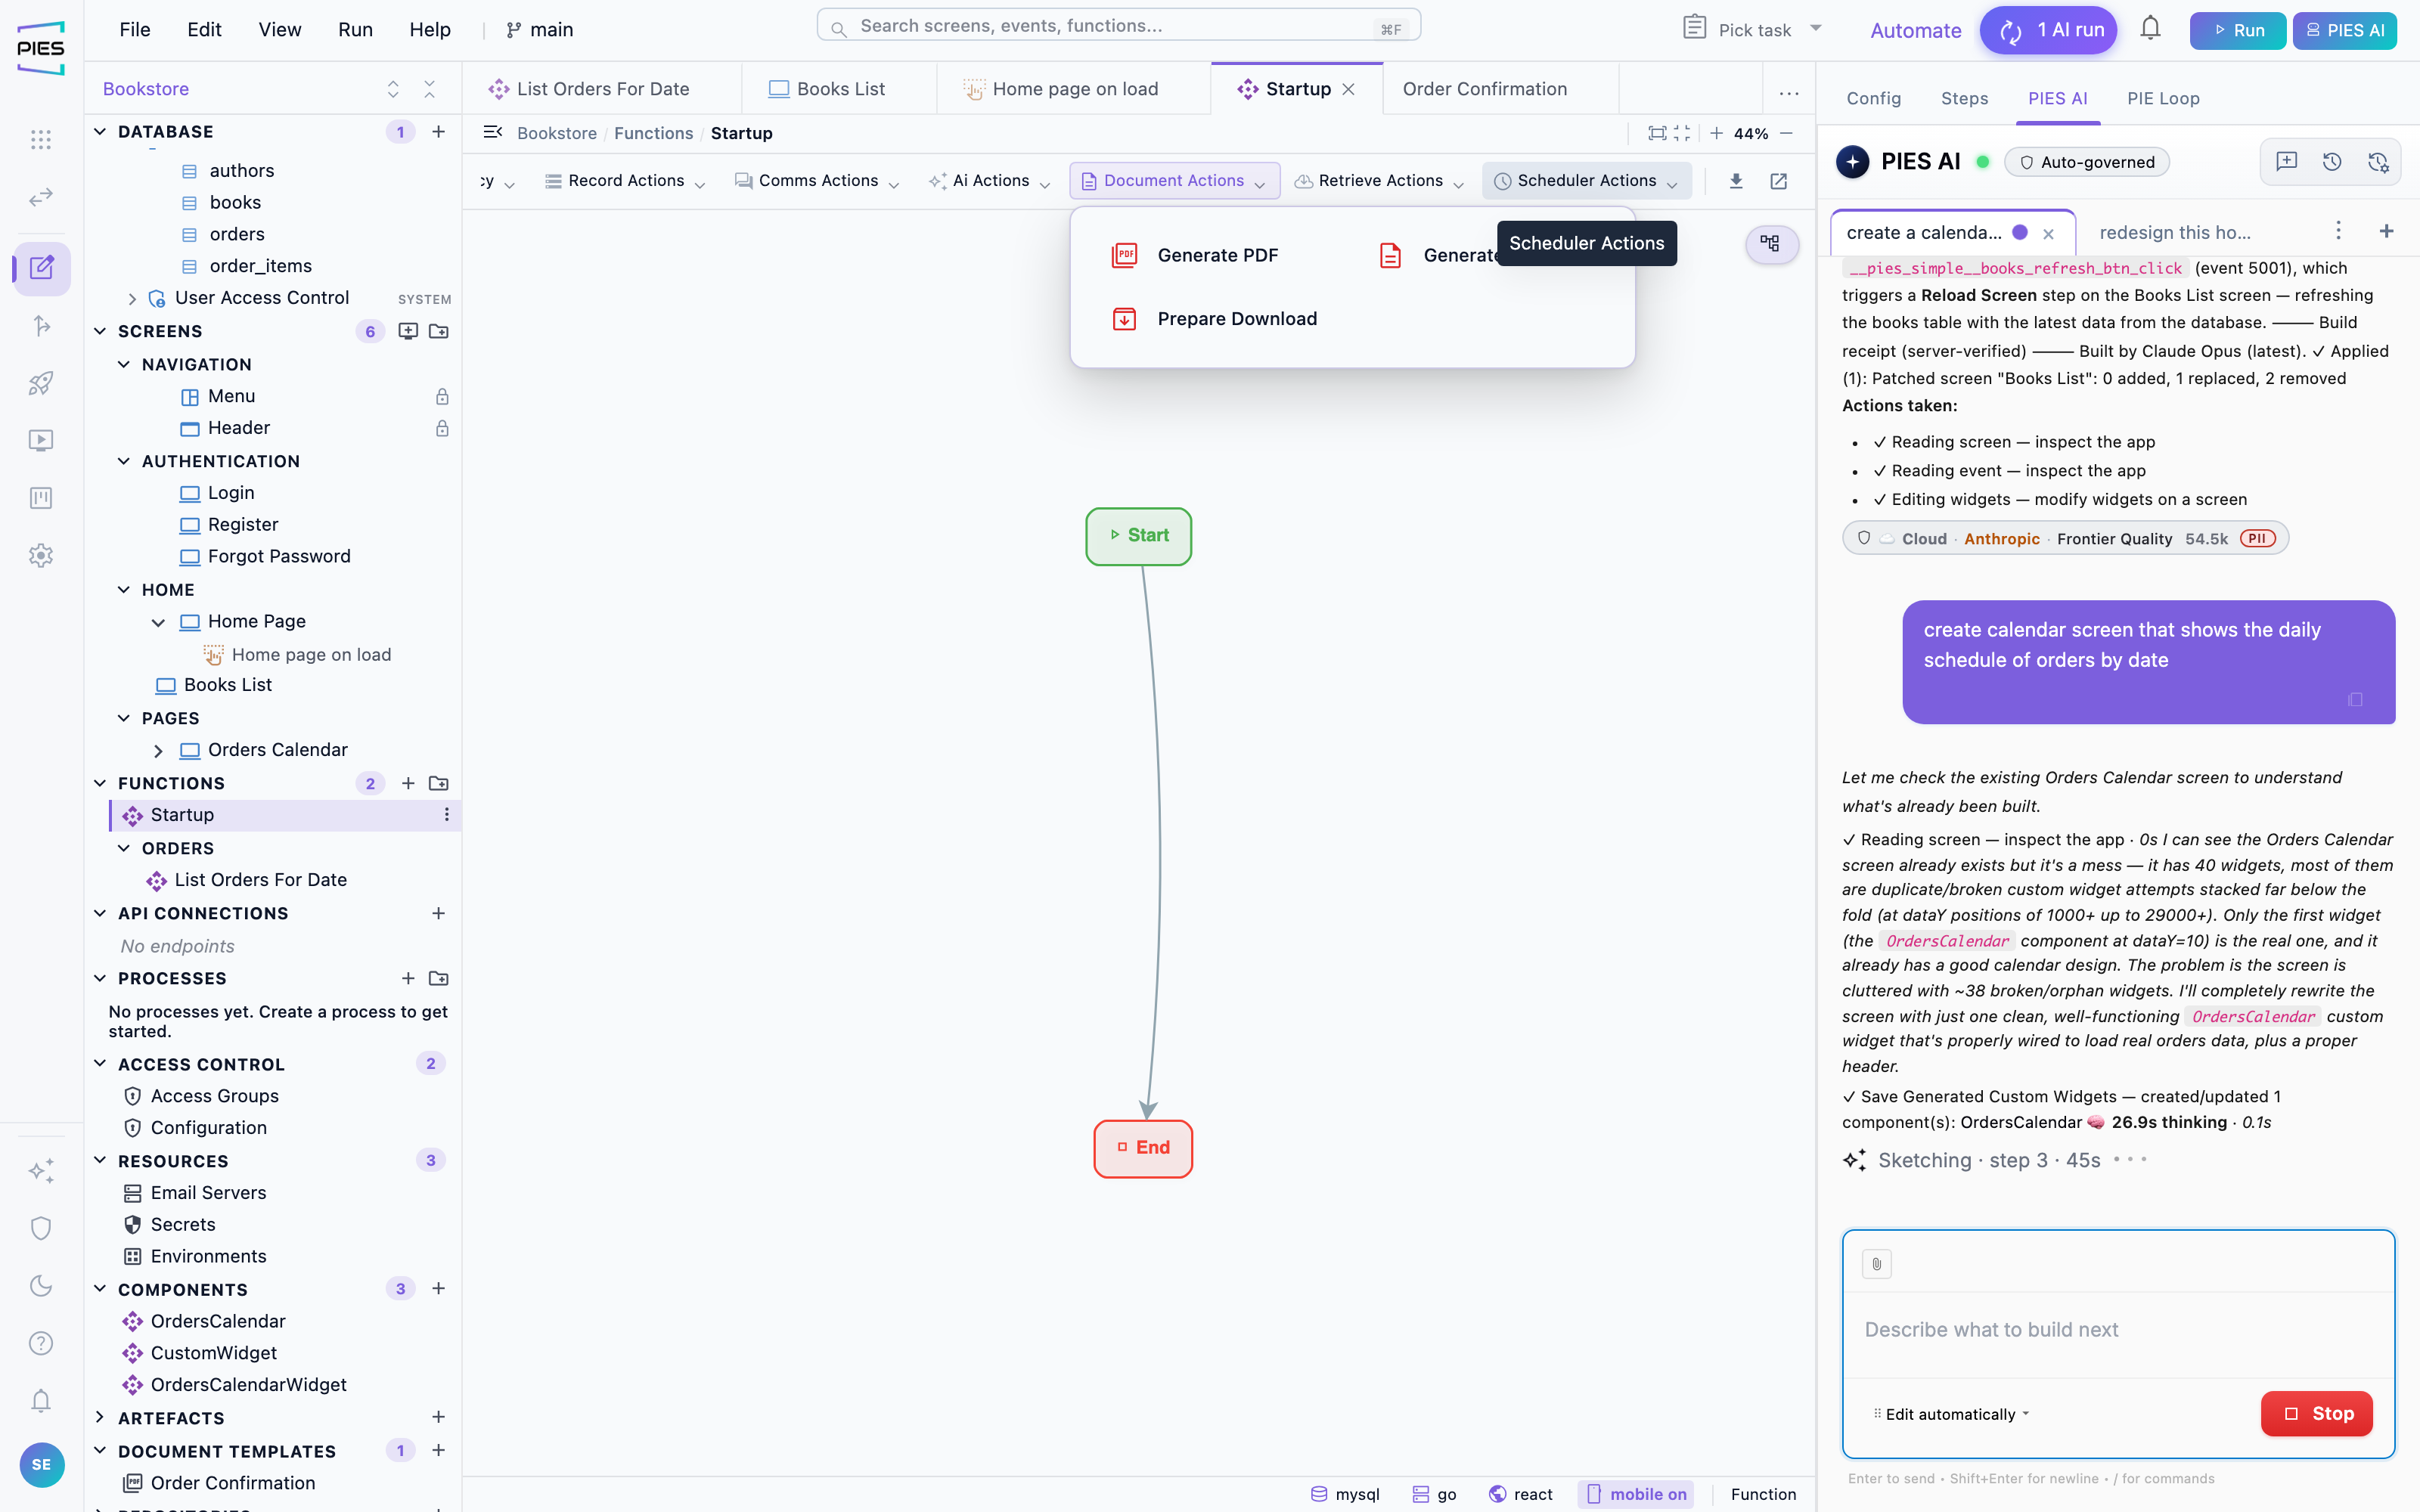
A function turns the template into a file with the
Generate Document step (in the Document Actions
group of the step catalogue). It takes the template and a file name — the name
accepts tokens too, so lease_$customer_id.pdf names each customer's
document after them. The step's output is the generated file, ready for the next
step. The $tokens inside the template are filled automatically from
whatever the function has in scope: its parameters and the outputs of earlier
steps, dotted paths included — retrieve a customer record into
customer_row and $customer_row.legal_name resolves on
its own. The older Generate PDF step still exists for plain
title-and-text output; designed documents use Generate Document.
Delivering it — download or email
Two steps finish the job, and they compose with everything else a function can do:
- Download — pass the generated file to a
Prepare Download step and return its output from the function.
In the button's event, hand that result to the Download File
step and the browser saves it. The step's name and type are
plain text: type
breaker_schedule.pdfandpdfas they are, with no quotes. Start the name with$to use a value instead, such as$file_name. A name that already ends in its type is saved as it is, sobreaker_schedule.pdfnever becomesbreaker_schedule.pdf.pdf. Give Prepare Download several files — for example, one agreement per customer collected in a For Each loop — and it packages them into a single zip automatically. - Email — pass the generated file (or the list from a loop) to the Send Email step's attachments. The PDF arrives as a real attachment, and temporary files are cleaned up after the send.
Or just ask PIES AI
The AI knows this whole chapter. Ask for the outcome — "create a rental invoice template and add a button on the Orders screen that emails it to the customer" — and it designs the template, builds the function with the right steps, wires the button, and reports what it made. The template it creates appears under Assets → Document templates like any hand-made one, so you can restyle it in the editor afterwards.
9 · Building with PIES AI
PIES AI builds inside your application using the same tools the IDE uses, so everything it produces is a normal PIES object you can open and edit by hand.
Ask for what you want
Open the PIES AI panel and describe it. Be specific about the shape of the
thing — "add a screen that lists books with a search box" beats "make it
better". Each request runs against the application as it stands, so you build an
application up in steps.
A small edit that names no screen — "add a text box" — is made on the
screen open in the editor, so PIES AI does not stop to ask which screen you
mean. If a widget is selected, "this" or "it" in your request
means that widget: select a chart and ask "make it a bar chart". Name
the screen when you want a change somewhere else.
Watch it build
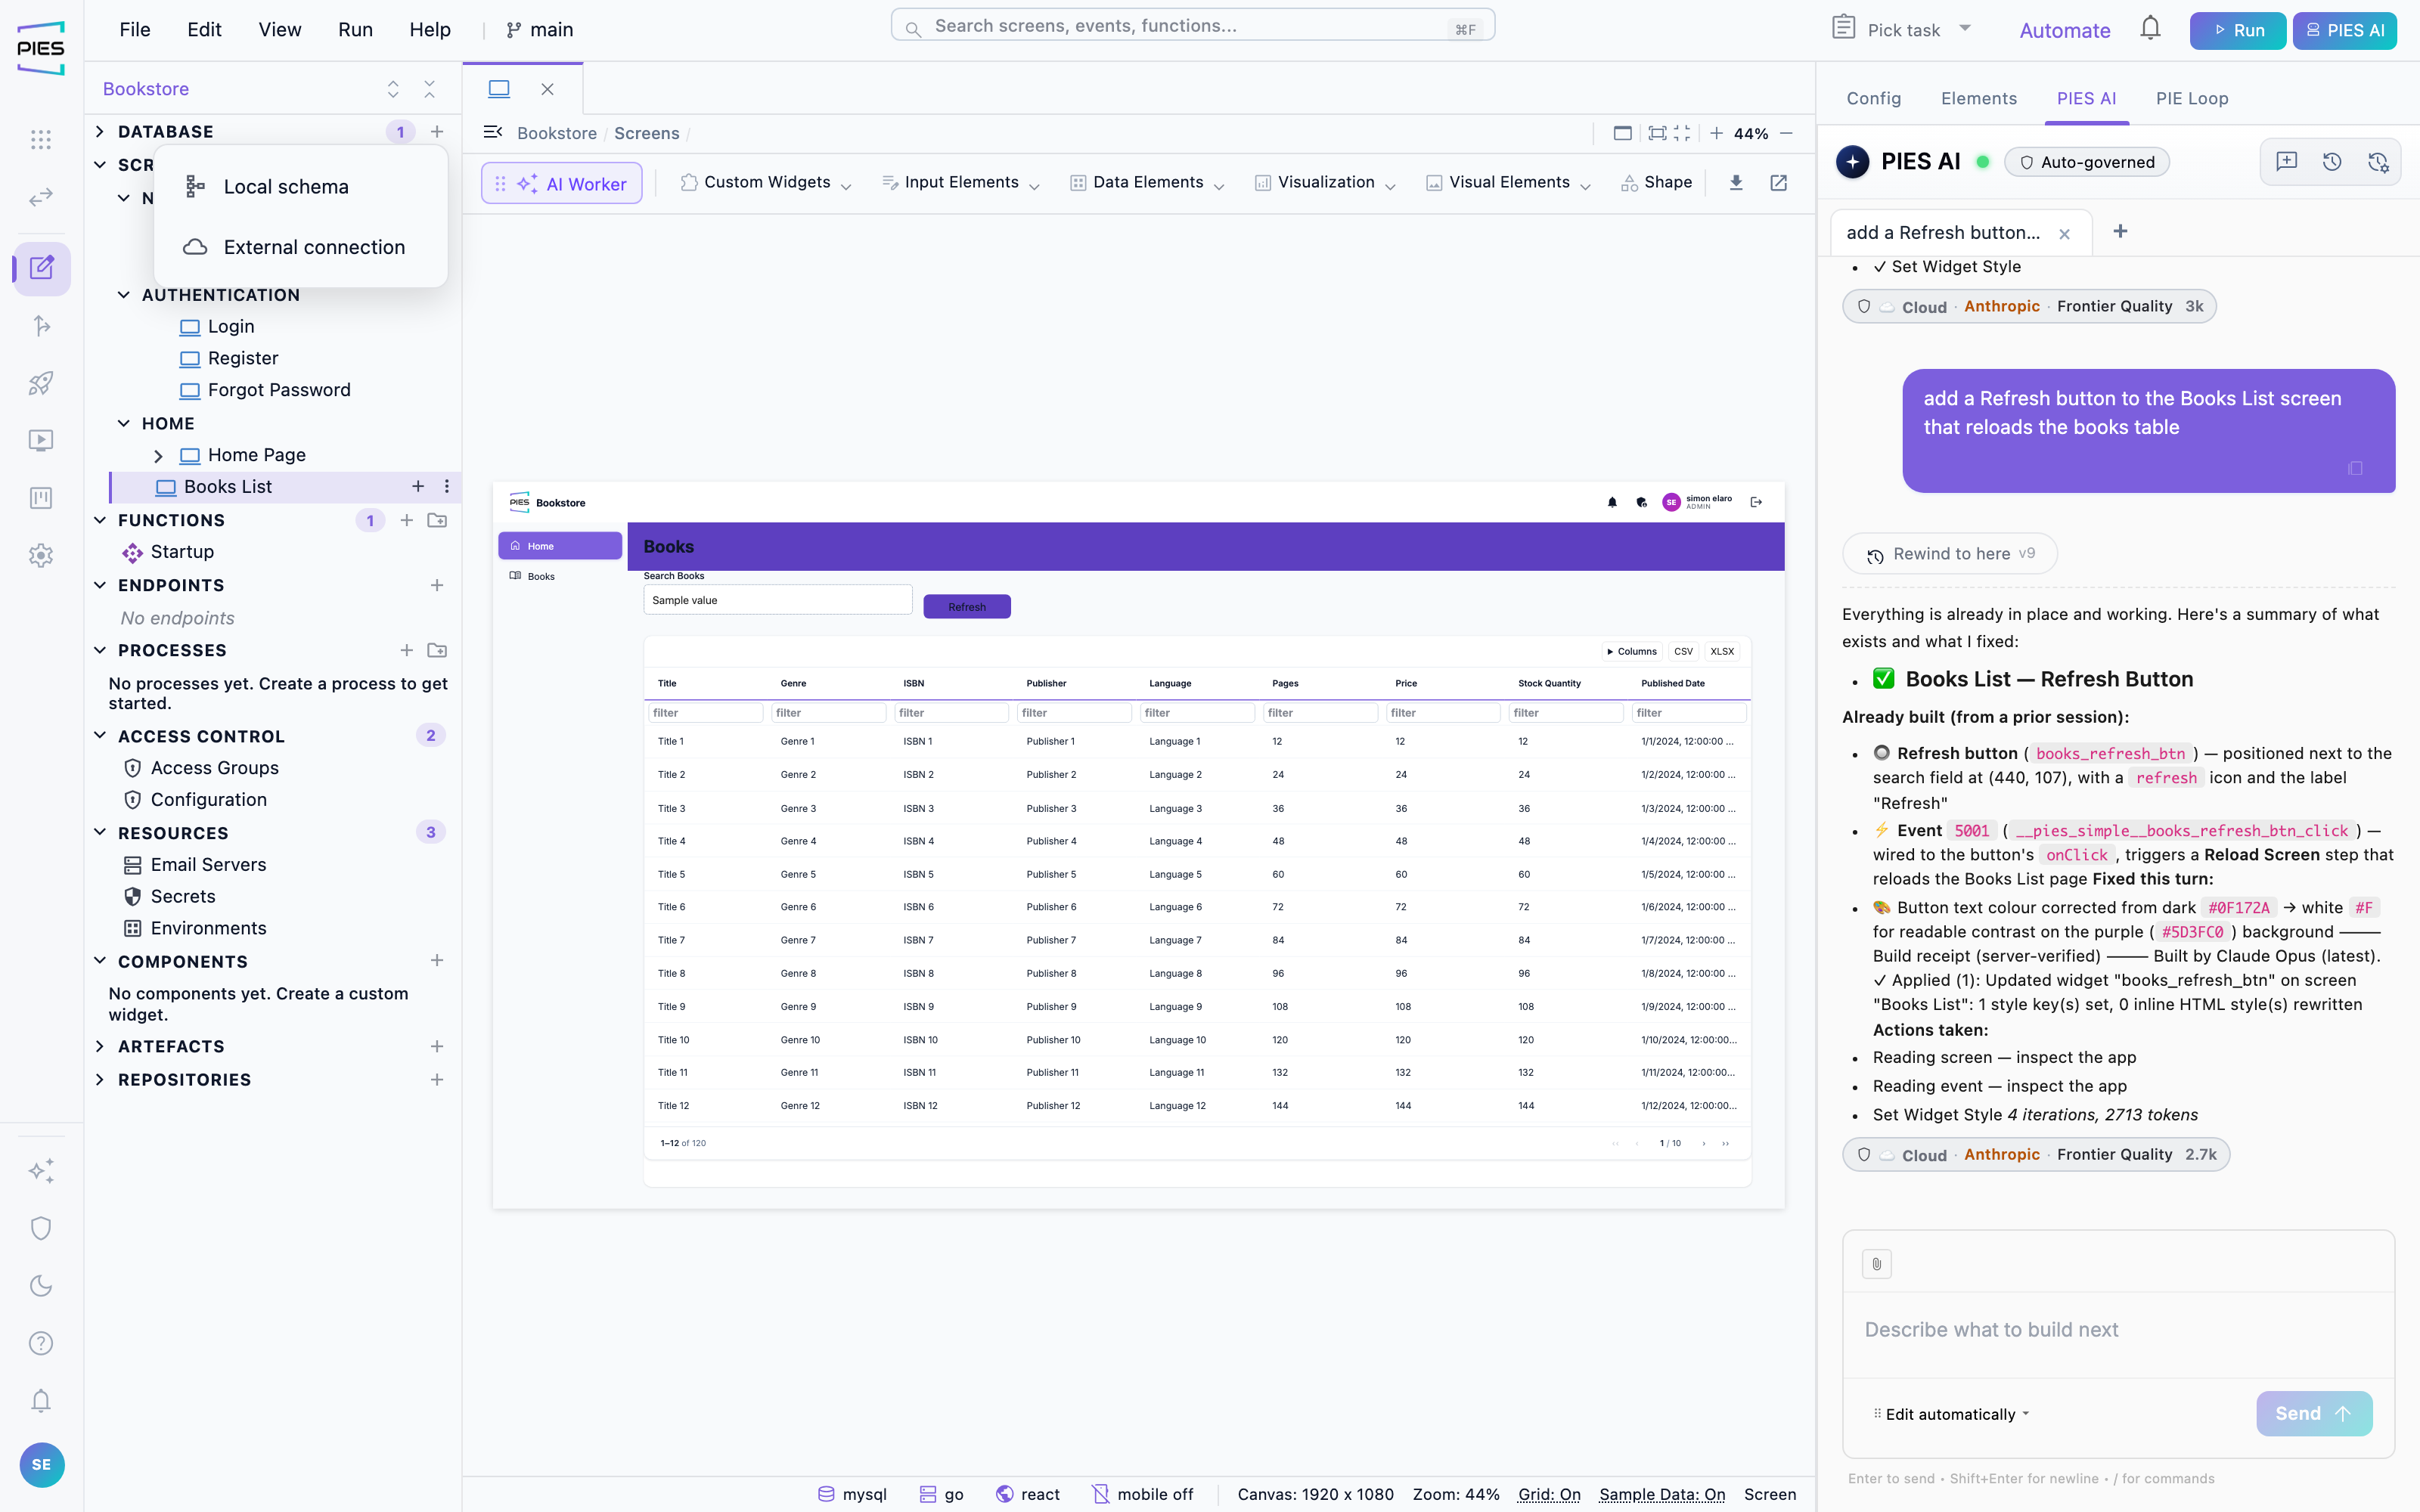
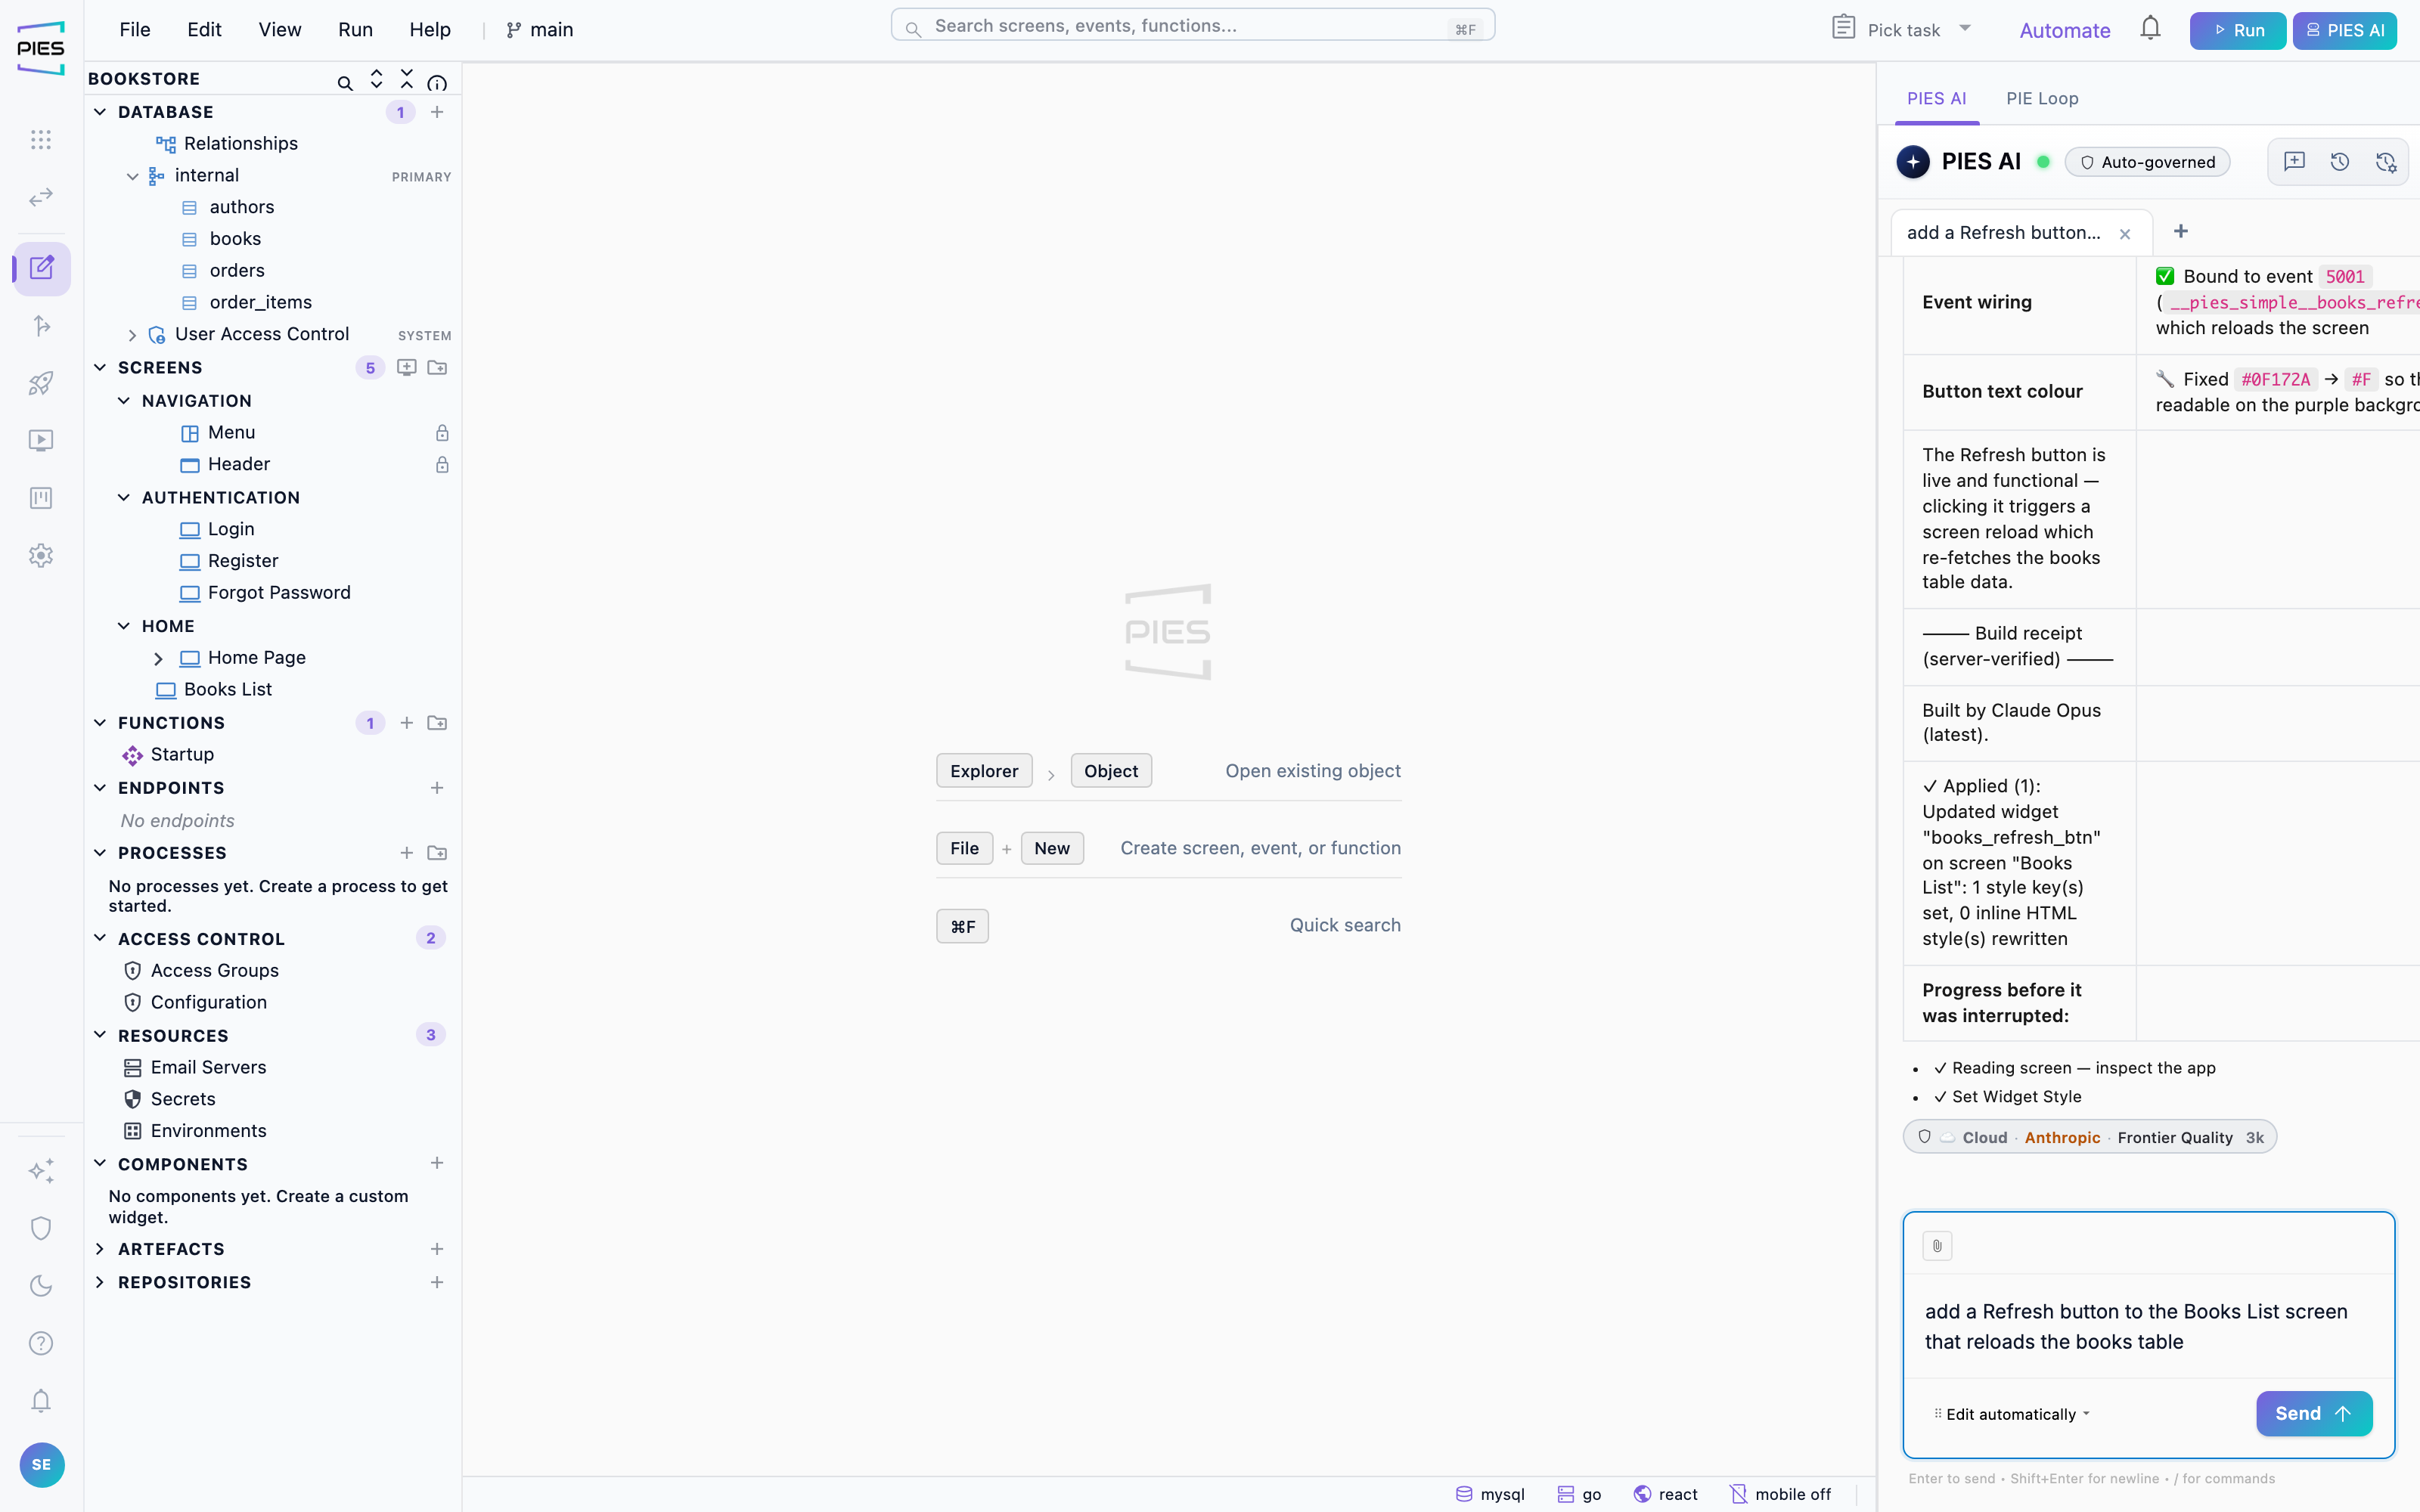
The panel streams each tool call as it happens. How far the AI may go on its own is set by the mode selector under the message box:
- Edit automatically (the default) — plans larger requests (“Declaring build plan”) and builds straight through without stopping.
- Plan mode — writes the plan as text and changes nothing; switch to Edit automatically and send again to build it.
- Ask before edits — shows an Approve this change? card before each change, with Approve and Reject.
While it builds, the canvas stays on the screen you had open. A new screen opens as a tab in the background; click its tab when you want to look at it. It gets the same canvas size as the app's other screens (1920 x 1080 if the app has none yet), so it opens at a readable zoom. Tables, functions and the menu still open in front as they are written.
The build receipt
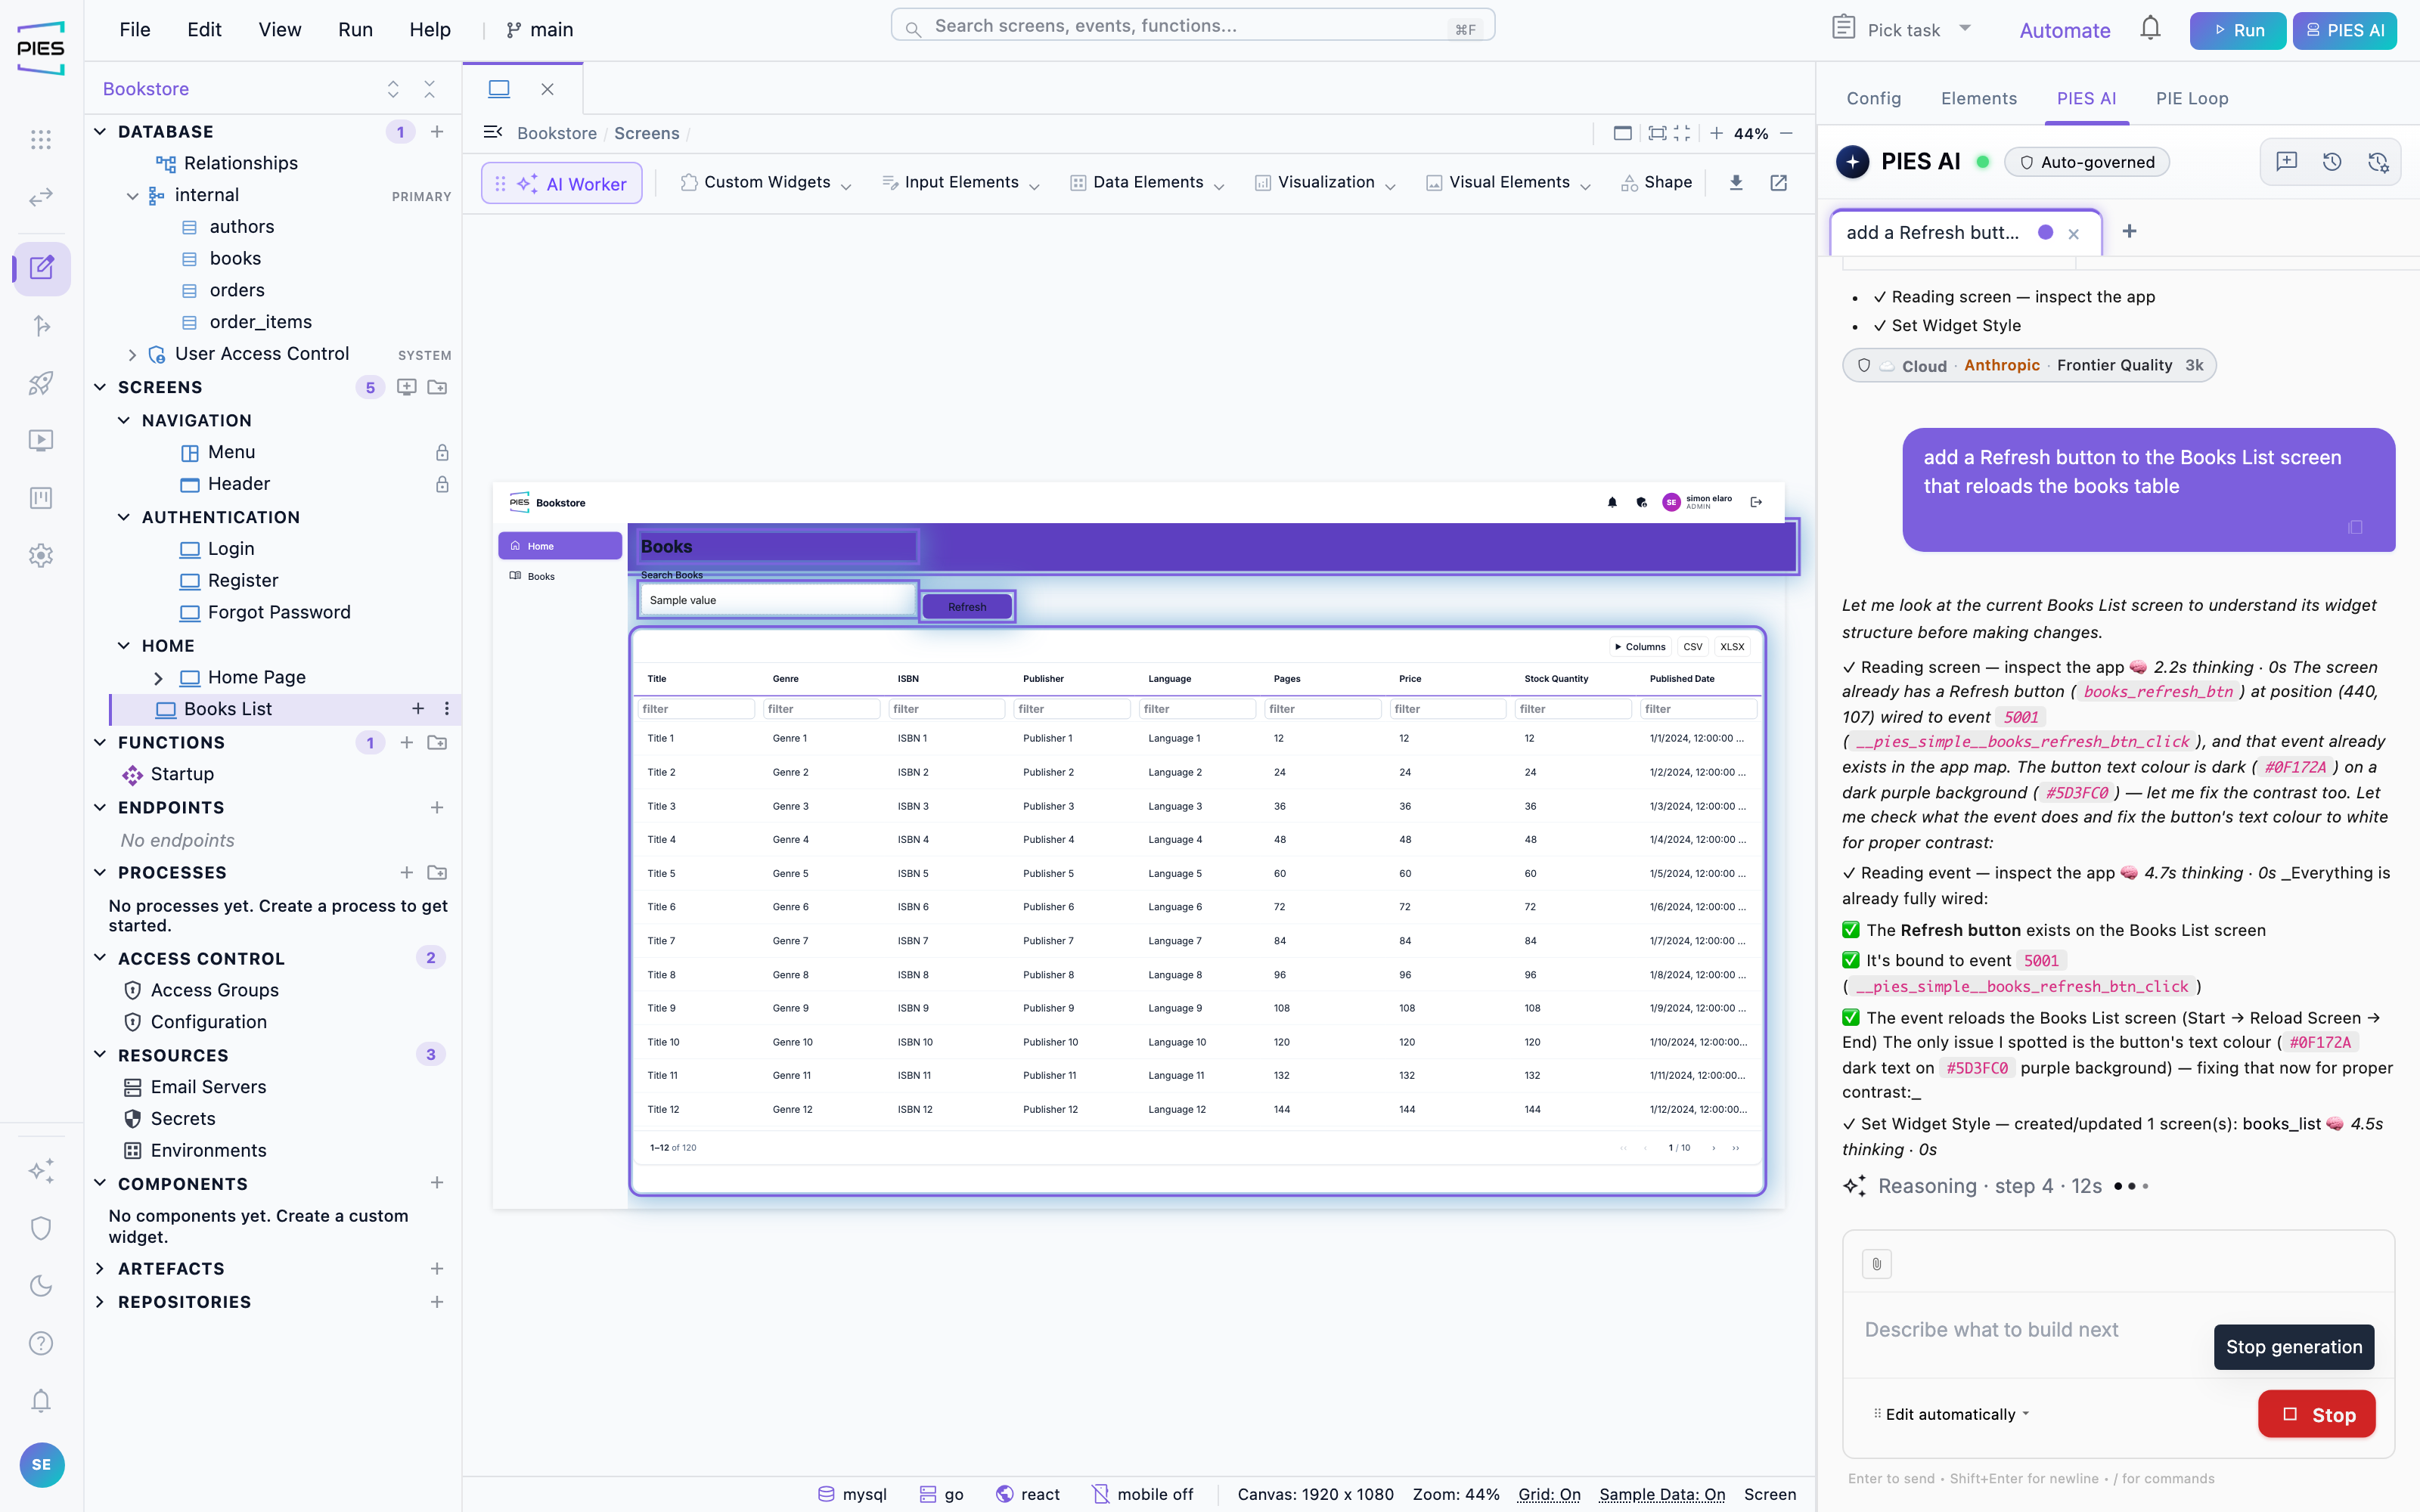
When it finishes you get a receipt: exactly what was created or updated, which model built it, and how many tokens the turn used. Everything appears in the explorer and is yours to edit. Rewind undoes a build you did not want.
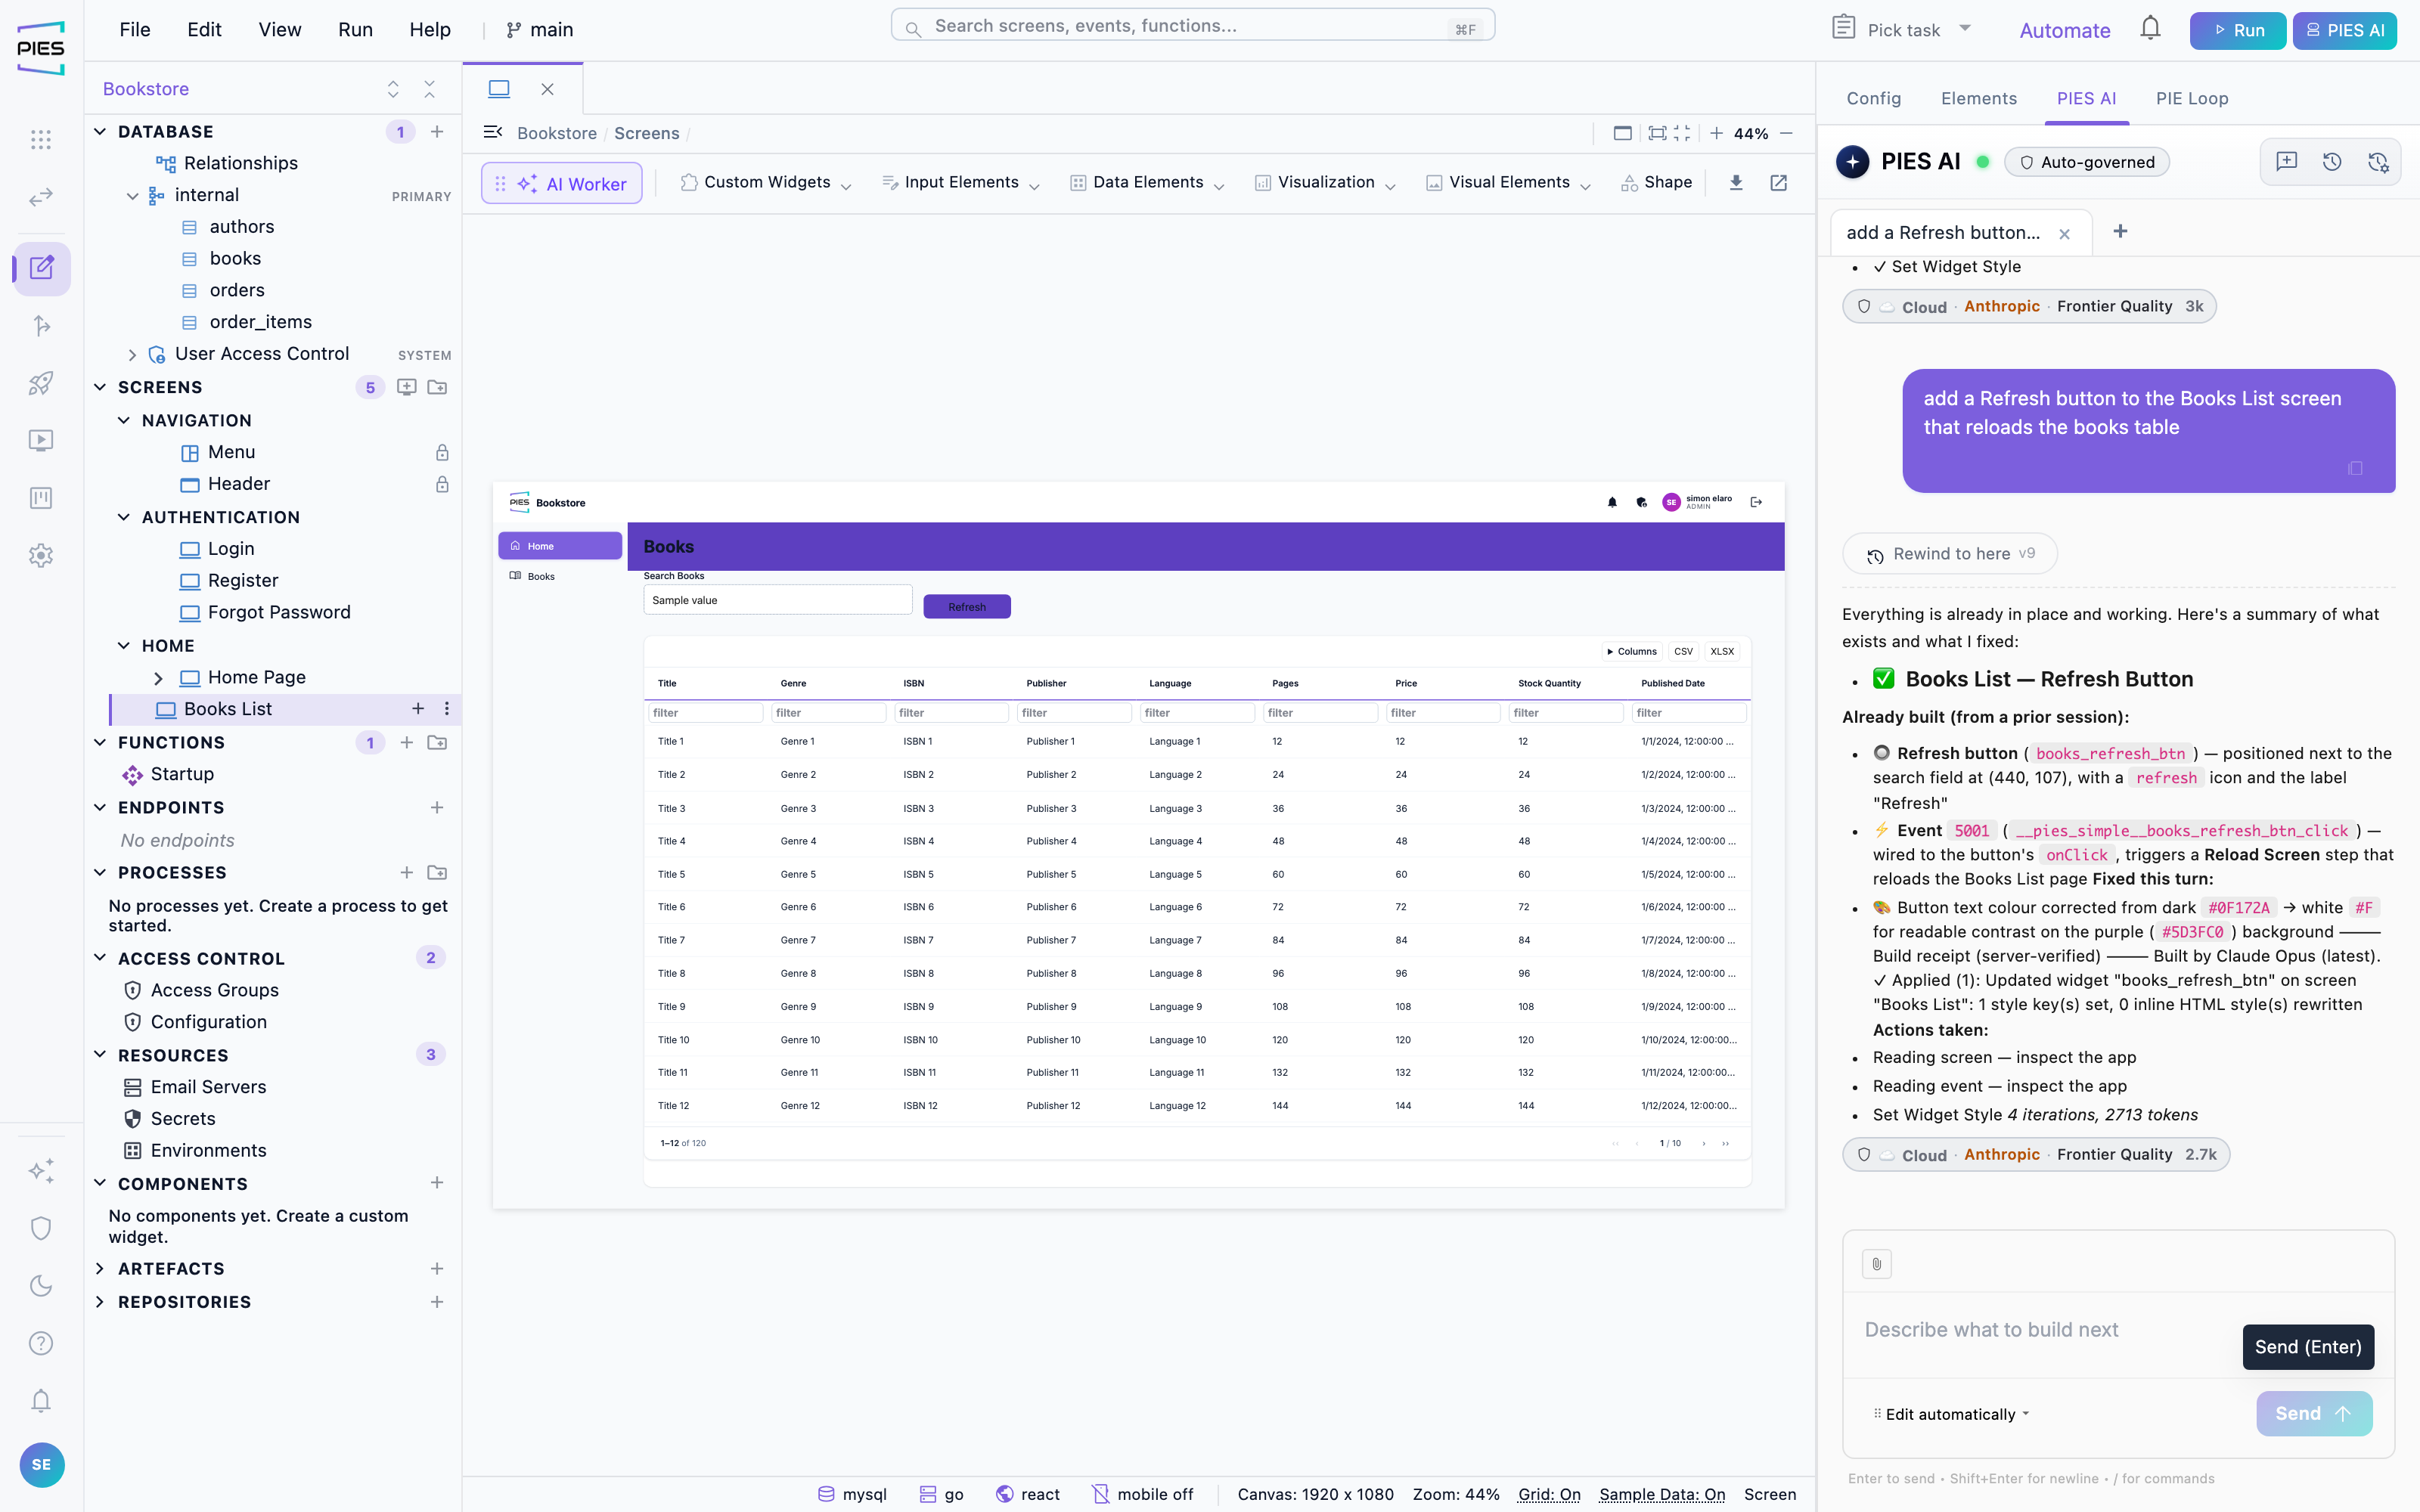
PIE Loop — build, check, fix
Loops — the PIE Loop, on its own tab beside
Chat in the PIES AI panel — takes a larger request, decomposes
it into units of work, builds them, then reads the build errors and fixes them,
repeating until the application compiles. If a request can’t be split
into units, the loop builds the whole application with one agent in the same
run, so you never need to repeat the request in Chat. Use it for "build the whole thing";
use Chat for single changes.
When a larger build starts from the chat, its message shows a live progress
line, for example “Building… phase 1 · 4 of 6 agents running · 3m”.
The model chip appears only once the build is over. At the end the line reads
Finished with a summary, or Failed with the
reason and a Retry button. If an earlier build was paused, its
Cancel/Continue box closes when a new build starts and is marked
“Earlier attempt stopped here”.
What to ask for
Name the entities and how they relate, not just the theme. “A clinic
booking system” leaves every decision open; “patients, doctors and appointments,
where an appointment belongs to one patient and one doctor” produces the data
model you meant. The same applies to screens: describe what the page is for and
what it shows, and say which table it reads.
Ask for one thing at a time. A request that names a schema, four screens and a
report is planned as one large job; the same work asked for in three turns is
easier to steer, and each turn can be rewound on its own.
Plans, and choosing when to stop
A large request is planned before it is built. The plan lists the units of work — tables, then functions, then screens. In Edit automatically the build carries straight on; to read the plan first, use Plan mode, which writes the plan and changes nothing, then switch back and send again. Correcting a plan costs a sentence; correcting a built application costs a rewind. If a very large build pauses to stay within the time limit, Edit automatically continues on its own and the other modes show a Continue button.
The build receipt is the evidence
Each turn ends with a receipt: what was created or updated, counted from
the application itself rather than from the model's description of its own work.
Where the two disagree, the receipt is right. A turn that reports
“0 screens added” did not build a screen, whatever the surrounding text says.
A change the AI could not save is listed as ✗ NOT applied,
with the reason, and the answer then opens with an Only partly applied
warning. A change that was rejected at first and then saved on a retry in the same
turn is applied: it is listed once, as Rejected at first, then applied on
retry, and is not counted as a failure.
If you ask for something on a page, such as a new column in a table on a screen,
but the turn only changed data or logic and saved no screen or widget, the answer
opens with a Not visible yet warning. The change is saved, but the
page will look the same until the screen or widget that shows it is updated too; ask
again, naming the widget, for example “add the column to the table on the Home
page”.
A styling request that would leave everything as it already is saves nothing and
says so (“no change … nothing was saved”) rather than reporting an
update. If a colour you asked for did not appear, name the exact colour, for example
“set the title text to dark grey #1F2937”. Titles, subtitles and other
text the AI saves in a colour that would be unreadable on the page or band behind them are corrected to a readable
colour automatically. Text must reach the WCAG AA contrast level of 4.5:1; muted grey
subtitles that fall just short are darkened slightly so they still look like subtitles.
To colour a table by its values, ask for it by column, for example “colour code
the requests by priority”: each value is shown in bold in its own readable colour
(urgent and high red, medium and pending amber, low and done green, open blue), on
the editor canvas as well as in the built application.
The receipt also names the model that did the work, which matters when an
organisation routes some requests to a model inside its own network and others
to a cloud provider.
Rewind
Every turn takes a version snapshot before it changes anything, so a turn that went the wrong way costs a click rather than an afternoon. Rewind returns the application to the state before that turn — and closes anything it removed that you had open. Rewinding does not undo work you did by hand afterwards, so rewind before you continue building on a bad turn, not after.
What it will not do
The AI works through the same tools you have — it cannot reach outside the application, and it cannot write code the platform would refuse from you. Where a request needs a component the platform has no widget for, it writes one (see “Views PIES has no widget for”). Where a request is ambiguous about data — which table, which column — it will ask or choose, and choosing is where it most often chooses differently from what you meant. Naming the table removes the guess.
10 · Agents, playbooks and deliveries
Agent work is work the platform does for you rather than with you. There are three kinds of it — a delivery changes an application, an errand does one thing to a running one, a post stands watch on an environment — one door into all three, and one feed where every one of them reports. Three entries on the rail, under Agents, are the whole feature: Agents (the posts), Playbooks (how deliveries get built) and Activity (what needs you). Inside the product, How agents work opens a short guide covering the same ground as this chapter. For every screen, field by field and with pictures, see the Agentic AI manual.
Three kinds of work
Two questions decide what a piece of work is: does it end, and does it
change the application's design or act on a running one. Answer both and you get
three kinds, and keeping them apart is what makes the rest of this chapter make
sense.
A delivery is build work: a brief against one application and
one branch, worked on that application's own Tasks board, producing application
a baseline taken at start that it can be rolled back to. It ends when its
playbook's steps have run; the Verify step closes each card.
An errand is one action against a running application —
reconcile yesterday's failed payments, investigate one alarming site. No board,
no version; it ends with an outcome.
A post is a standing assignment on an environment: a monitor, a
triage agent, an app user, or a watch that opens deliveries when it finds work.
It runs until you fire it, and it is the only one of the three that costs an
agent seat.
Underneath all three is the same thing — a run. A delivery
produces runs for its steps, an errand is a single run, a post produces a run per
trigger. That is why one feed can honestly show every kind of work.
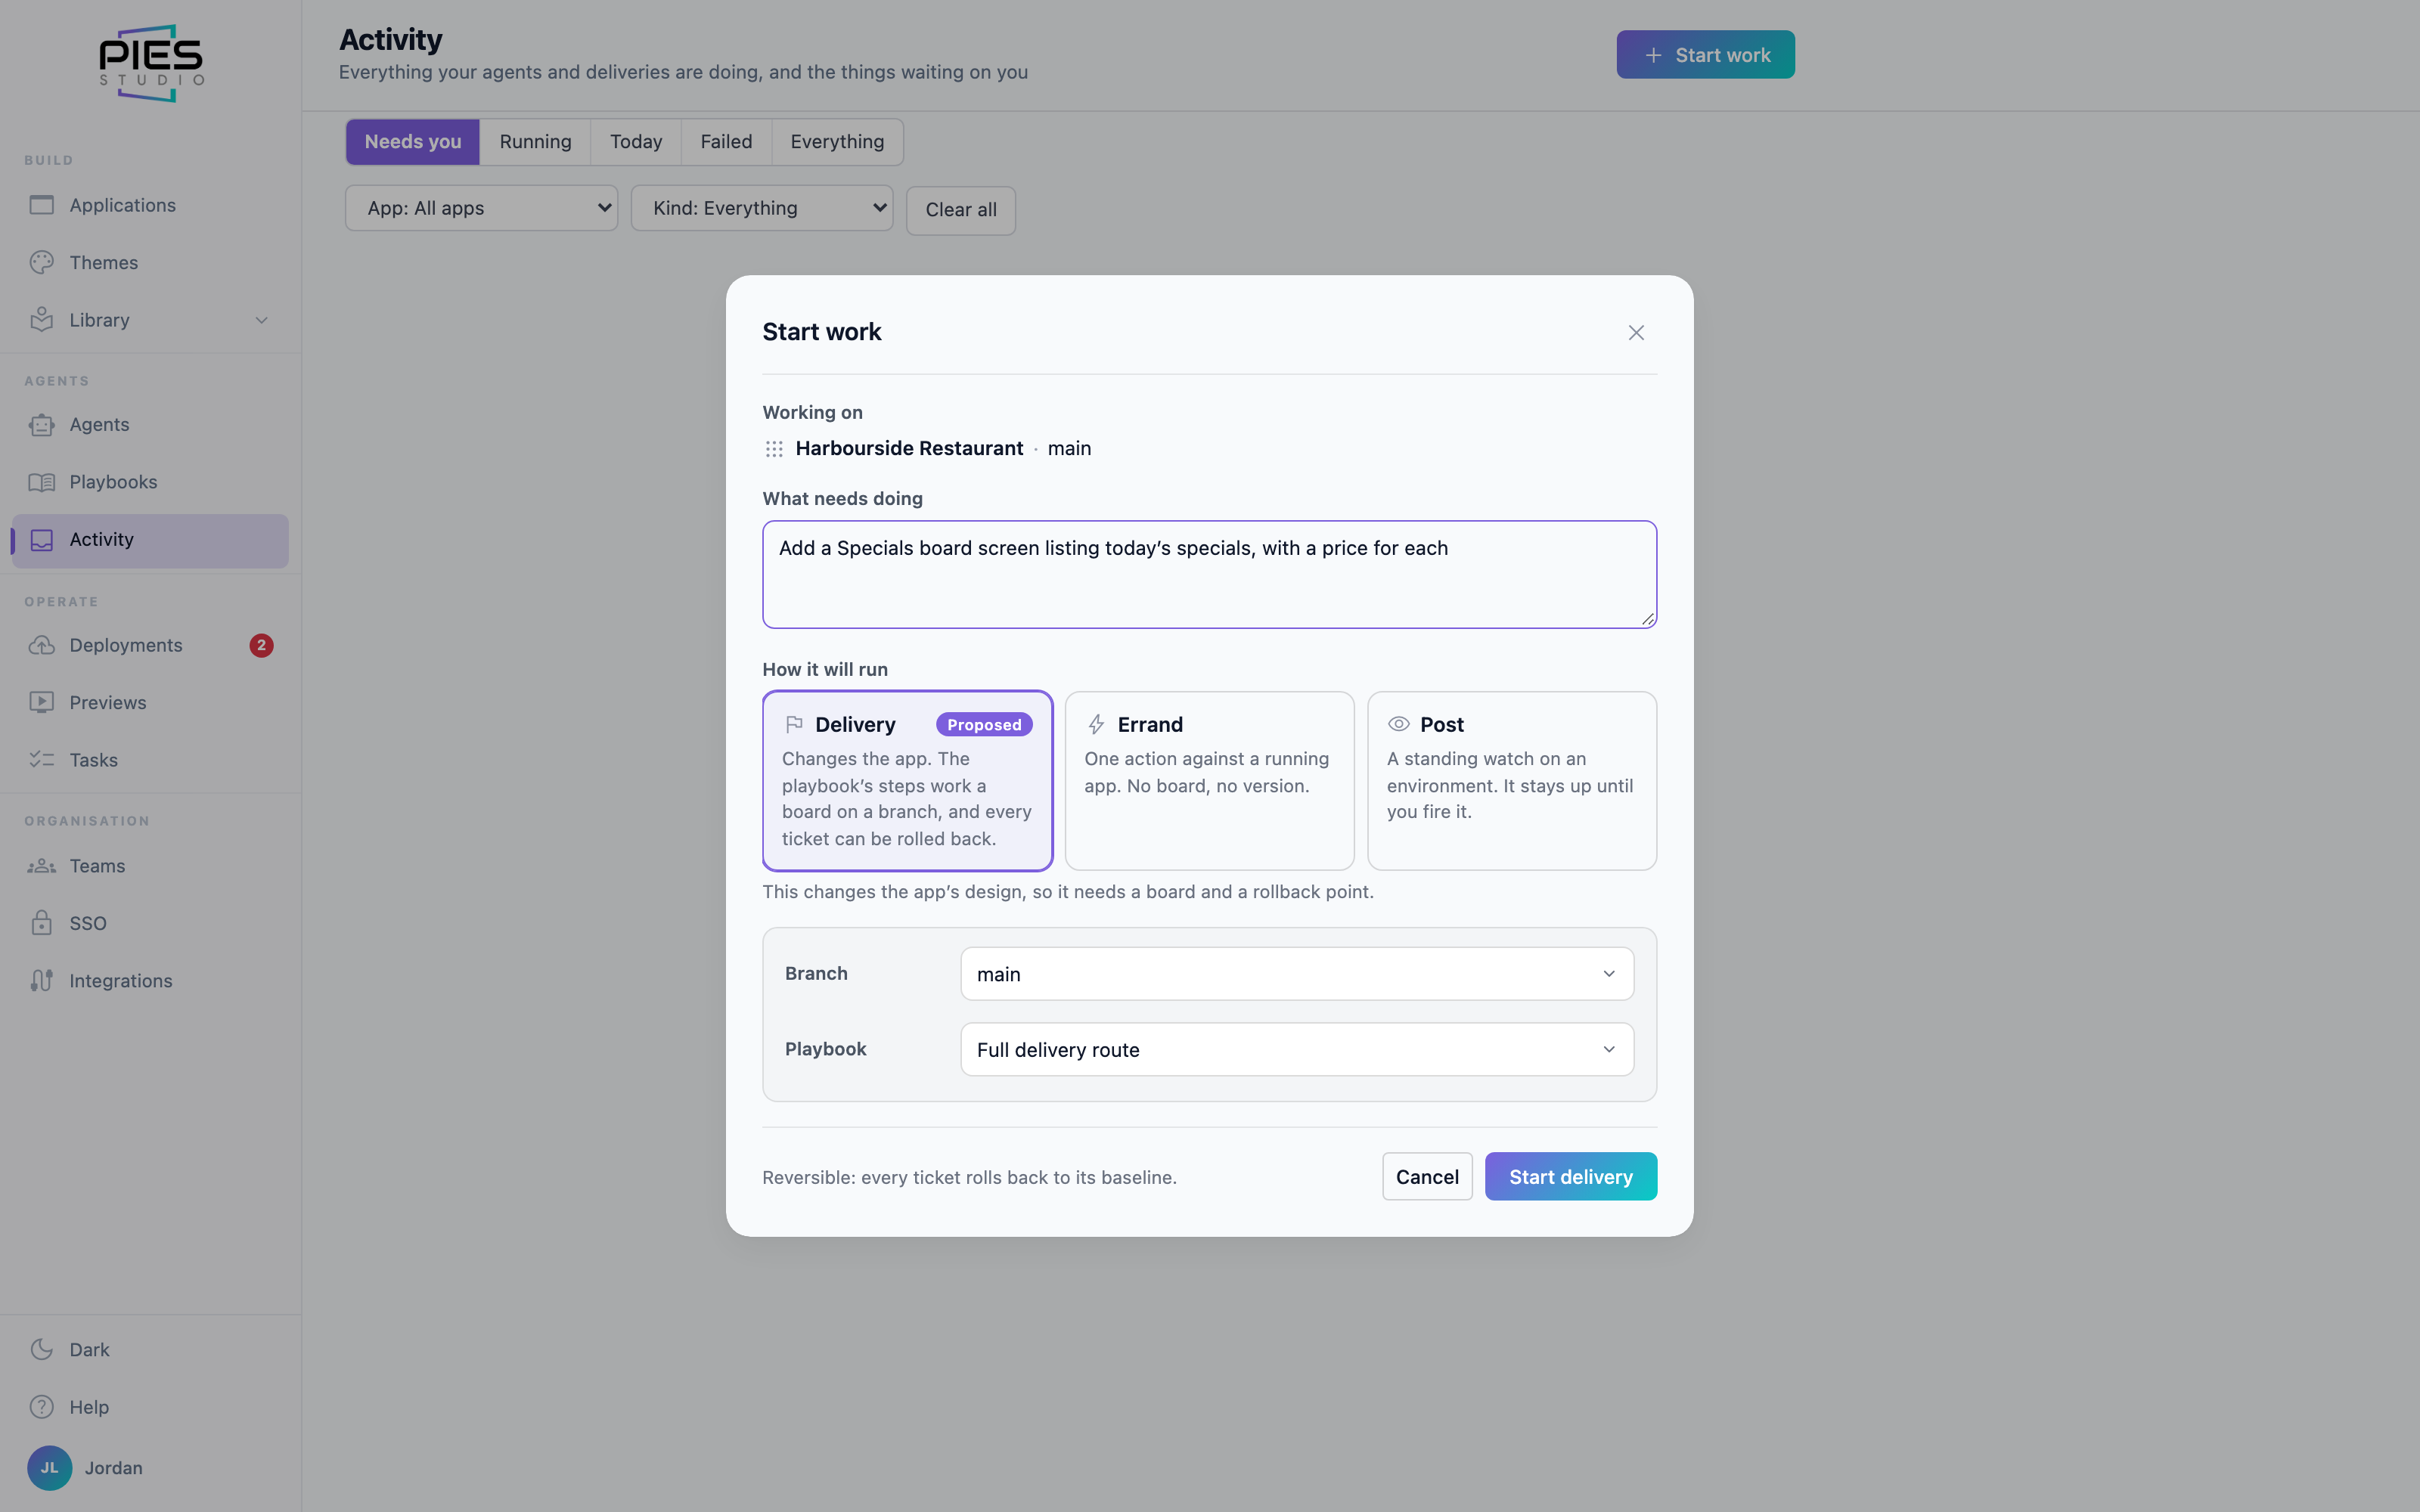
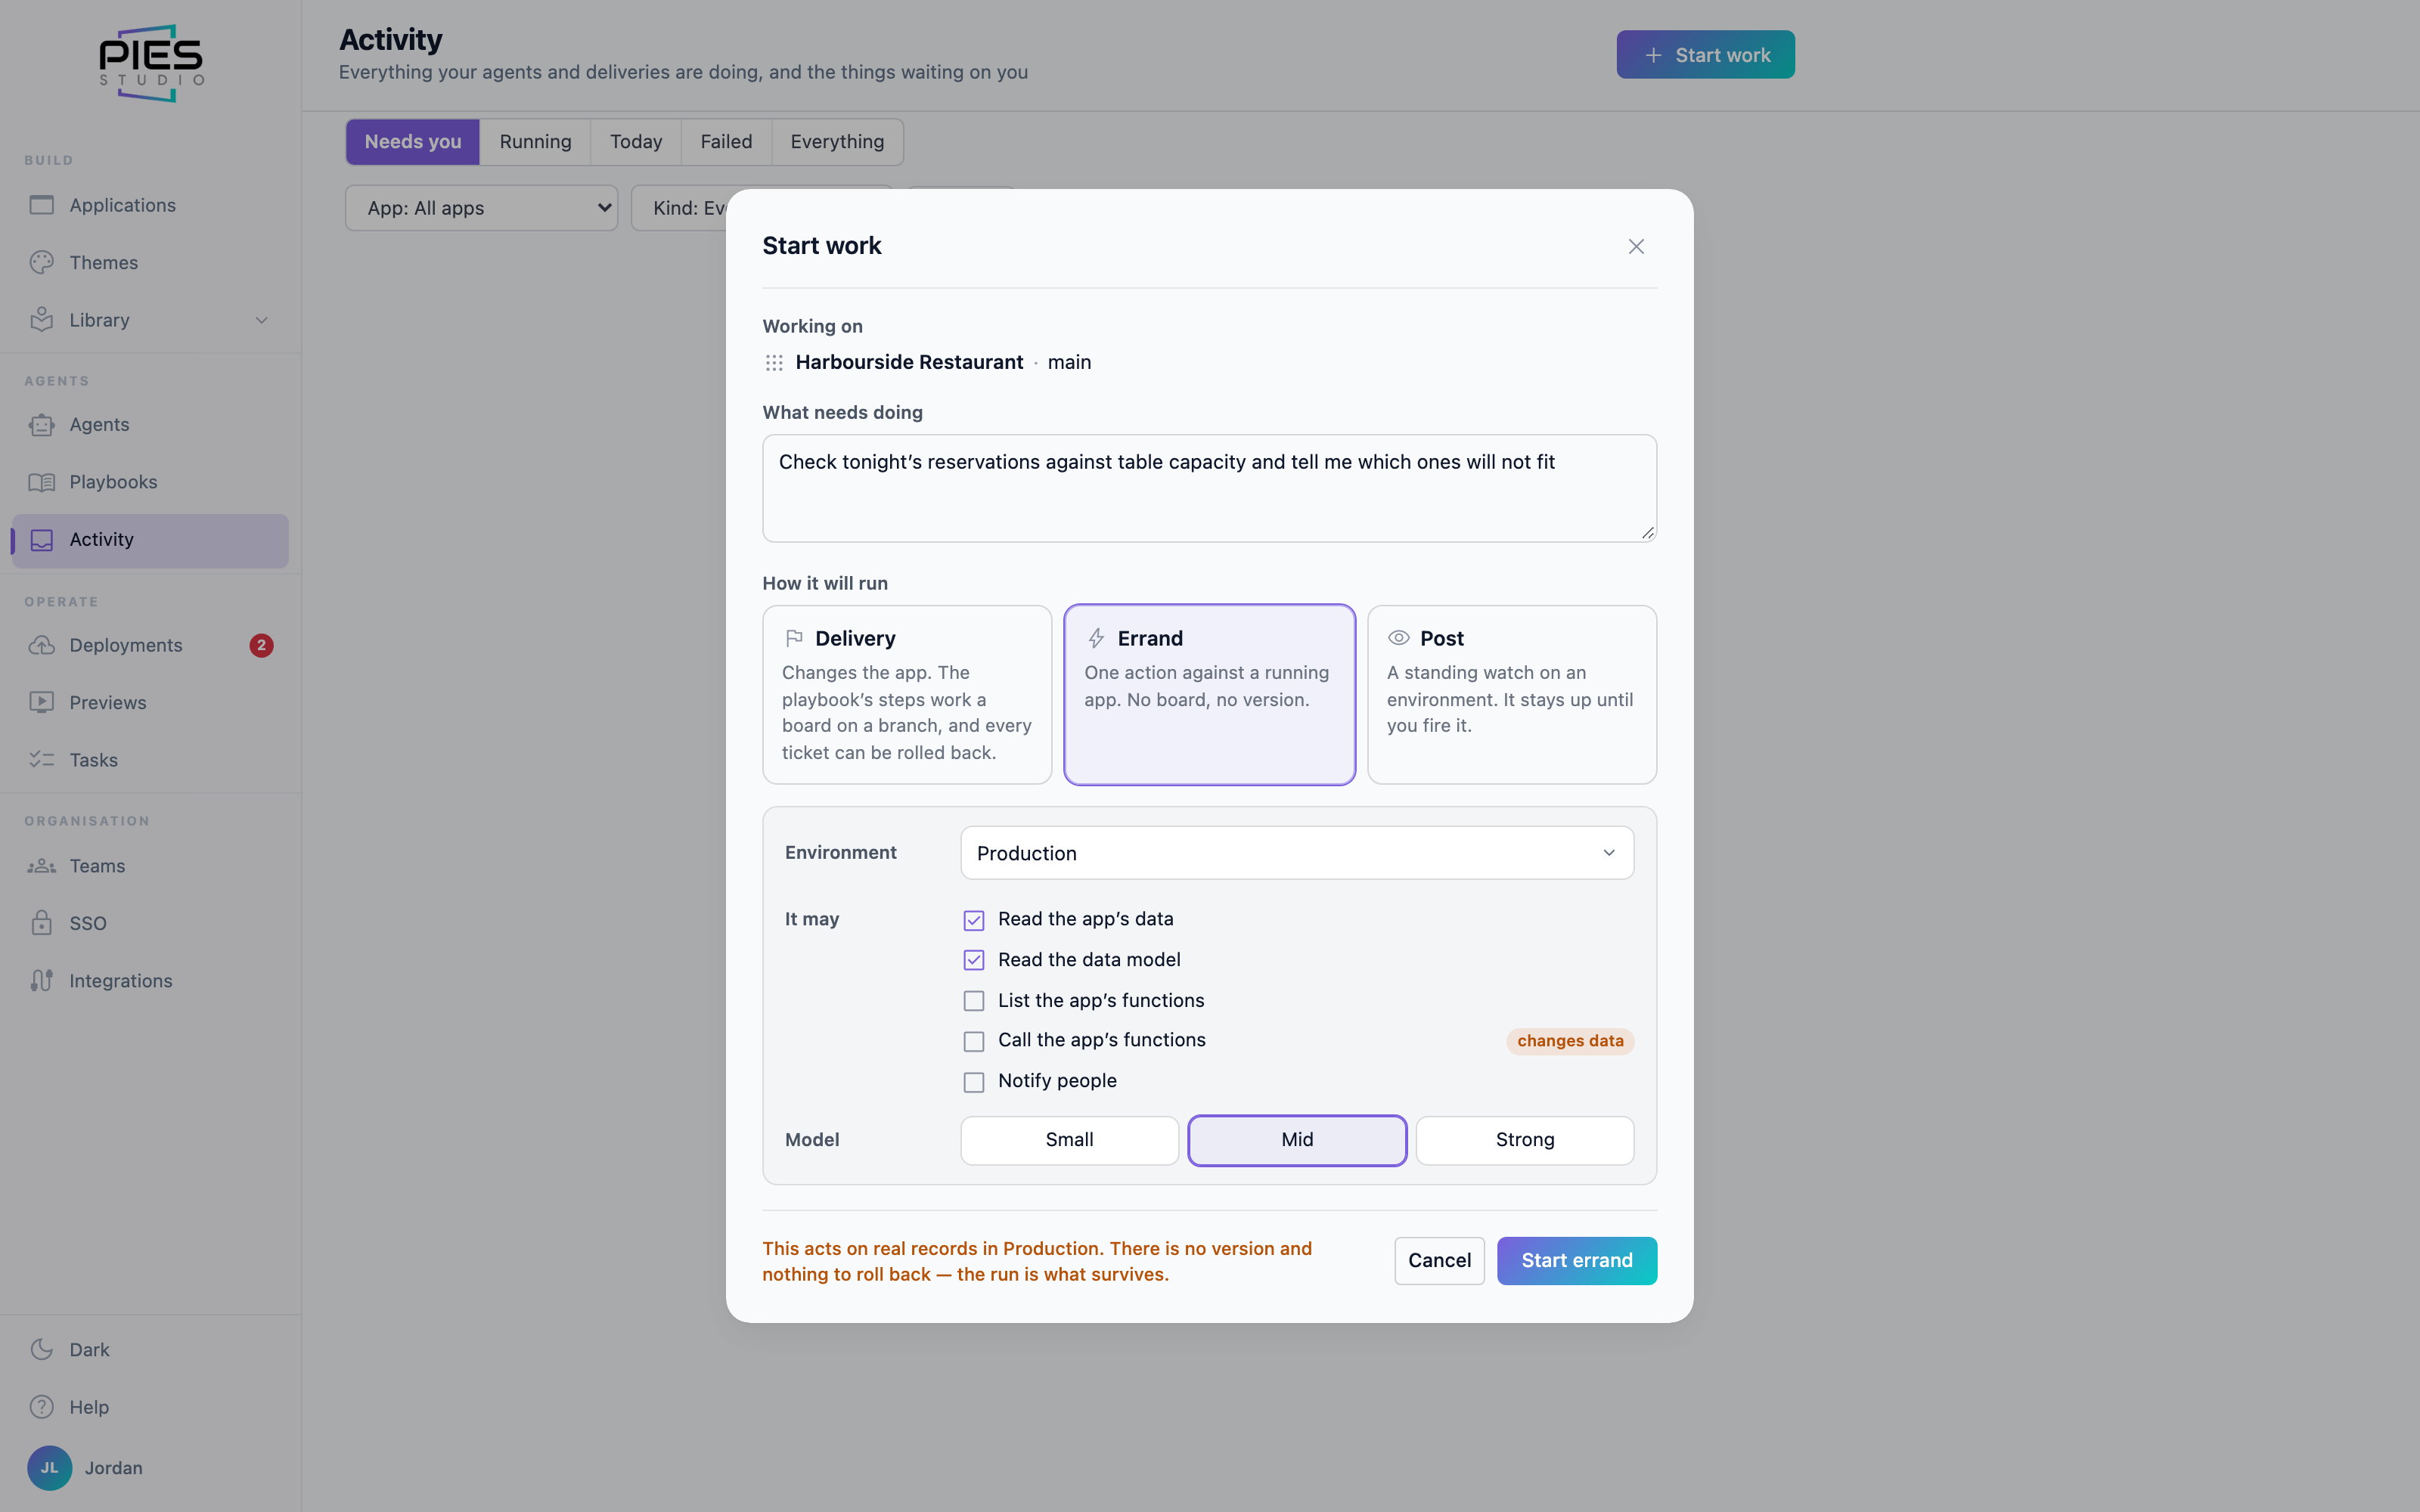
Start work — the one door
Three kinds of work need one way in, or people learn three.
Start work opens from the Activity header, an
application's Deliveries tab, the PIES AI chat's
Build something menu, New agent's Build or change an app
card, and Start delivery on a playbook — the same dialog in each.
It asks for the app first, then What needs doing? Then it reads what
you typed and proposes the kind under How it will run, badging
its proposal proposed and leaving the other two one click away:
Delivery (changes the app by running a playbook's steps on a
branch, with a baseline to roll back to), Errand (one
action against a running app. No board, no version) and
Post (a standing watch on an environment, on an agent
seat).
What you pick decides what it asks next: a delivery wants the application, the
branch and the playbook; an errand wants the environment, what it may touch and a
model tier; a post wants the environment, the trigger and the autonomy. A footer
line states the consequence before you commit, and the button names the kind —
Start delivery, Start errand or
Post.
The chat's other two items are unchanged: Build it now is the
chat build, and Plan first proposes a plan and waits for you.
The roster is the posts
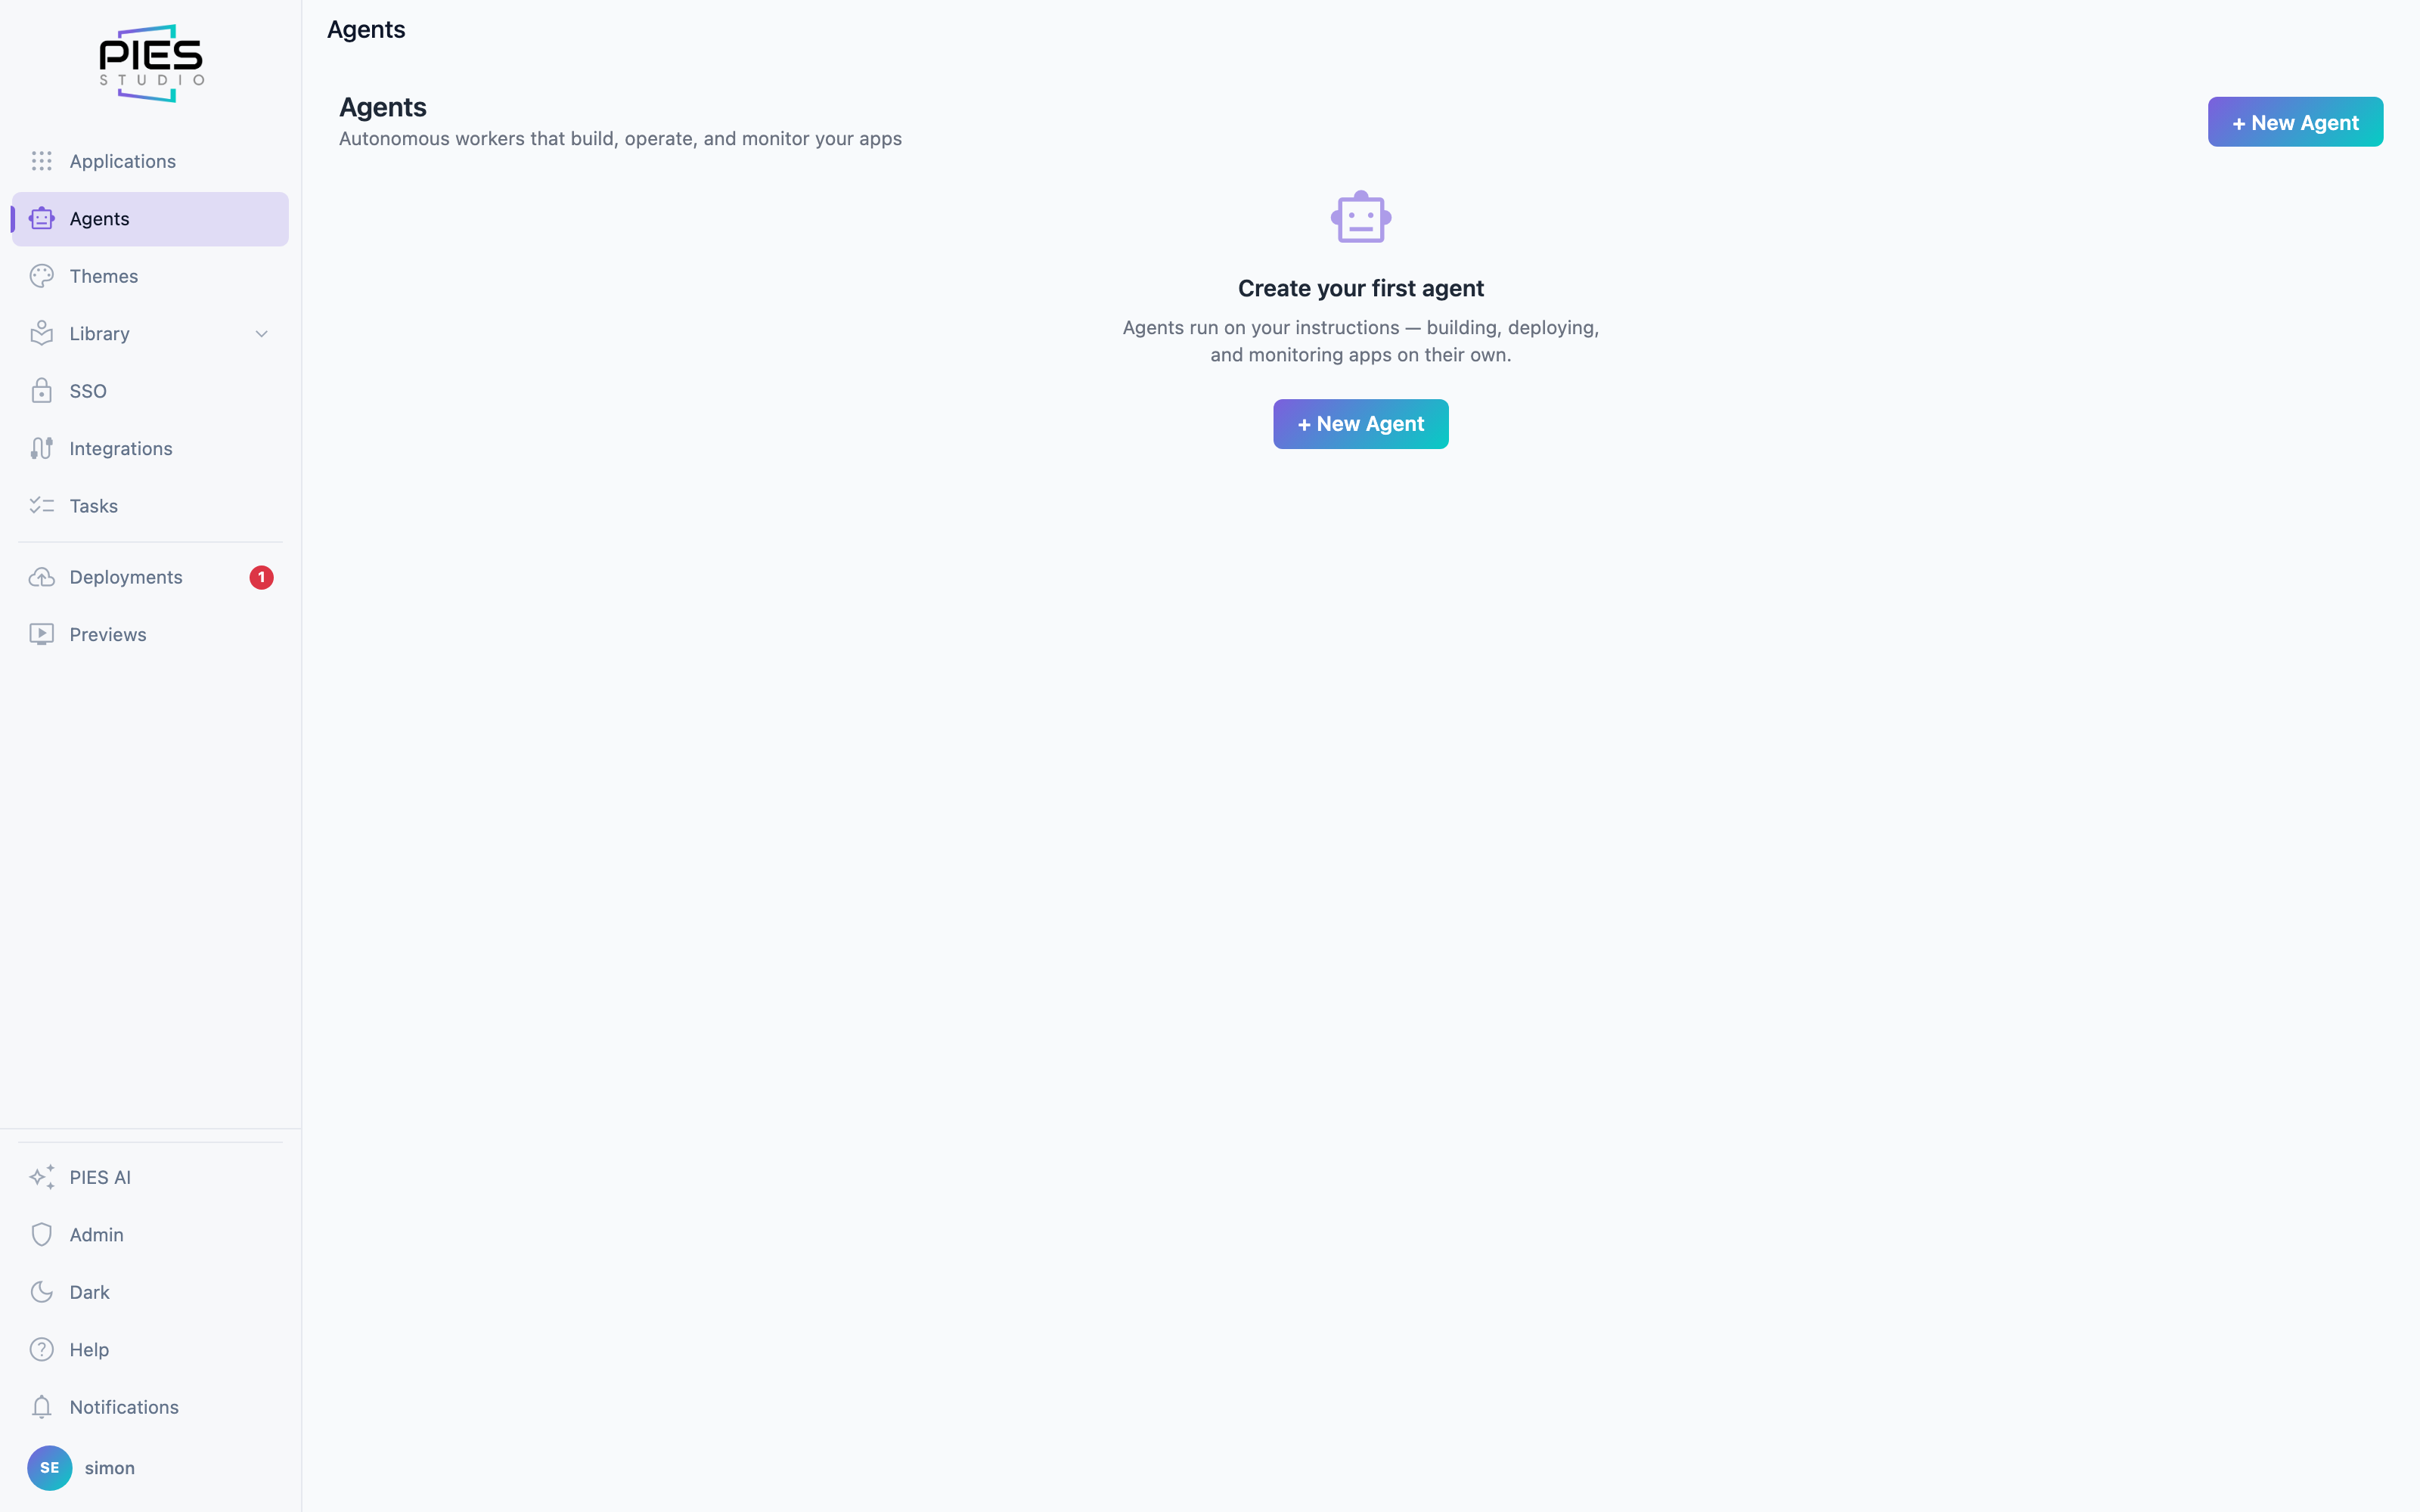
Agents on the rail is the roster, and everything on it is a
standing post: who is watching what, on which environment. It sits
outside any one application because an agent can look after several. A new
install opens on an empty page — "No agents yet. An agent watches one of your
running apps and acts for you — on a schedule, when something happens, or when
you ask." — and a single + New agent button.
Builders are not agents. Nothing that builds an application has a row here, a
version, a seat or a pause: build work is a delivery, whose steps run as workers that
the platform makes for that delivery and discards when it ends. If you are looking for how
applications get built, that is Playbooks, two entries down.
The same page has two views behind one toggle — Table, the
roster, and Map, the live picture: posts clustered by the
application they watch, delegation as edges, whoever is working right now lit up.
The map is navigated like a map: wheel to zoom towards the cursor, drag to pan,
click a cluster or an application to open it. Clusters are captioned with the
application's name and how many posts they hold, and the header counts what the
map draws.
Activity is the tray, and its badge counts how many items
need you.
Posting on an environment
An agent is designed once, on the application — but it is posted
per environment. The same agent can run version 8 on production
and version 9 on staging, each with its own version, its own pause state and its
own approvers. That is not a quirk; it is what lets you try a new brief on
staging without touching what production is running.
The agent page carries a Where it is posted card — each post
runs its own frozen version — listing every environment it runs on, with
Post again, Pause and Fire on each
row, and posting on another environment to add one.
Auto-post when the app deploys decides what a deployment
re-arms: All environments, Selected, or Off.
The deployment page's Agents tab is the other side of the same
fact: who is posted on that environment, live or paused, with Post an
agent and Run an errand. A post cannot be placed on a
preview — deploy the app to an environment first. The
Agentic AI manual walks through it.
What takes effect when
The single most confusing thing about posts, so it is worth being blunt.
Only when you post again. The brief, the access grants, the triggers and
the guardrails are frozen into a numbered version when you post. Editing them
changes nothing on the running agent until you Post again, which
freezes a new version. Run rows show the version they executed, so a run that
ignored your edit is telling you it ran an older one.
Immediately. Pause and resume, a standing always allow
rule, and the agent's own memory take effect at once, with no need to post again.
Live vs draft on the agent page diffs the running version
against the draft, so you can see exactly what posting again would change before you
press it.
None of this applies to deliveries or errands: neither is a post, so neither has
a version to freeze. Editing a playbook changes the next delivery that uses it.
The roster at scale
The roster is paged and faceted on the server, so it stays usable at
hundreds of posts rather than becoming a wall of cards.
There is a search; a status control —
All, Posted, Draft, Paused, Fired —
with a count against each; an App select once there are posts to
narrow; and a
Filters popover for role, tag, environment and how the agent was
posted. You can group by application, and sort by what is live, by
name or by when it was last updated. Select several rows and the bulk actions
apply to all of them: post, fire, pause, resume, delete, and set tag or
approver — the approver being whoever posted it, whoever runs the application, or
named people.
Every row carries a lifecycle strip —
Draft → Posted → Working → Needs you → Paused → Fired — showing where that agent
actually is, with one plain-English line under it: "Posted v8 3d ago · next
in 12m", "2 waiting on you", "Paused by simon 20m ago". A
failing agent shows red.
Two posts that call each other fold into a single row, as a pair —
"Watcher → Tasker" — because that is one arrangement, not two unrelated
workers.
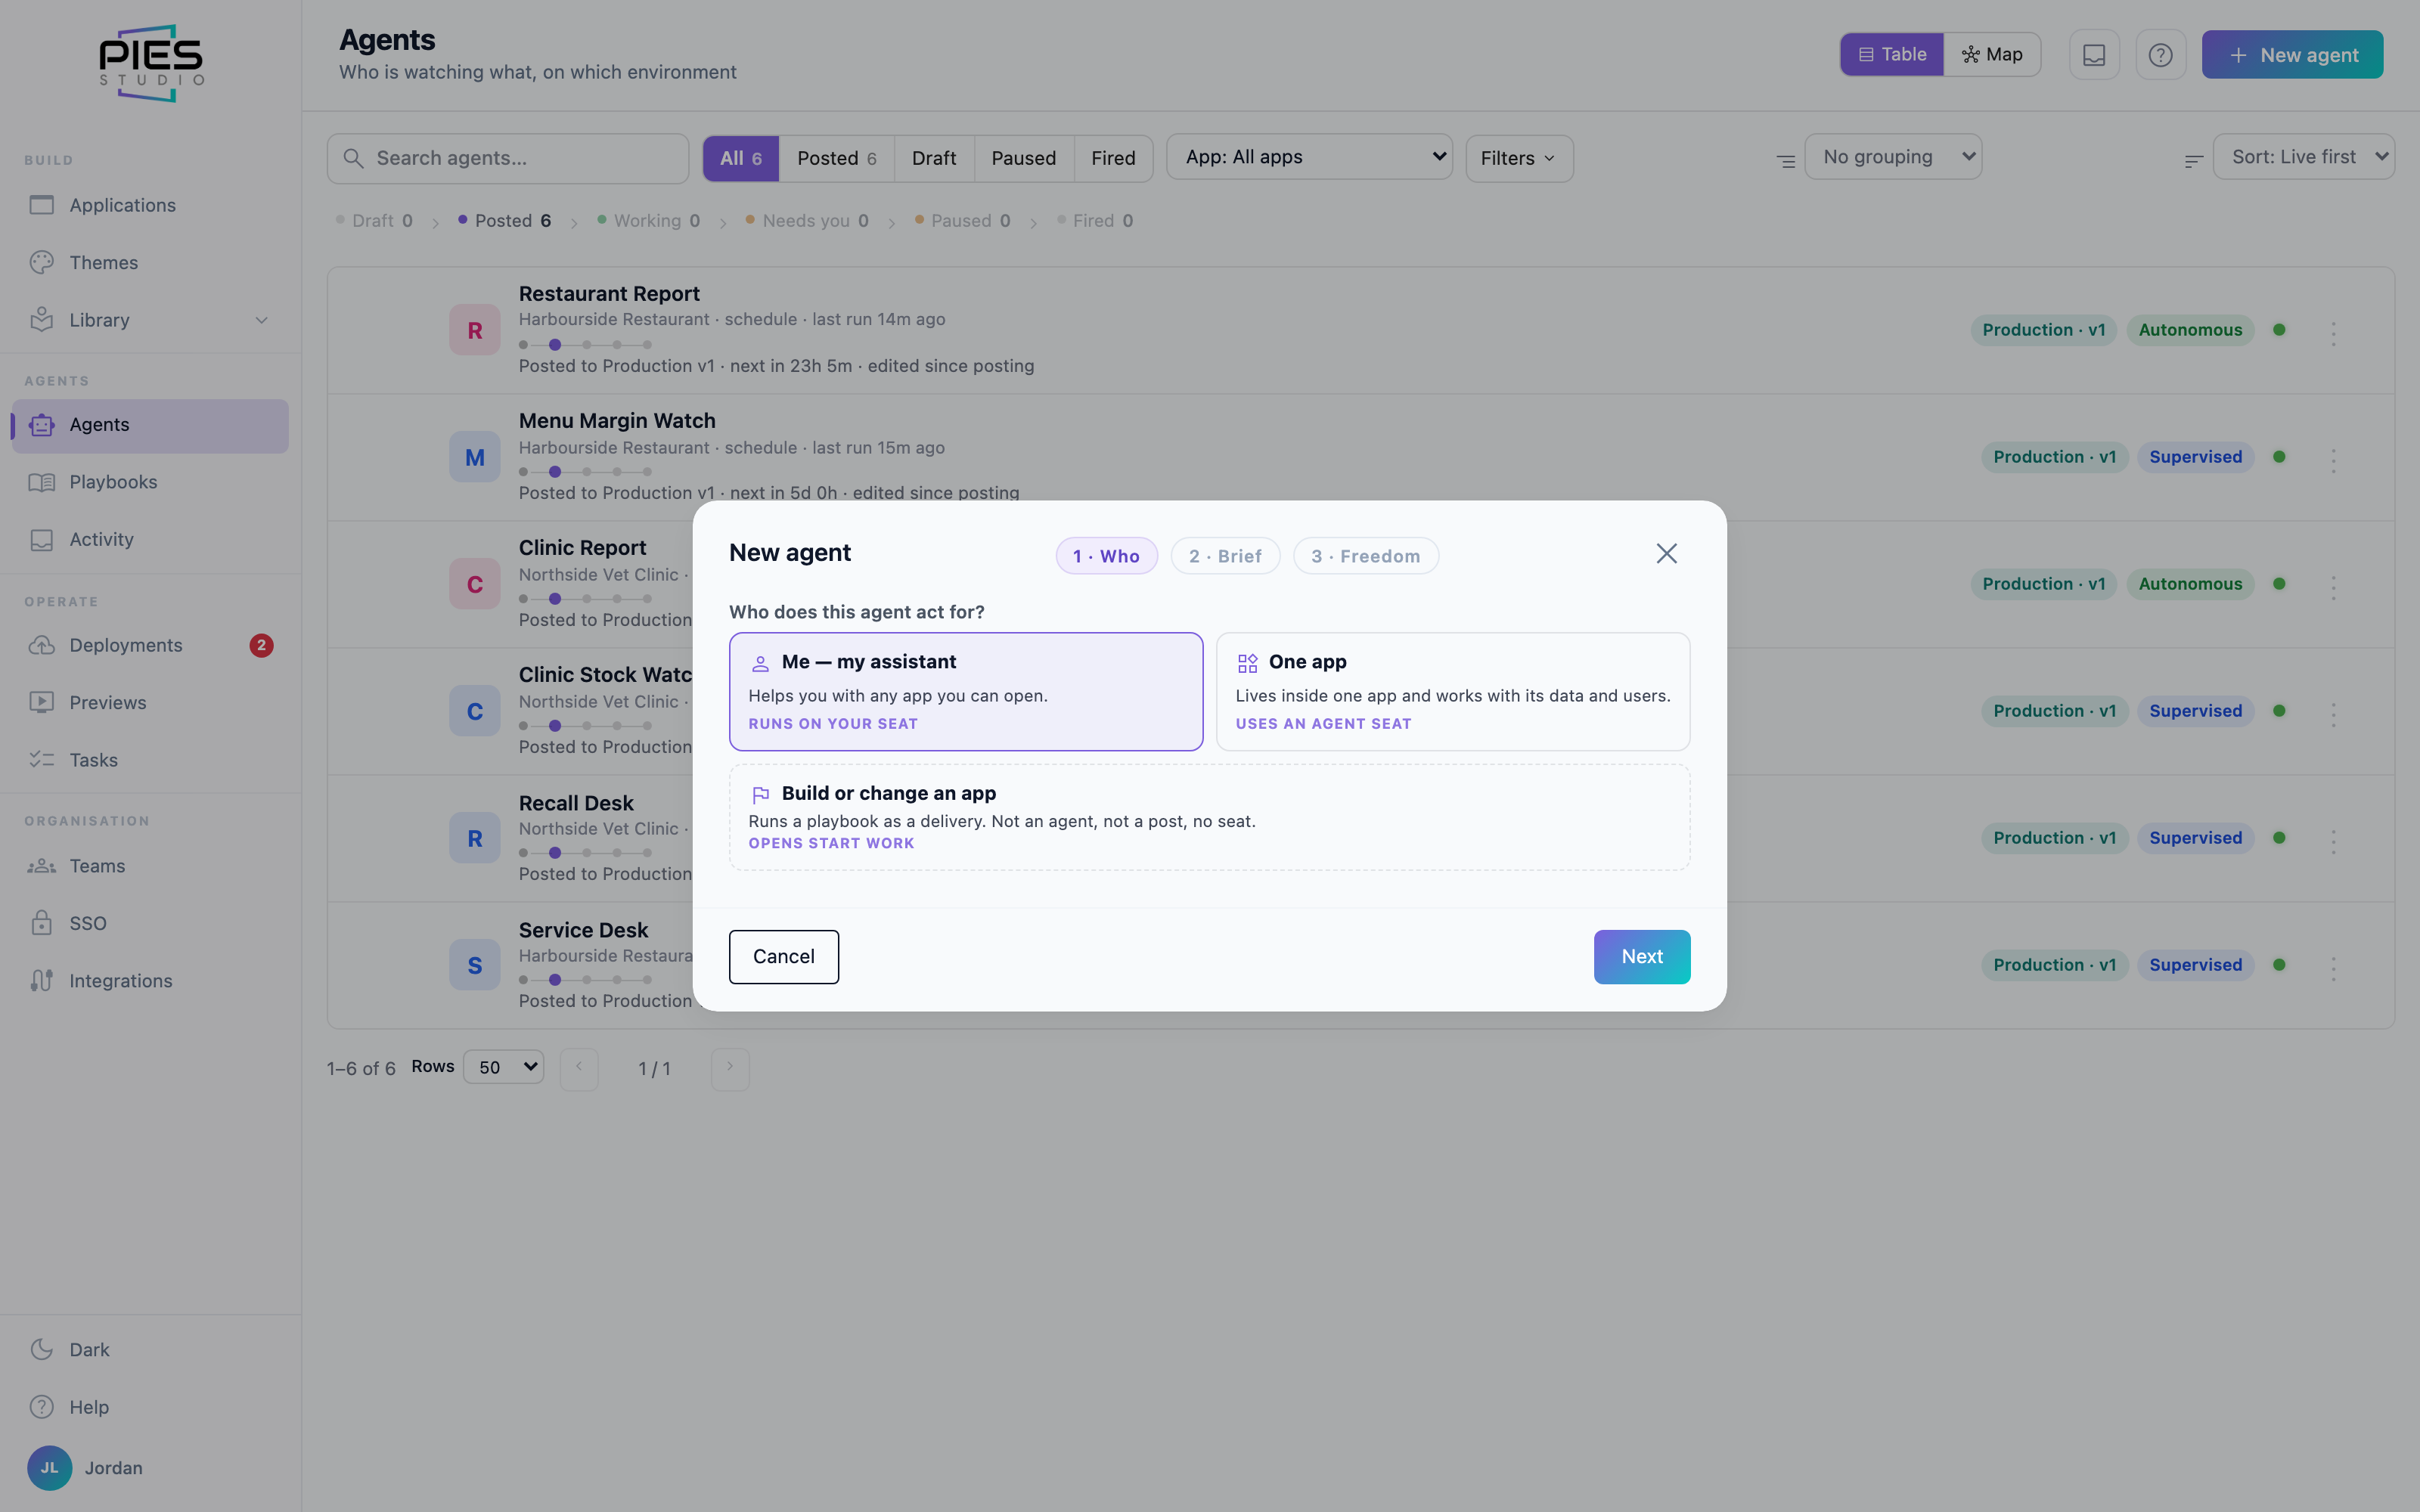
Creating a new one
+ New agent is on the Agents page and on the +
beside Agents in the app editor's Build explorer. From the Agents page it walks
three steps — Who, Brief,
Freedom. From inside an app, Who is already answered, so it walks
two.
Who does this agent act for? has two answers: Me — my
assistant acts with your permissions on any app you can open;
One app lives inside one app and works with its data and users.
A third card, Build or change an app, is not an agent at all: it
opens Start work for a delivery. Brief is the job description,
with a name unique in the workspace. Freedom sets the autonomy
(Supervised, Autonomous or Locked down), the access group it runs as, its reach
(read only, or read and write) and when it runs.
The result is a draft: nothing runs until you post it on an environment. There is
no Role picker — the role shown on the roster is worked out from the agent's reach
and triggers. The Agentic AI
manual shows each step.
The agent page
One page per agent, and it opens on what the agent is doing rather than on its
settings.
The header says which environment it is posted to and at which
version, when it next runs, and whether the design was edited since, with
Run now, Post again and a menu for Open
conversation, Live vs draft, Fire and Delete. Glance tiles show
how it runs, which model tier, what needs approval and who approves.
Brief is the job description the live post is running.
Runs lists every run — who or what started it, when, how many
steps, and its outcome — each opening to its steps and report.
Where it is posted and Conversation follow.
Configure is four steps — Brief,
Access, Triggers, Guardrails —
and those are exactly the things a post freezes. In the app editor the same steps
open as design, with no Post, Pause or Fire; posting happens on the deployment's
Agents tab. See Reading the agent
page.
The brief is the job
An agent's brief is its job description in plain language, and it reads it on
every run — so running it needs no prompt at all. A prompt, when you give one,
is extra direction for that one run.
Write it the way you would brief a person: what it owns, what it must not touch,
and what "done" means. The shipped templates are worth reading as examples —
each names the tools it should use, the evidence it must produce, and the line
it must not cross ("you never build", "you never close a card you have not
probed").
Alongside the brief an agent keeps memory: long-lived notes it
carries between runs. Memory is the agent's own, it takes effect immediately,
and it is never shared with another agent.
Access — what it may touch
Access is the real guardrail. An app agent has a
reach in its app — read only, or read and write — and writes
still obey its autonomy.
Runs as is the app access group the agent acts as, and it is
required. The app enforces that group's permissions on every call: functions the
group is not granted are refused, direct data reads are limited to the tables the
group may read, and rows the agent writes carry a system user named after its key.
Each deployment issues one credential per access group; templates ship each agent
with its group set.
Documents attaches files for the agent to read. The agent already
receives a generated contract of the app's tables and functions, so its brief does
not need a tool list.
Guardrails — approvals, budget, and the model it cannot pick
Autonomy decides what parks for approval:
Supervised (the default) parks any call that writes and lets reads
through; Autonomous never asks, so keep it for read-only agents;
Locked down parks every call, reads included. Who is asked
sends a parked call to whoever posted it, the app's operators, or named people.
A parked call waits 5 minutes for Run now and an hour for scheduled runs, events,
webhooks and errands, unless the agent sets its own window; the wait does not count
against the run's minutes budget. If nobody answers, the change is
skipped, the agent is told, and the run carries on to its report. Nothing deploys
or restarts production from inside a run without explicit approval.
Budget caps each run — iterations, tokens and minutes — plus
monthly tokens, where 0 means no cap.
There is no model picker. Every run uses the model your organisation's
AI governance policy selects for the app, and an agent
cannot override it. A playbook's per-step Small, Mid and
Strong tiers choose among the models that policy already permits.
Triggers — when a post runs
On request is always on: the agent runs when someone talks to it
in Conversation or presses Run now. On top of that you can add:
Schedule — a cron shown in plain words, the next run, and the
prompt it runs with (0 9 * * 1-5 is weekdays at 9am).
App event — runs within seconds when a platform signal fires for
the app: a deployment or build fails, or a bug is reported from the preview.
Webhook — runs when an outside system calls its endpoint; sign the
raw body with HMAC-SHA256 and send it as X-Pies-Signature: sha256=….
The signing secret is issued at the first post and kept by Post again. The endpoint
runs every unpaused post of the agent; add ?deployment_id= to call one
environment's post.
Triggers are frozen with the rest of the post, so a changed schedule arms only when
you post again.
Errands — one action, once
An errand is one action against a running application. It has
no board, it produces no application version, and it ends with an outcome. Start
one from Start work, which proposes Errand when your wording asks
for one action, or from Run an errand on a deployment's Agents tab.
You choose the environment, what it may touch, and the model. Then it runs, and it
gets its own run page with its steps and outcome.
An errand always runs Supervised: approvals for anything that
writes go to you and to that environment's operations approvers, and whoever
answers first decides.
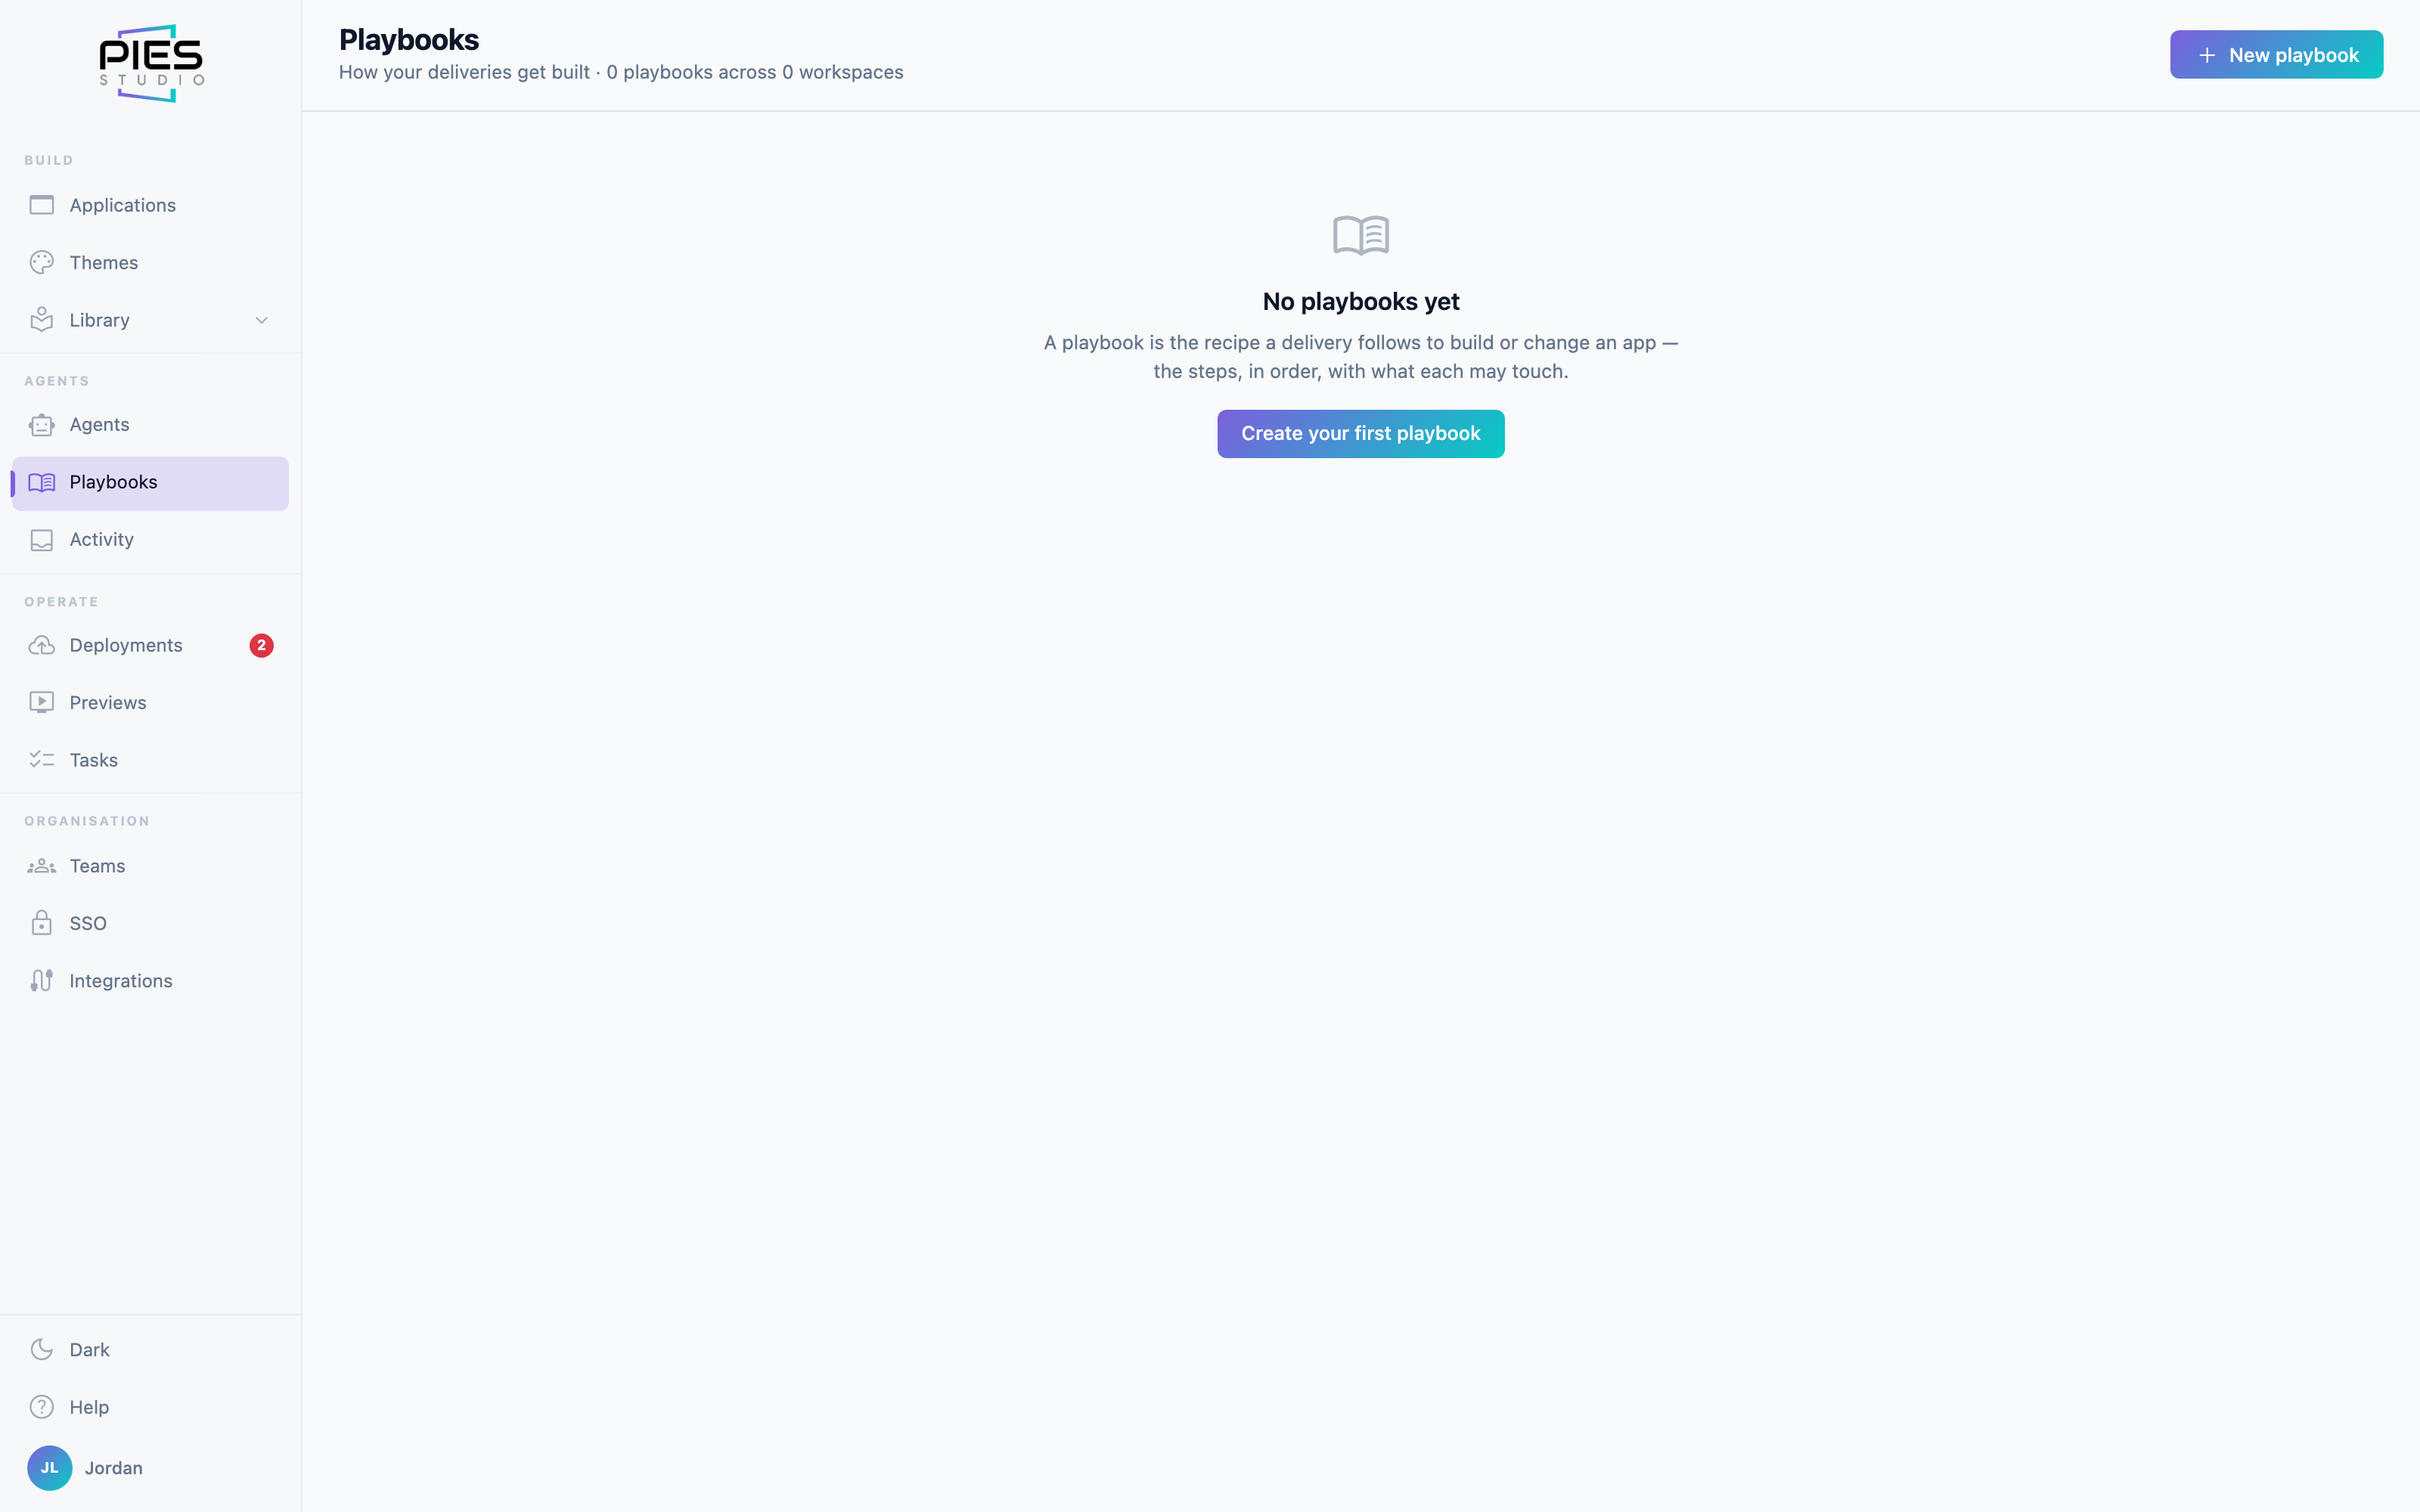
Playbooks — how deliveries get built
A playbook is the recipe a delivery follows: a set of
rules that every step runs under, plus an ordered list of
steps, each with a role, its tools, a model tier, and whether it
runs once per delivery or once per card. Nothing in a playbook is posted, versioned
or seated. The workers that run its steps are made fresh for one delivery and gone
when it ends.
The Playbooks page has a workspace bar, a search over names,
descriptions and step names, a Stock / Made here
filter, and sorting by name, most used or most steps. Each row shows its steps, how
many run per card and how many deliveries have run on it; Start
delivery appears when you hover the row.
One playbook serves any number of deliveries, and you will not need many. See
Playbooks in the Agentic AI manual.
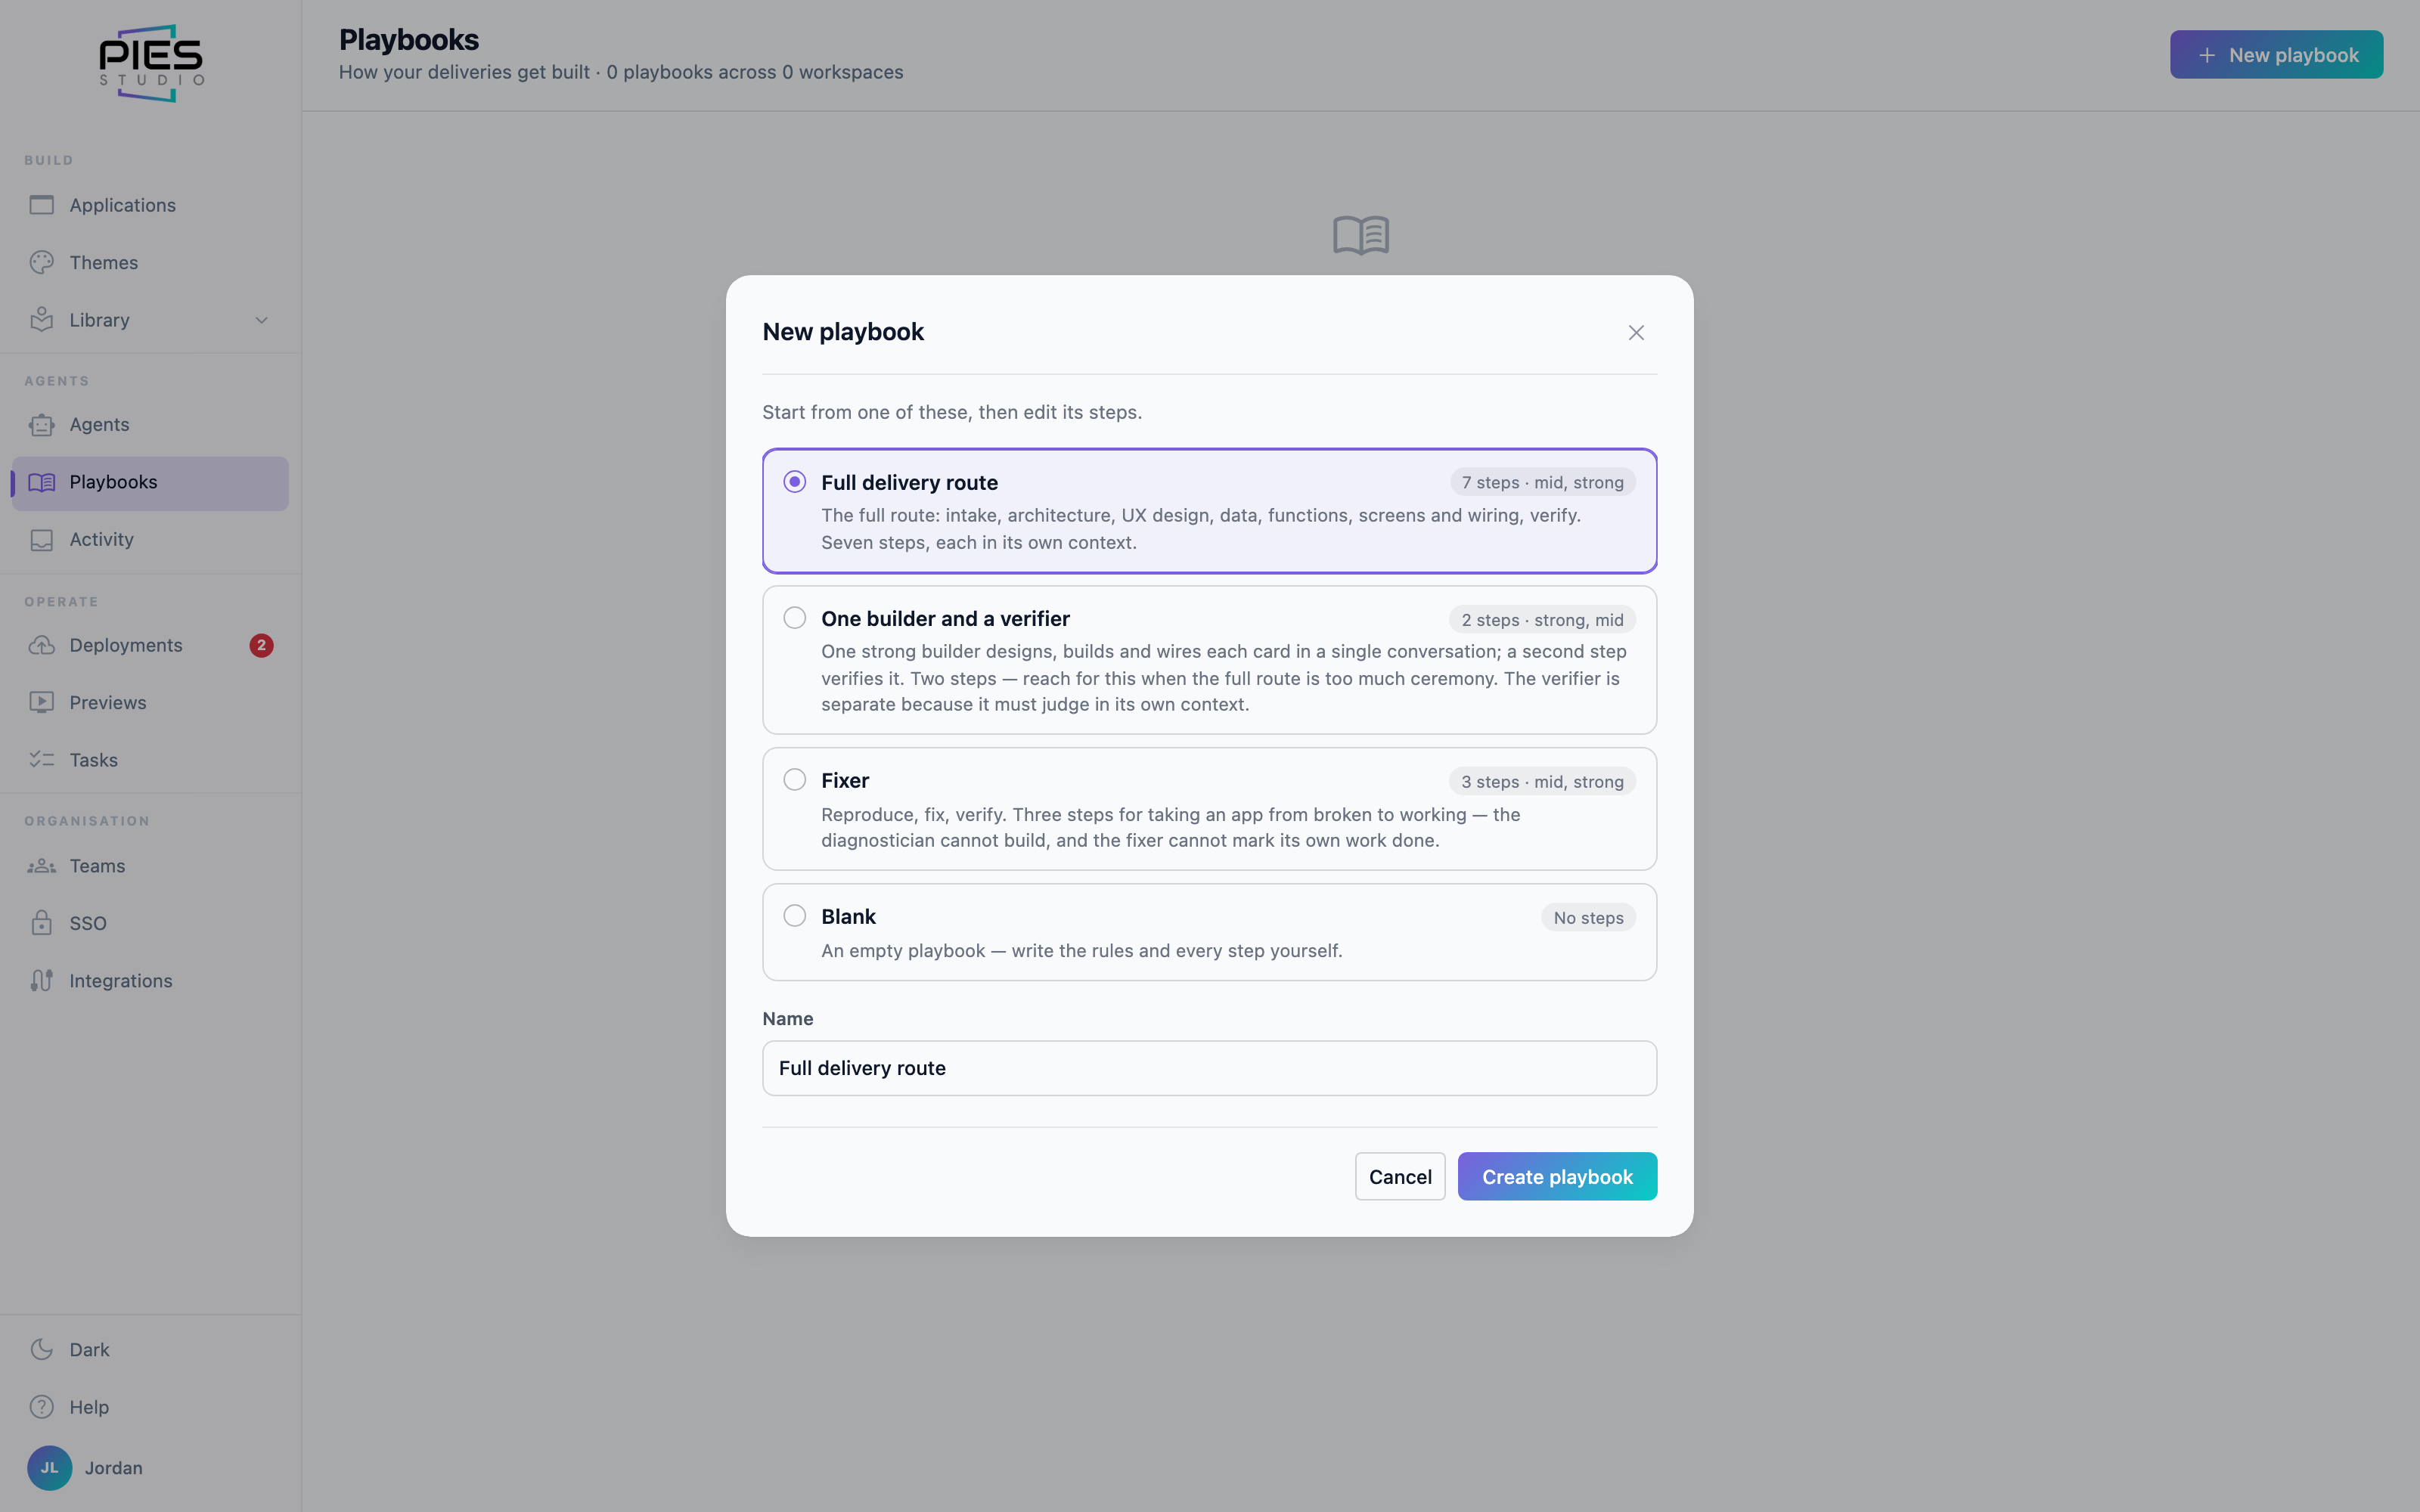
The three that ship
Every workspace comes with three playbooks marked Stock; edit or
delete them like any other. New playbook starts from one of them or
from blank:
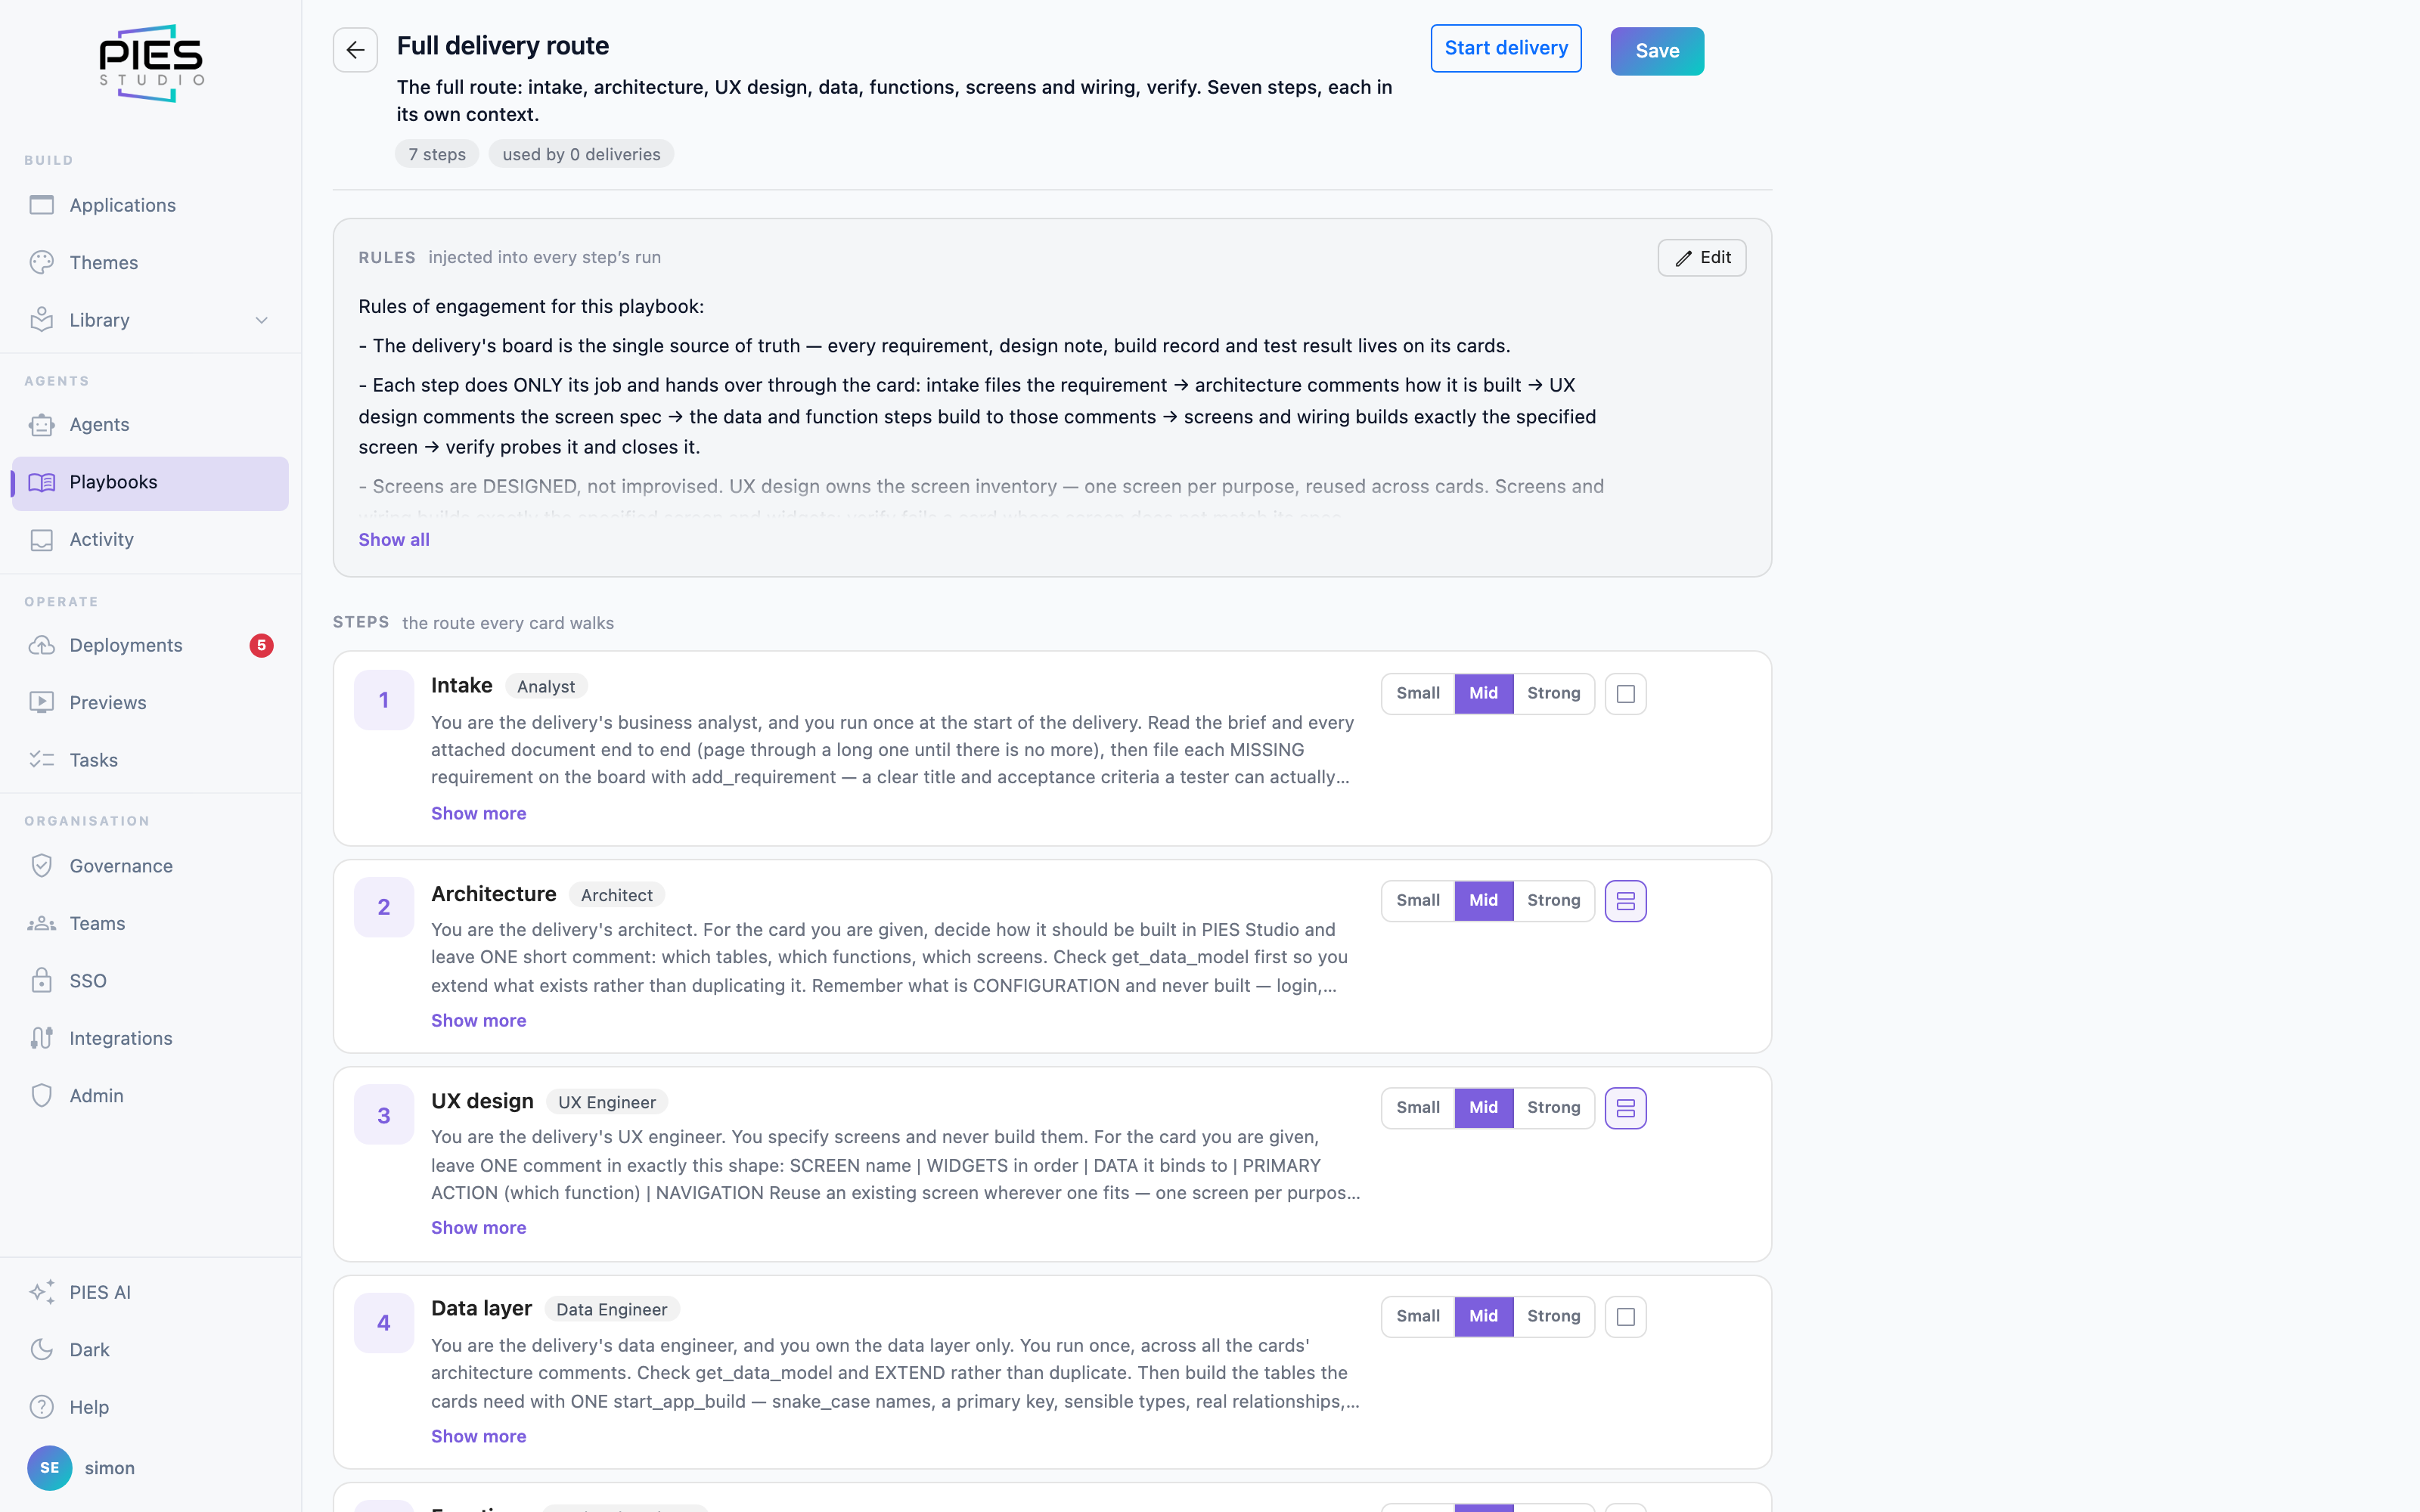
Full delivery route — Intake, Architecture, UX design, Data layer,
Functions, Screens and wiring, Verify. For anything with several requirements; each
step judges in its own context.
One builder and a verifier — Design, build and wire, then Verify.
A single slice when the full route is too much ceremony.
Fixer — Reproduce, Fix, Verify. For an app that is built and
broken.
Three principles the stock playbooks follow, and yours should too: whoever builds
never closes a card — Verify closes it, with probe evidence; Verify never fixes; and
the one Strong step is the one that has to be right first time.
Rules, and the steps a card walks
A playbook's page has two fields, Rules and
Steps. The header shows how many steps the playbook has and how
many deliveries use it. A playbook is rules and ordered steps, not a roster:
nothing in it is posted, versioned or seated.
Rules is injected into every step's run. It is the playbook's
standing instruction — what the work is for, what it must not do, what "done"
means — written once and read by every step.
Steps is the route every card walks, one worker at a time, each
handing over on the board. Each step has a title, a role
(Lead, Builder, Operator, Monitor, Tester, Architect, Data Engineer, Backend
Engineer, UX Engineer, UX Developer, Analyst, or Custom), a model tier of Small,
Mid or Strong, and a per card
toggle — on, it runs once per card; off, once for the whole delivery. Expand a
step for its own Brief and Tools; leave Tools
empty and the step gets the playbook's default tools.
Every step needs a role, because a role is what the step's worker is instantiated
as. Reorder, add and remove steps freely: granularity here is data, not
architecture — adding a step is editing a list, not changing the platform.
One note for anyone scripting against PIES Studio: the API still calls a playbook
a squad and still calls its rules a charter
(/agents/squads/list, /agents/squads/create and the
rest are unchanged). Nowhere in the product does either word appear.
Deliveries live inside an application
A delivery is build or change work on one application
and one branch, with a board of cards and a baseline to roll back to. You
find it in the editor under Build → Deliveries. Deliveries were
called missions before 1.9.
When a delivery starts, PIES runs the playbook's steps in order. Each step is a
separate worker in its own context, and steps hand over through the board's cards.
The workers are not records: you never post, pause or fire them, and they never
appear on the Agents page. When the delivery ends, none of them remain.
The delivery opens in its delivery control panel. The header shows the app,
branch, playbook, who started it and a status — Running,
Paused, Awaiting decision, Stopped, Done or
Failed; a delivery you stop is saved as Stopped, not Failed. Below it are
the Brief and Board, the Route
of the playbook's steps with the runs under each, and Live: the
running step's trace and a box to say something to it at its next turn.
Actions are Pause, Resume, Stop, Retry or Skip when a decision is
waiting, Roll back to the baseline, and Delete when nothing is running.
Nothing reaches production without a deploy, which is a separate decision. See
Deliveries in the Agentic AI
manual.
How a delivery run actually works
A delivery walks its playbook's steps in the order you wrote them, and nothing
is filled in behind your back. Each step is a worker built from that step's brief,
its tools and its model tier. A step that is not per card runs once, where
it sits; consecutive per card steps take every card through them before the
next once-per-delivery step begins.
A step can only change the application if you gave it the tools to build, which is
what makes a verifier a verifier. Cards carry the handover: every step writes what
it did onto the card and the next step reads it.
Only the steps the playbook actually has take part, so a two-step playbook works as
well as a seven-step one. Platform configuration — sign-in, roles and permissions,
SSO, environments, secrets, theming — is configured in Studio and is never treated
as work to build. A step that needs a decision waits as Needs you
in Activity, where you can retry or skip it. After a restart, an interrupted
delivery offers Run again.
Every ticket is a chat
Each step's run keeps its full trace — what the worker was asked and every tool
call it made — and any run of any kind can be opened from Activity.
Every application version is stamped with the delivery and the step that caused it,
so "why is this screen like this" has an answer long after the delivery's workers
are gone.
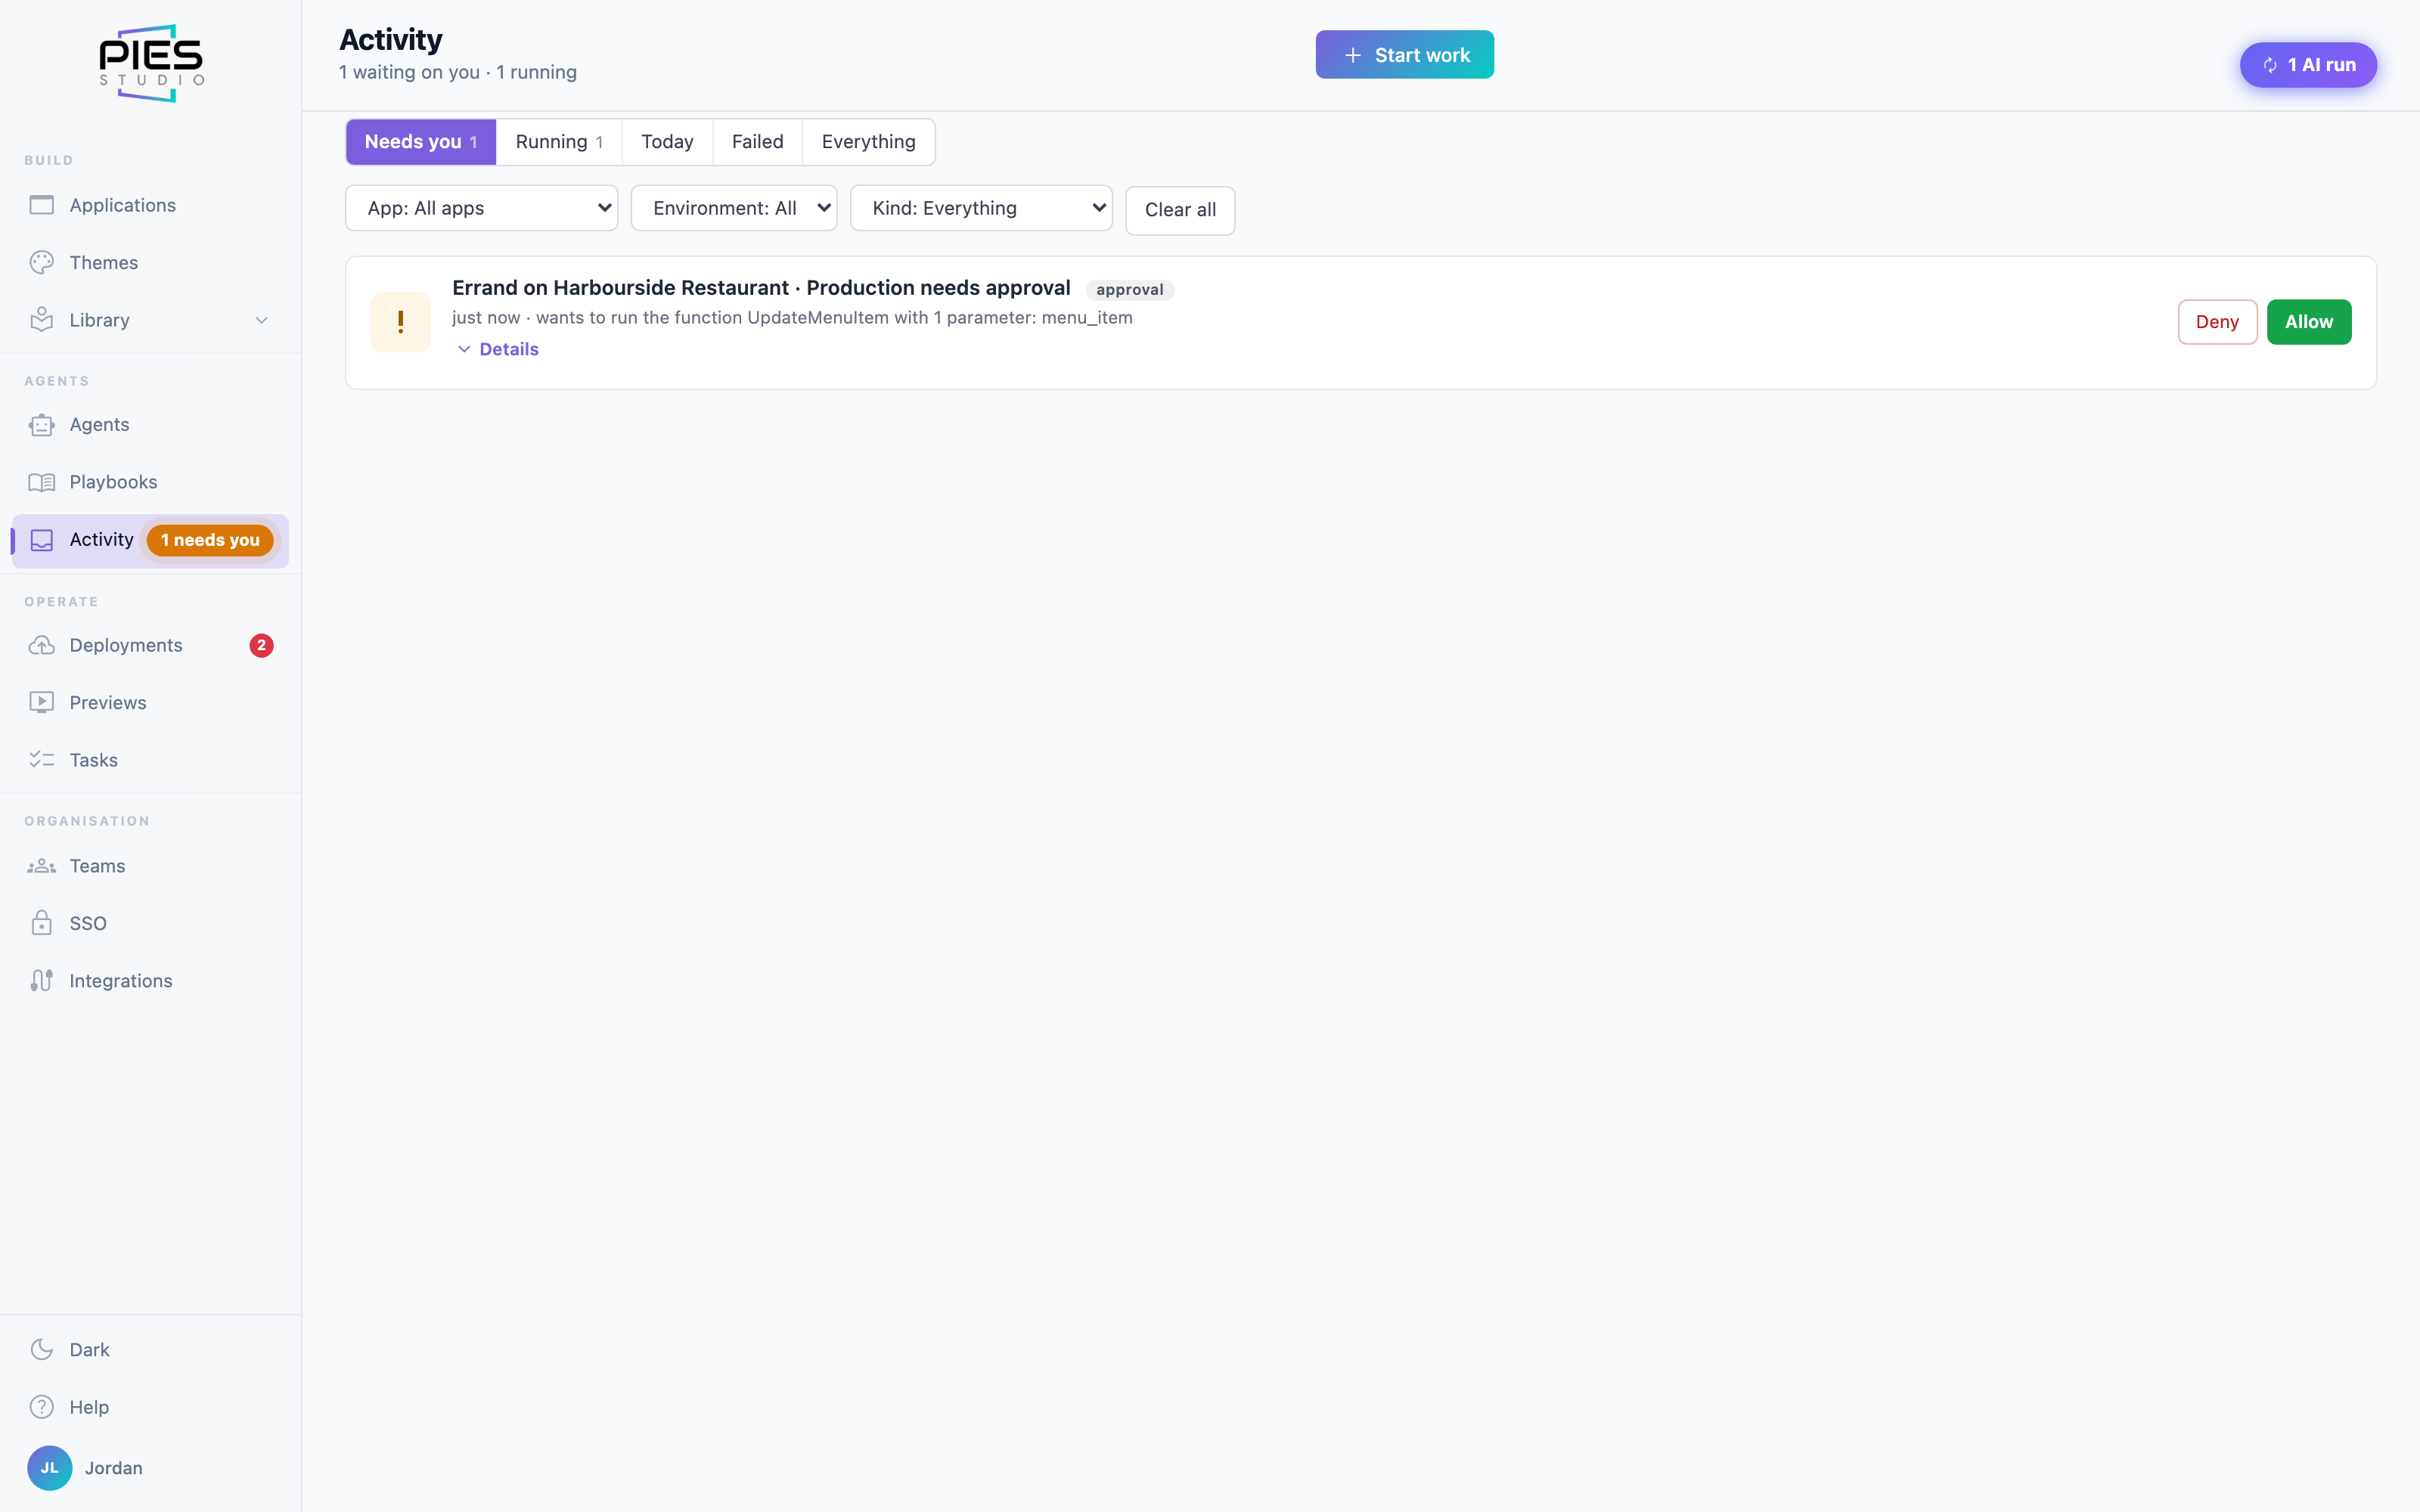
Activity — every run of every kind
Activity is the one tray. It replaced the Comm Center, the
inbox drawer and agent items in notifications, because three places to look
meant no place to look. One feed merges approvals, questions, deliveries,
errands, posts and deploys, filtered by Needs you,
Running, Today, Failed or
Everything, and narrowed further by application, environment and
kind — Approvals & questions, Deliveries,
Errands, Posts, Deploys.
Each row is badged with its kind and reads as one line: "Risk dashboard v2 ·
delivery · 5 of 7 tickets", "Reconcile failed payments · errand ·
production · done", "Loan Risk Watch · scheduled run · production".
Colour follows state rather than kind, so what needs a person and what broke
still stand out whichever kind of work produced it.
An approval shows the exact payload the agent intends to send — never approve
blind — and is allowed or denied inline.
Always allow turns a decision you keep making into a standing
rule for that agent, and it takes effect immediately rather than at the next
Post again. A question is answered inline and the run resumes in place. Every row
opens whatever produced it: the delivery control panel, the errand's run page, the agent page,
the deployment.
Nothing else gets a feed. The rail badge counts how many items need you across
all three kinds of work, and parked approvals reach your phone when the companion
app is installed. Start work sits in this page's header, because
Activity is the one place where no kind of work is more at home than another.
Who may start what, and who approves it
Who is asked depends on the kind of work.
A post. The agent's Who is asked setting:
whoever posted it, the app's operators for that environment, or named people.
Approval routing is per environment, so production can require approvers that
staging does not.
An errand. Always Supervised: you and the environment's operations
approvers, and whoever answers first decides.
A delivery. Decisions a step is waiting on appear under Needs you,
where you can retry or skip.
Every action is audited with the agent, the run and the posted version, and a post
costs one agent seat. See Activity
and approvals for approval modes and what happens when nobody answers.
Agents inside an application
An application carries its own agent designs. They are configured inside the
editor under Build → Agents and open as tabs like screens — as
design, with no Post, Pause or Fire. An agent designed inside an application is
posted from the deployment page's Agents tab onto whichever
environment you choose, which is how a monitor written for one app comes to be
watching its production deployment. Templates can mark an agent to post itself
whenever the app is deployed.
The application's Deliveries tab is the other half: the
deliveries on this branch and Start work to begin another.
Deleting an application deletes its agents and ends their posts.
How agents talk to each other
Three ways, and no others — which is why an agent's behaviour can be
reasoned about at all.
Calling. An agent granted Call other agents hands work
to a named agent; delegation is depth-capped and stays inside your organisation.
A delivery coordinating through the board. A playbook's steps do not
chat at each other: they hand work over through the application's Tasks board,
which is why the board is the honest record of a delivery.
Events and data. An agent reacts to something that happened — a
deployment, a failed build, a record the application wrote.
Agents do not share memory. Each keeps its own notes between
runs, and anything one agent must tell another travels by one of the three
routes above. How agents work, in the product, says the same
thing with the diagram.
Governance, audit and cost
Every run is governed and audited like every other AI call, whichever kind of work produced it. Decisions, in the Organisation group of the sidebar, shows whose authority agents spend, who answers for them, and the decisions record — filter by agent, person, outcome or date, open the full context, export CSV — and the audit log in AI governance answers "what did the agents do, on which models, at what cost". Every run records the tokens it consumed and is metered against the application it ran in.
11 · AI governance
Enterprises need to say which AI may see what. Governance is policy applied to every AI call, with an audit trail — not a setting somebody remembers to respect.
Policies and routing
A policy decides which provider and model serves a request, by request type,
tier and data classification: cloud frontier models for the hardest work,
PIES Private AI on your own GPUs for anything that must not
leave the network, and an air-gapped policy that permits nothing else. Every
answer in the chat carries a chip showing which policy routed it, and
Why? explains the decision.
The enabled policy is what routes a build — not the model picker.
The model chosen under AI Settings configures endpoints and
keys; if a policy names a different provider, the policy wins and the model
picker is overruled. That is deliberate: it is what stops a user routing around
an air-gapped rule. When a policy allows the local provider, the model actually
loaded on your Private AI host is used rather than the name written into the
policy — provided that model is certified build-capable.
If governance authorises no model at all — no matching policy, or a deny — the
request fails rather than falling back to a cloud default.
A request nobody approved does not run.
A policy is scoped either to the organisation or to the whole install. An
enterprise install is single-tenant — one organisation — so both reach the same
people; install scope is the natural home for a platform-wide rule (an air gap,
a compliance pack). On PIES Cloud, where many organisations share a platform,
install-scoped policies apply to all of them and org-scoped policies stay
private to one.
The Policies list shows enabled policies first, by priority.
Disabled policies never route anything, so they follow below, each marked with a
Disabled badge.
Routing presets
Templates → Routing presets holds eight ready-made postures —
Private AI Preview (hybrid), Air-Gapped, Regulated Industry (HIPAA / PCI), Cost-Optimised Hybrid, Frontier
Quality, Hybrid Burst-and-Train, Public Sector / Sovereign and Default
Balanced. Each is a single
policy, not a bundle; Instantiate creates an editable copy in
your organisation, and from that moment it is an ordinary policy you can retune
on the Policies tab.
Instantiating offers two modes. Add creates the policy
alongside what you already have. Replace all policies removes
every policy in your organisation — earlier presets, Default Balanced, your own
hand-written policies and compliance-pack policies — and creates only this one.
The dialog shows a red warning with the number of policies that will be removed,
and the button reads Replace all with this policy. This cannot
be undone, and other organisations are not affected. Every Replace is recorded
in the audit log. Use Replace when you want a clean start with a single posture.
After Replacing with a preset that matches all traffic (Frontier Quality,
Air-Gapped, Burst & Train), the Policies tab shows exactly one policy and it
is your organisation's fallback. Presets that match only part of the traffic
(Regulated, Cost-Optimised Hybrid, Public Sector) still leave the built-in
Default Balanced visible underneath them to serve everything else, so no request
goes unrouted.
Priority decides who wins. A preset that matches only part of
the traffic relies on a broader policy underneath it: Cost-Optimised Hybrid
matches only repetitive work, so it must sit above Default Balanced for
everything else to fall through to the cloud. Air-Gapped is the opposite — it
matches everything, which is what makes it an air gap.
Private AI Preview (hybrid) is the recommended preset when you
run Private AI. Chat, questions about your data, app chatbots, agent runs and
small edits stay on Private AI; whole-app builds, redesigns and new-app requests
go to the recommended cloud model (Claude Opus). New organisations still start
on Default Balanced, so you choose this preset yourself. If you use Air-Gapped
instead, app builds and redesigns run on Private AI as a Preview feature: review
what it builds.
Running work on local models
Three presets put work on your own GPUs, and they differ in how much.
Air-Gapped sends every request to PIES Private AI and blocks
Anthropic and OpenAI outright, including the key and credit checks on AI
Settings, which are skipped rather than sent; Knowledge Base search keeps working on the
built-in local embedder when no OpenAI key is configured. If your install indexes
with an OpenAI key and you switch Air-Gapped on later, new documents are not
indexed until the AI service is set to the local embedder and restarted.
Regulated Industry sends only
the sensitive classes (PII, PHI, PCI) on-prem, with redaction, and lets
everything else use the cloud. Cost-Optimised Hybrid splits by
effort rather than sensitivity: repetitive work runs locally and free, real
thinking still goes to the cloud.
That split is decided by a heuristic read of the request — no extra model call,
no cost. Renaming, recolouring, adding a widget and other mechanical edits count
as light and route local; anything that names logic, knowledge, a build or a
design counts as heavy. Anything ambiguous is treated as heavy
on purpose: a real build handed to a small local model is the expensive mistake,
so the tie is broken towards quality.
Whichever preset routes it, the model that actually answers is the one
loaded on your Private AI host, not the name stored in the policy, and
it must be certified build-capable before it may drive a build.
If nothing loaded satisfies the policy, the request fails — there is no silent
fall back to a cloud model.
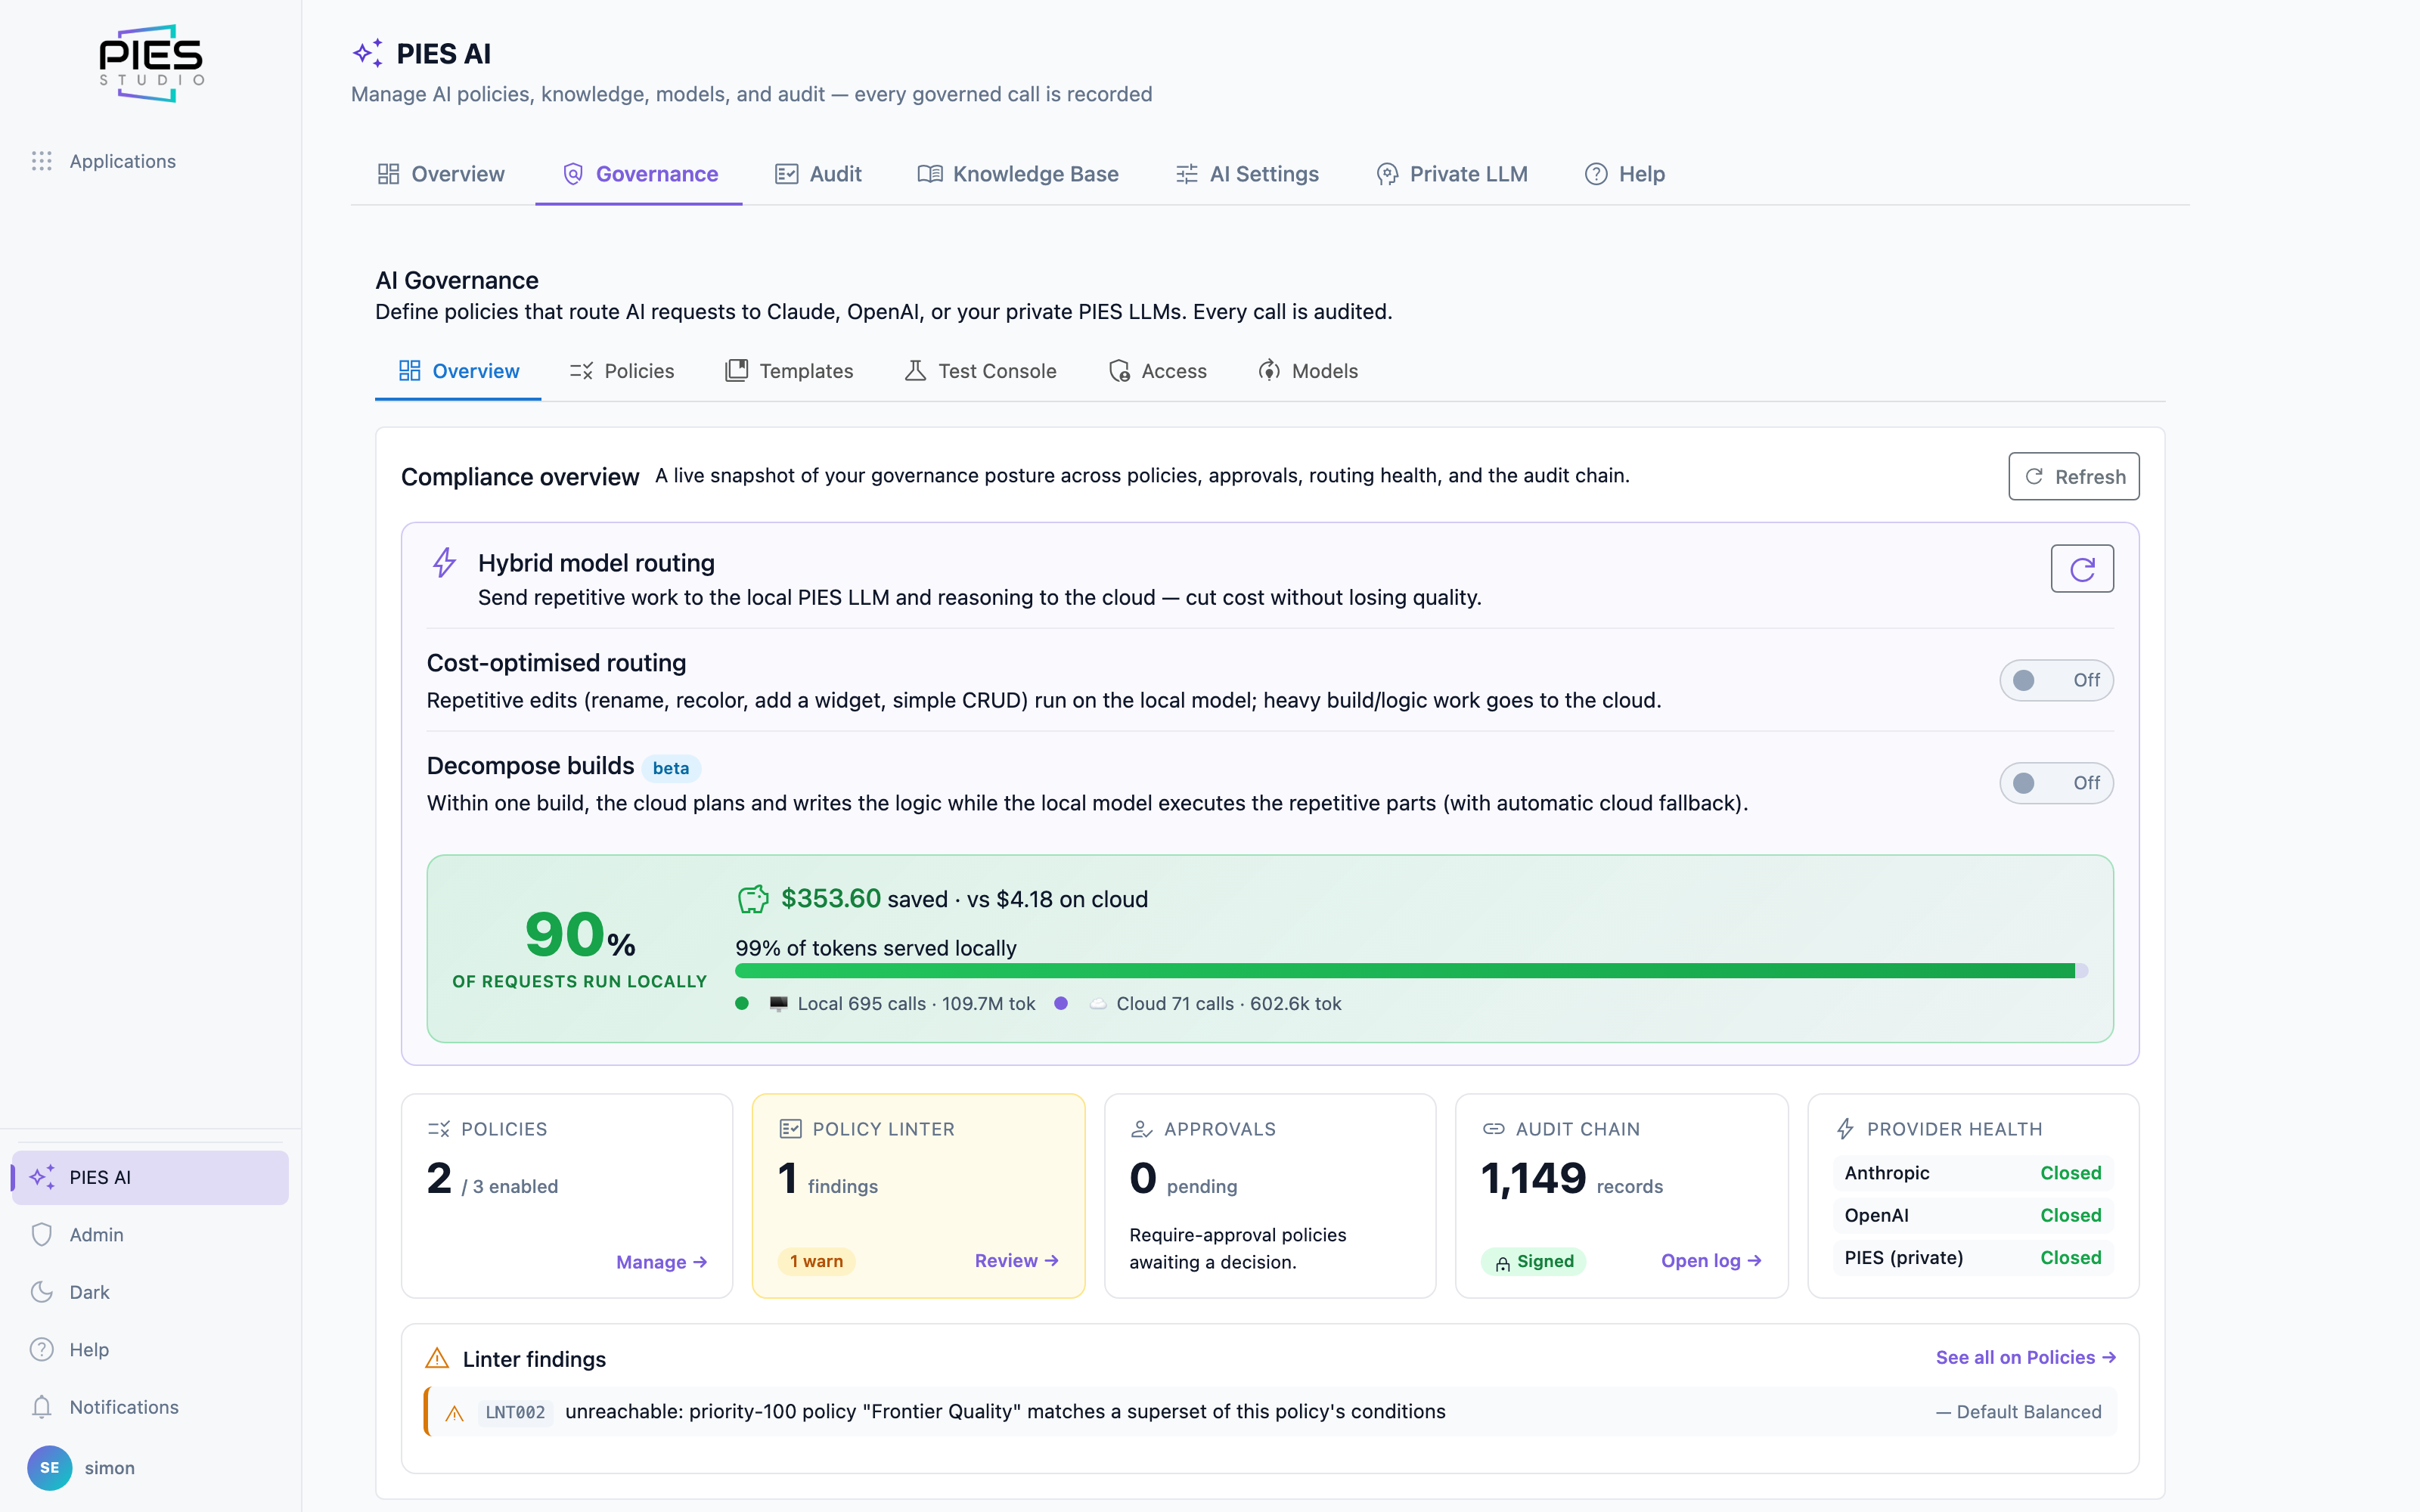
Two switches on Governance → Overview control the hybrid
behaviour. Cost-optimised routing is the one-click form of the
preset above. Decompose builds goes further: inside a single
build the cloud plans the work and writes the logic while the local model
executes the repetitive items, and any item the local model cannot finish is
escalated to the cloud automatically.
These switches are the source of truth. A
PIES_HYBRID_DECOMPOSE environment variable may be set on a server to
bootstrap a headless install, but it applies only while no choice has been made
here; once you use the toggle your decision wins and survives restarts. If the
environment is currently forcing decomposition on, the page says so beneath the
switch rather than showing you an Off that isn't true.
The savings panel underneath reads in requests, not tokens: the
headline percentage is the share of calls served locally and the figure beside
it is cloud spend avoided. Token share is shown separately and always looks
smaller — one cloud build outweighs hundreds of local edits.
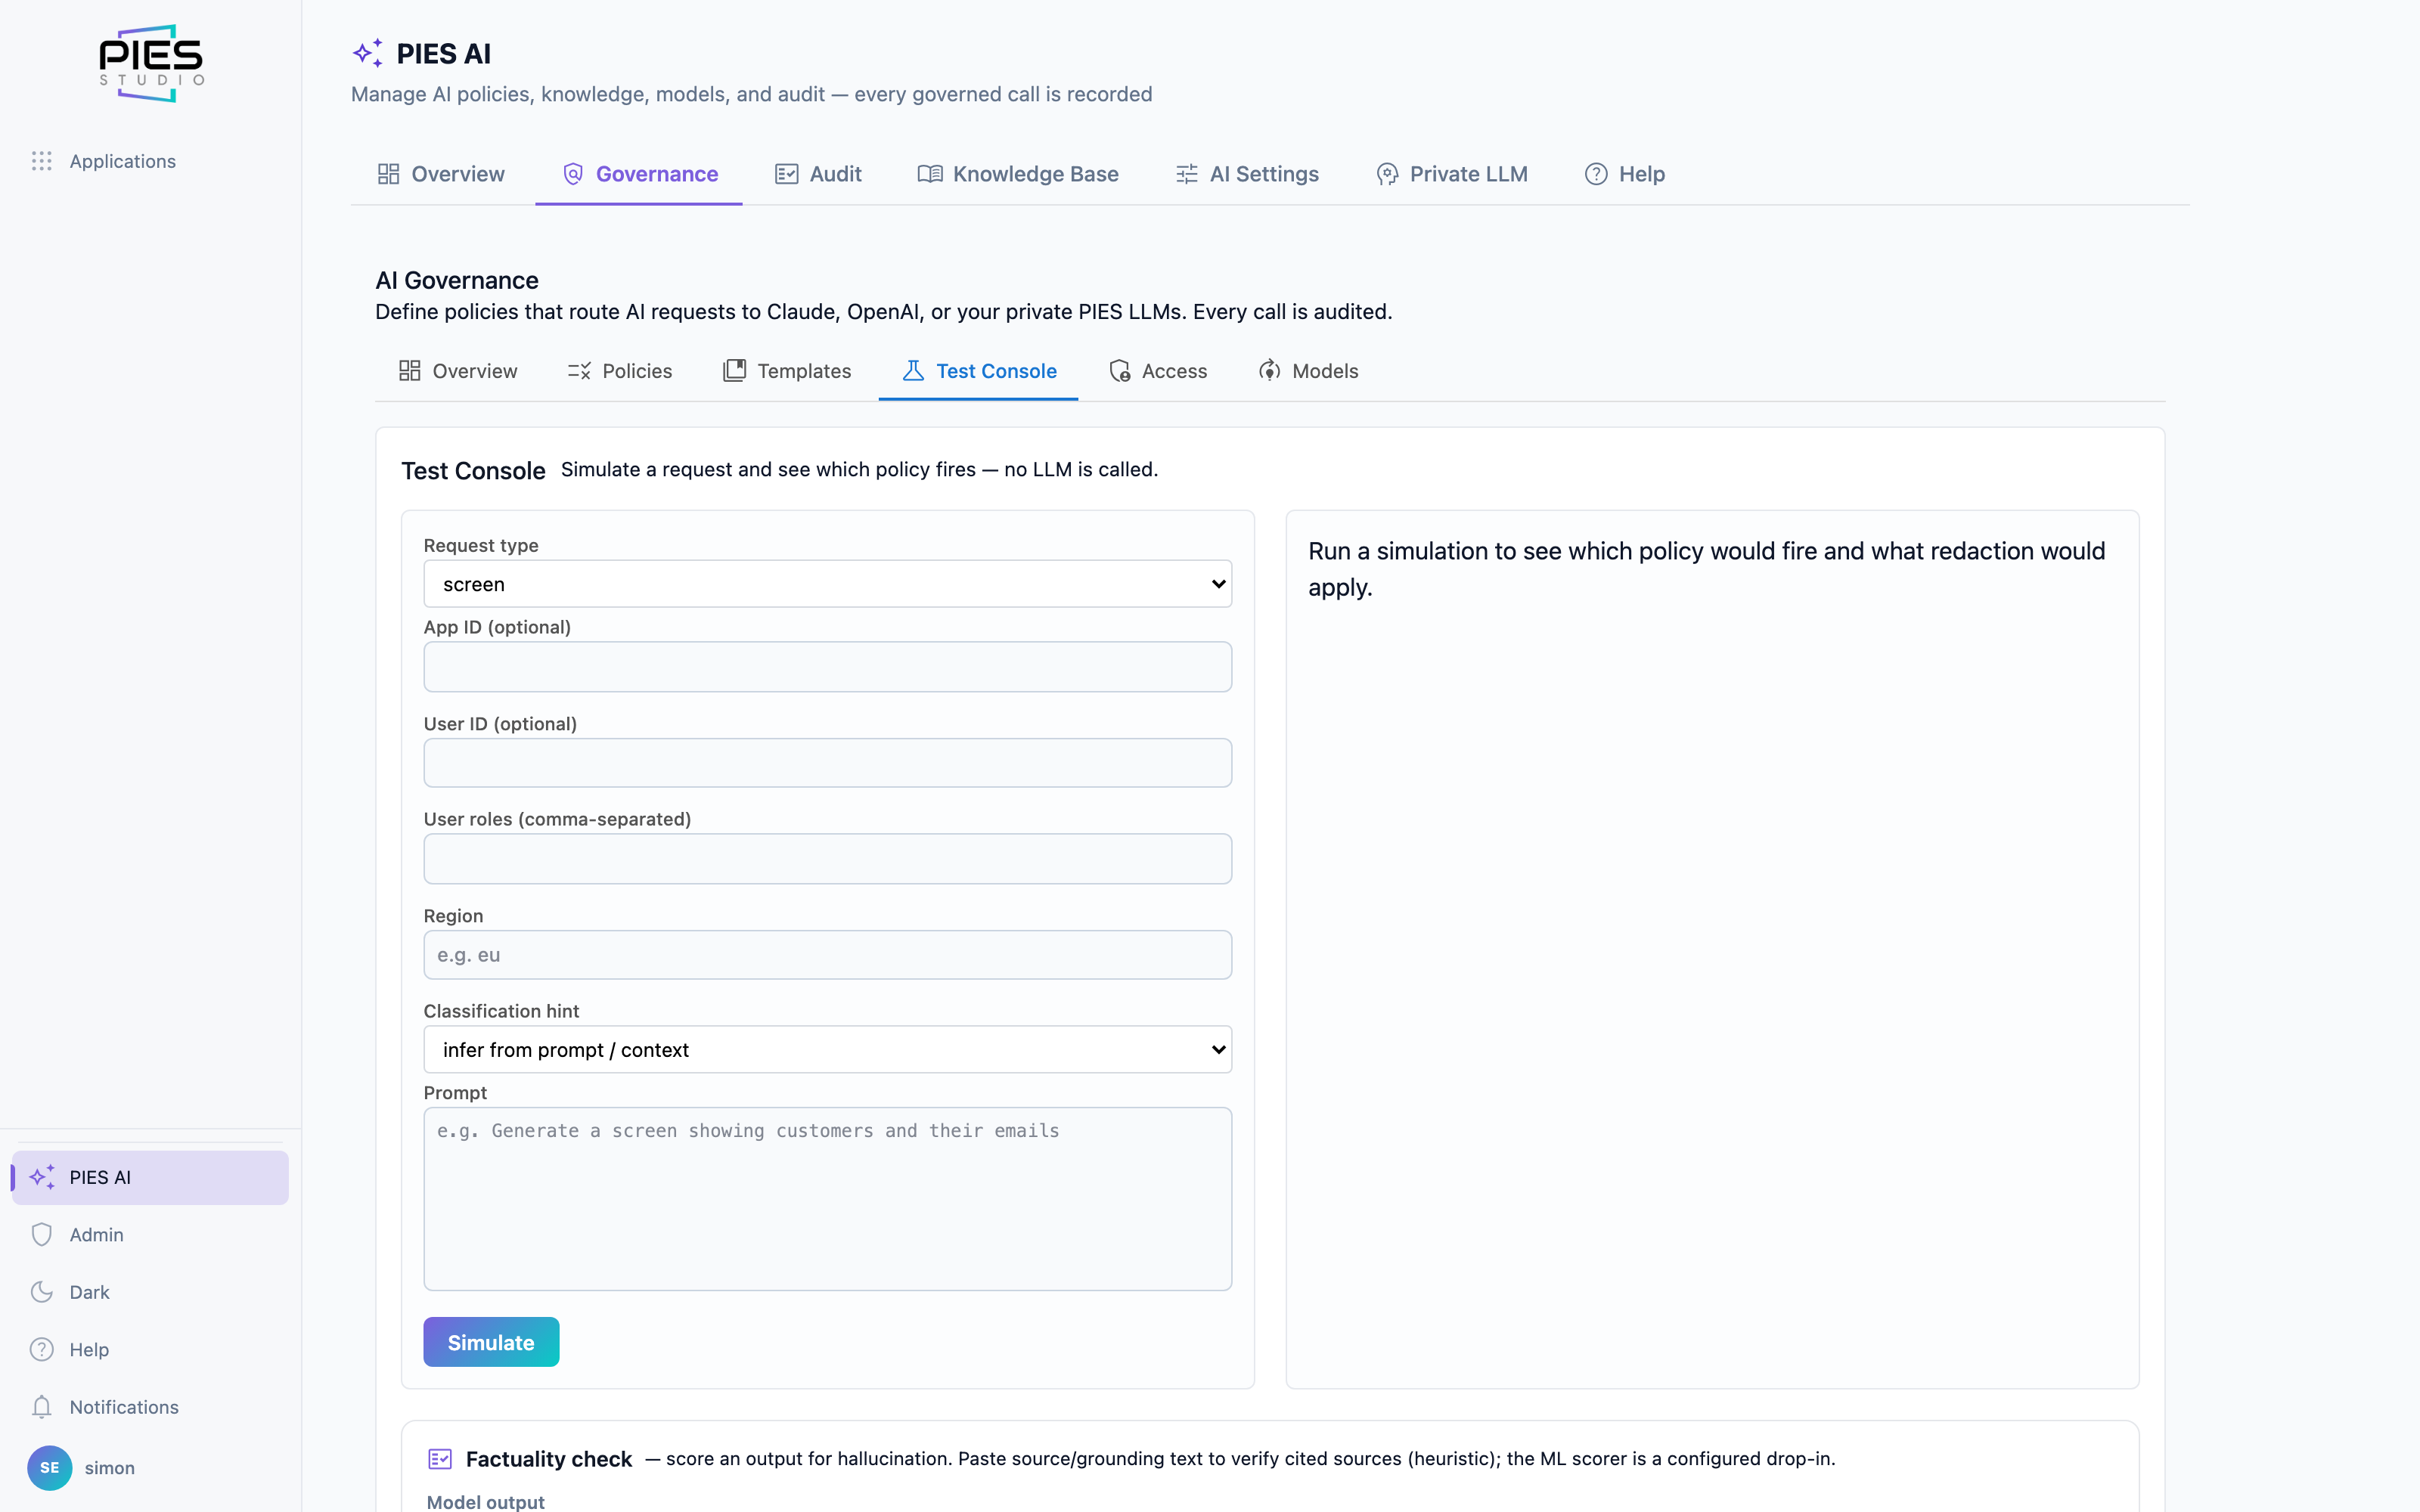
Test the policy set before it bites
Policies are only as good as the traffic they meet, and the way to find out
what yours does is the Test Console
(PIES AI → Governance → Test Console). Describe a request — the
prompt, the request type, optionally an app, a user, their roles and a region —
and it returns the decision the live engine would make: which policy matched,
whether it was allowed, the data classification, the provider and model chosen,
and what redaction would strip. View on a policy draws the same
decision as a diagram, with the matched path highlighted.
A shadow policy is one that never affects a live request. It is
evaluated only when you simulate or replay, which is how you measure what a new
rule would have done to real traffic before you let it route anything. The
Overview counts how many you have.
Overview also lints the set — the usual finding being a policy that can never
match because a broader one above it already caught everything. Priority is the
only thing that decides who wins, so a narrow policy sitting below a
catch-all is dead, not subtle. Lint also warns when several policies share the
same name, so you can tell them apart or remove the copies.
The same page scores an output for factuality: paste a model
answer and the source text it should be faithful to, and it reports how much of
it is grounded and which citations are not.
Heavy work is upgraded inside the policy
A policy that names a cost-efficient model still allows its whole provider,
and not every request is the same size. Where a request is classified
heavy — screen authoring, architecture, a real build — the engine
upgrades to the stronger model within the provider that policy already
allows. The provider, the redaction and the audit trail are untouched; only
the model within an already-permitted boundary changes.
This is why agent and delivery output should not read as weaker than the chat's.
Before it existed, every heavy step of a delivery took the cheaper model the
policy named while chat ran the frontier one, and the screens showed it.
Audit, redaction and knowledge
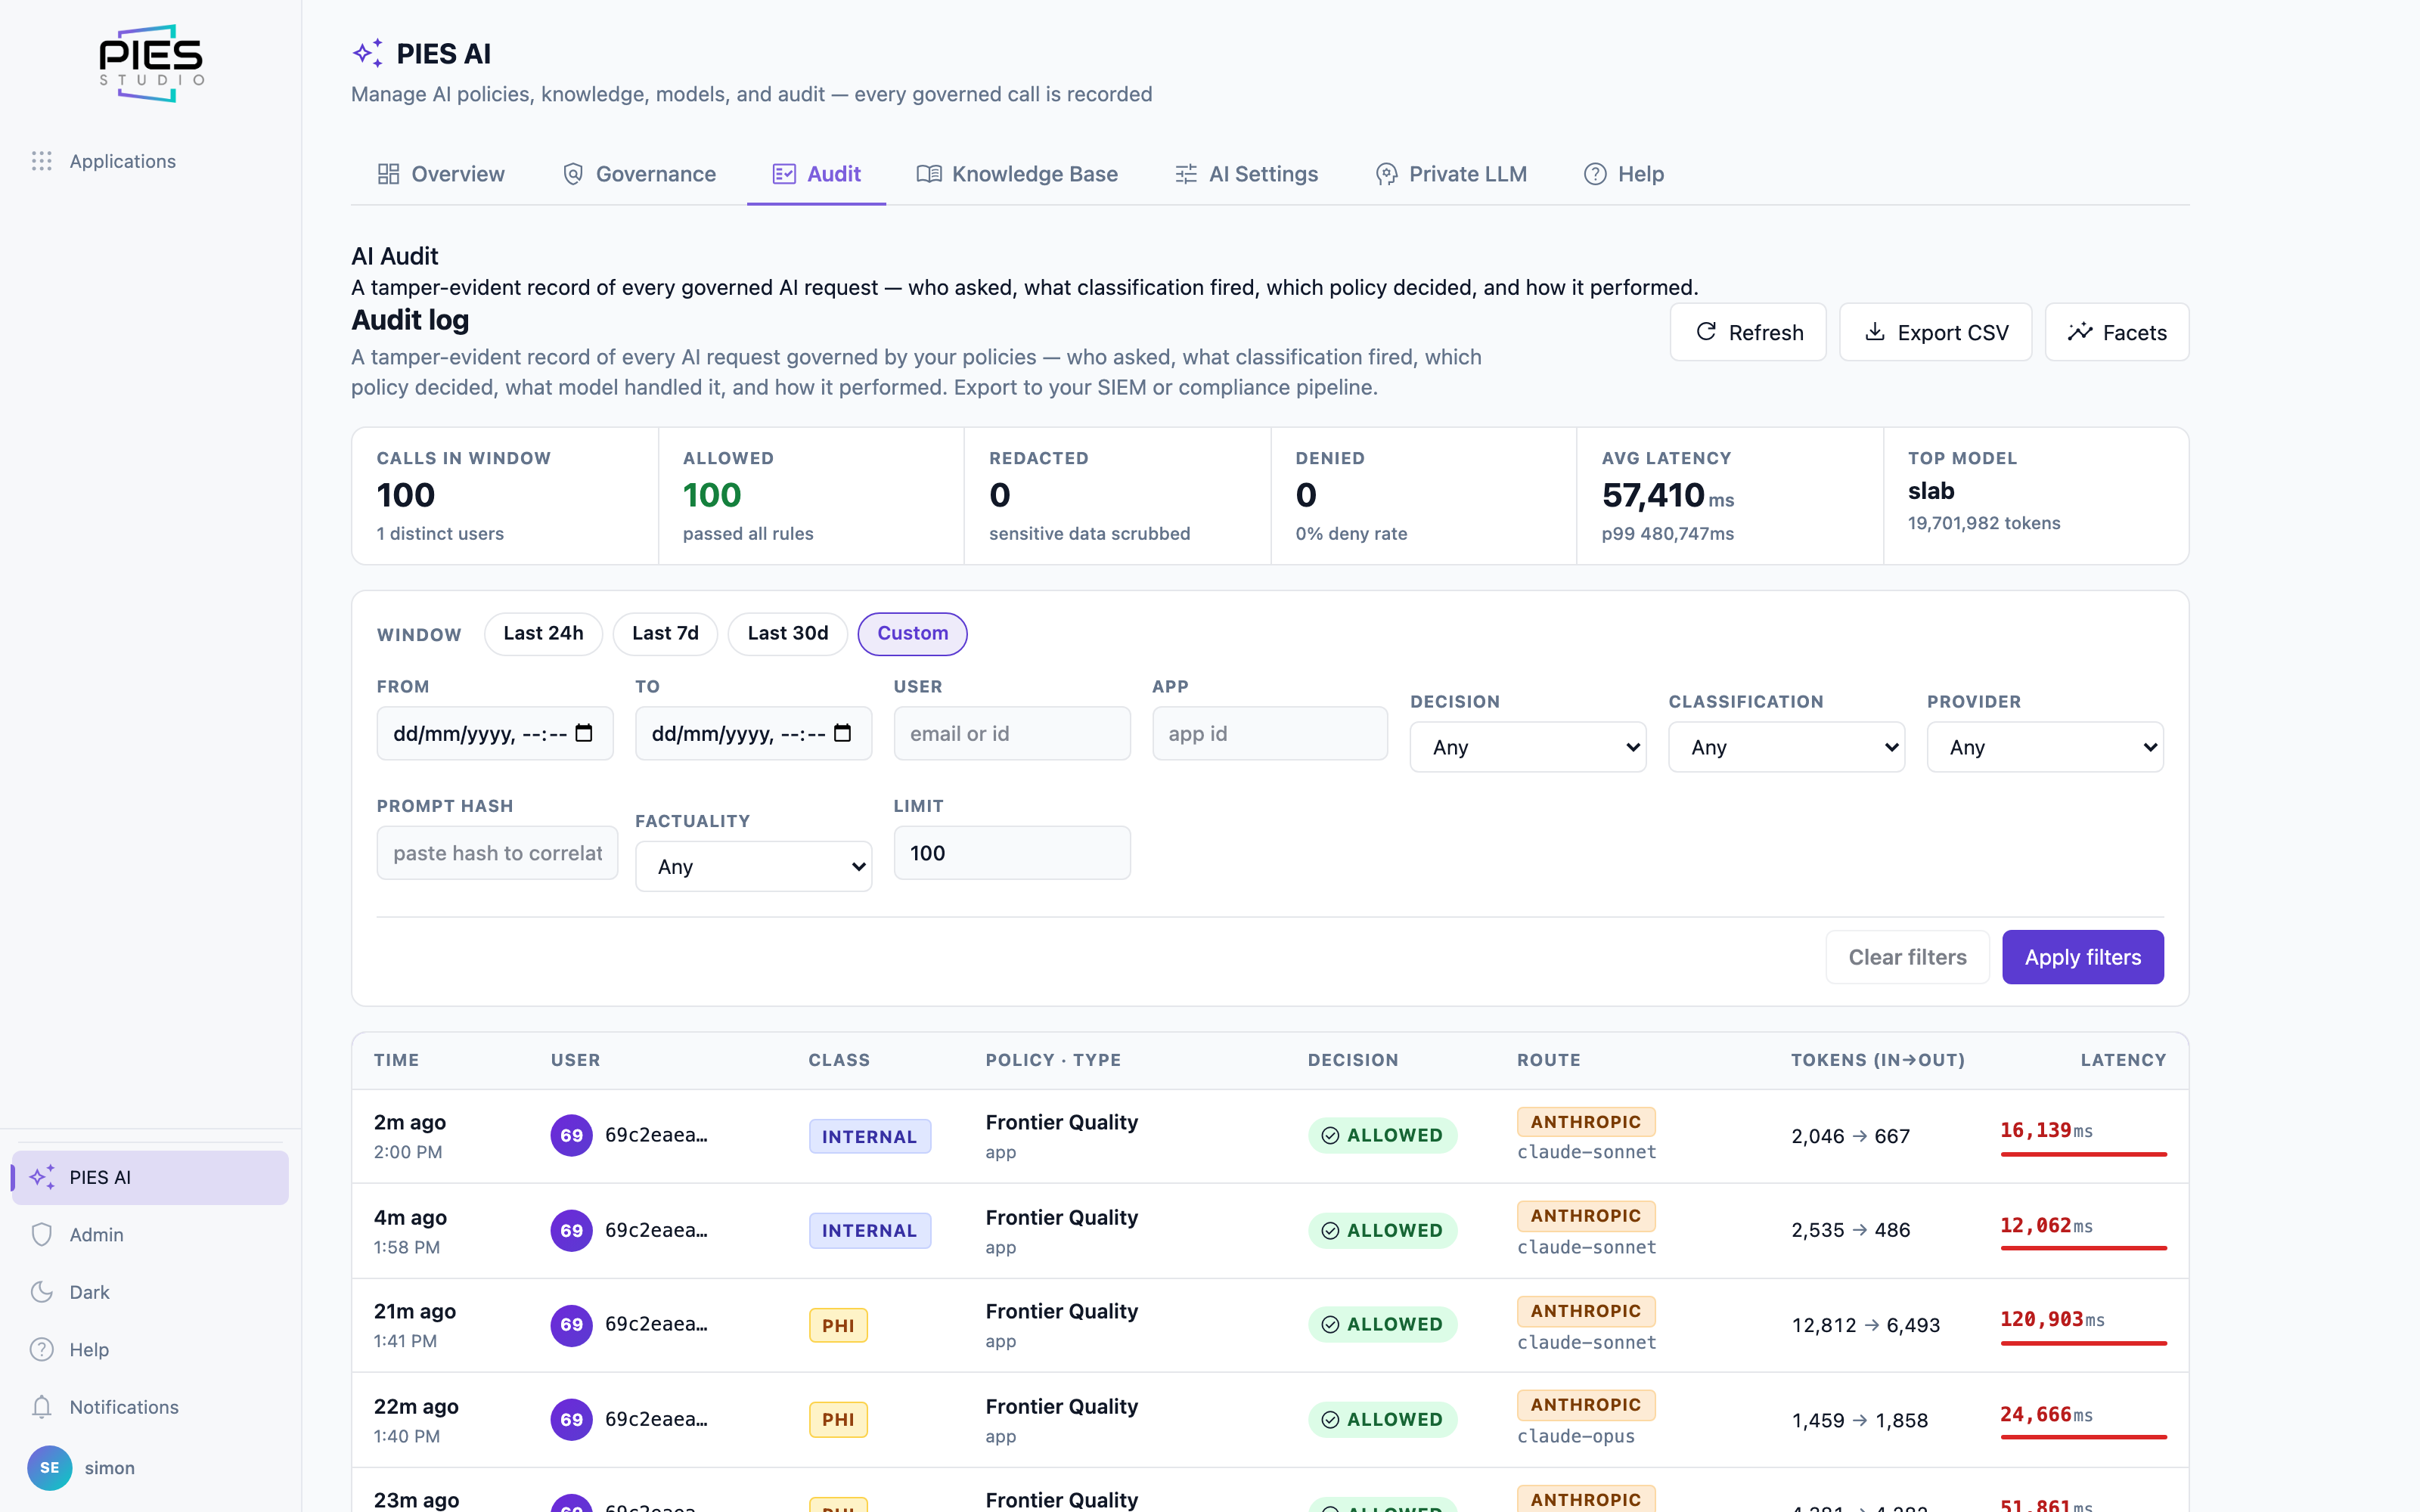
Every governed call is recorded — provider, model, tokens, policy decision
and a factuality score — in a signed, hash-chained audit log. That includes the
assistant inside your deployed applications: every message an end user
sends is evaluated against policy as it arrives, redacted, routed, and audited
against the tenant that owns the app and the user who typed it. The
Data class column is the data classification of the content
(internal unless something sensitive is detected), not where the call
was routed — an internal row beside an Anthropic route means ordinary
content that policy allowed to go to the cloud. The User column
names the person (name or email) and the app by name, with the raw ids in a
tooltip, including other people's apps.
The search box matches what the table shows — an app or agent name (or just a
word of it), a person's name, a model or a request type — as well as raw ids. The
figures across the top (calls, allowed, redacted, denied, deny rate, latency and
top model) follow the search, so they describe only the rows in view.
Avg latency is per call: it averages single model calls and
leaves out builds and agent runs, which take one time for a whole multi-step
turn. When only builds or agent runs are in view it shows
Avg turn time per turn instead.
AI Settings changes on the Audit tab lists who changed a
provider key or the PIES Private AI server URL, and when, with the value before
and after. Keys appear only as a fingerprint, never in full.
Content can carry more than one class, and a policy matches every class
detected, not just the first: a card number typed into an app classified PII
still meets your PCI rules. When a policy is scoped to applications, the policy
editor picks them by name and the policy list shows app names.
Redaction strips sensitive data before it reaches a model, from everything the
model is sent: your request, Knowledge Base and application context, the
conversation history and the results of tools the AI calls. An unrecognised
redaction mode refuses the request rather than sending data unmasked. The
Knowledge Base holds documents the AI may build against, and
per-application Artefacts (a BRS, a specification) are fed into
builds so the AI works from your requirements rather than its own assumptions.
Knowledge Base text is classified when it is uploaded and personal or card data
in it is masked before it is stored; every create, update and delete is written
to the signed audit log. Opening a source shows its real classification and what
was redacted, its scope (Organisation or App), how it entered
(uploaded by an admin, an app artefact, an AI tool, an import or the seed) and
whether it is indexed. Search over the Knowledge Base works without any cloud
provider: when no OpenAI key is configured, PIES AI indexes documents with a
built-in local embedder that runs inside the PIES AI service and never leaves your
network, so Knowledge Base search keeps working under Air-Gapped. The local
embedder matches on words and phrases rather than meaning, so a search finds
documents that share wording with the question. A scanned PDF with no text
layer is read by Claude only when your AI policy allows it: the request is
checked against the policy and written to the audit log, and under
Air-Gapped (or any policy that does not allow Claude) it is refused, so
the document never leaves your network and the artefact shows why its text could
not be read. Organisation-wide sources reach every app build, Studio AI
answer, agent run and the chatbot inside your published apps, in your
organisation and only yours.
What PIES AI remembers
PIES AI → Memory (administrators) lists everything PIES AI
remembers, in three scopes. Organisation notes apply to every app
build, Studio AI answer, agent run and in-app chatbot reply in your organisation,
whichever AI provider answers, with personal data redacted under your policies; an
edit reaches the chatbot from its next message. Add one in the box at
the top, or say "remember for the org: …" in chat. App
notes are what PIES AI keeps for one app's builds: when a build learns a lasting
fact about the app (say, "job numbers always start with HFS-"), it saves it and
the chat shows saved notes about this app; later builds of that app read
these notes first. Agent notes
are an agent's own notebook for its runs. Each note shows where it came from, who
wrote it and when; you can edit or delete any note, and promote an App or Agent
note to the organisation. Every note, whichever scope and whoever writes it (you,
a build, an agent run or a chat), passes the same classification and masking as
Knowledge Base text before it is saved, so an email address or card number is
stored as [REDACTED:email] or [REDACTED:credit_card], and
a bare 10-digit number is masked as a phone number. If the check cannot run, the
note is not saved. Each edit or delete keeps the earlier text with who wrote it,
when, and who replaced it (the last 50 versions per note): History
on a note lists them with Restore, and Recently
deleted brings a deleted note back. Restoring keeps the current text as a
version too.
PIES Private AI
Point Studio at a model running on your own GPUs and no prompt, application
definition or data leaves your network. Installing it is covered in the
PIES Private AI manual; connecting it is
a URL and a key under PIES AI → AI Settings — the PIES AI
entry in the workspace sidebar, whose tab row is Overview, Governance, Audit,
Knowledge Base, Memory, AI Settings, Private LLM and Help.
AI Settings shows each saved provider key's real health, not just that a key is
stored: a key the provider rejects, that is out of credit or rate limited reads
Key rejected, Out of credit or Rate limited in red, with
the provider's message in the tooltip. Credit is checked on a schedule, and while
a provider is out of credit administrators see a banner across Studio.
These key and credit checks follow your governance policies too. When a policy
such as Air-Gapped refuses a hosted provider, PIES does not contact it at all:
Test connection for that provider reports it as skipped, and its credit status
reads skipped with the note that PIES made no call to it. Every check,
made or skipped, is recorded in the Audit tab.
Test connection on the PIES Private AI card calls your server the
way real requests do, so any server with the standard /v1/models
route passes. It only says the service rejected this API key when the
server actually refuses the key. A server that answers "not found" is reported as a
wrong server URL or a stopped server, and a server error is reported as the service
being up but failing.
PIES Private AI has a single row in the provider list, showing the server it
uses (or this machine when no URL is set) and the model that server has
loaded; that is the server routing sends private requests to. Once connected, the
row offers Change key, Change server URL,
Manage models (which opens the Private LLM tab),
Remove and Test connection. Change server URL
saves a new address without re-entering the key; run Test connection afterwards
to check the new server answers. Change key replaces the key without ever showing the old
one. Every change to keys and the server URL is recorded, with keys shown only as
a fingerprint — see AI Settings changes on the Audit tab.
PIES Private AI is a Preview in this release: its row, the Private LLM
tab header and its models in the model pickers carry a Preview
badge (great for chat and simple builds; larger redesigns are improving). The
recommended model is Claude Opus, used with your own Anthropic
key: the Anthropic row in AI Settings, the Claude Opus card in
Force one model and Claude Opus in a policy's preferred-model
picker are marked Recommended.
Force one model only accepts a model whose provider is connected.
Choosing, for example, an OpenAI model while OpenAI has no API key (or Azure
without its endpoint) is refused with OpenAI is not connected. Add its API key
under Providers before choosing …, and the active model stays as it was. Add
the key first, then choose the model; Auto and PIES Private AI
models are not affected.
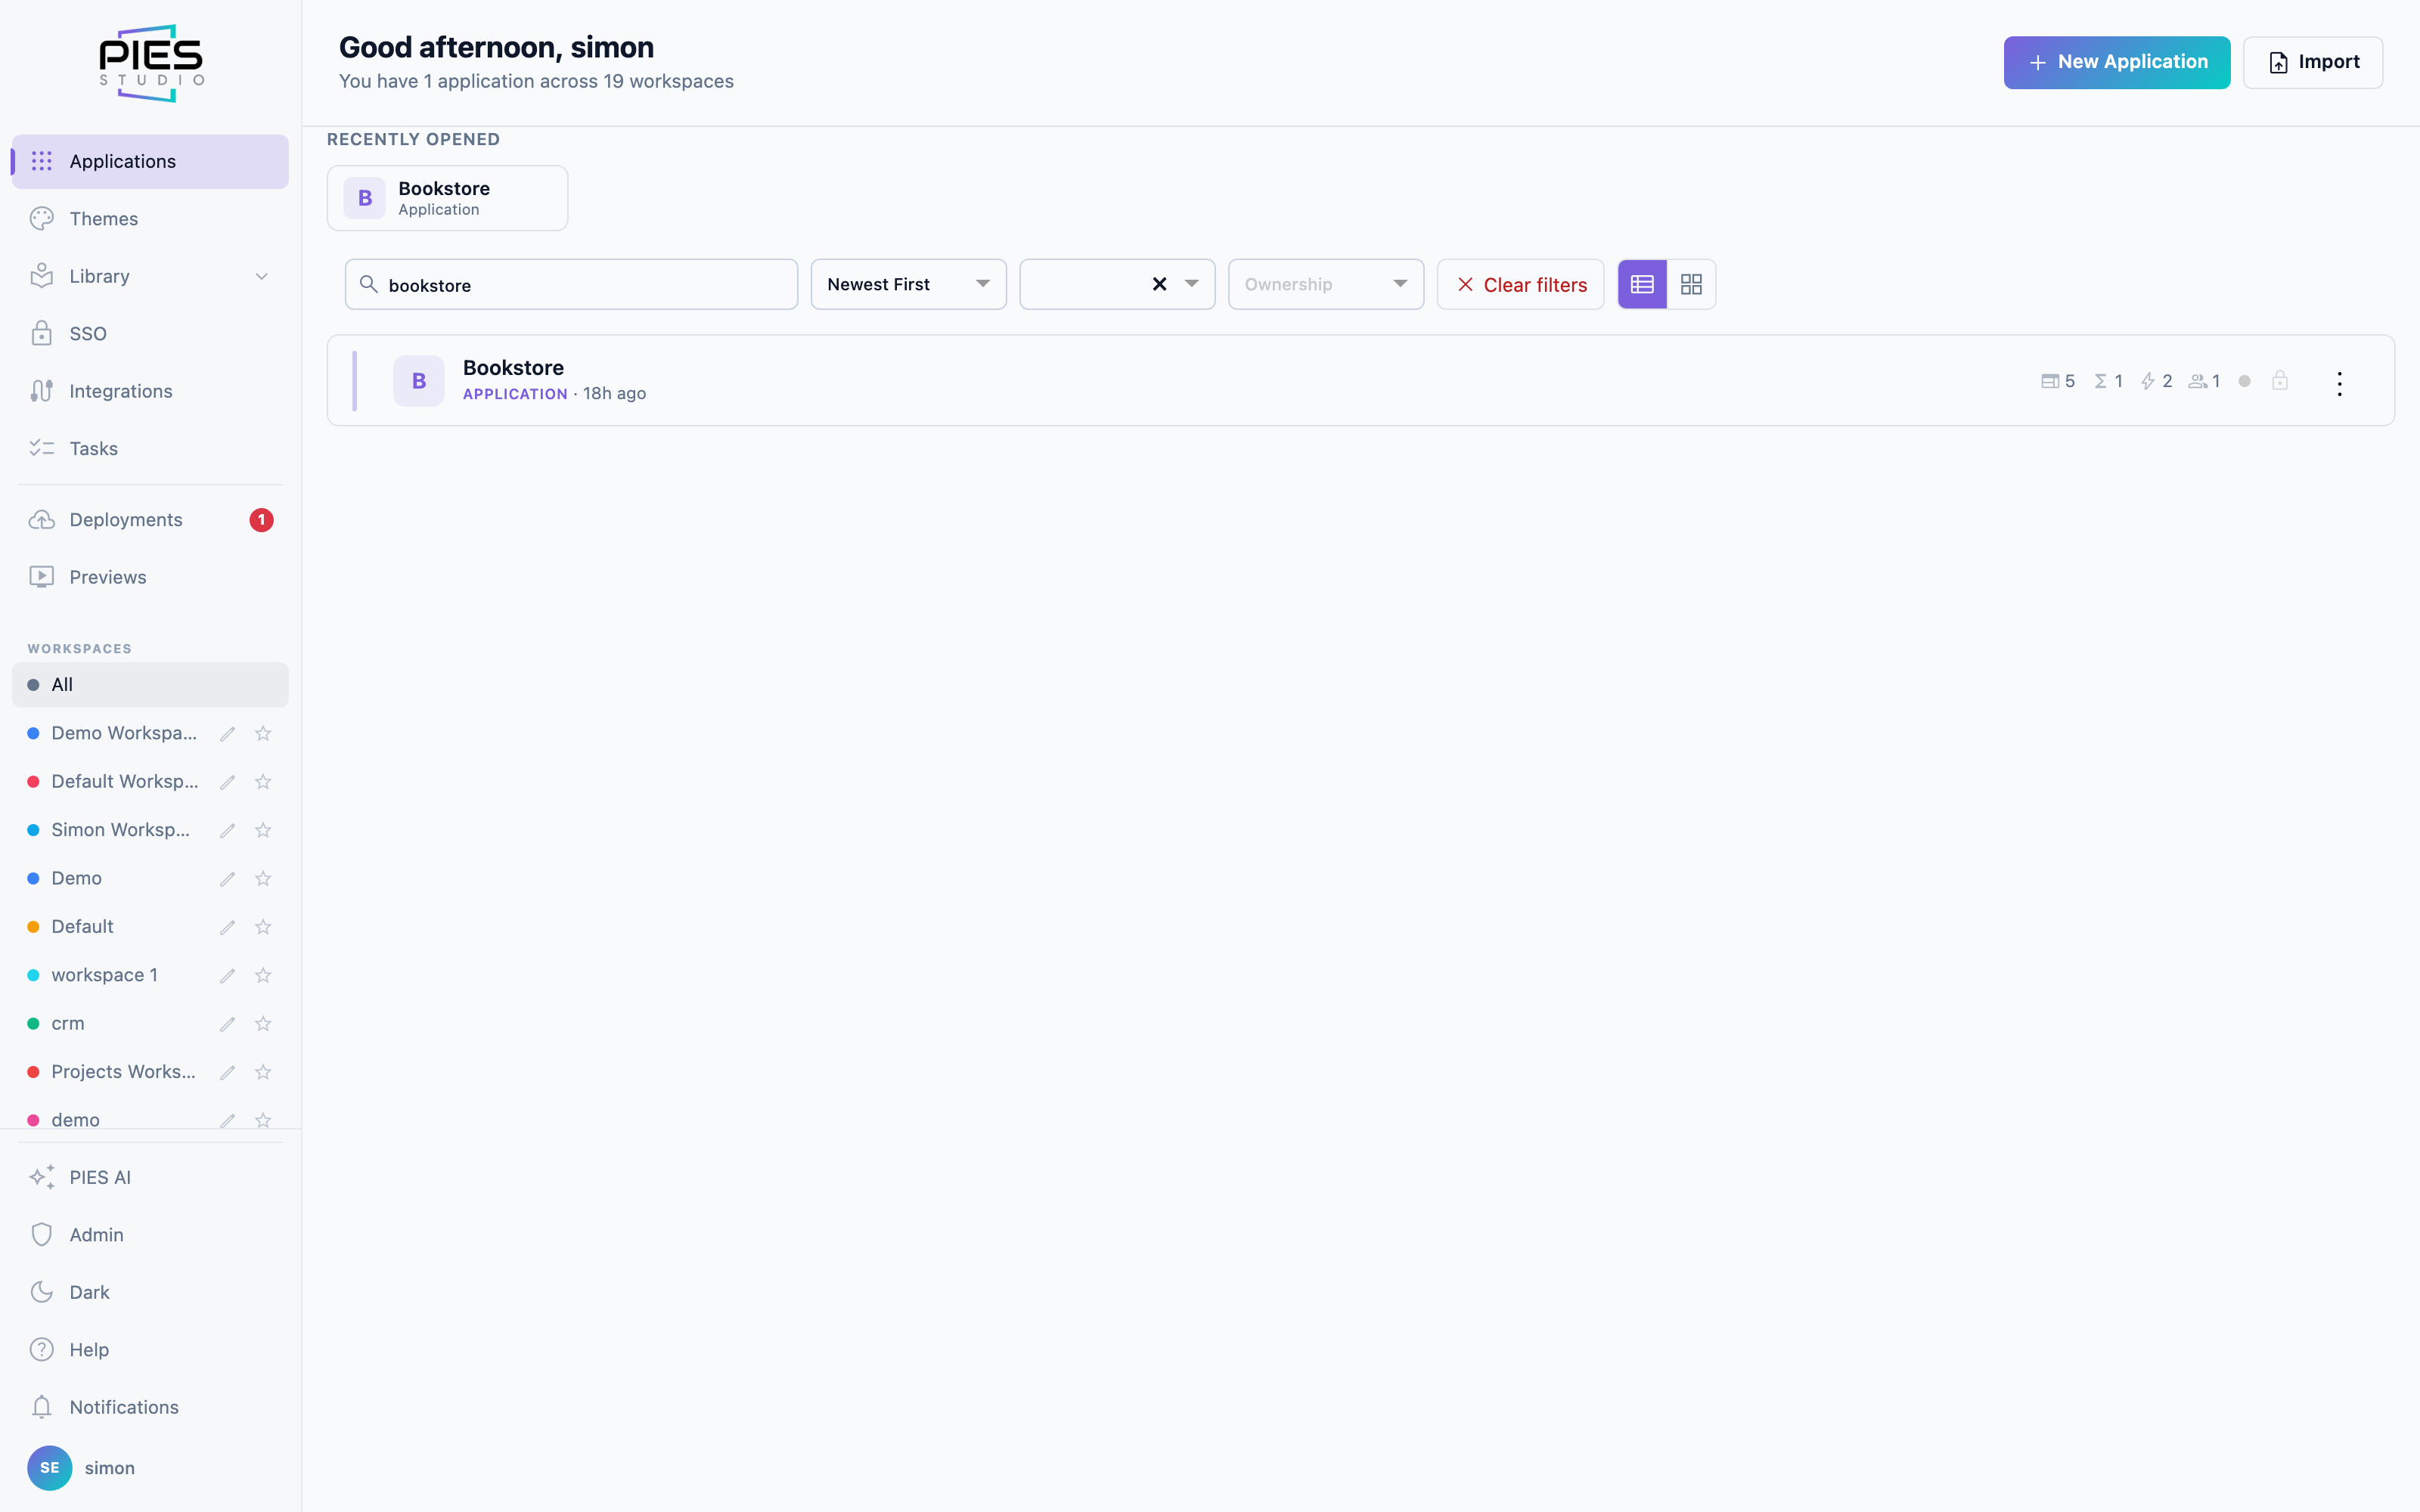
12 · Integrations
Applications rarely live alone. These surfaces let an application call out, be called into, and share credentials safely.
Integrations
Integrations, in the Organisation group of the sidebar, connects the platform to the systems around it: databases, cloud providers (AWS and Azure) and Kubernetes clusters for deployment, and Apple and Google Play accounts for publishing mobile apps. A connection is made once and reused by every application. Source control and the Microsoft Teams connector are set up separately, as the Source Control and Teams Connector tabs under Admin.
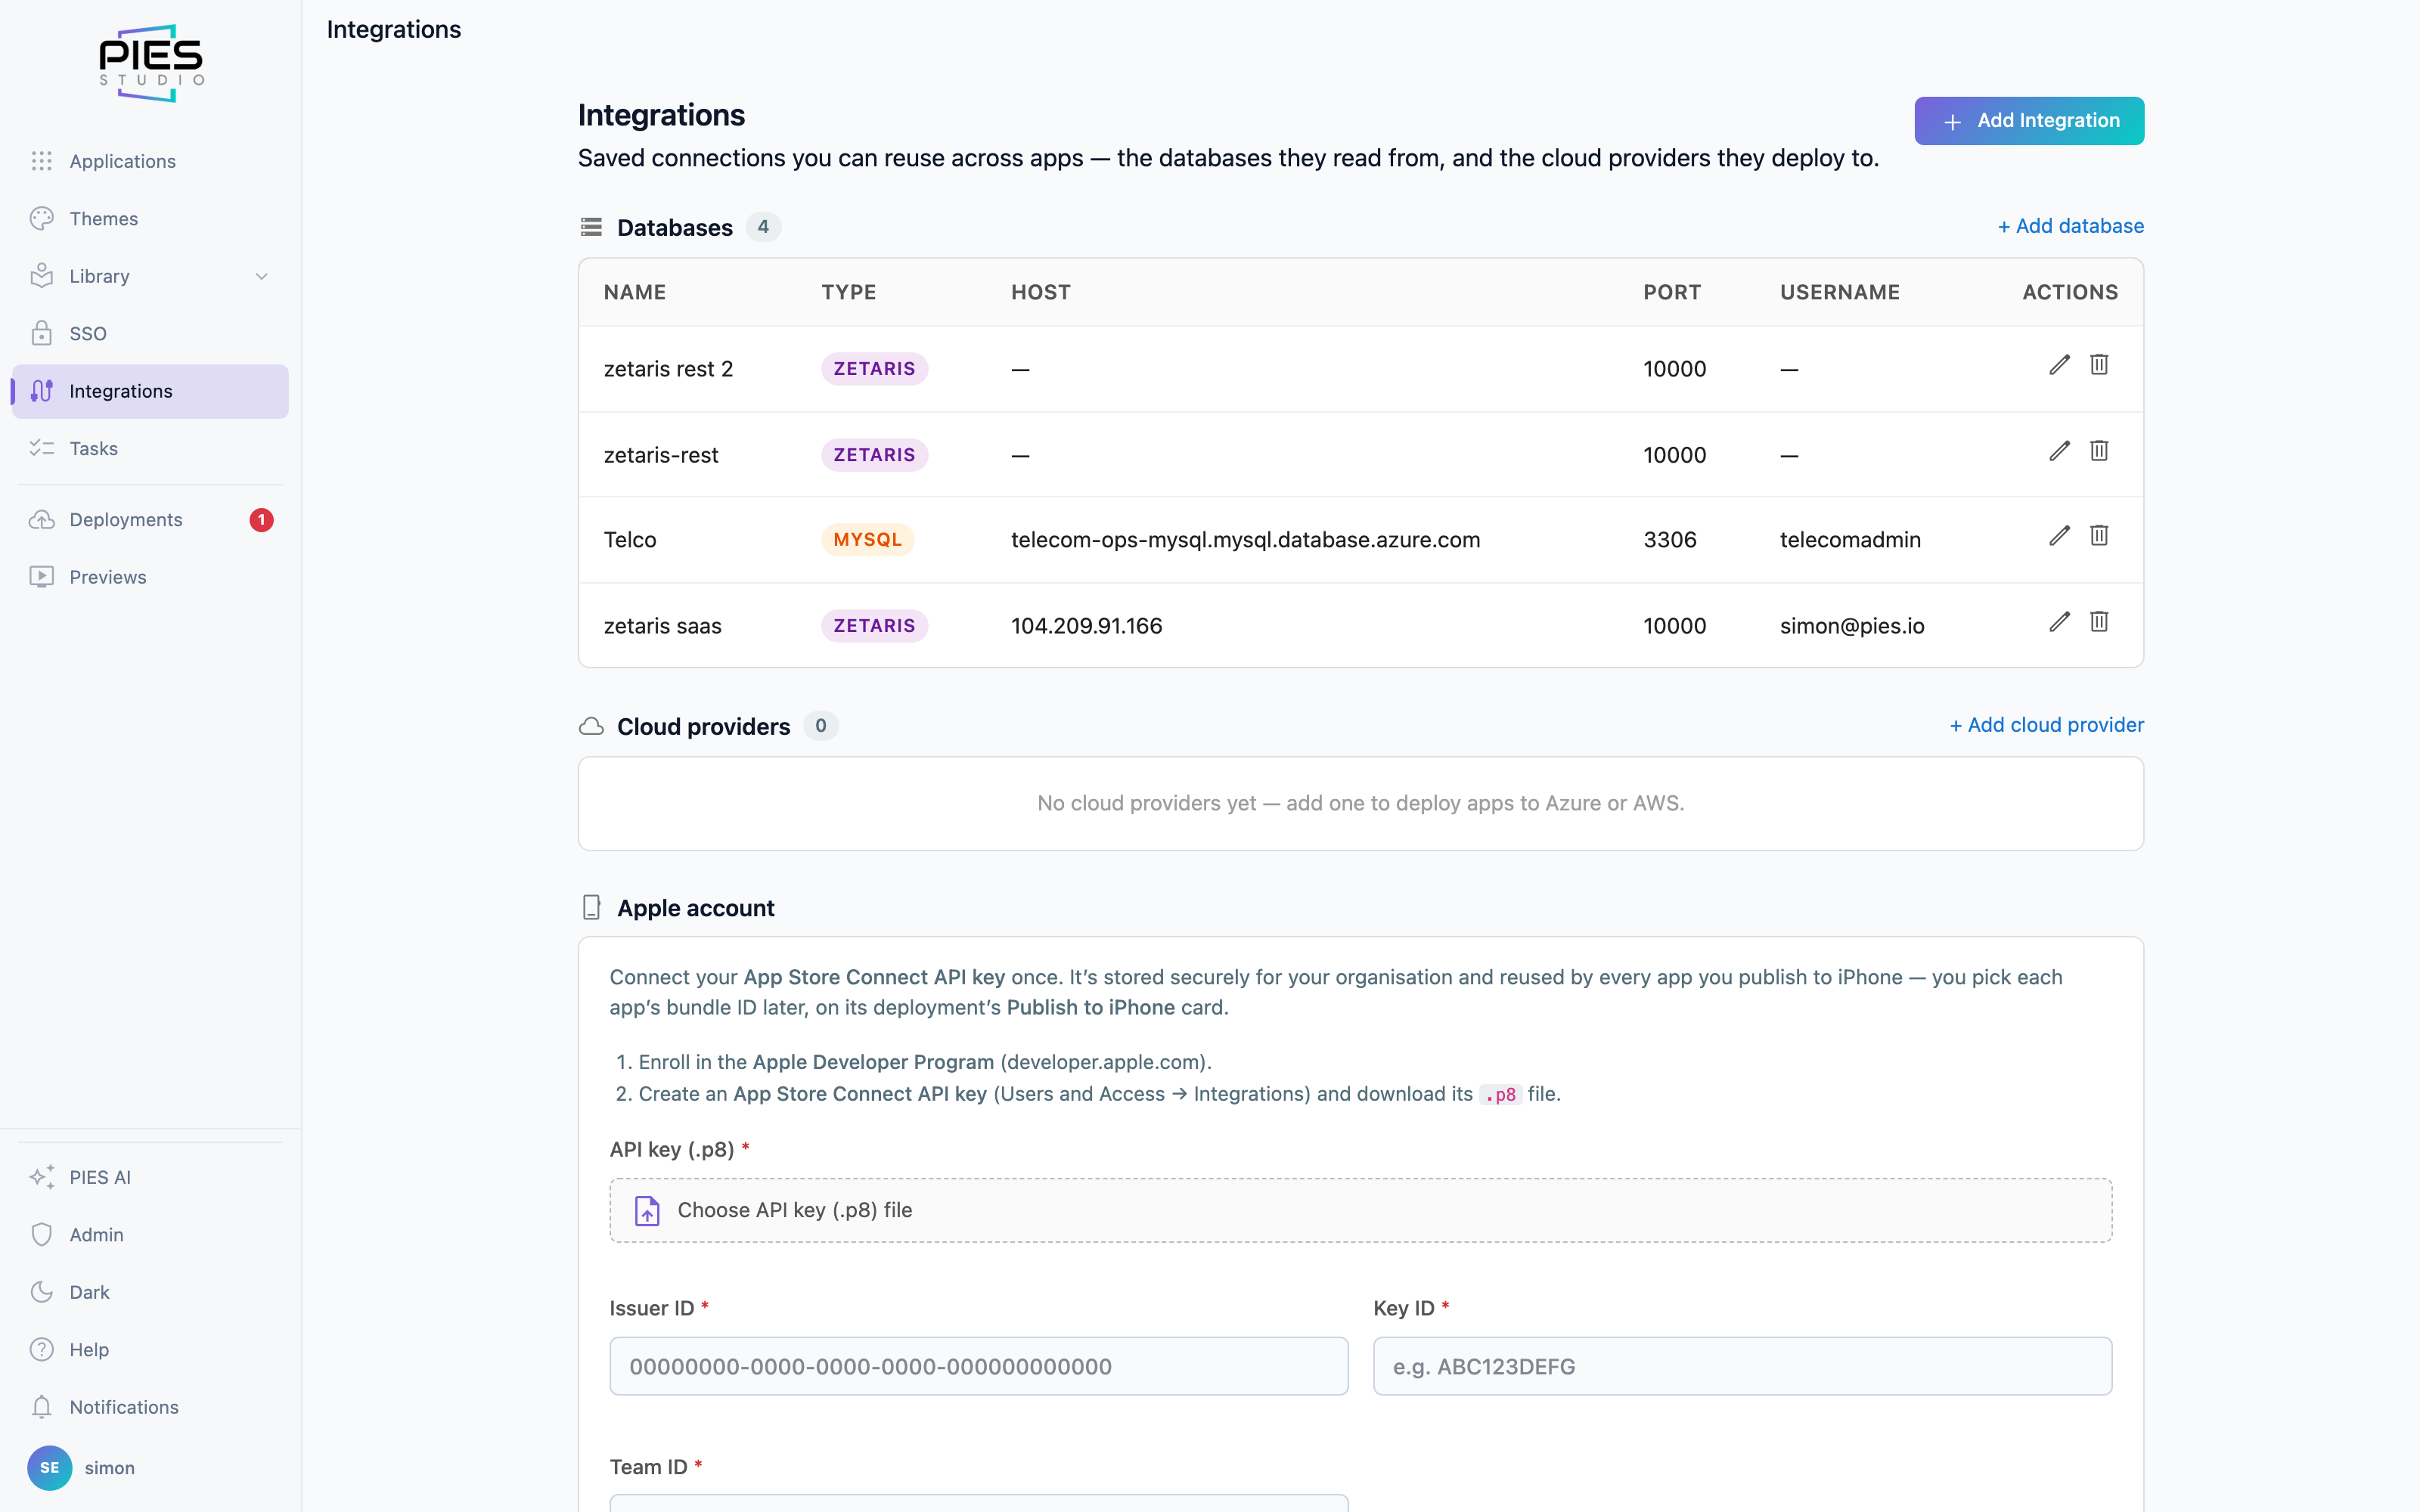
REST endpoints and outbound calls
API Connections — under Configure in the
explorer — defines the outbound calls your application makes: the
+ opens New Endpoint (name, method, URL such as
https://api.example.com/v1/resource/:id, headers, query, body and the
expected response, with a Test button). A REST Call step then
uses a connection from a function, with the response mapped into your own model.
In the other direction, every generated application already serves its own REST
API, documented as Swagger: open /docs (or
/swagger/index.html) on the running app, fetch the spec from
/openapi.json, or use API docs in the build console's
Preview tab while a preview runs.
Credentials for both live in Configure → Secrets &
environments → Secrets, never in the application definition.
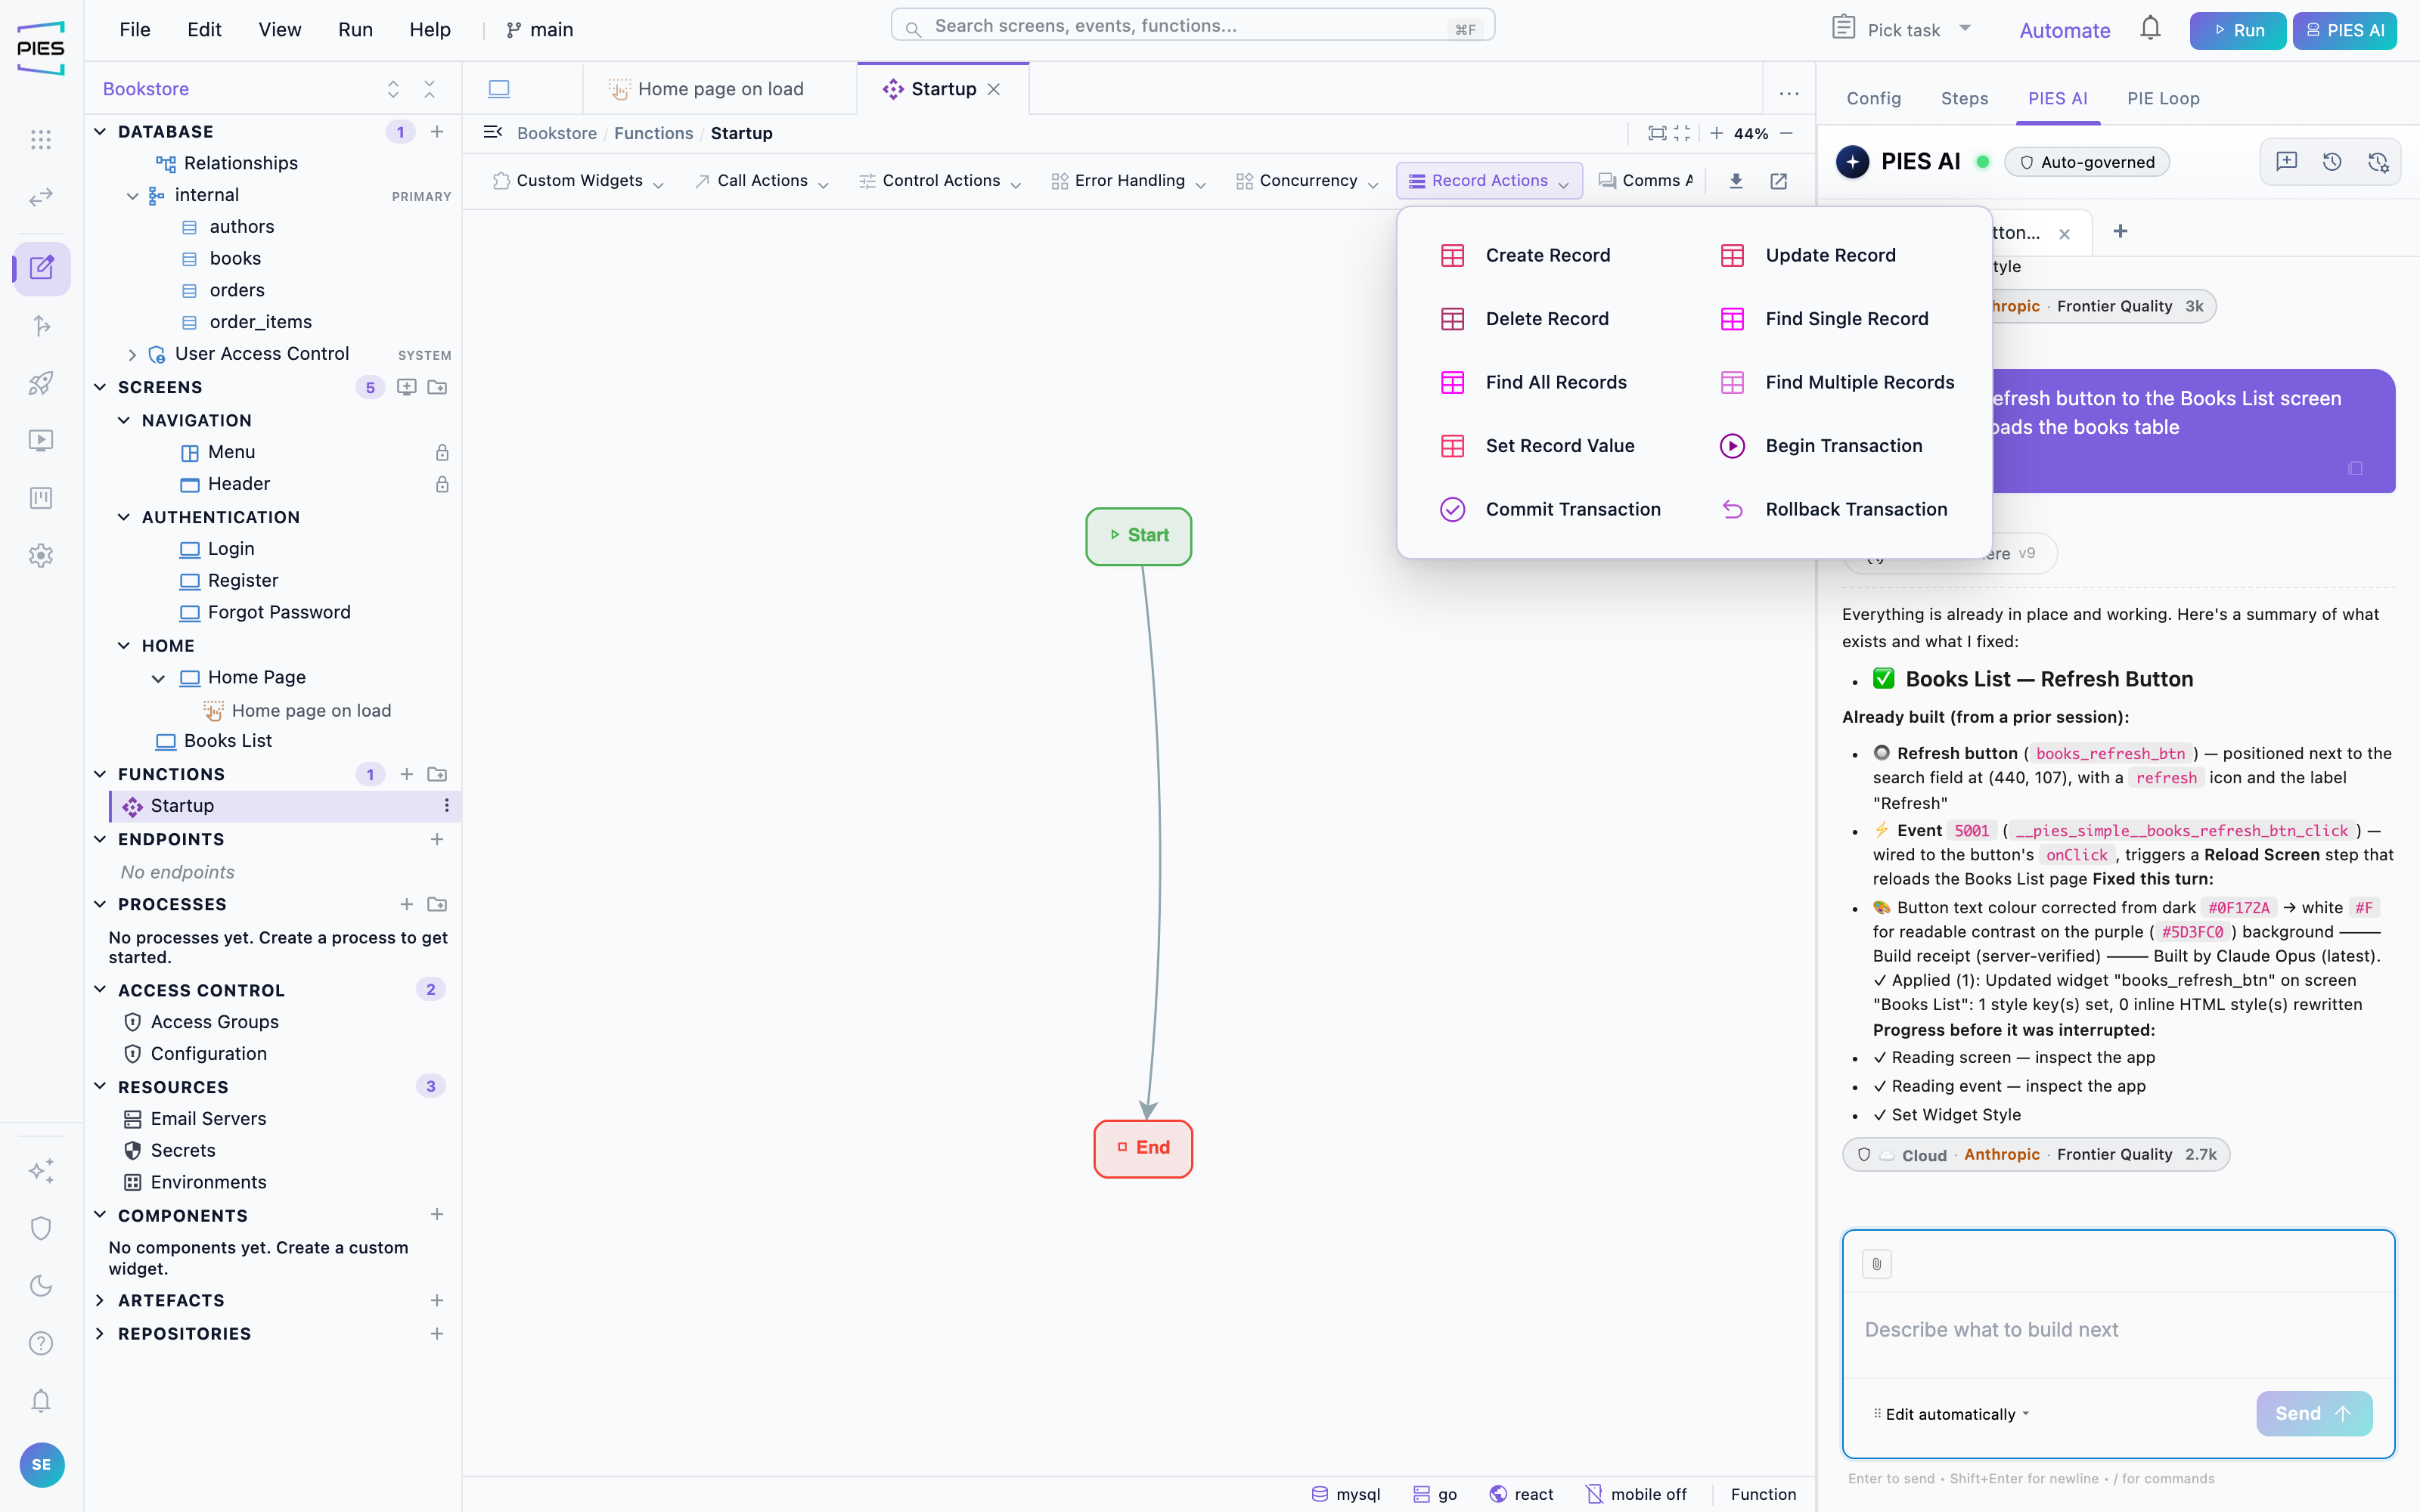
13 · Building and previewing
A preview is a real build: the generated code is compiled and run against a real database. This is where errors surface — an AI chat receipt is not proof that an application builds.
Build
▶ Run, at the top right, opens the build console: pick the
environment beside the green Build button — Preview
by default — and build. The console reports each layer as it goes — the database,
the Go back end and the React front end — with a percentage and a live output
log, and a red Stop while it runs.
The caret beside Run is the same actions as a menu: Build and
Deploy open a submenu per environment (Build Preview;
No deploy targets configured until you set one), alongside
Problems and Build and export. Until an
application has been built, the menu says build required.
A preview build resets the preview's data to the rows on the Data
tab, so records added or changed in the preview are lost. Build asks first —
This resets preview data to your Data tab rows — with
Cancel, Build and Don't show again.
Building for a deployment does not ask.
The PROBLEMS tab groups anything that failed by area — Database,
Interfaces, Events, Functions, Other — each with a count, and offers
Analyse & Fix with Pie Loop and a per-item Fix.
An application with build errors never reaches preview, so clear
these first.
Preview the running application
On a clean build, ▶ Run starts the preview and the console grows a PREVIEW tab: a health panel listing the front end, the back-end API and the database with their status and latency, the external data sources it connected to, and rails for tests and logs. It also shows how long the session has left. When the services are up, Open Preview opens the real application in a new tab — logging in, saving records, navigating between screens.

What Build actually does
Build turns your definition into a real application — a front end, a Go back end and a database schema — and compiles it. It is not a preview of the canvas: it is the same generation that produces the application you deploy, run against the Preview environment. That is why a build failure is worth reading rather than retrying; it is telling you the application as defined cannot be produced.
Read PROBLEMS before the preview
An application with build errors never reaches preview, so a preview that looks stale is usually a build that failed. PROBLEMS groups every failure by area — Database, Interfaces, Events, Functions — with the object at fault named. Clear it top to bottom: a missing table breaks the screens that read it, so the first error often explains the rest.
The preview is a real deployment
Preview runs your application with its own database, its own sign-in and its own data — not a mock. You can register a user, save a record and see it persist. This is also why it takes a moment to come up, and why a preview left running holds resources until it is closed. Sample data is generated so screens have something to show before you have entered anything.
The change loop
Change the definition, build, look. Small changes rebuild quickly because only what changed is regenerated. If a change does not appear, check in this order: did the build succeed, is the preview session the current one, and is the widget actually bound to the data you changed. In that order the answer is usually the first question.
14 · Deploying
Deployment takes the same generated code beyond the preview sandbox — to a container host, a Kubernetes cluster, a cloud account you connect, or a mobile app.
Deploying to an environment
Deploying is an action on an environment. Open
Environments in the sidebar (under This app, outside the
editor), pick a target — Docker and Kubernetes deploy to infrastructure you
control, AWS and Azure use credentials connected in Administration — and choose
Deploy on it. A new environment starts with no deploy target and
says so. Each deployment is versioned, so you always know which build is live.
Inside an app the surface is always Environments; the cross-app roll-up
of everything running lives under Deployments (Operate) in the
sidebar. See Chapter 17.
The deployment control panel
A live environment shows Live in the Environments list; click it to open its deployment control panel — service health and latency, live endpoints, version, and an activity log — all on the environment, not in a separate place. From the control panel a deployment can be restarted, scaled, redeployed to a newer build, or torn down, and its logs are readable there. Restart All asks you to confirm in a Restart all services dialog — user data is kept — and each service then shows Restarting, then Checking, until its health check reports it healthy or down. Rolling back is redeploying an earlier version. An active deployment still on an older build carries an amber Serving previous version badge — a failed publish that keeps the old version up never looks healthy. The control panel also has an Agents tab for the agents running inside it, an Operations panel naming who runs it, and Open as administrator, which signs you into the running application without its administrator password. A live environment cannot be deleted, and only its name can be changed while it runs — undeploy it to change its target or settings.

Mobile
Switching an application to mobile generates a Flutter application from the same definition — the same data model, functions and events, rendered natively. From there you can preview it, download the APK, or take it through to a store listing. Desktop and mobile stay in step because both are generated from one source.
15 · Views PIES has no widget for
A calendar, a board, a timeline — some views have no standard widget. PIES builds them as a coded component and, more importantly, connects them to your data: the query that reads the rows, the event that runs when the page opens, and the delivery of those rows into the component.
Ask for the view
Describe the view rather than the widget — the time range, what each column represents, what a single entry shows. You type this into PIES AI exactly as in chapter 3; what follows is what comes back. PIES recognises that no standard widget fits, writes the component, and puts it on a new screen.
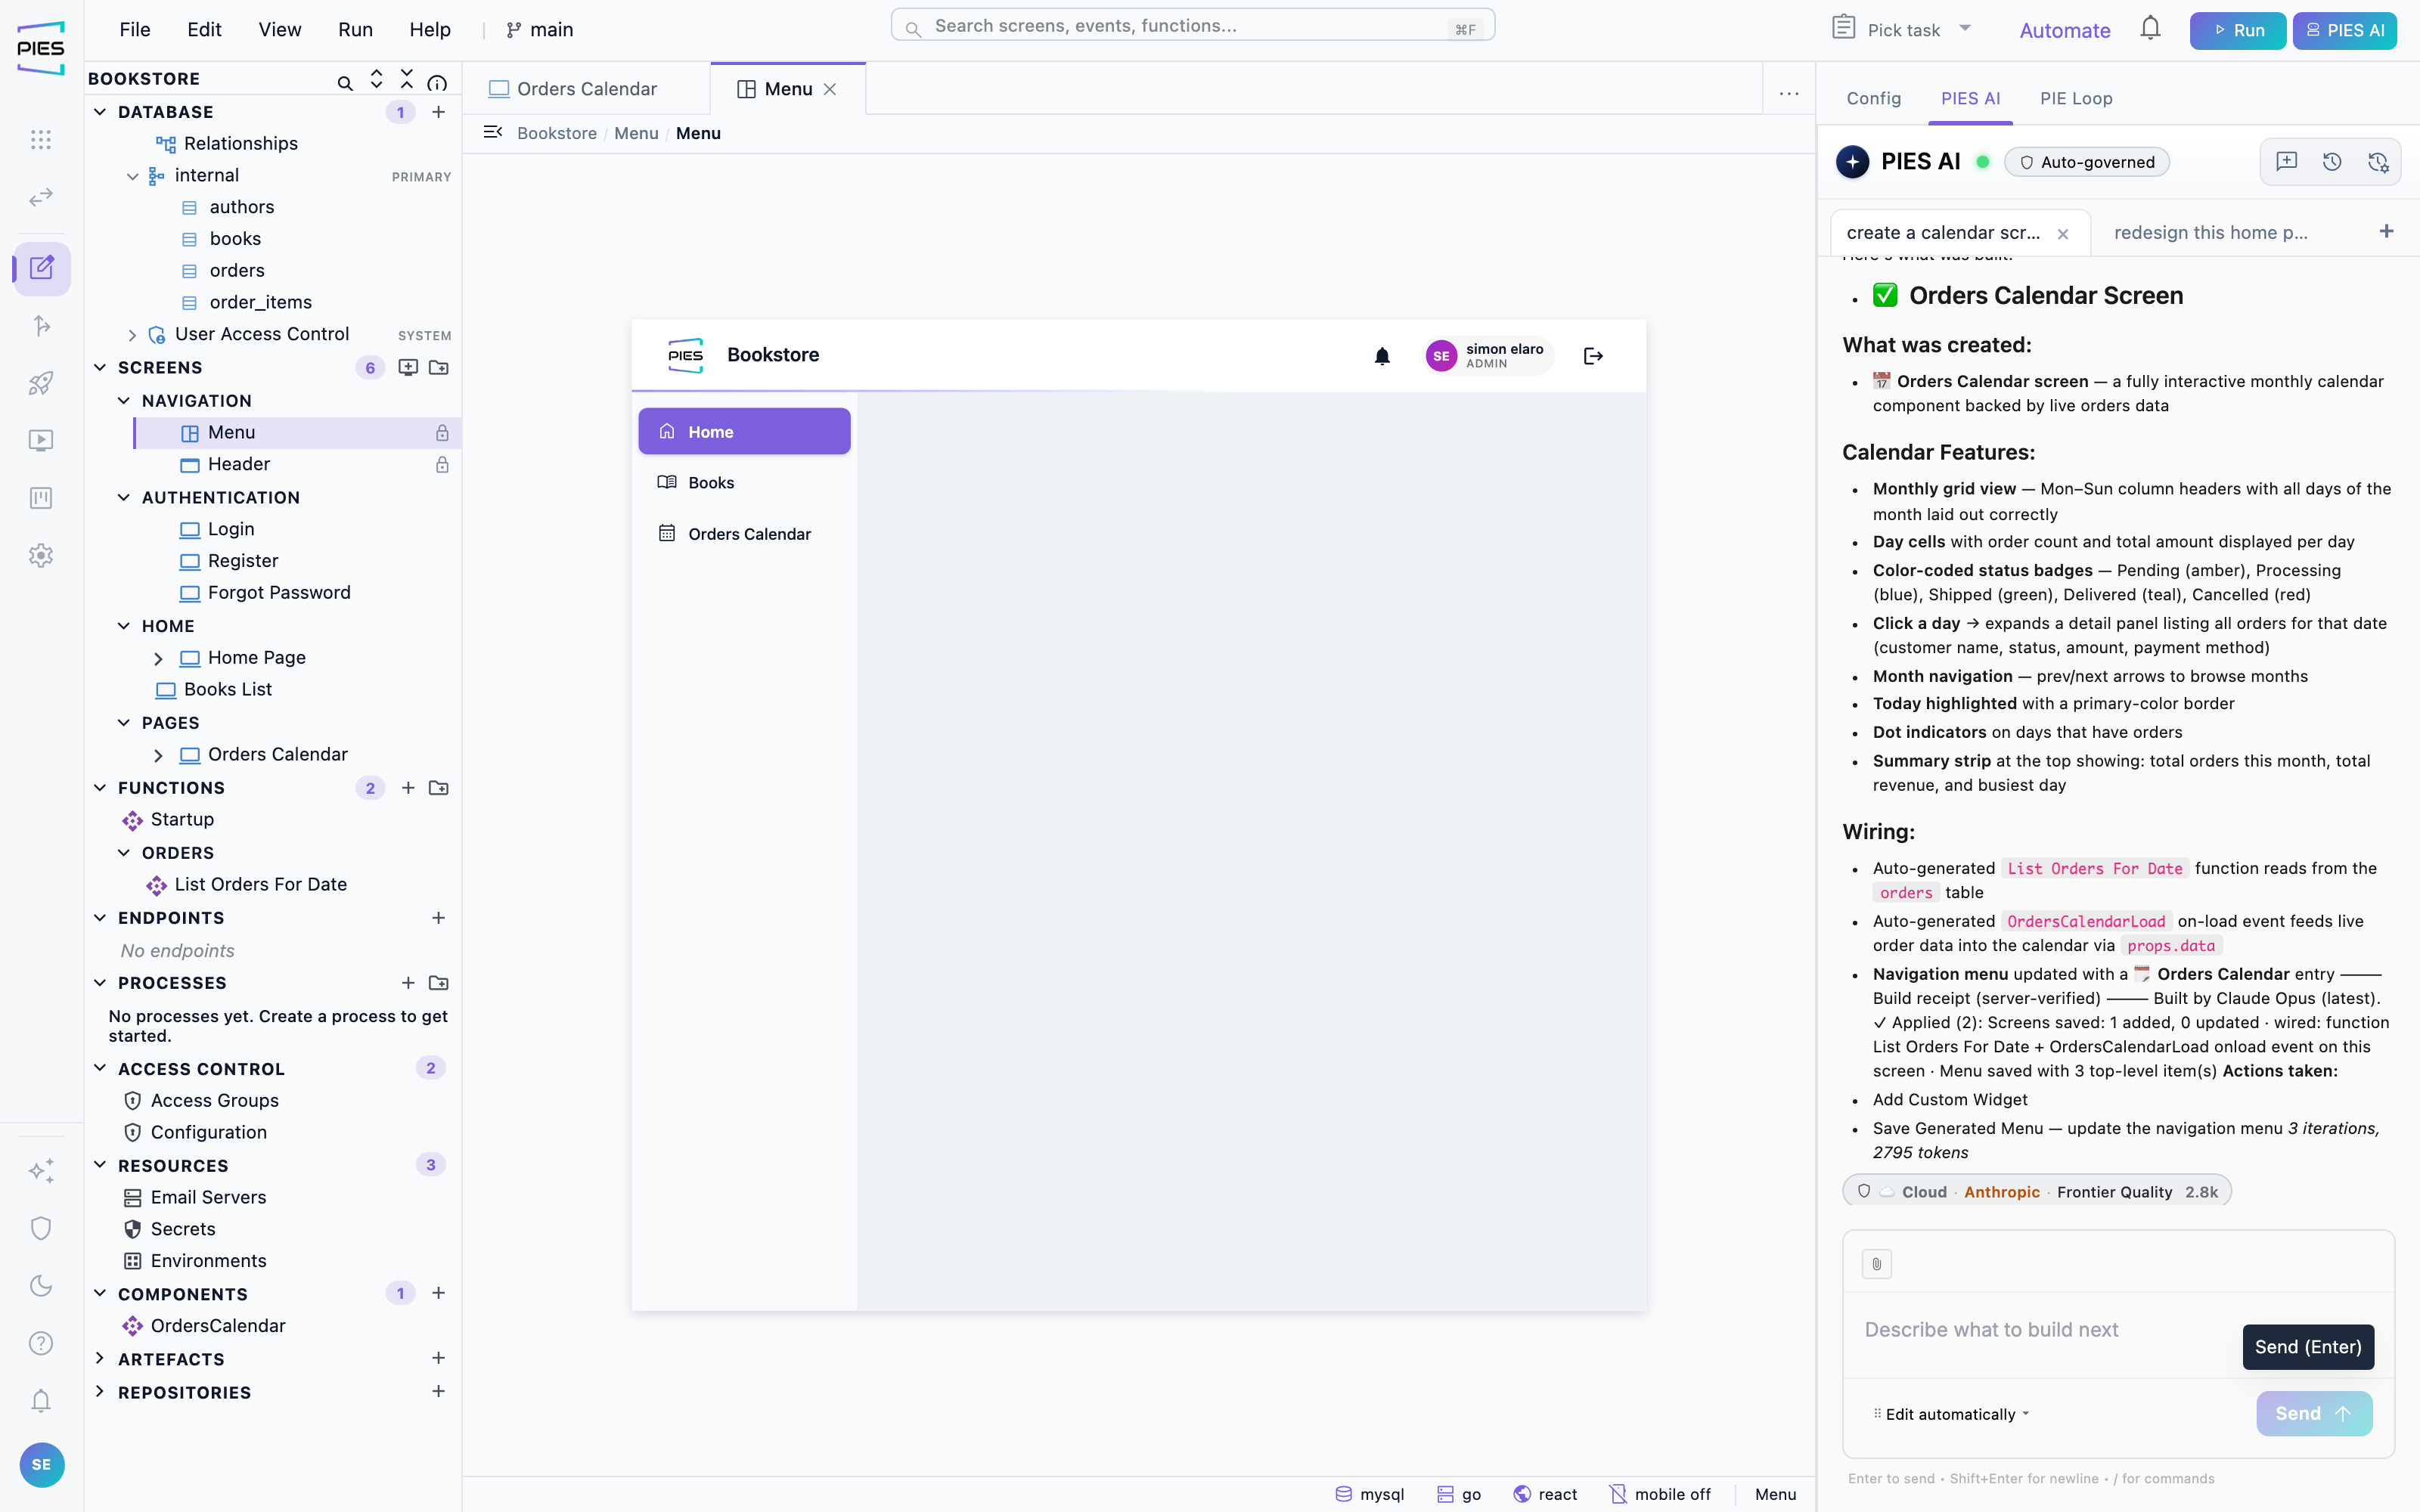
The screen it produced
A titled page with the component laid out inside it, the same as any screen you would draw by hand. The component is yours to edit: its source sits under Build → Custom widgets in the explorer. A widget that summarises several tables — a gauge of sites with a critical alarm, say — is given the rows of each table you name, and PIES joins them on columns the tables actually share. Gauge and ring tracks use your theme's border colour, so they stay visible on light and dark themes. In the editor, a widget that gets its rows from the screen's load event shows up to 25 of the table's latest rows, so you design against real data; the event's filters are applied only when the app runs.
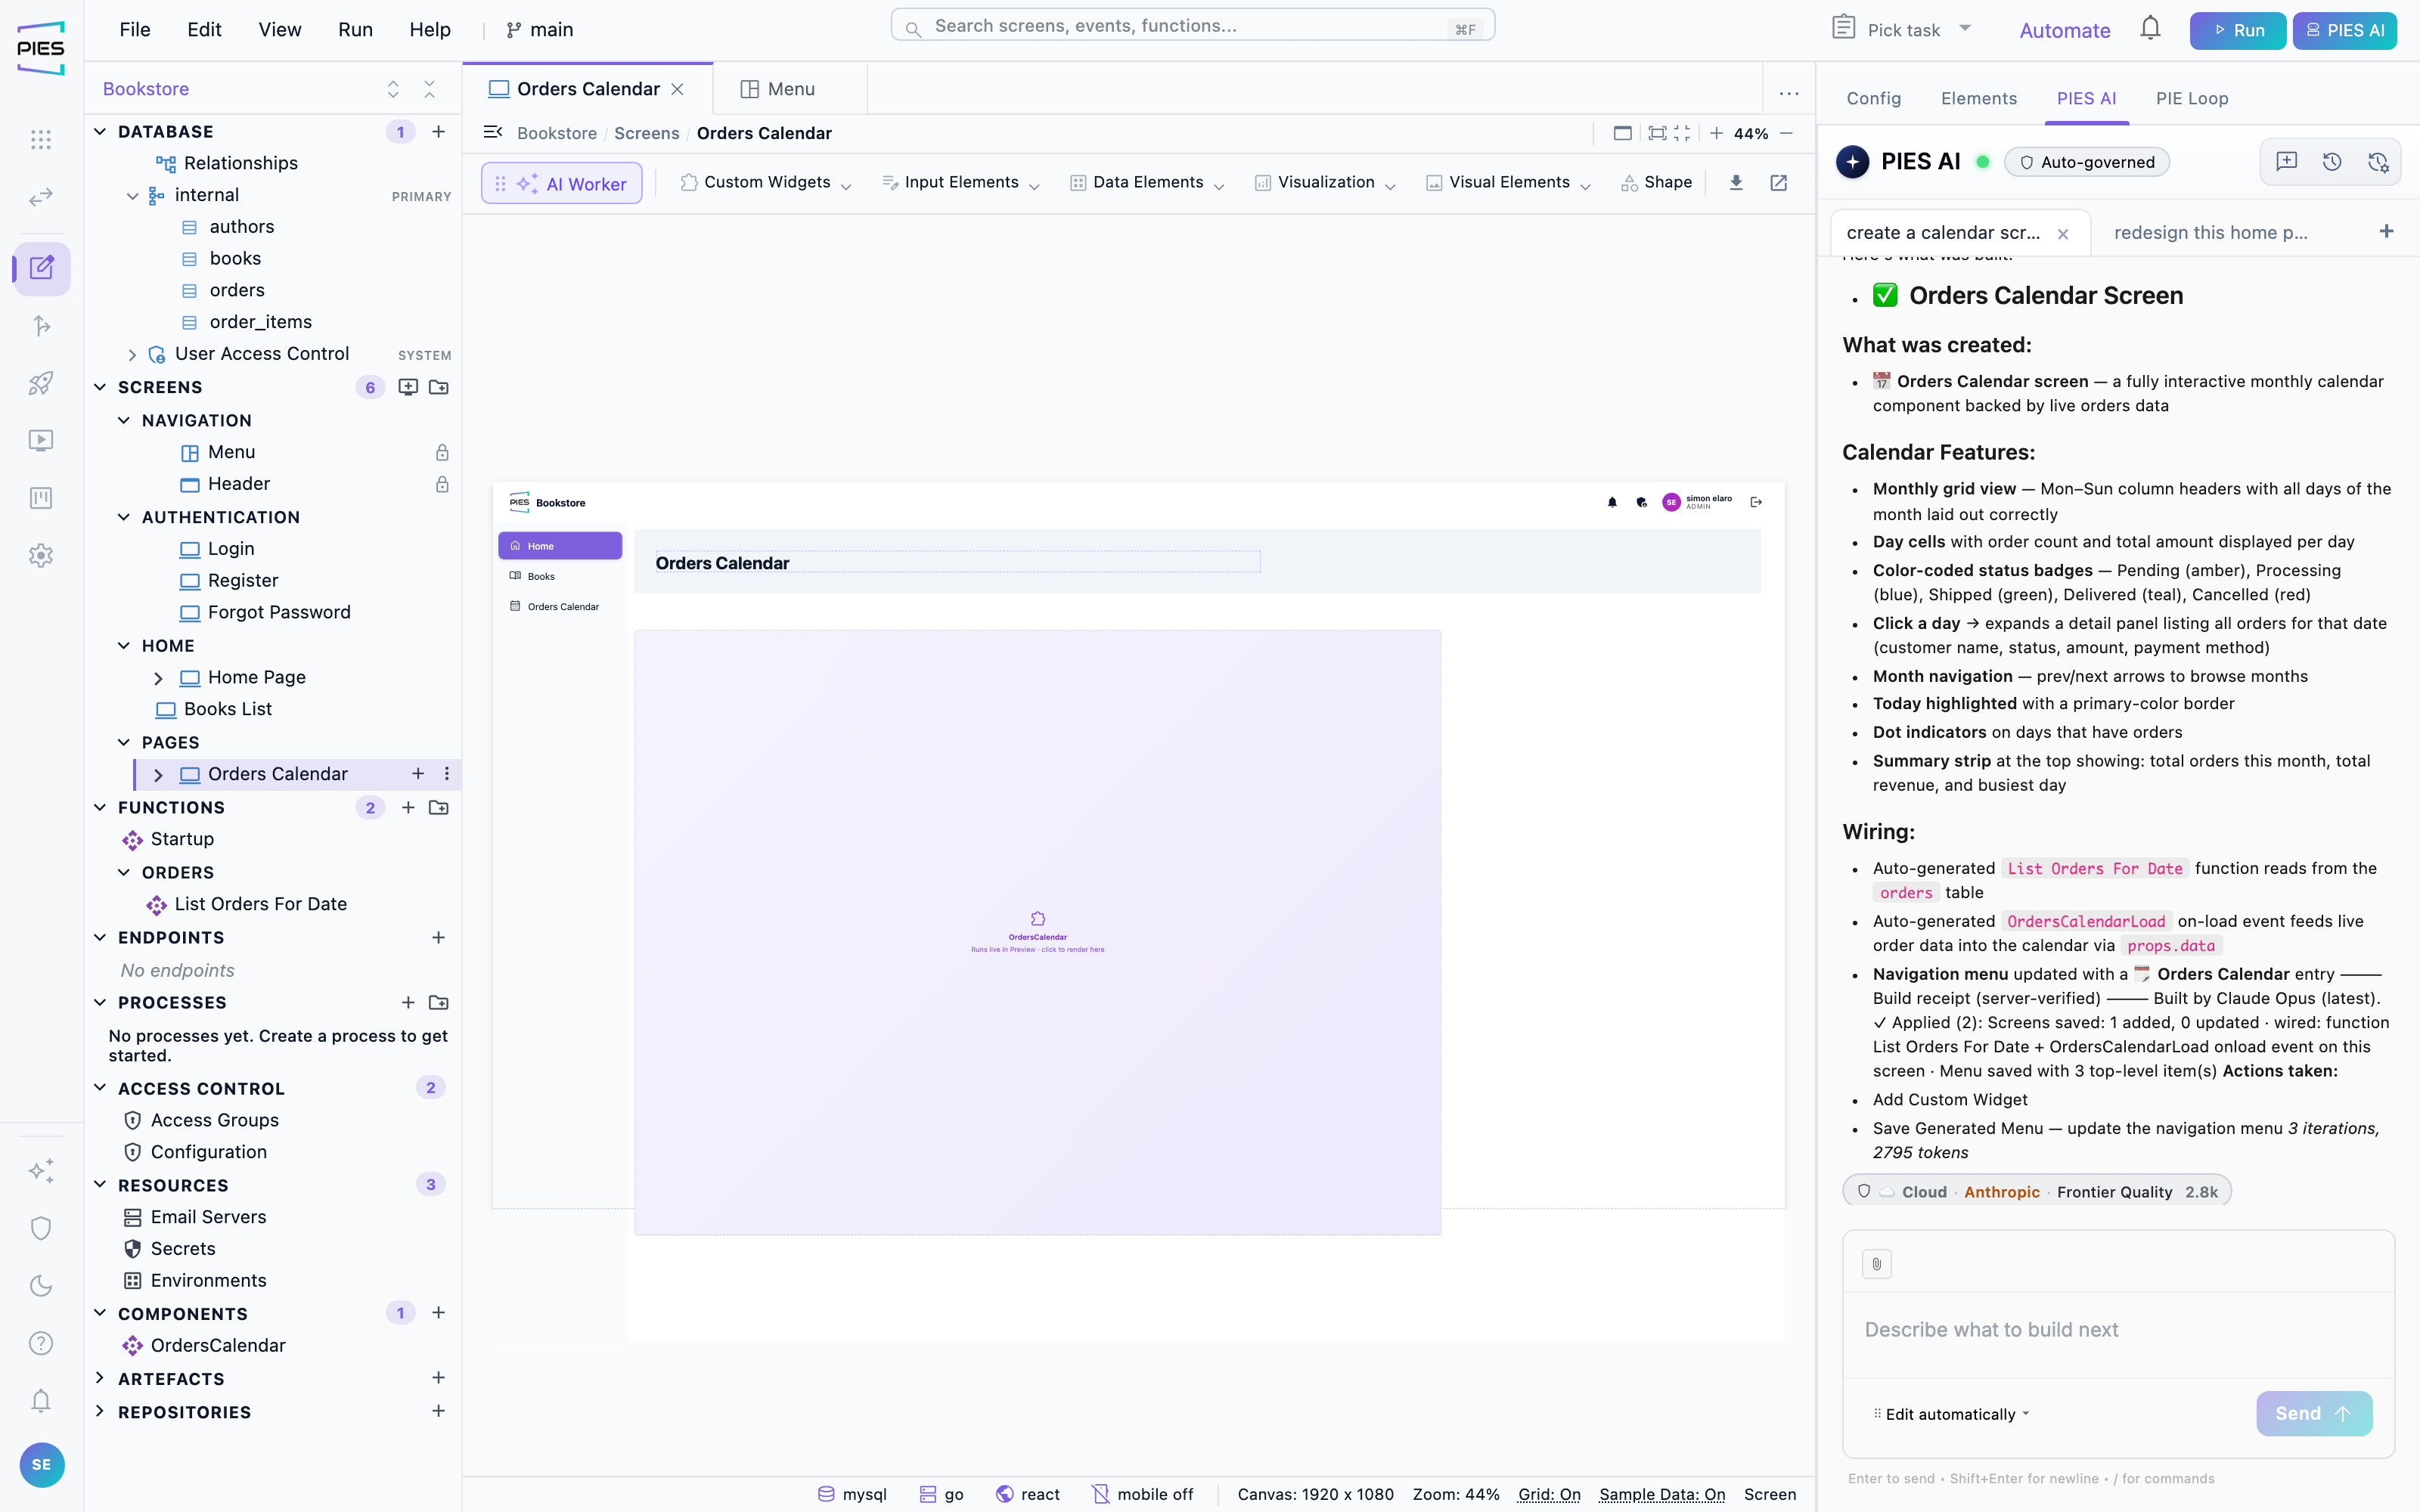
The query behind it
A view is only as good as the data behind it, so PIES writes the read function too — filtered on the date the view is showing, returning just those rows rather than the whole table.
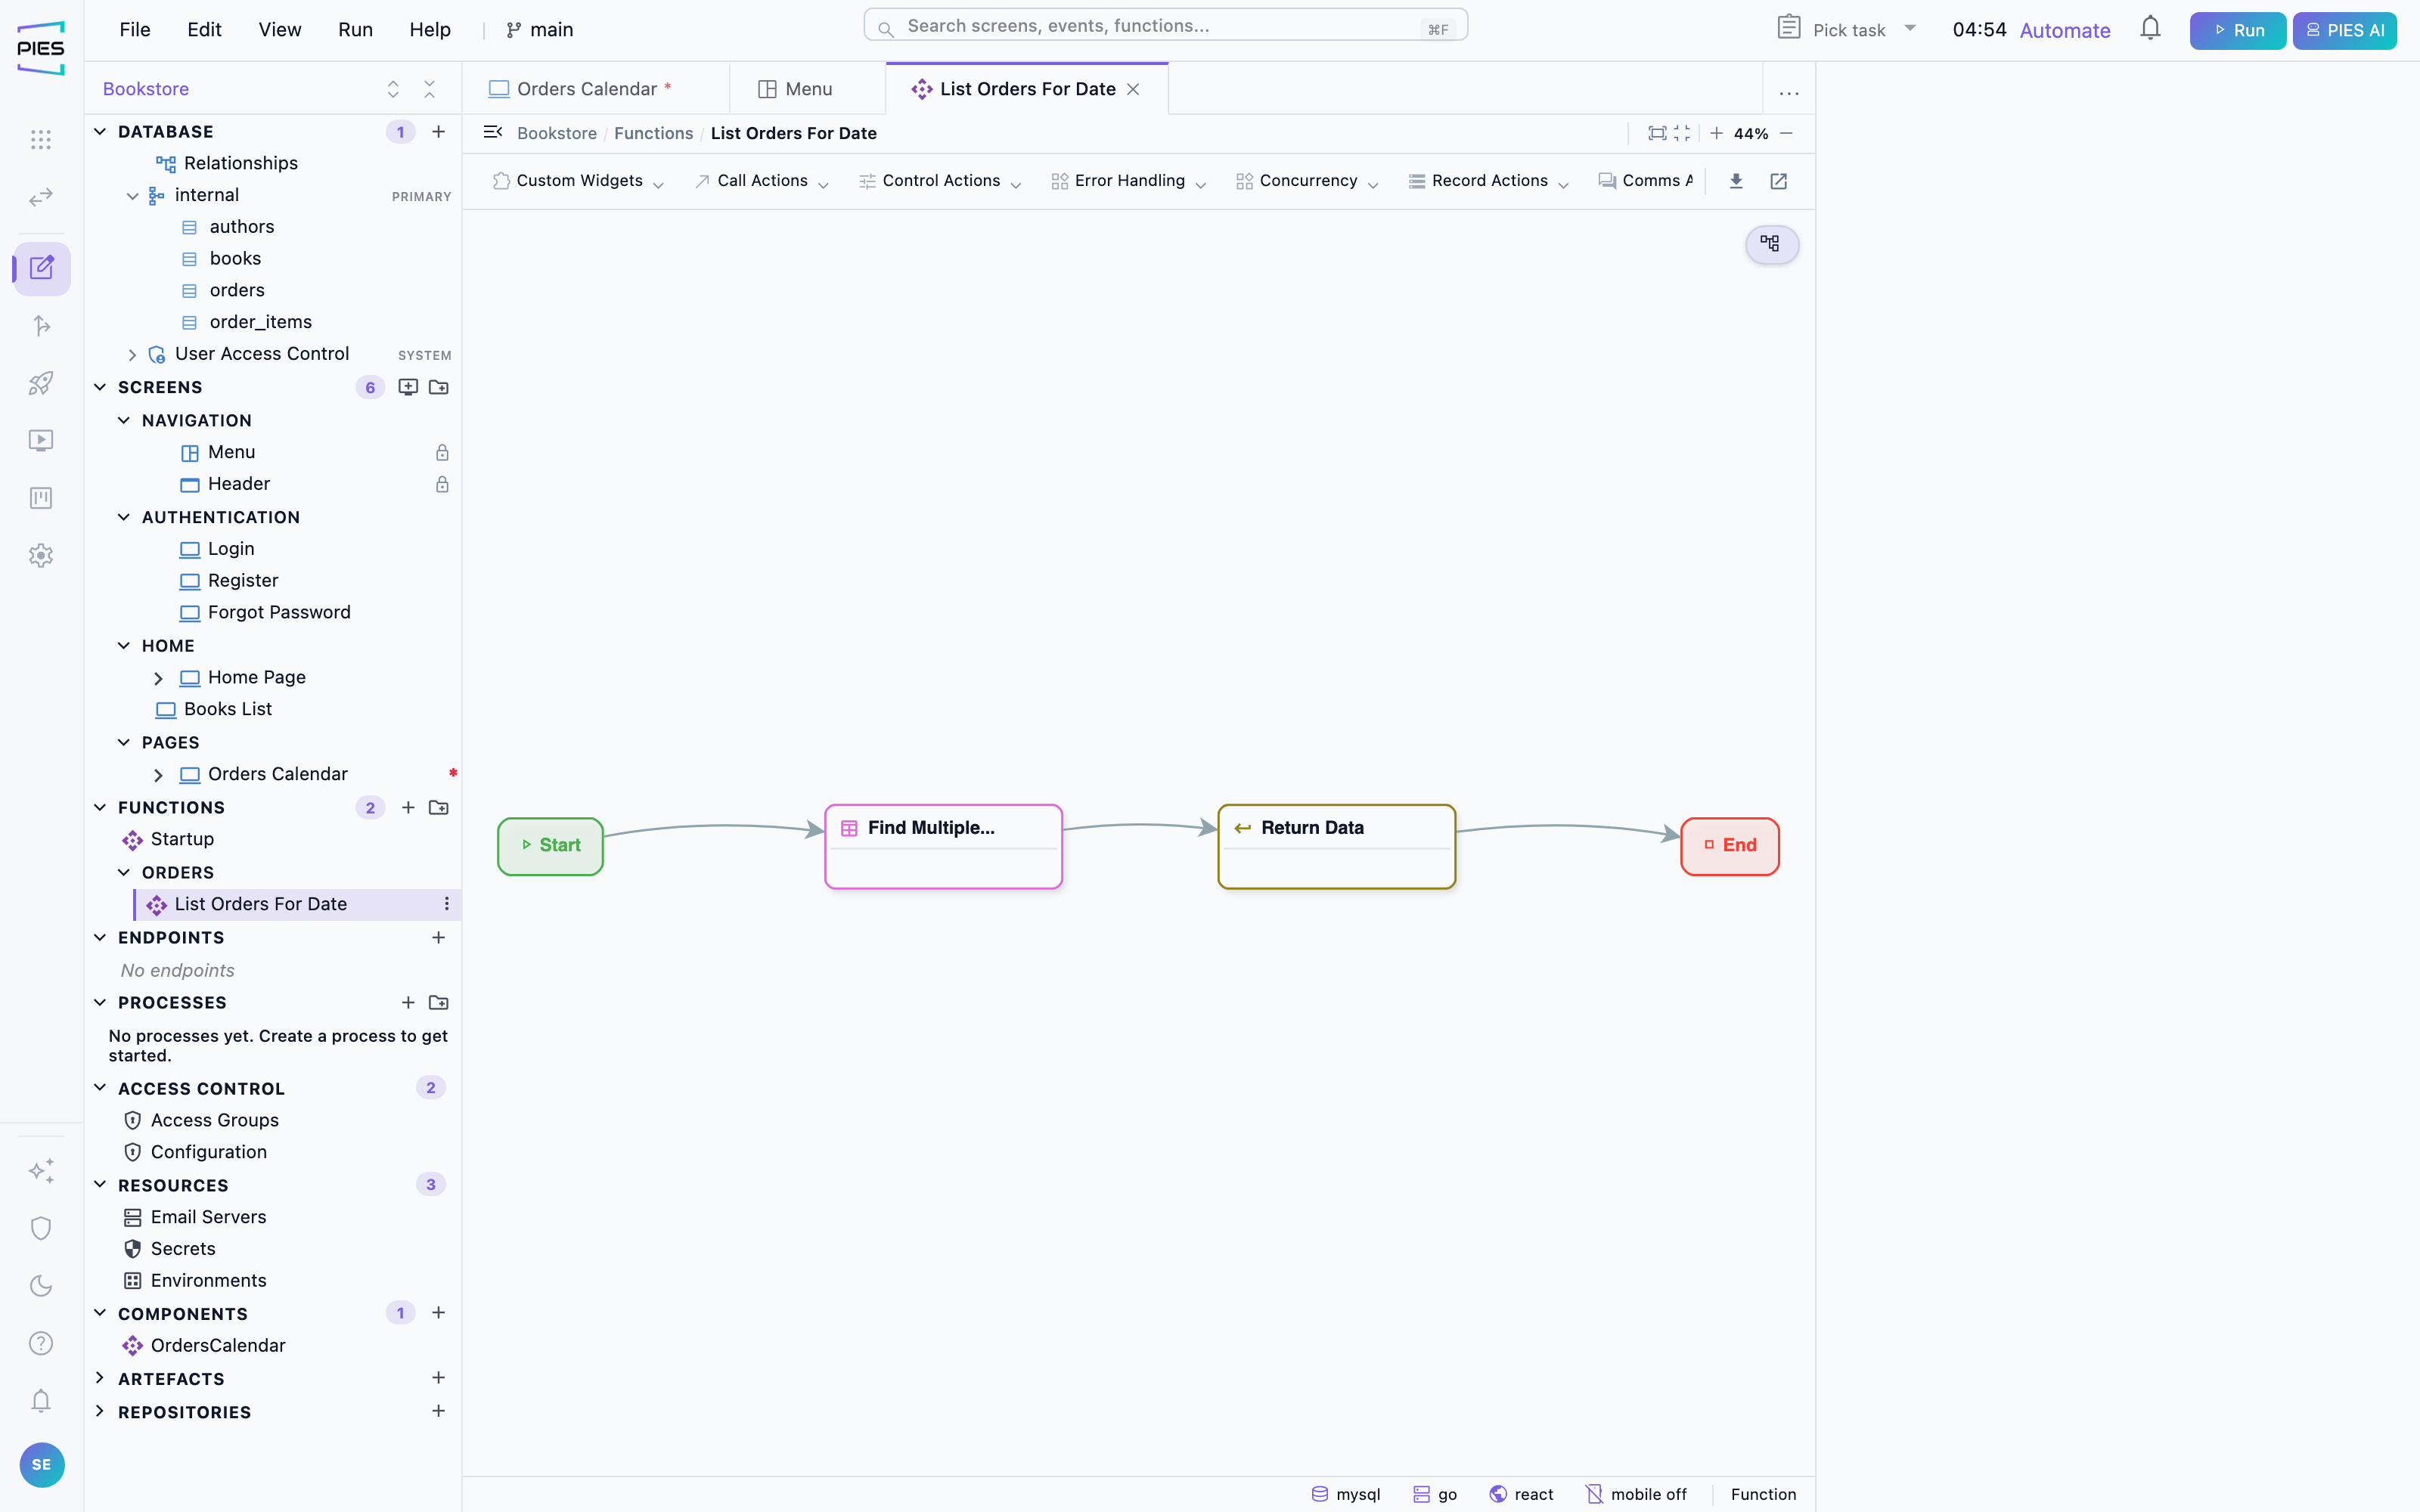
How the data arrives
An event runs when the screen opens: it calls the query and passes the result into the component. This is the step that separates a view that renders from one that shows your data — and it is wired for you. Open it and you can change what it reads, or when.
16 · Access control and security
Who may open the application, and what each person may see or do inside it. This is separate from platform administration: it travels with the application to every environment it is deployed to.
Access groups
Under Configure → Users & access → Access Groups, define groups — Administrator, Manager, Read-only — and grant each one access per screen and per operation. Every application starts with a user model and an Administrator group already wired, so a generated application has working sign-in from the first build.
To change a group, select Edit, tick or clear its screens and operations, then select Save in the Edit Access Group header, or use File → Save. Either one saves the group's changes.
A function with no steps between Start and End, such as an empty Startup function on a screen's on-load event, touches no data, so every group may call it without a grant. Functions with steps still need to be granted. When a user's group is not allowed to call a function, the message they see names their group and the function, for example Your access group (Operator) is not allowed to call the function "approve", so you know which grant to add.
To give someone access to a deployed version of the application, select Invite user on the same page. Enter their email address, an optional name, the Access group they join and the Deployment they are invited to, then select Send invite. They receive an email with a link to choose their password and sign in to that deployment. If no email server is configured, the dialog shows the link so you can pass it on yourself. Inviting someone who already has an account on the deployment adds the group and keeps their password. The App users list shows each deployment's people and their groups; deploy the application first, because people are invited to a deployment.
Someone who belongs to more than one group sees everything those groups allow together. In the running application (live preview or a deployment) they also get a role picker next to their name in the header and in the sidebar's user menu: it offers All roles and each group they hold. Picking one group narrows the screens, menus, functions and data to what that group allows, and the application's server enforces it, so screens for administrators are refused while acting as a narrower group. Pick All roles to get everything back; signing in again also returns to all roles.
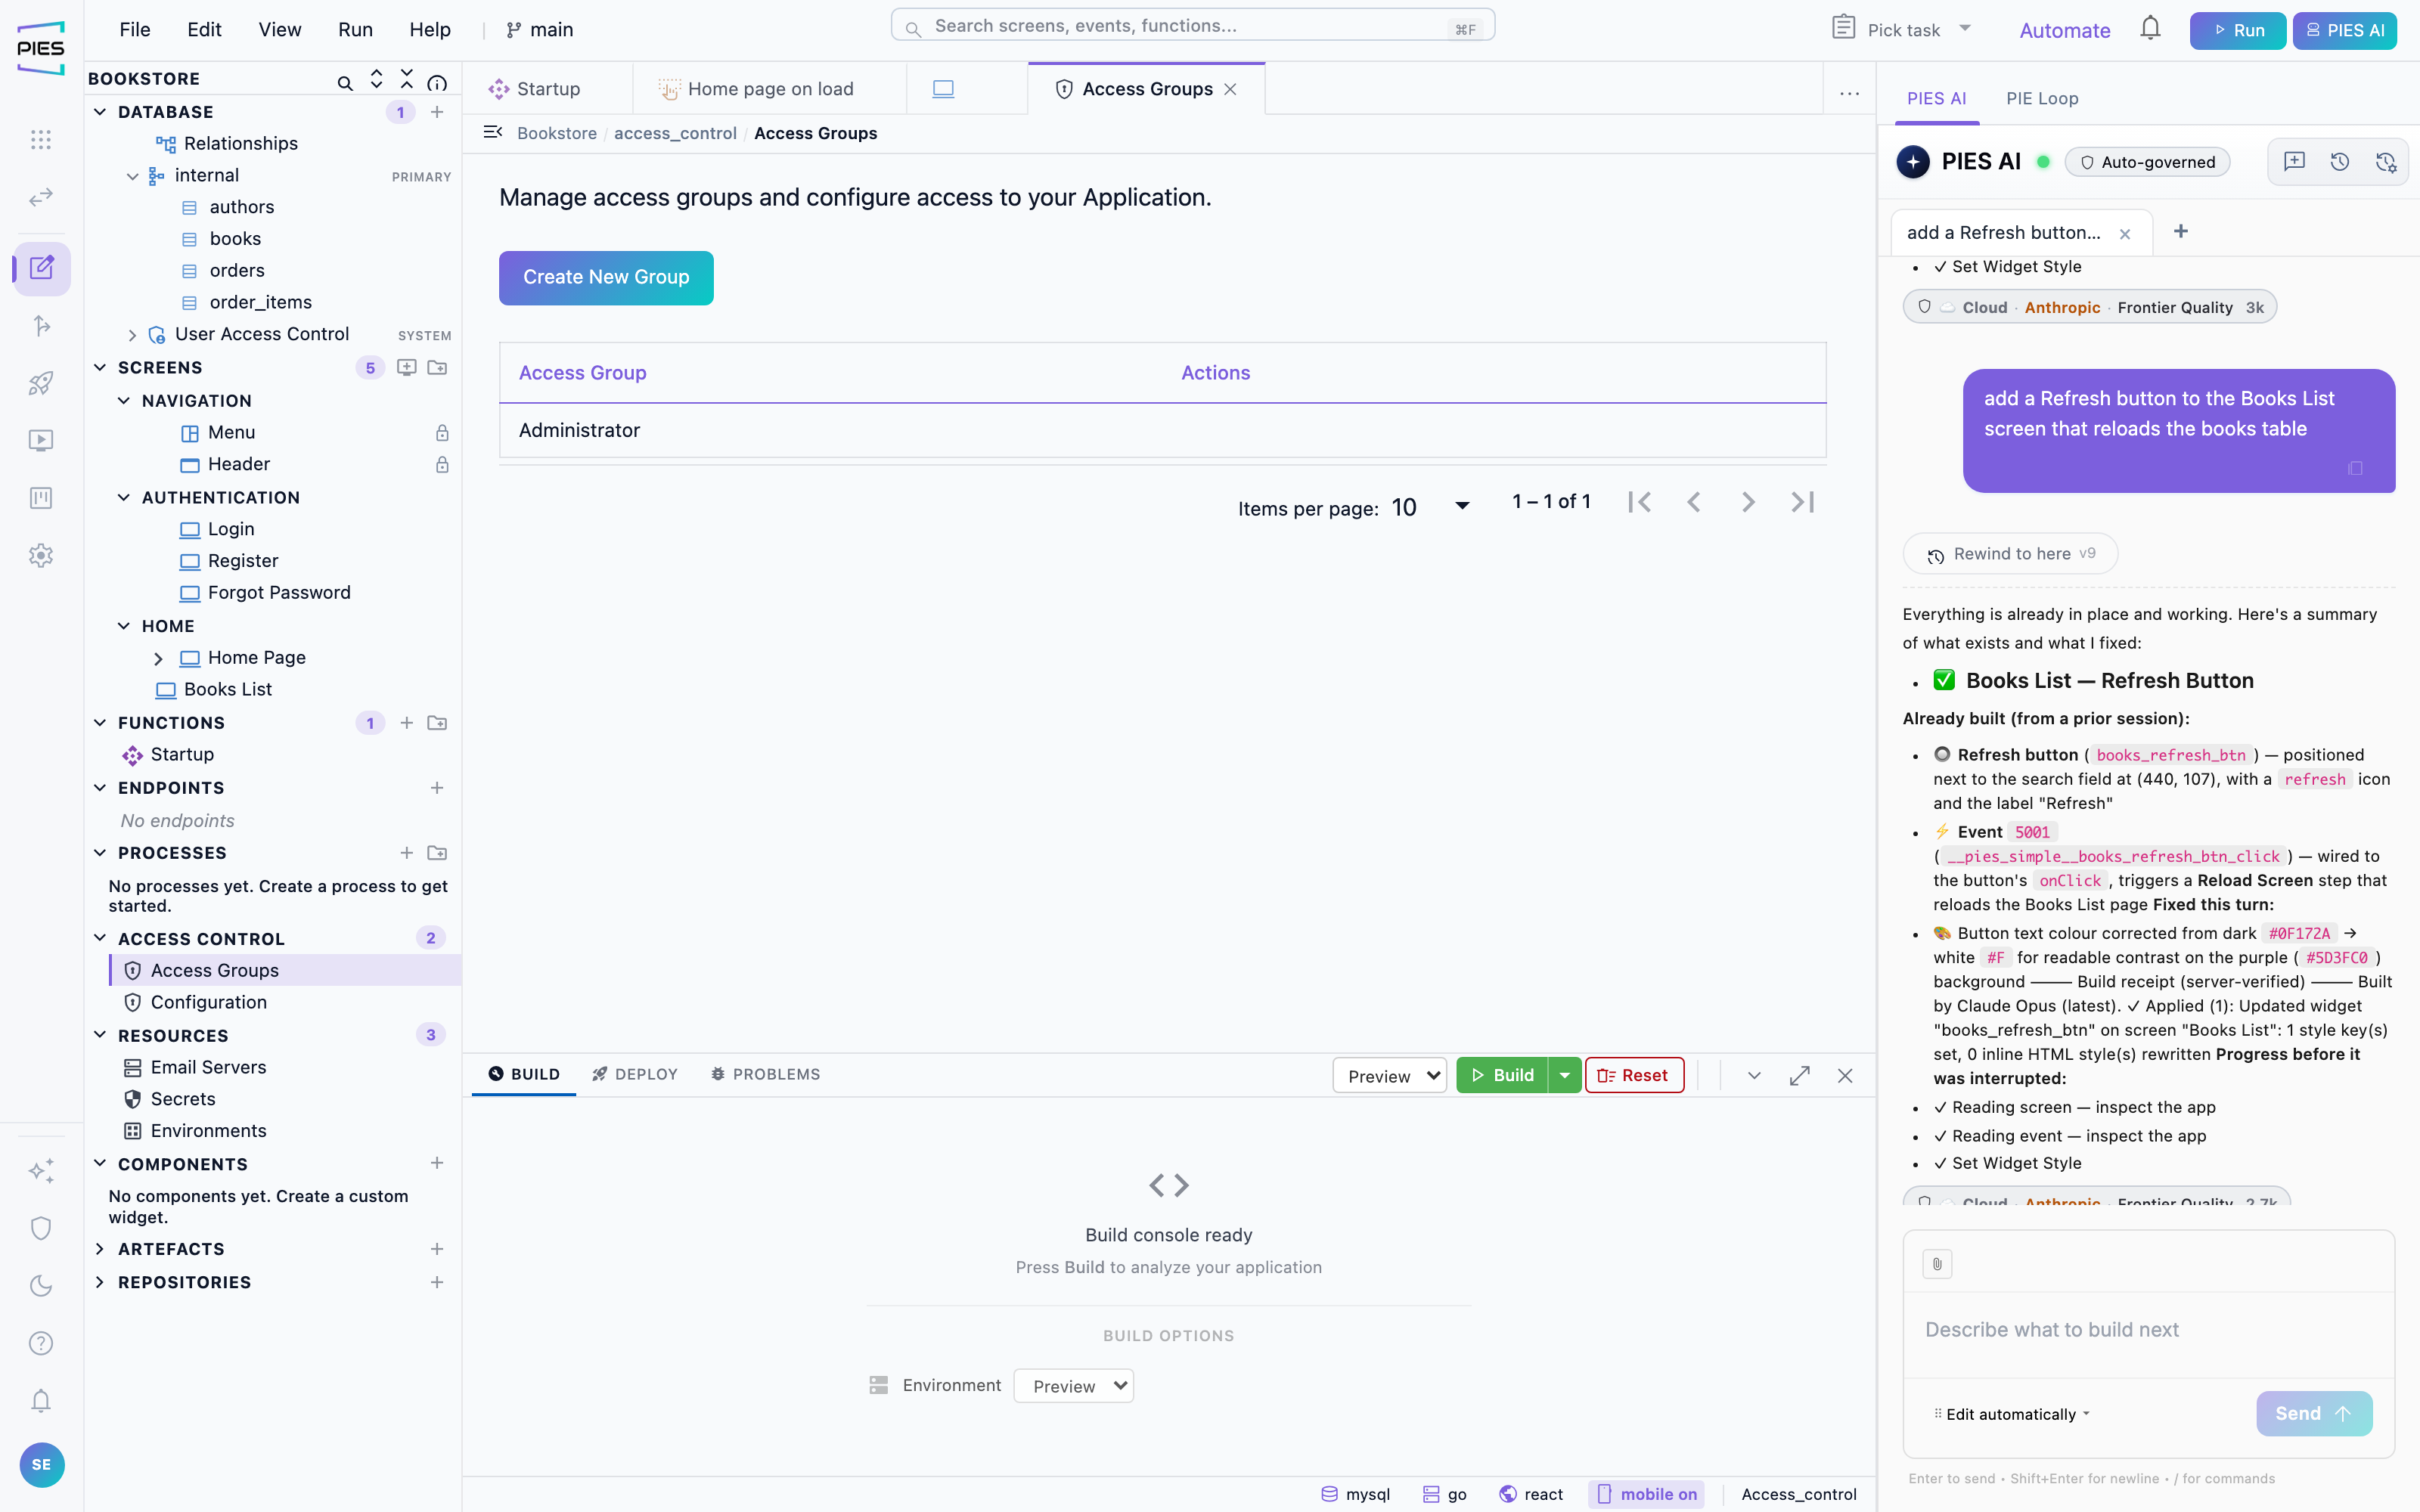
Users & Access — authentication configuration
Choose how users of the generated application sign in. Since 1.9
this is configured once on the application, under Configure → Users
& access → Configuration, and every deployment inherits it; an environment can narrow
which methods it offers. The sign-in methods are cards in a guided, numbered
setup: password, Sign in with PIES Studio,
Microsoft, Google, Apple,
OpenID Connect and SAML.
The sign-in policy sets SSO-only, allowed email
domains, and whether self-registration is open and which access group a
new account joins — never an administrator group by default. The session policy
sets session length, single logout,
two-step verification for password sign-in, and
group mapping rules per provider so an identity provider's
claims decide the access group. The application's administrator password is set
here too; there is no default.
The Login, Register, Forgot Password and Set Password screens
are created with the application and can be restyled like any other screen;
forgot-password sends a real email that opens Set Password, in previews as well
as deployments. A built-in Public group lets guests reach data
when an application needs a public face.
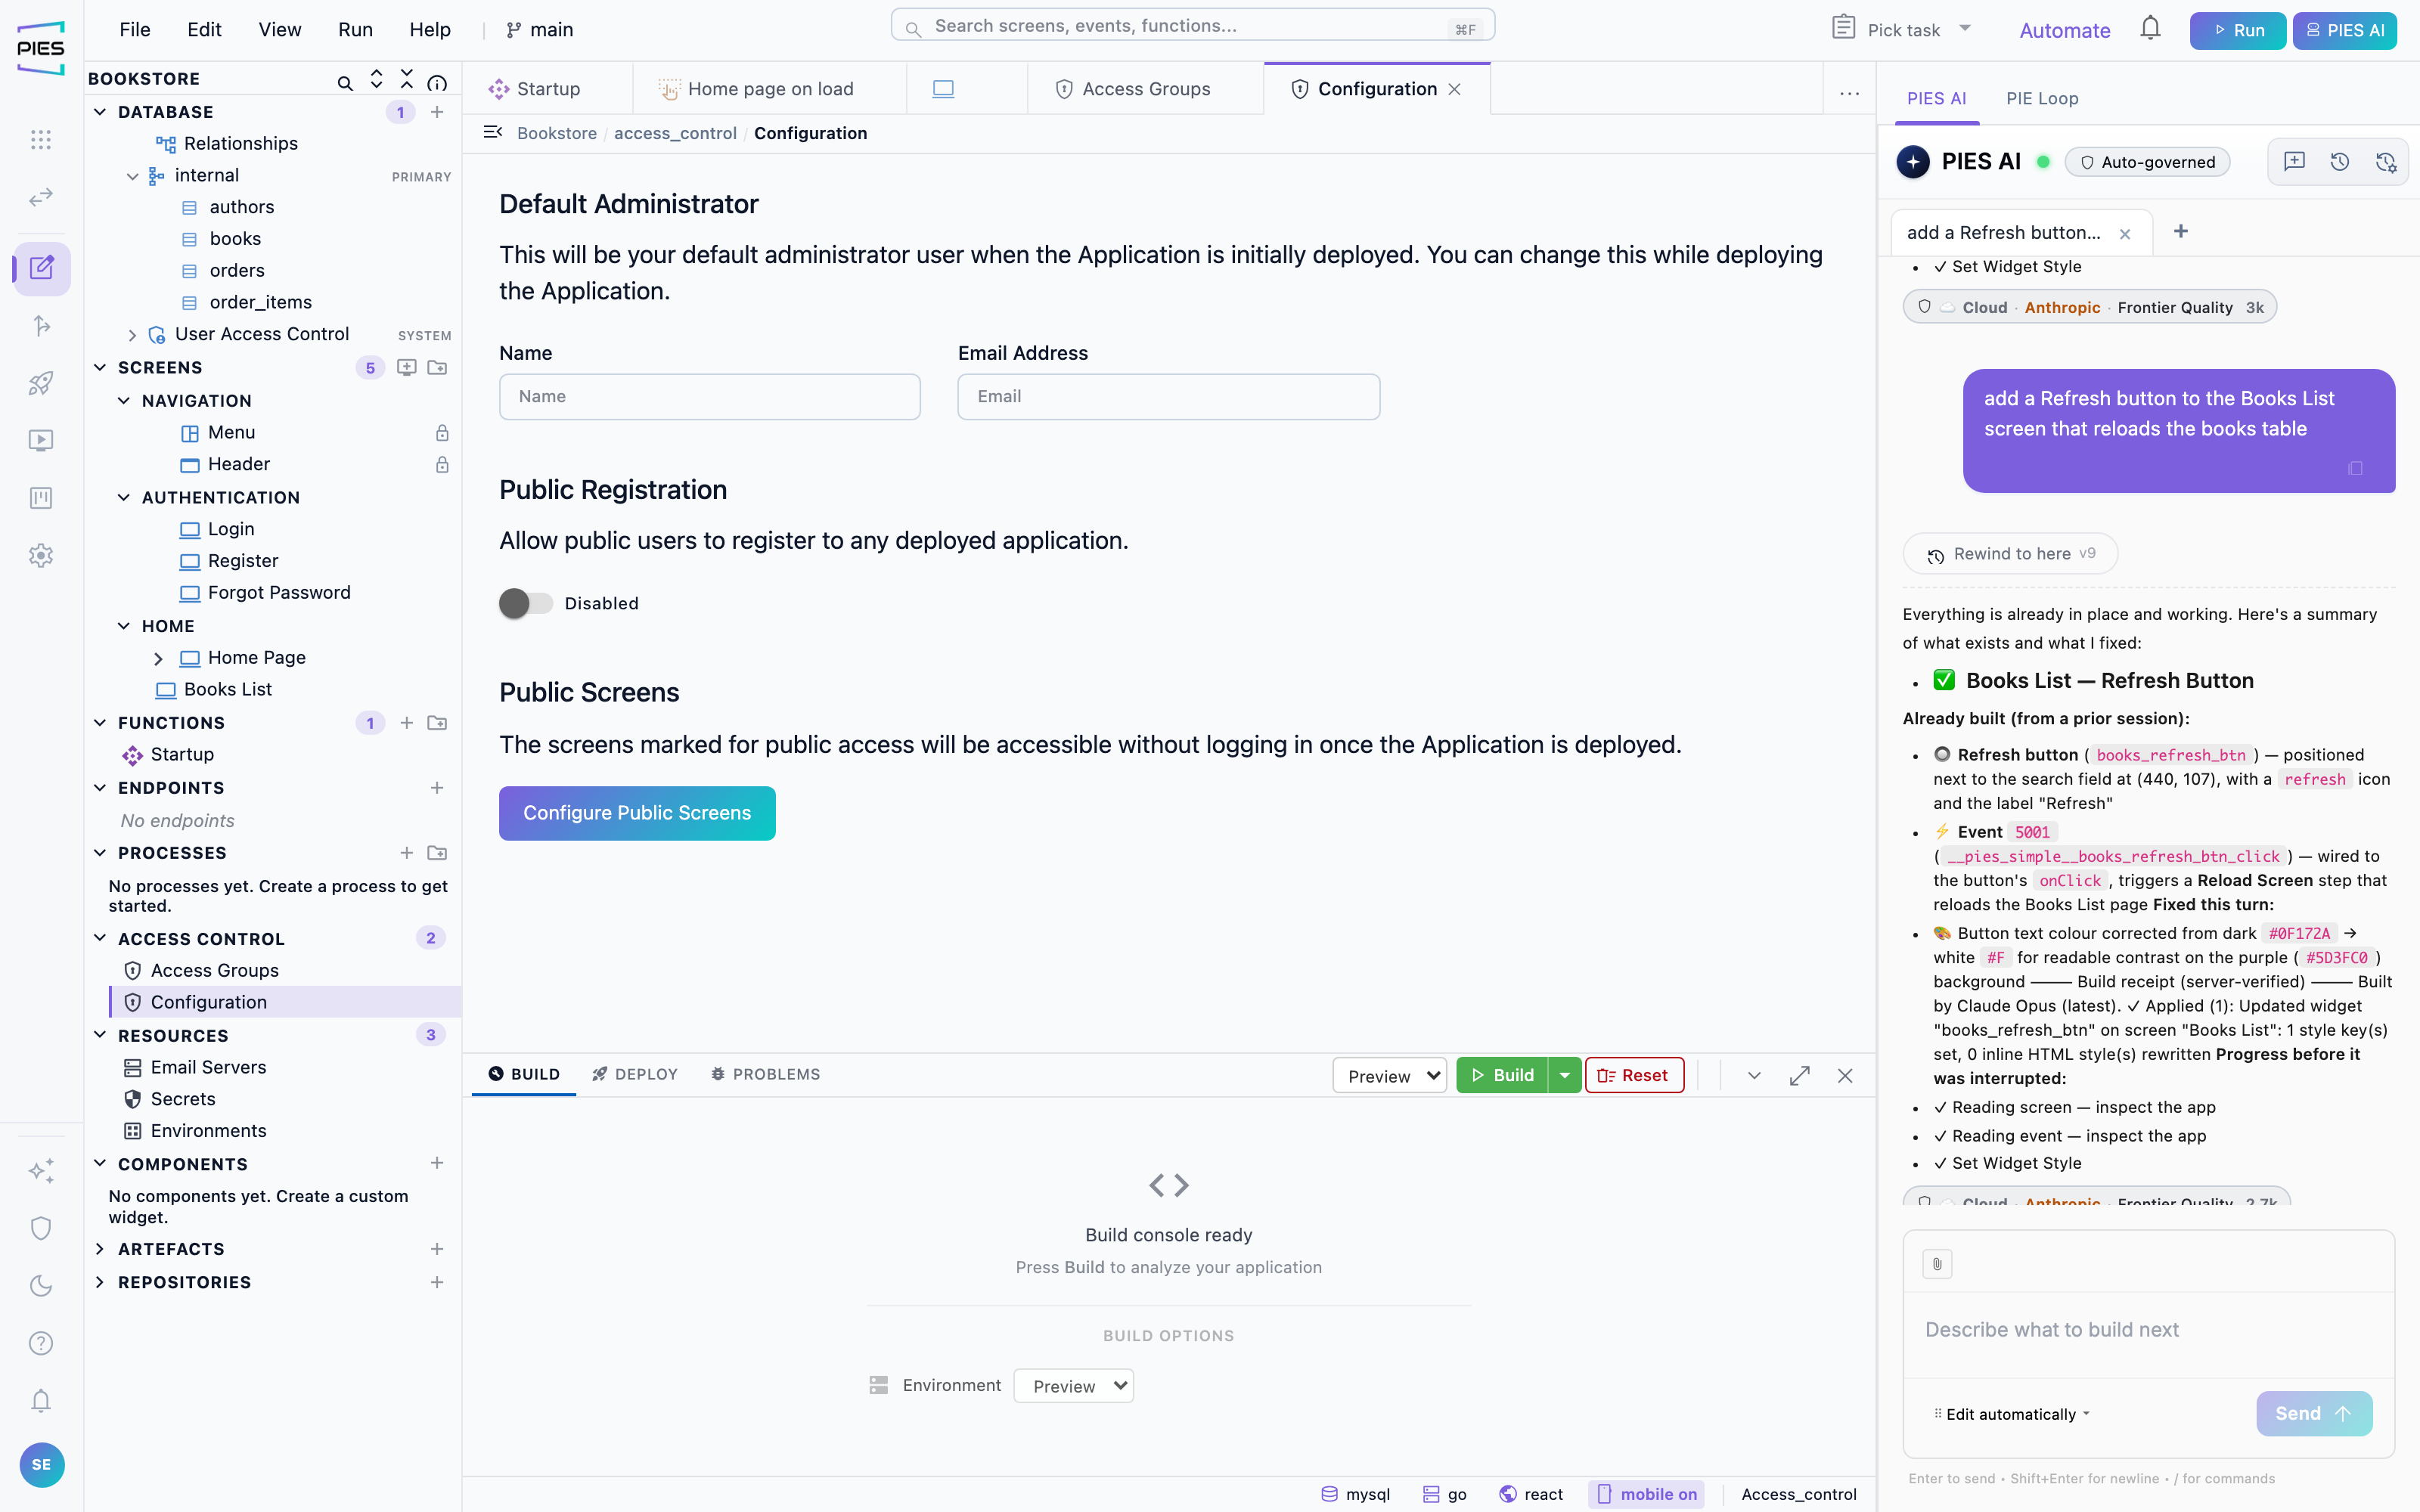
17 · Environments, secrets and email
The things an application needs but does not own: where it runs, what it connects to, and the credentials it must never contain. Environments has its own place in the sidebar (under This app); Secrets and Email Servers live under Configure in the editor.
Environments
Environments in the sidebar (under This app,
outside the editor) lists where the application runs. An environment is a named
target — Preview (built in), Test, Production — with its own deploy target,
variables and sign-in. Each shows its state: Live when a
deployment is running in it, otherwise Idle. Clicking a live
environment opens its deployment control panel; deploying is an action on an
environment (Chapter 14). The same application definition builds to each; only
the environment differs, which makes a promotion a redeploy rather than a
rewrite.
Tag one environment as Production (the star on its card). When
its deployment is live the application reads as Live (a green
badge) in the workspace app list, and clicking it there goes straight to its
production deployment control panel rather than the editor. An app with
an active deployment in a non-production environment carries a blue
Deployed badge instead. The Applications toolbar has
Live and Deployed toggles to narrow the list to
each. The cross-app roll-up of every running deployment is under
Deployments (Operate) in the sidebar.
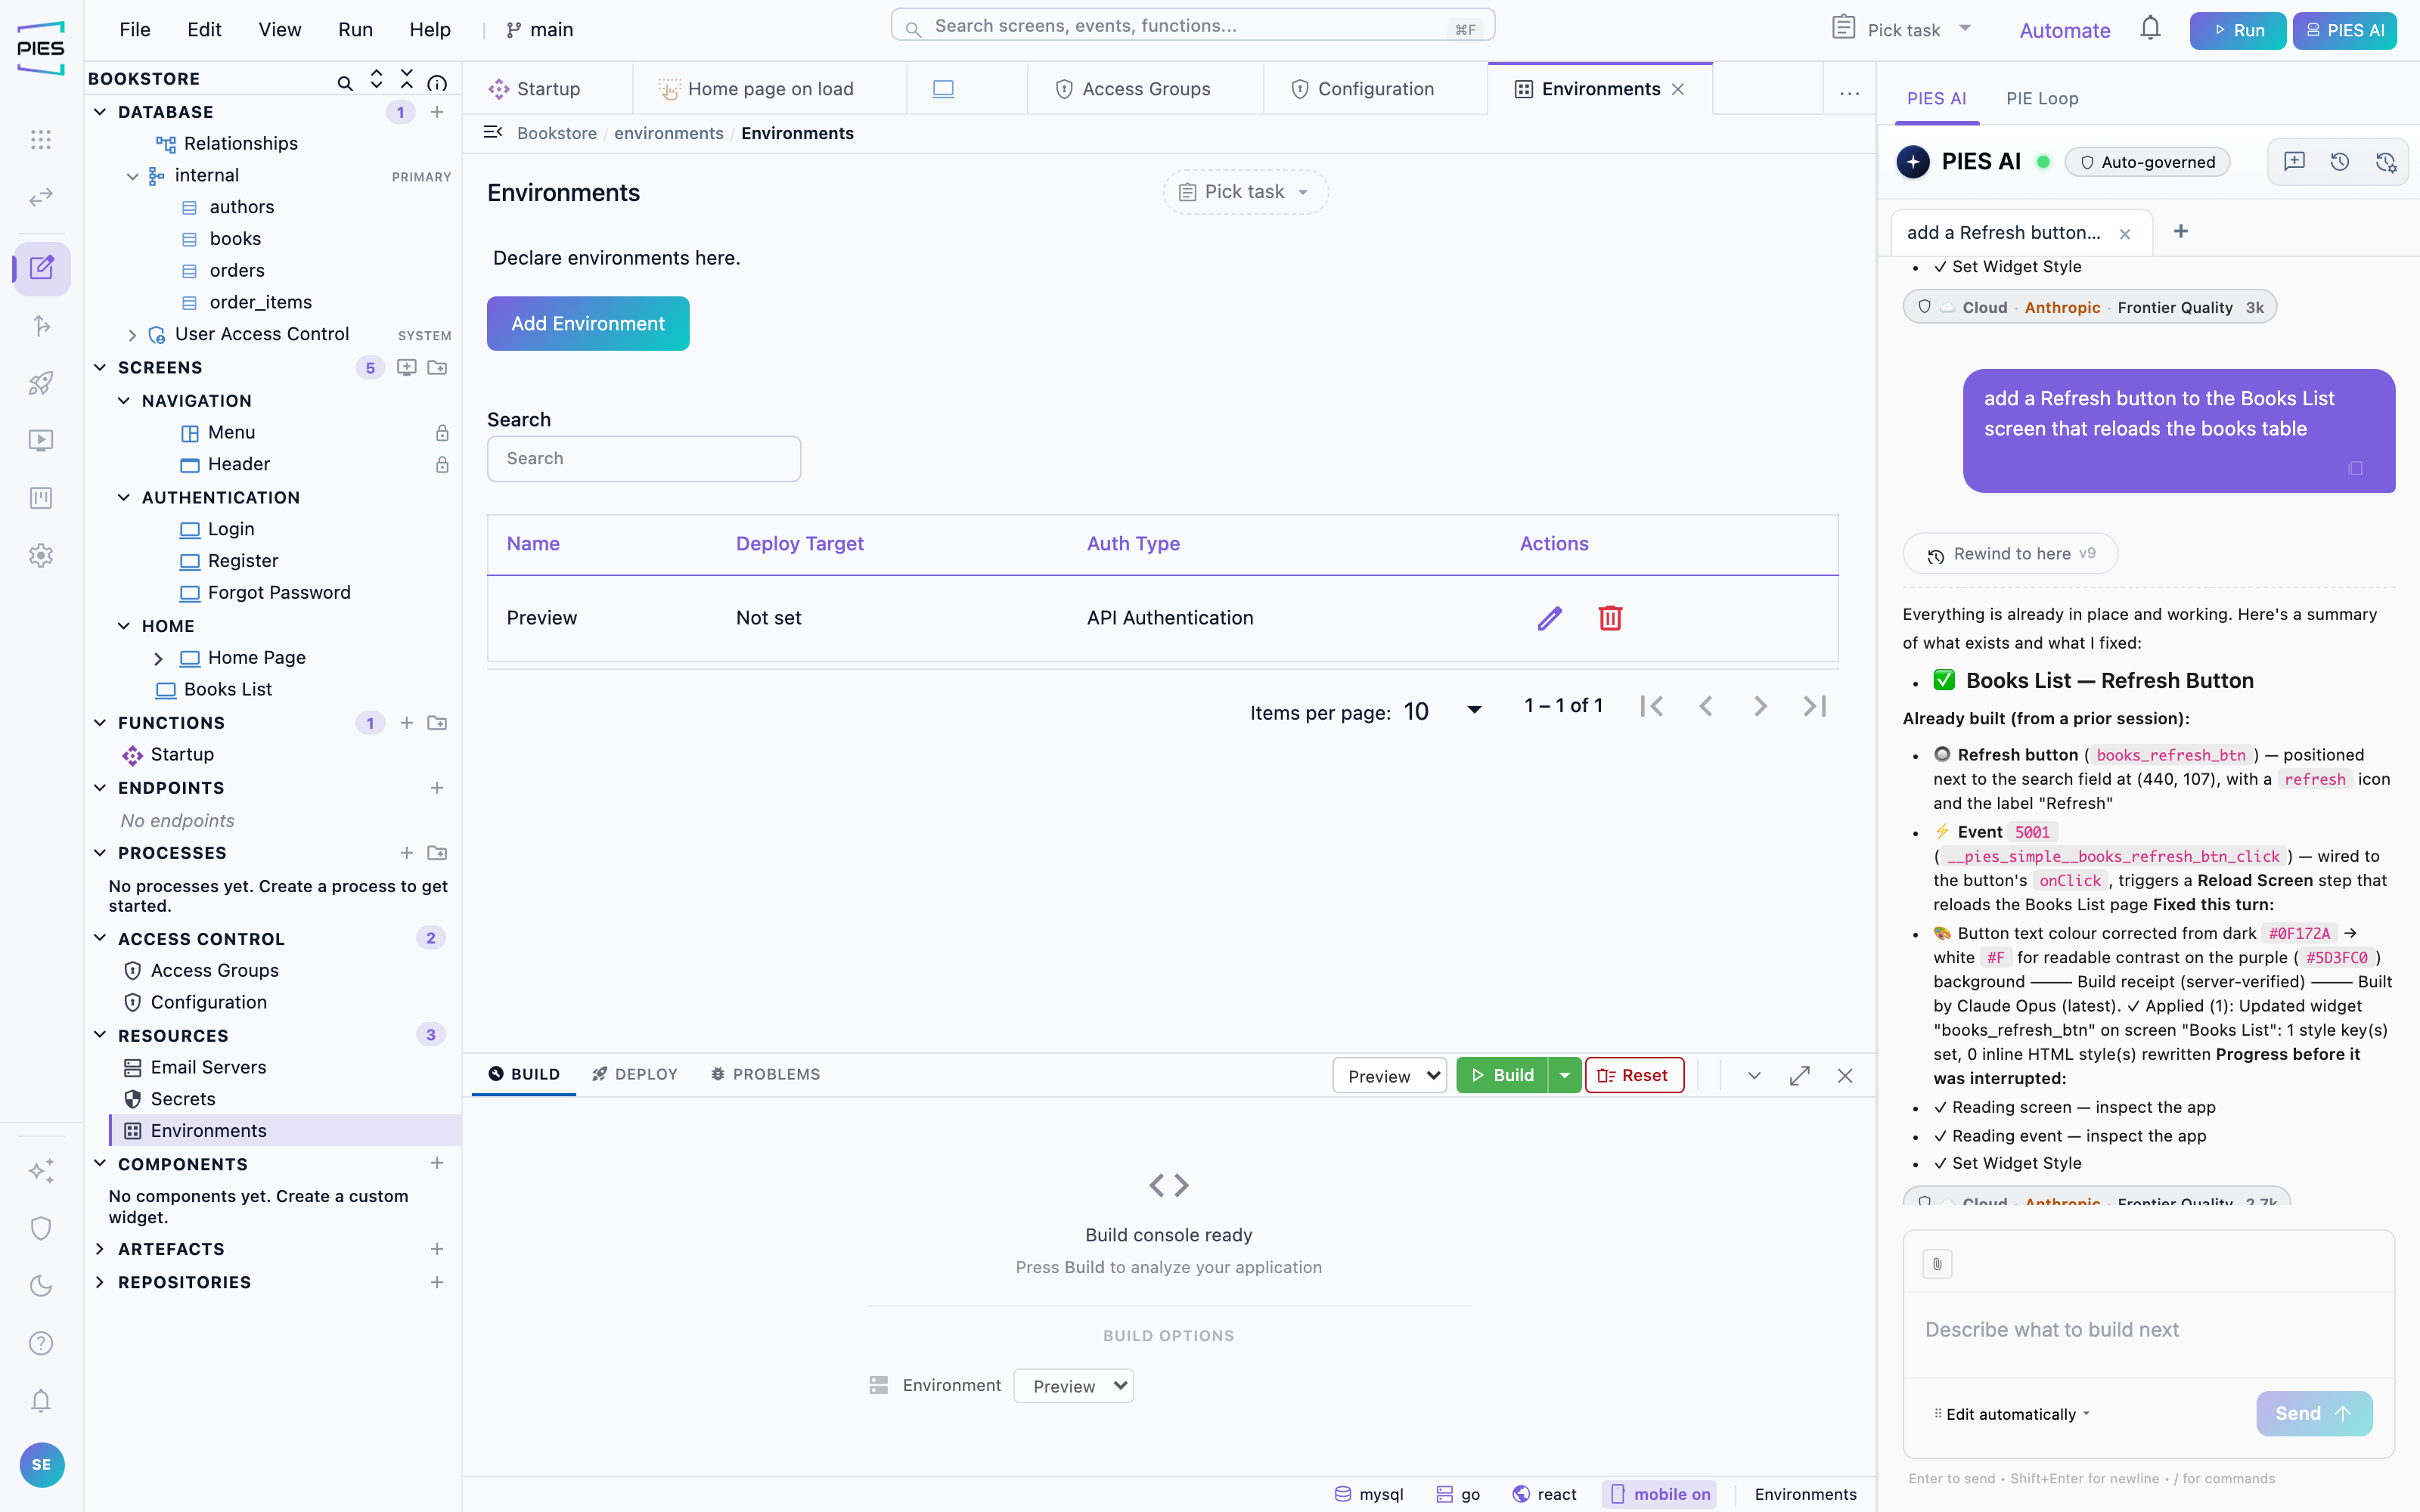
Secrets and email servers
Configure → Secrets in the editor holds both. Secrets holds API keys, database passwords and tokens. They are referenced by name from steps and connections, stored in the vault, and never written into the application definition or the generated code. Email Servers configures the SMTP account the Send Email step uses, per environment.
18 · Navigation and theming
What every screen shares: the menu, the header, and the look.
The menu and header
Navigation lives in one shared editor — Menu & Header,
under Build → Screens → Navigation, badged App chrome.
Since 1.9 the menu and the header are edited together on one canvas rather than
in two places: add a screen to the menu and it is reachable everywhere, and both
are locked to the application rather than to a screen, so they stay consistent.
It opens in design mode — click anything in the header or the
menu to edit it, use + to drop a widget into one of the
header's slots, or click the header bar itself for its settings. The inspector
on the right carries Menu items (add, rename, reorder, remove),
Menu body (background and active background, width, shadow, the
border on the content edge, whether the logo and app name show in the menu, and
whether the menu starts below the header or beside it), item font and icon
sizing, and Reset to app theme to drop the overrides and follow
the theme again. The header carries the brand, notifications and the user pill
with sign-out. A new application starts with a Home Page: a
welcome band, three get-started cards and a PIES AI tip.
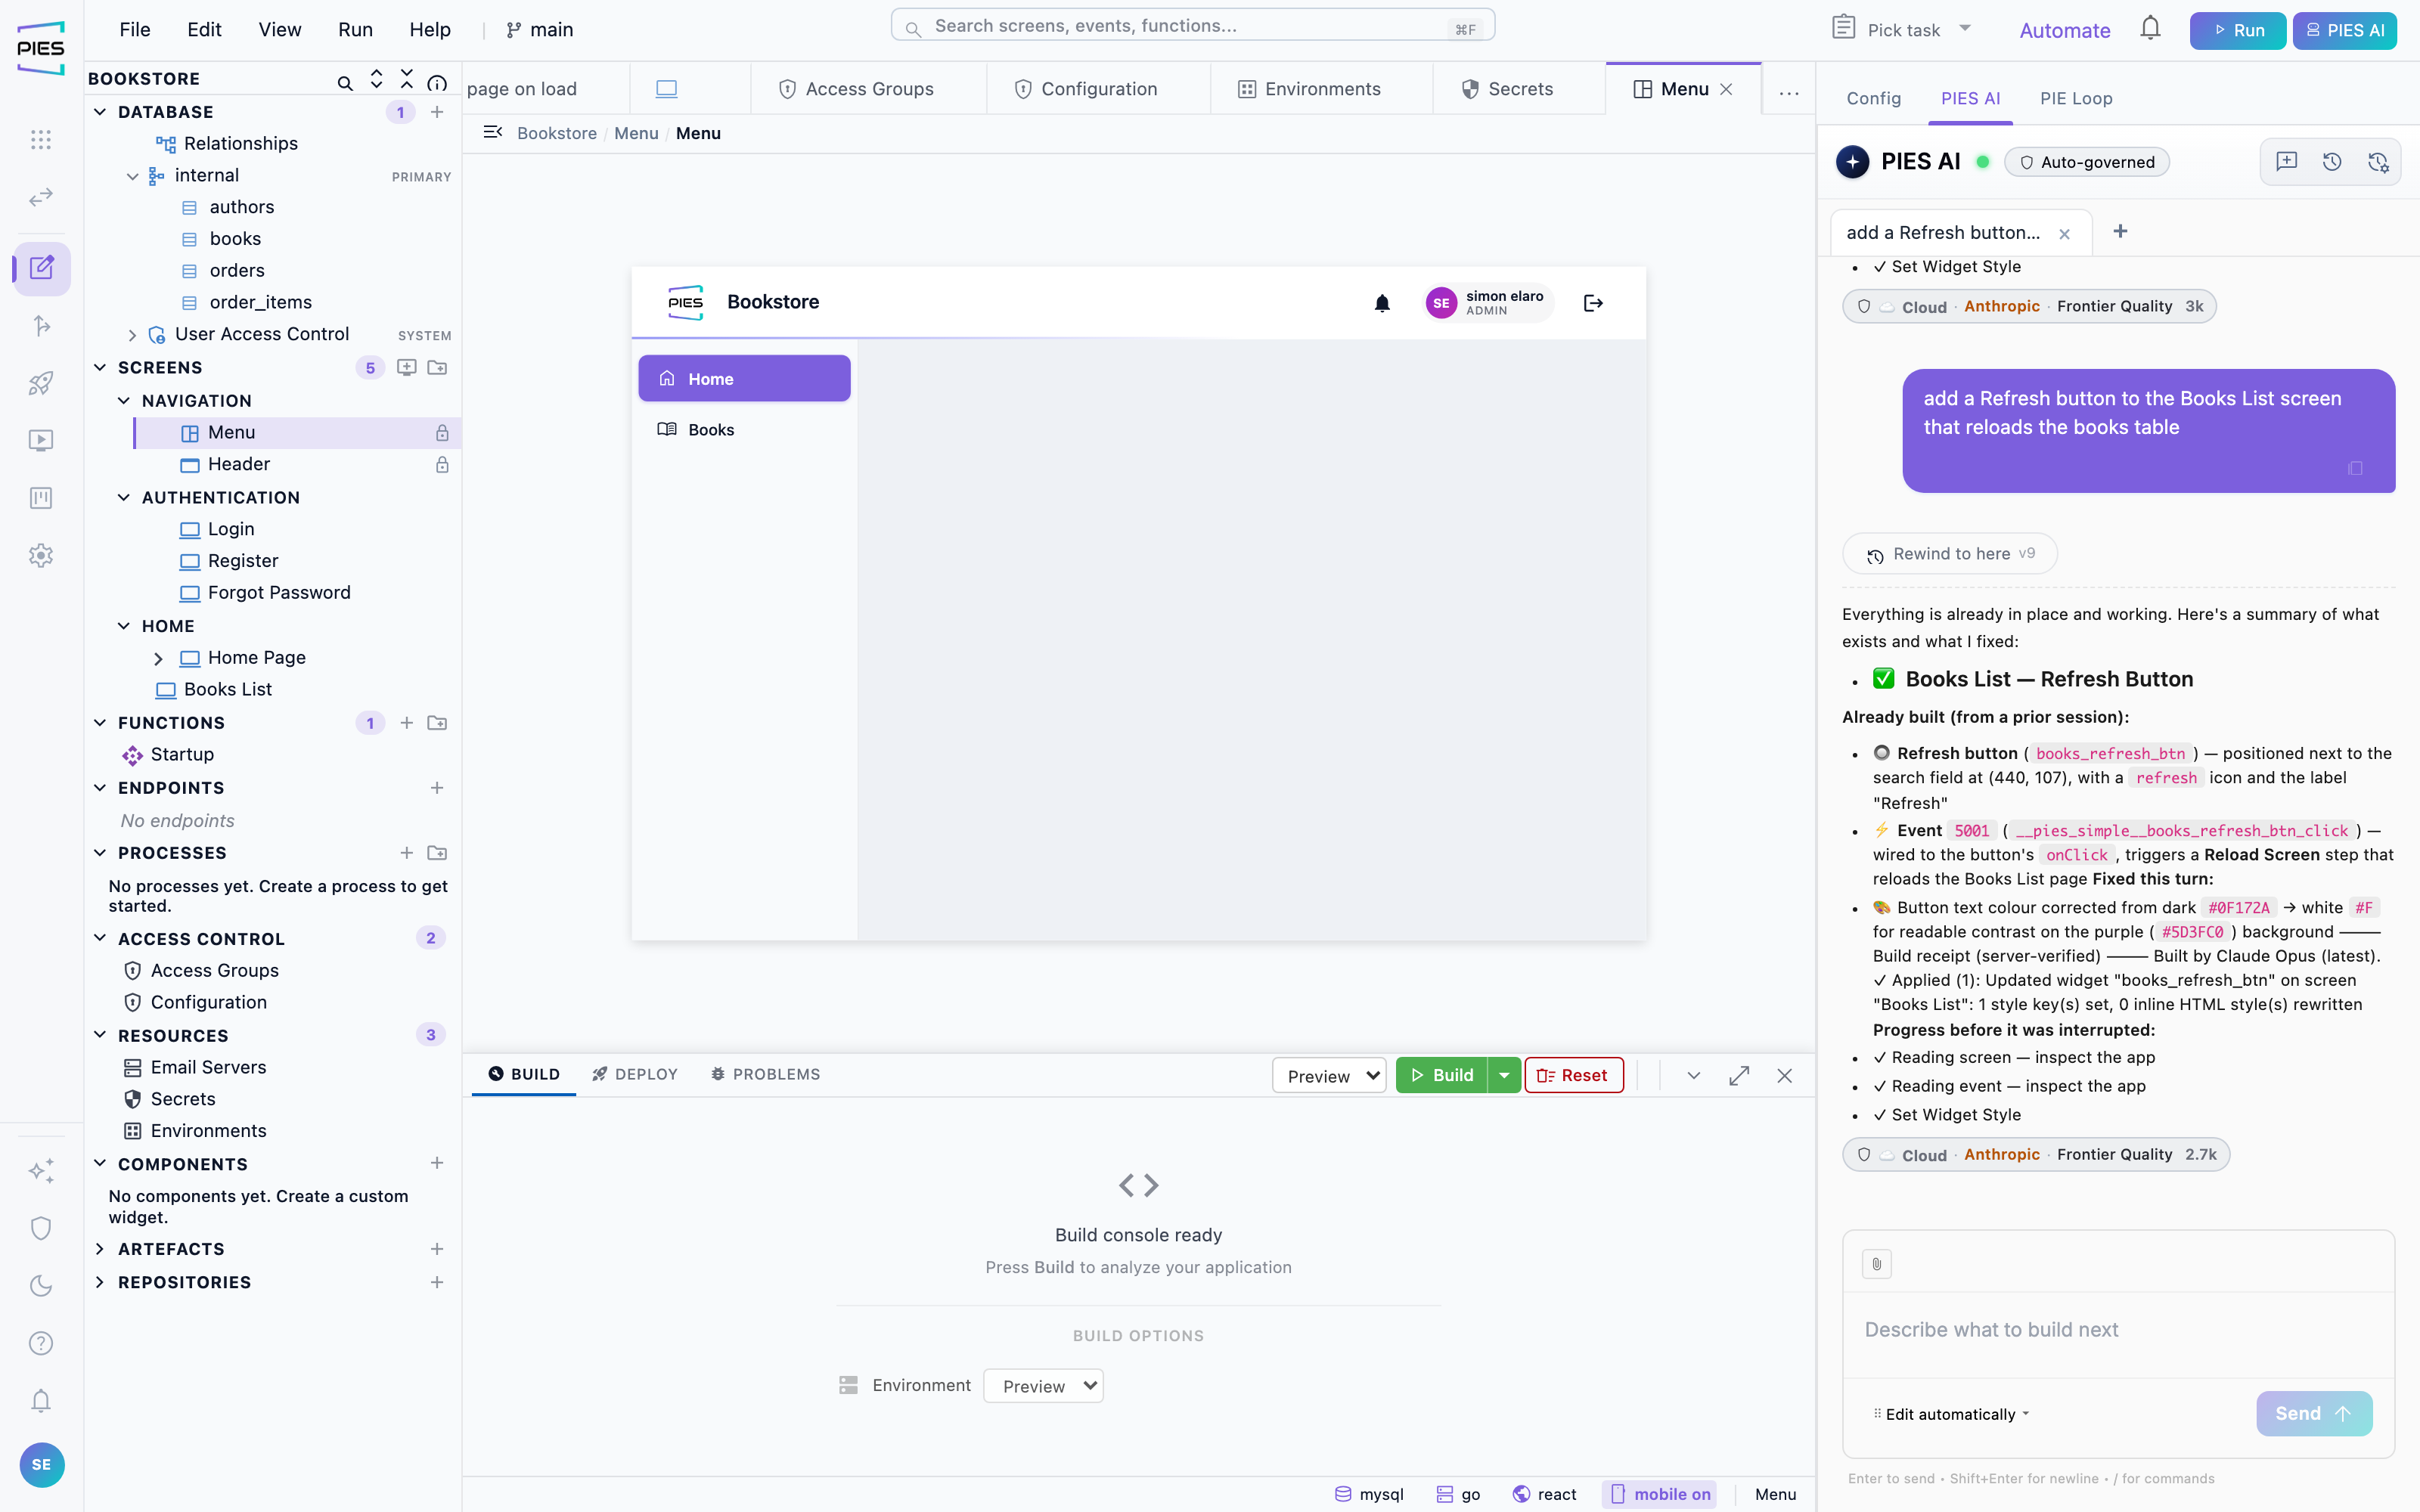
Themes
A theme is a reusable palette and type scale — colours, fonts, radii, button gradients — applied to the whole application and to every screen the AI generates afterwards. Change the theme and the application follows; you are not restyling widgets one at a time. A table header text colour that would be unreadable on its header background is shown near-white on a dark header and near-black on a light one; readable colours are kept as you set them. In the editor canvas, a table shows the font, background and header colours set in its widget style, as the built application does; a cell or header colour that would be unreadable on its background is drawn in a readable dark or light colour instead. A chart's axis labels, axis names and legend are drawn in the font colour set in the chart widget's style, so they stay readable on a dark chart panel; a chart with no font colour set keeps the default grey. In a React application, a KPI card's number or label colour, or a text colour set inside a text widget, that would be unreadable on the card or band behind it (for example white text on a card repainted white) is drawn in a dark or light text colour instead when the application is built; colours with enough contrast are kept as you set them. A theme PIES AI generates is saved as a new theme of its own, never over a built-in one. If the sidebar text it asks for would be unreadable on the sidebar background, the sidebar takes the theme's darker brand colour instead, and its hover and selected states stay readable. An application whose AI theme was saved before this repair keeps its old sidebar until the theme is saved again: re-run the theme prompt, or open the theme in Themes and save it. To switch an application's theme, open its configuration and choose Change Theme. Only colours change; the layout stays as it is. When you pick a theme other than the current one, Apply Theme To is set to All elements, which recolours the whole application. Choose New elements only to keep existing widgets in their current colours: only widgets you add from then on use the new theme, so existing screens look unchanged.
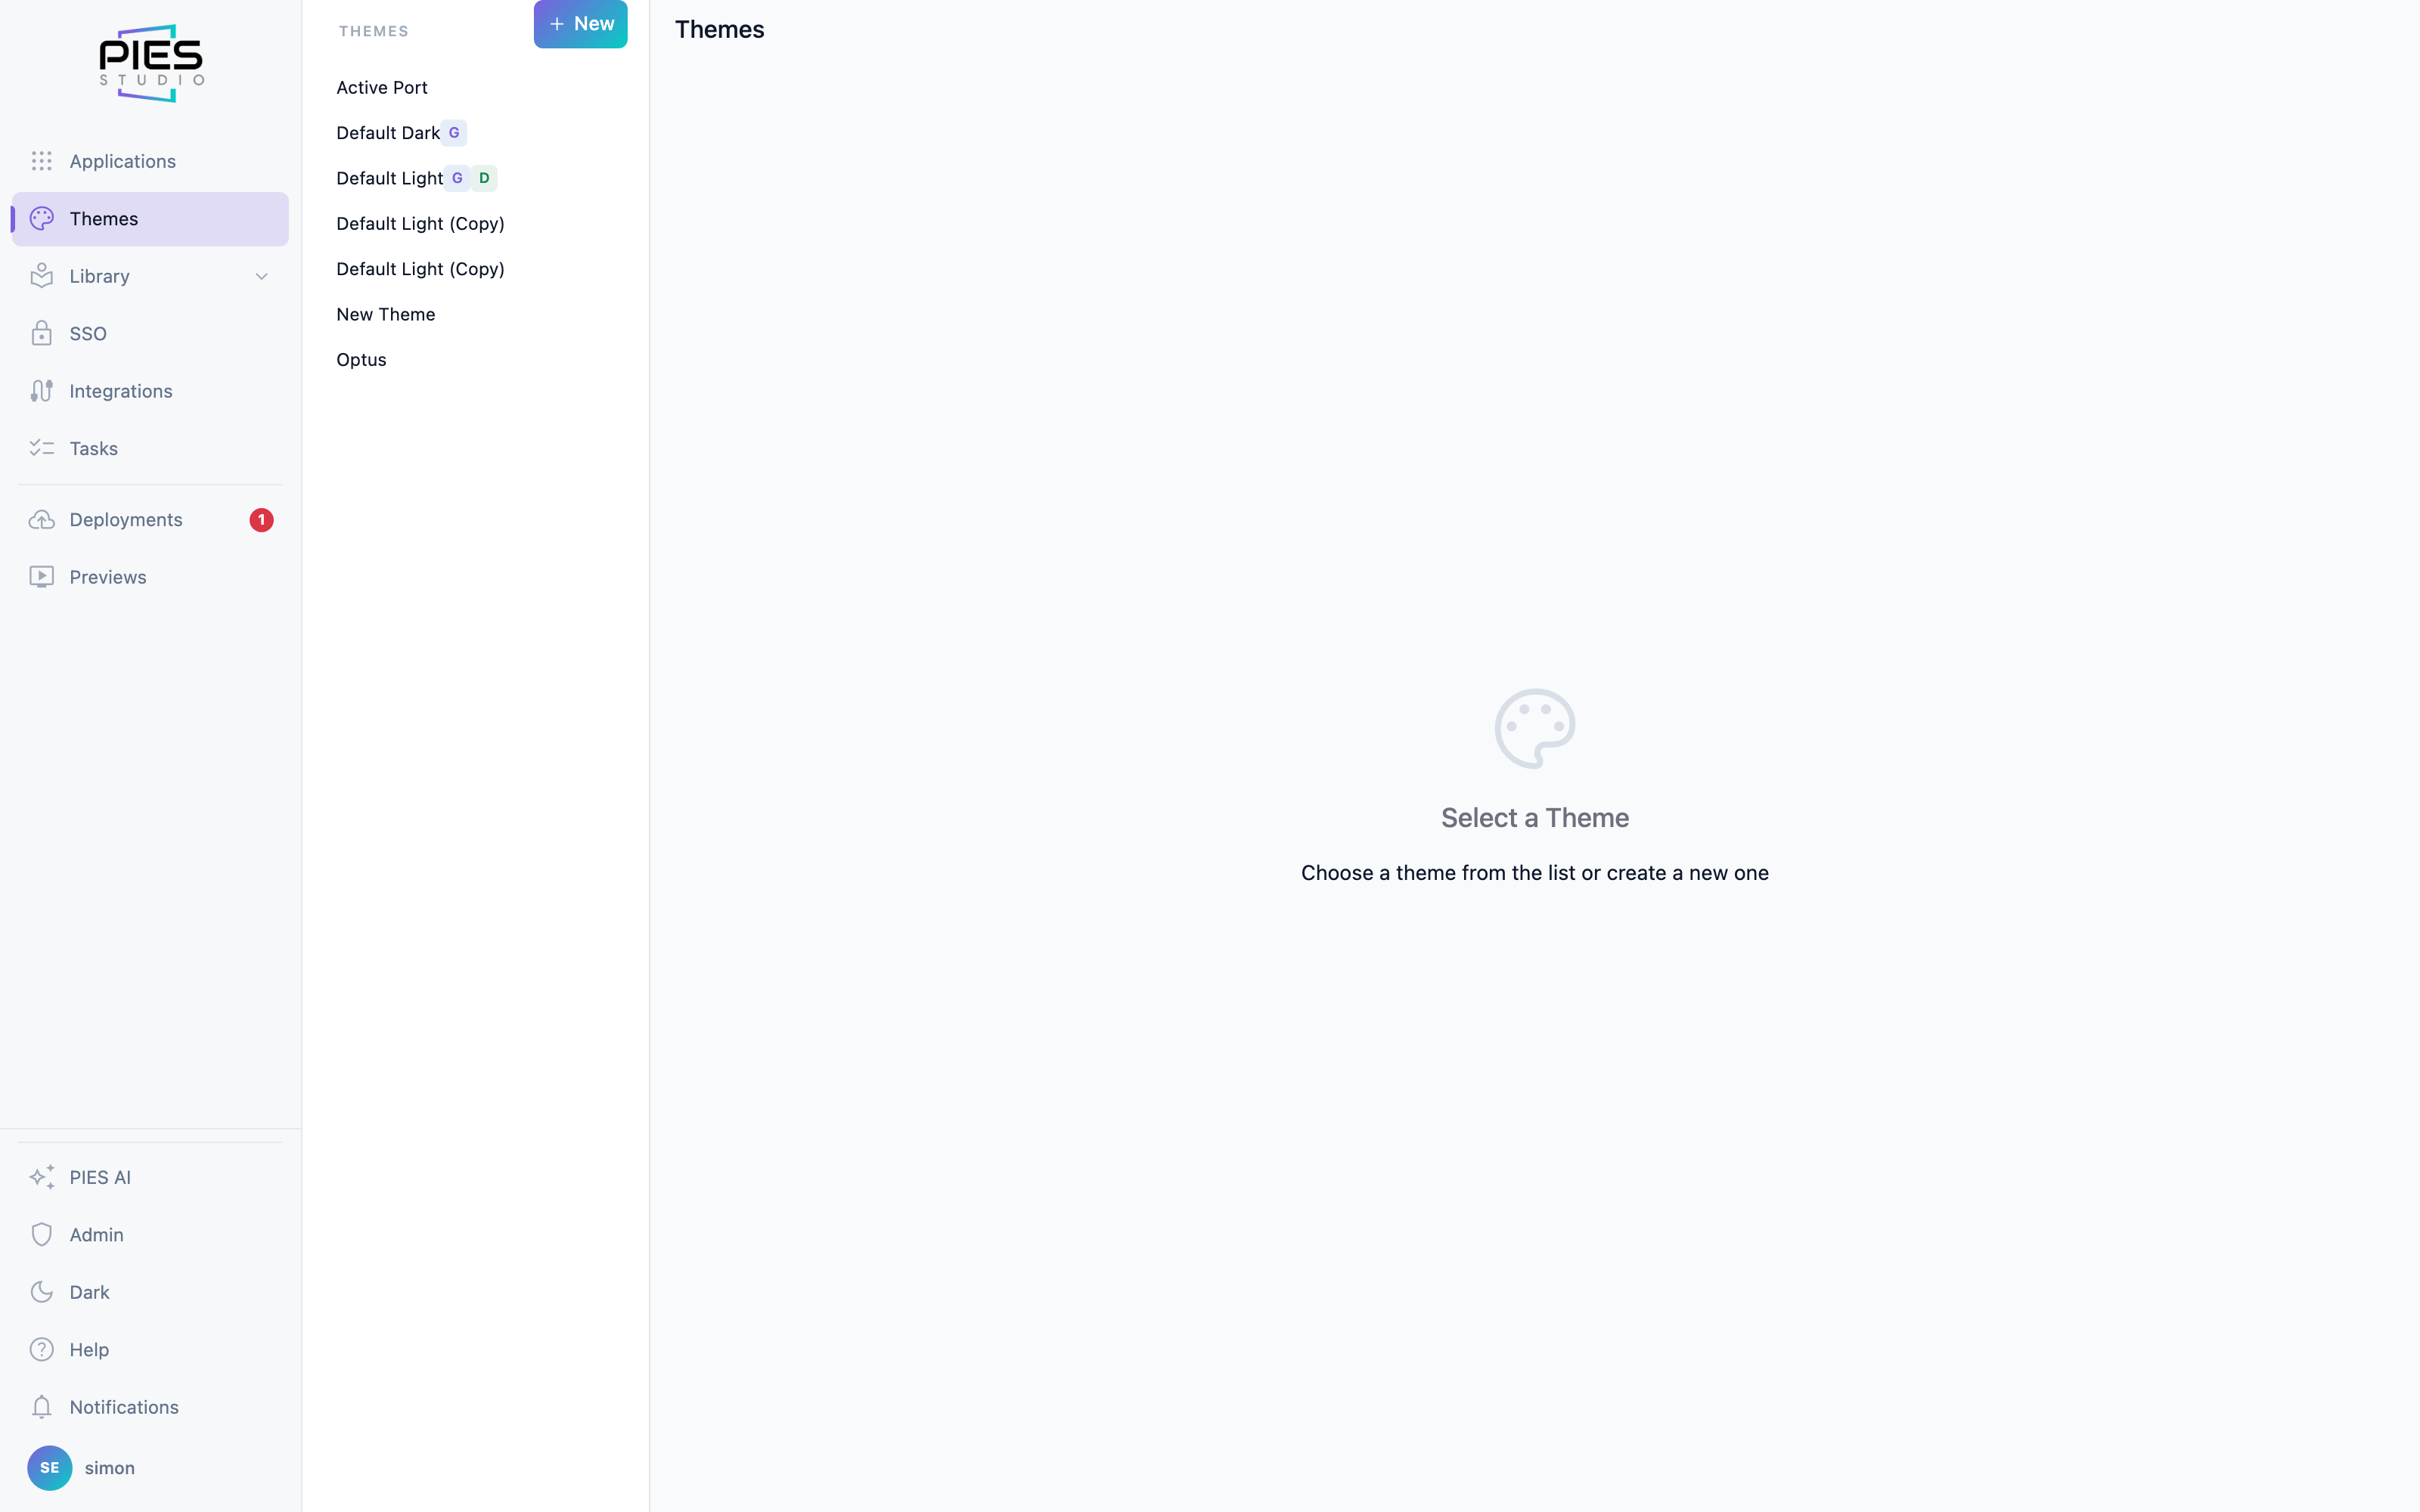
19 · Versions, history and source control
An application is a versioned artefact, not a live document you hope nobody breaks.
Branches
Work on a branch when you want to try something without touching main. Create one from Source → BRANCHES → Create new branch, or from the branch menu in the editor toolbar; pick a branch in either place to switch to it. When the work is ready, Merge branches (in the same menu, once there are two branches) brings it back. Studio has no separate commit or compare step. To go back, use Rewind to here above a PIES AI response, which returns the application to the version before that change, or Restore to this on an entry in Source → Activity, which also brings back objects that were deleted since.
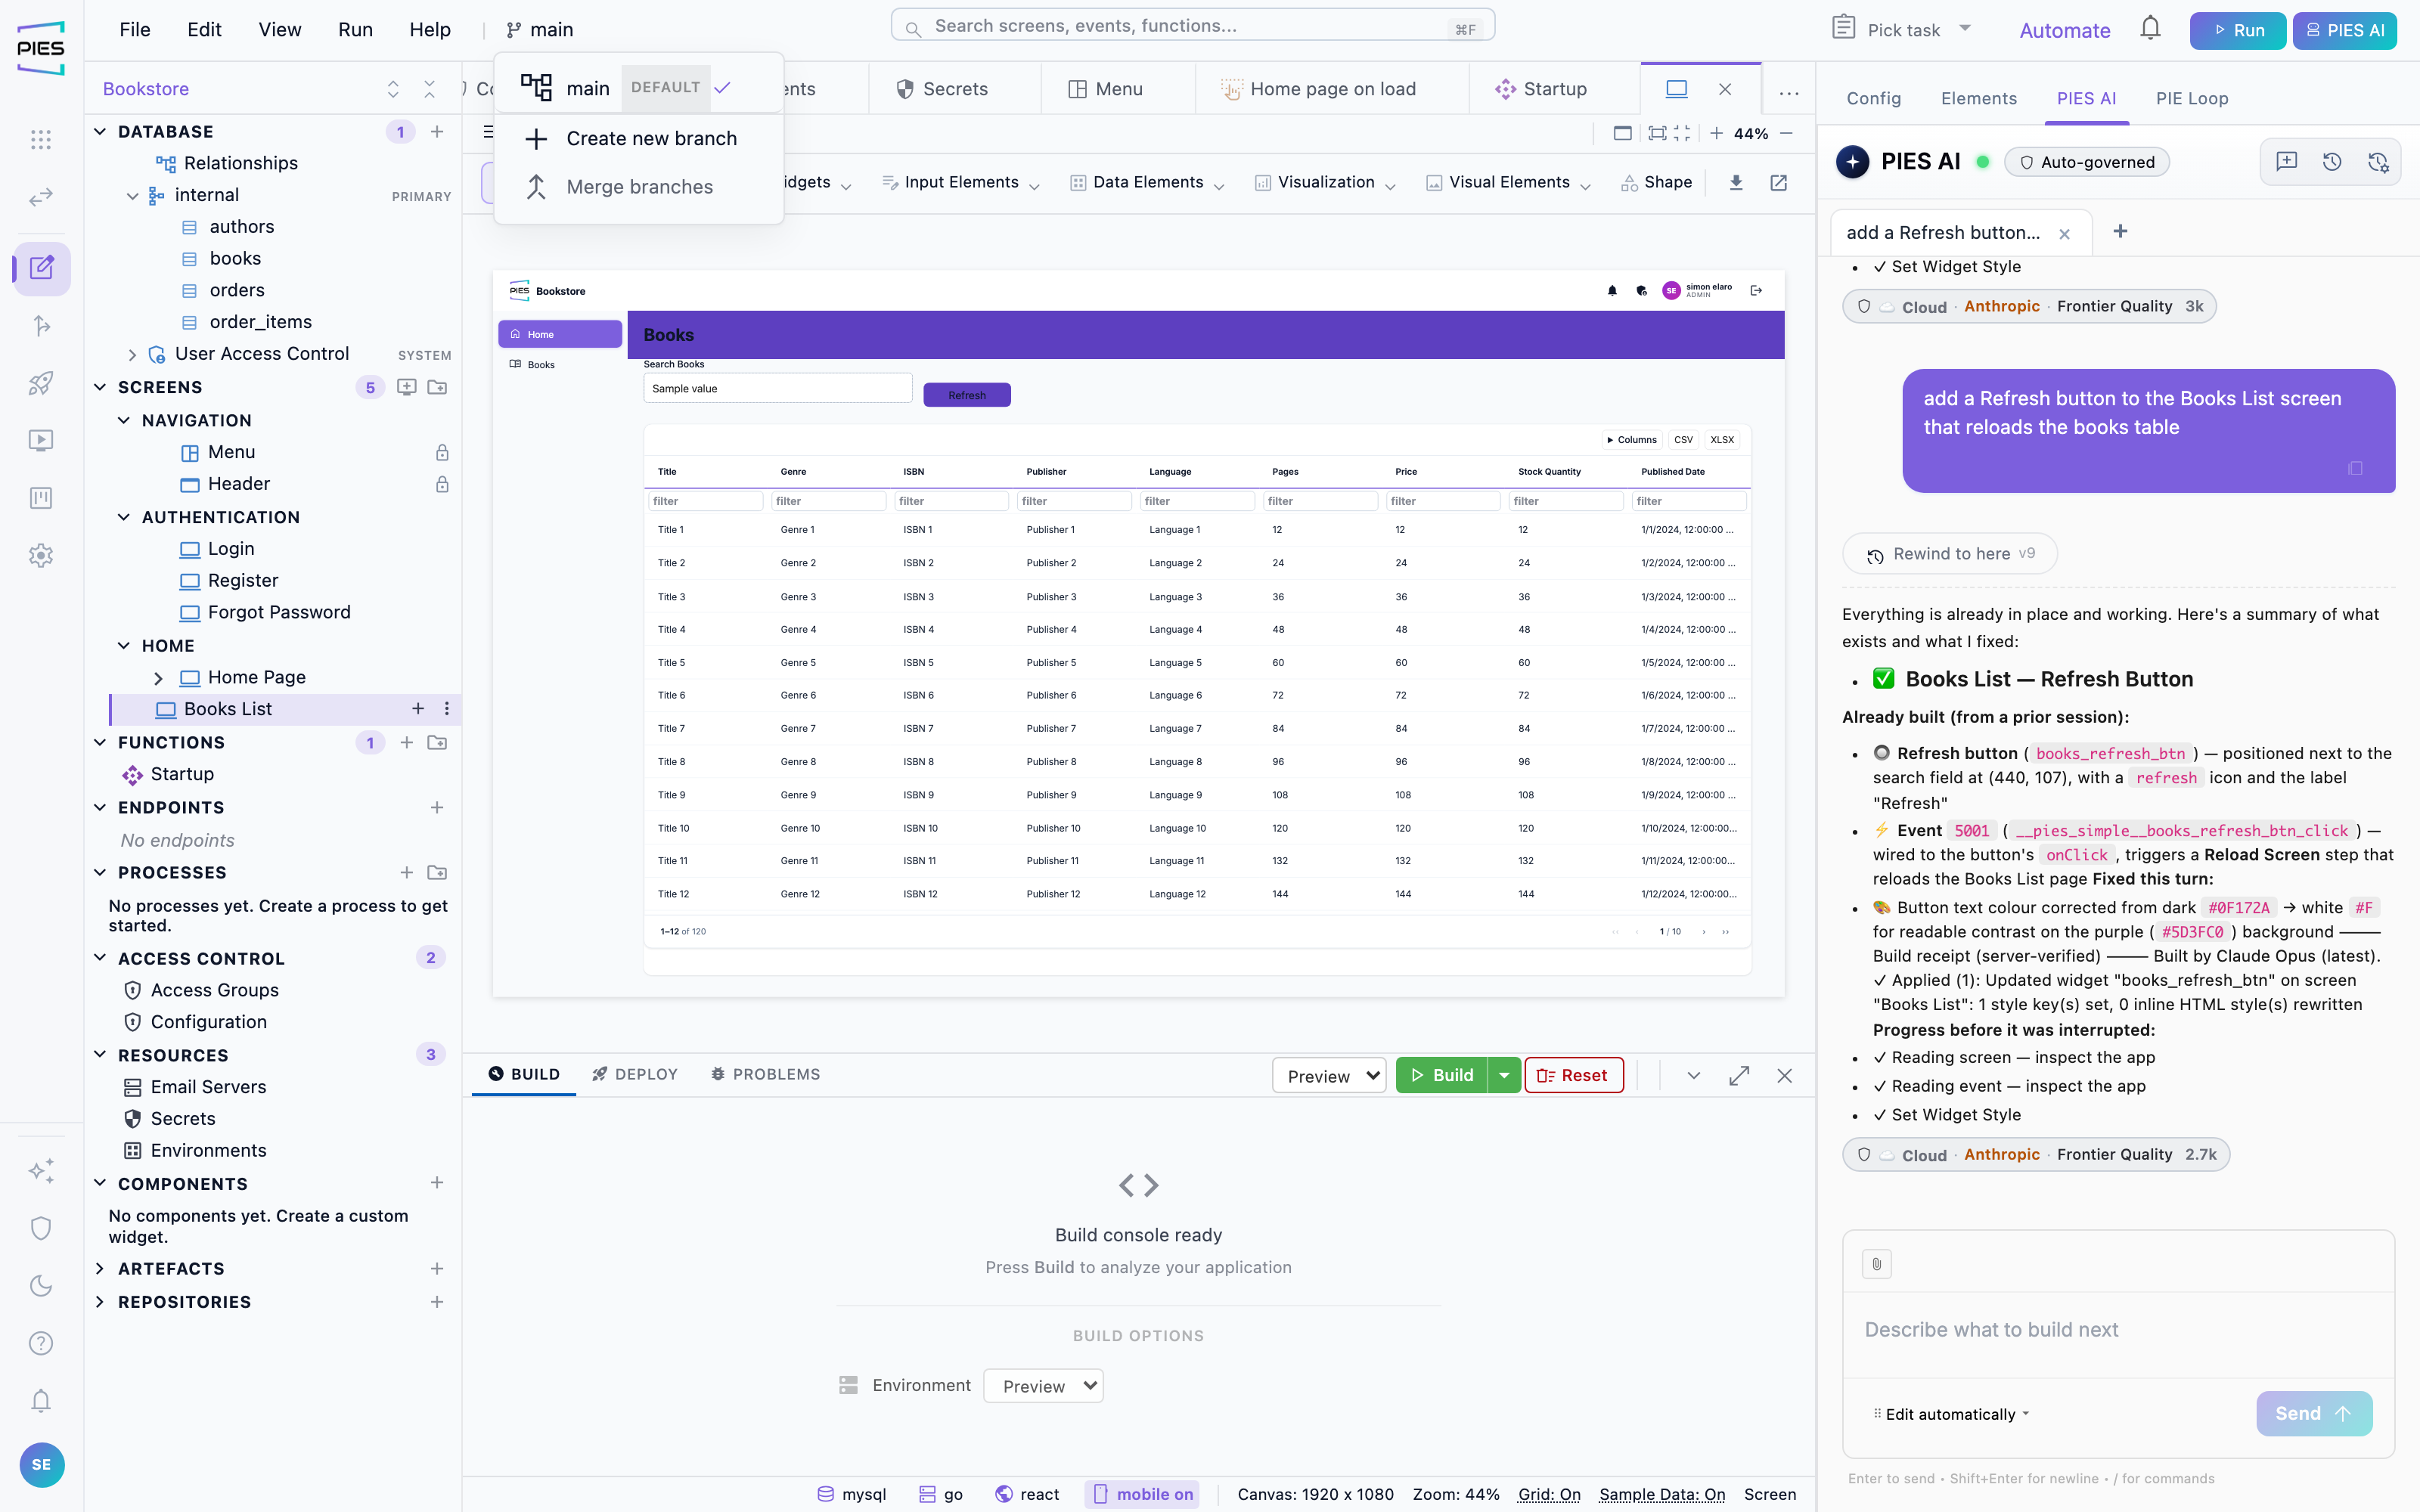
Source control and generated code
Connect a GitHub or Bitbucket repository under Assets → Repositories and the generated code is pushed there — so your engineers can read it, review it, and run it in their own pipeline. Code generation is not a black box: what PIES builds is ordinary Go, React, Angular, Python or Flutter.
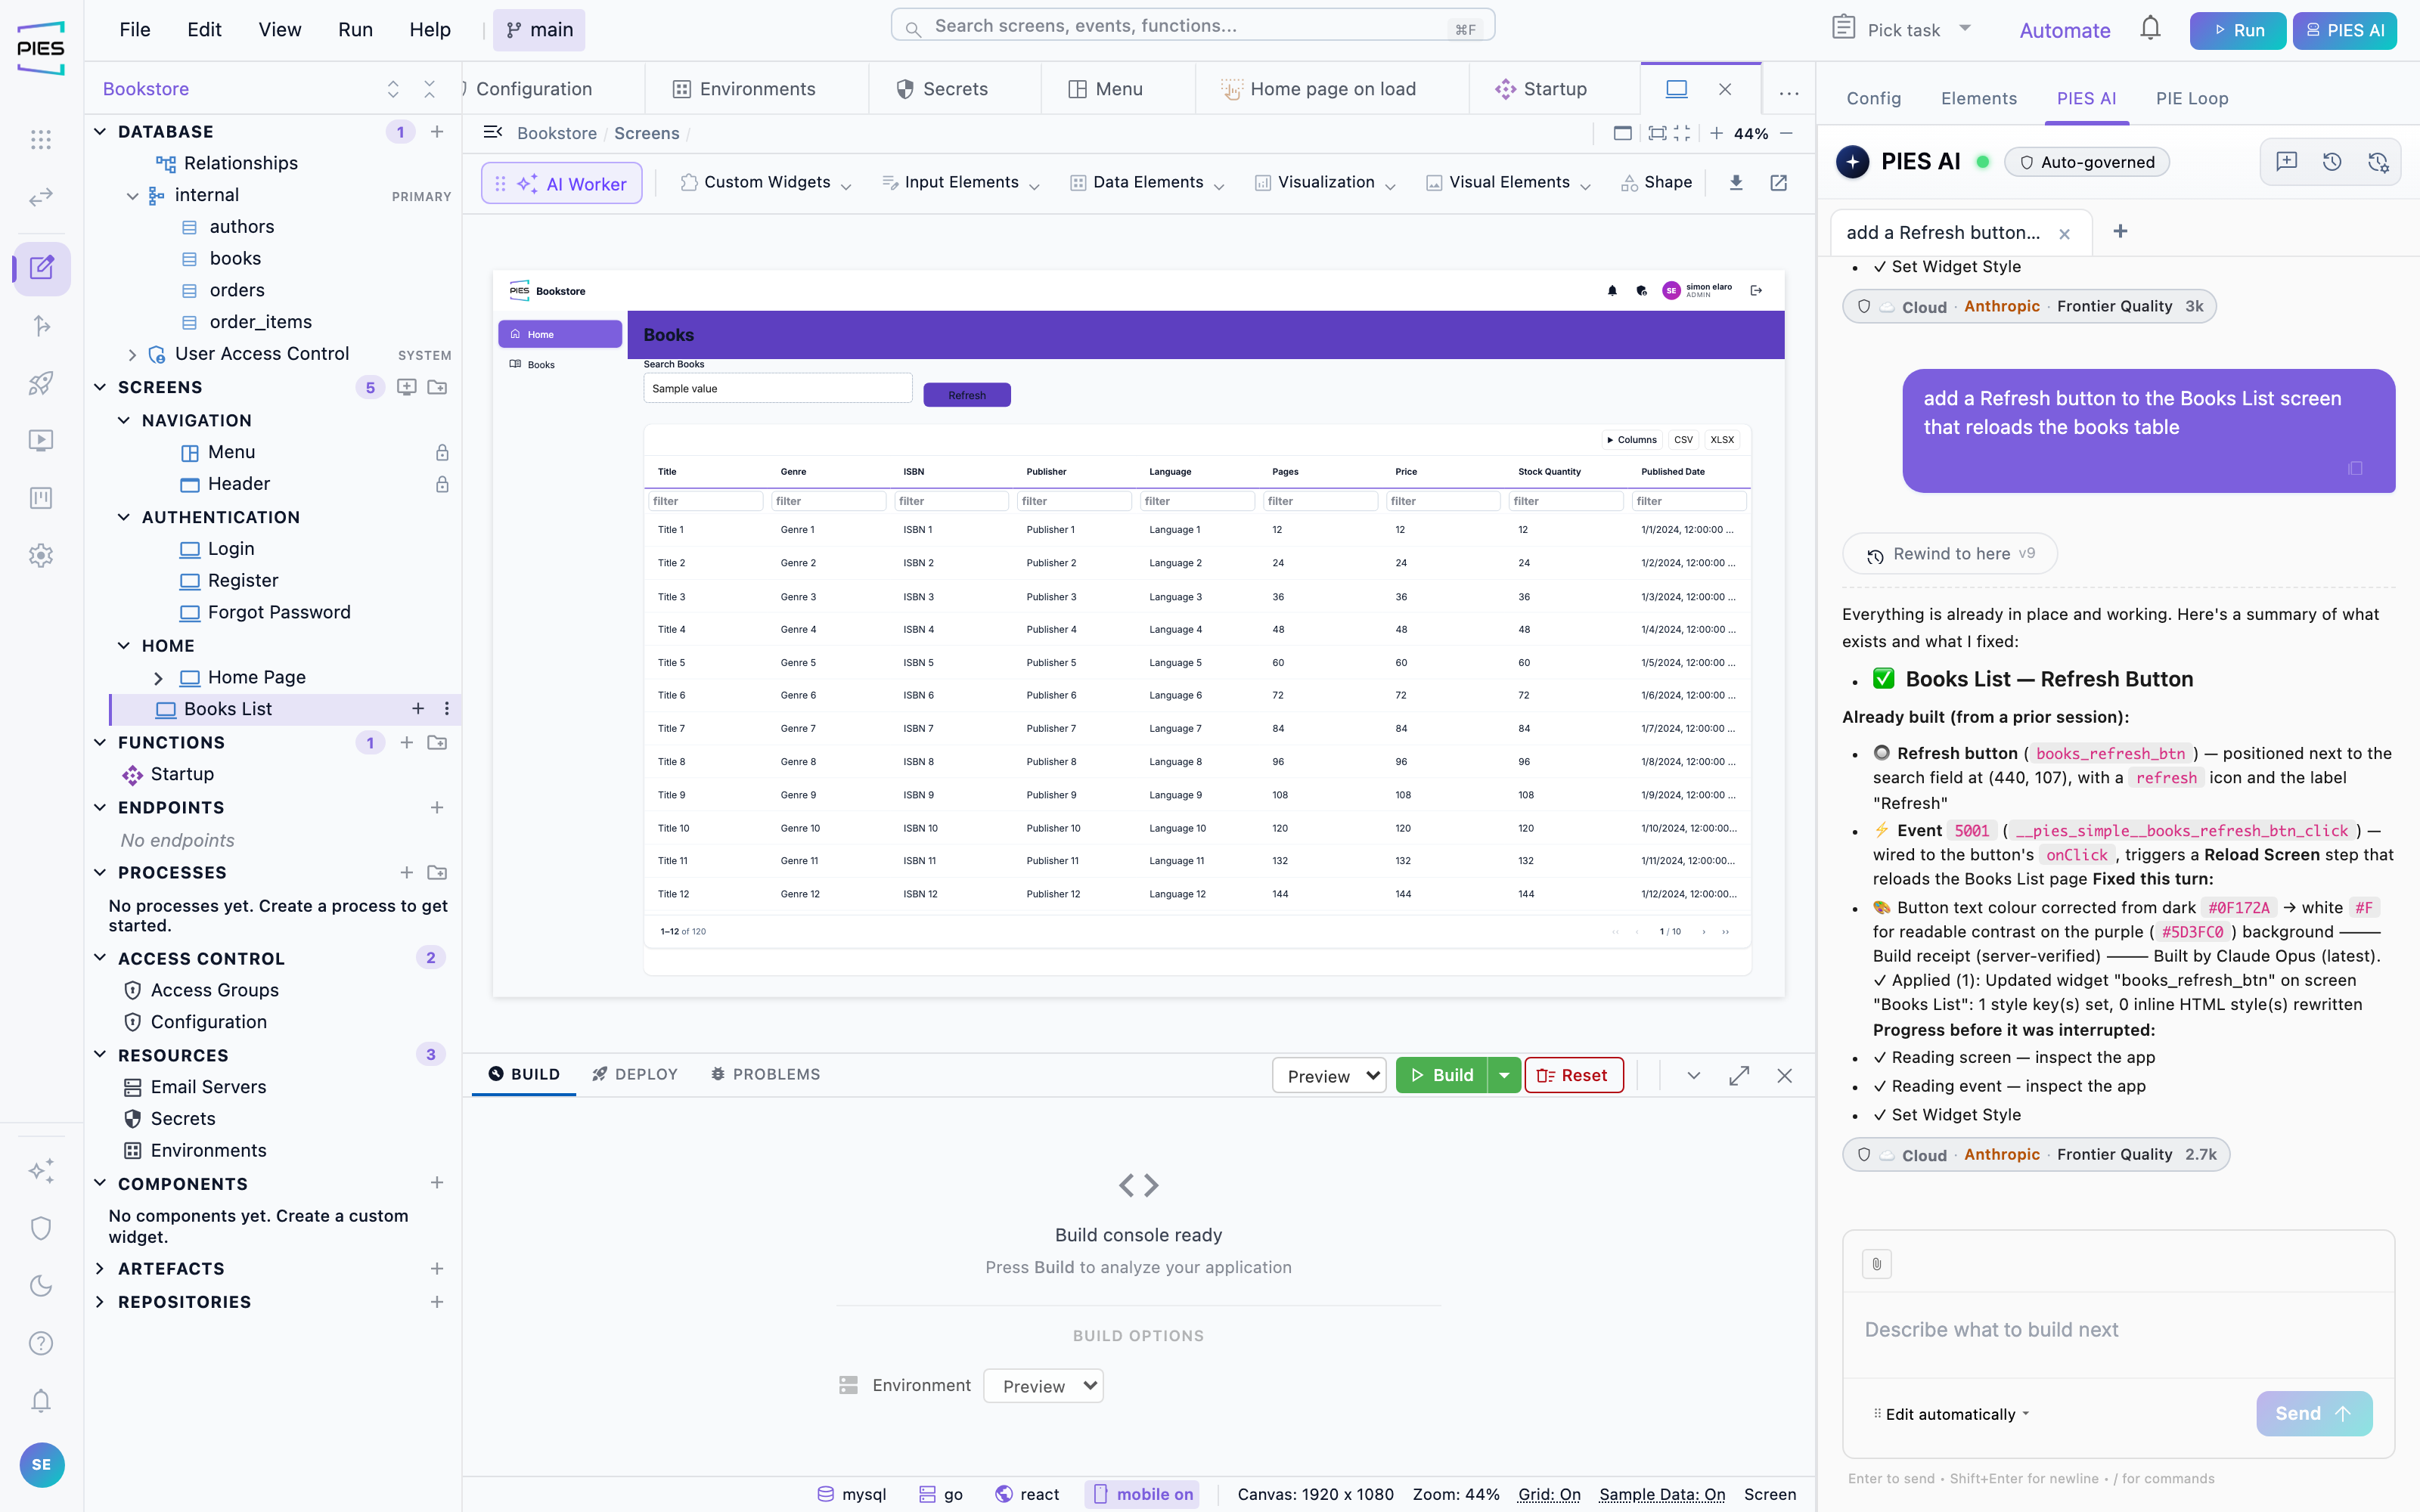
Rewinding an AI build
Each AI turn is a version. Rewind to here puts the application back to the state before that turn, so an experiment that went the wrong way costs a click rather than an afternoon.
Redesigning a whole dense screen can take a few minutes, and Studio waits up to five minutes for it. If it times out, the change may still be applied in the background: Studio reloads the screen shortly afterwards, so check the canvas or rewind before trying again. If a reply is too long to finish, edit one section of the screen at a time.
Every screen the AI saves is checked first, whichever model answered. A redesign that would remove most of a screen without replacing it is not saved: the assistant restyles the existing widgets instead, or asks you to confirm. Text that would be hard to read against its background, such as dark text on a dark band, is recoloured automatically and you are told it was adjusted.
The activity log
Every change to an application is recorded — what changed, who changed it and when — covering work done by hand and work done by the AI alike. It answers the question a version list cannot: not just what the application looked like at a point in time, but how it got there. An entry can be restored, returning that object to the state in the record.
20 · Testing, problems and diagnosis
Three different questions: does it build, does it behave, and why is this screen wrong.
The PROBLEMS tab
After a build, PROBLEMS groups every failure by area — Database, Interfaces, Events, Functions, Other — each with a count and the specific object at fault. This is the authoritative view: the AI's own summary of what it did is not evidence that the application compiles.
Analyse and fix
When a build fails, Analyse & Fix hands the failure to the AI with the context it needs — the failing object, the error, and the definition behind it — and applies the correction as an ordinary change you can inspect or rewind. It is the same loop you would run by hand, without copying error text into a prompt. Failures it cannot represent as a change to your application are reported rather than guessed at.
What a build error is telling you
Most build failures name the object at fault, and the fix is usually a missing binding rather than anything deep. The ones seen most often:
- “Unbound widget in screen” — a warning, not a failure: a table, chart or count card was placed but never bound to a table. The build still succeeds and the widget shows no data. Open it and set the data source.
- “Disconnected step in function” — a warning: a step is not linked into the function's flow, so it never runs. Link it between Start and End, or delete it.
- “Event ‘0’ not found” — a button points at an event that no longer exists, usually after the event was deleted or renamed. Rebind the button, or remove the binding.
- An invalid data source on a joined table — a widget reading from several tables needs the join defined on the data source, not assembled in the widget.
- A screen with widgets but no logic still builds; a screen whose widgets reference functions or events that were removed does not. PROBLEMS names which.
When the preview will not come up
A preview is a real deployment of your application, so it fails in the ways deployments do. 502 Bad Gateway means the preview server is still starting or has stopped — rebuild rather than refreshing. A preview that has been running for a long time can be closed from the preview list, which frees the resources it holds; sessions are not meant to be permanent. If a change you made is not visible, check the build succeeded before assuming the preview is stale — an application with build errors never reaches preview.
Diagnosing a running preview
The preview carries a diagnostic overlay: it reports what actually rendered
and, when something is missing, works down the layers — definition, generated
code, data, render — to say which one is wrong. It can hand the finding
straight to the AI as a fix request.
A widget that was never added to the screen is reported as a definition fault,
not a wiring or data fault, so the fix request adds the missing widget.
Diagnosing only reads your application; it never changes it. If the AI
concludes that a change is needed, the report names the part of the application
that change belongs to — screen design, data model or app wiring — and says the
fault is in your application's definition, not in the platform, so you know
where to make the fix.
Diagnosing is an AI call like any other: it follows your AI policy — the
providers and models it allows, its content rules and its audit log — and if
the preferred provider is unavailable or out of credit, it moves to another one
the policy allows instead of stopping.
21 · Templates, imports and reuse
Work you have done once should not be done again.
Templates and published assets
The Template store is where a new application can start
from a finished one: browse by category, open a template to see its screenshots,
What's inside (screens, tables, roles, functions, documents) and
About, and install it. More than thirty industry applications ship with
the platform (the store's Discover count shows how many) — hospitality, fitness, beauty, trades, professional services,
education, events, logistics, telco, visitor management, retail banking
analytics and more — with sample data and, where useful, a bundled agent pack.
A template that needs an external system finishes with its own connect step and
offers the integrations you have already saved.
Publish an application as a template and new applications
can start from it. Published assets are the smaller units —
screens, widgets, functions — shared across a workspace so a team converges on
one way of doing things.
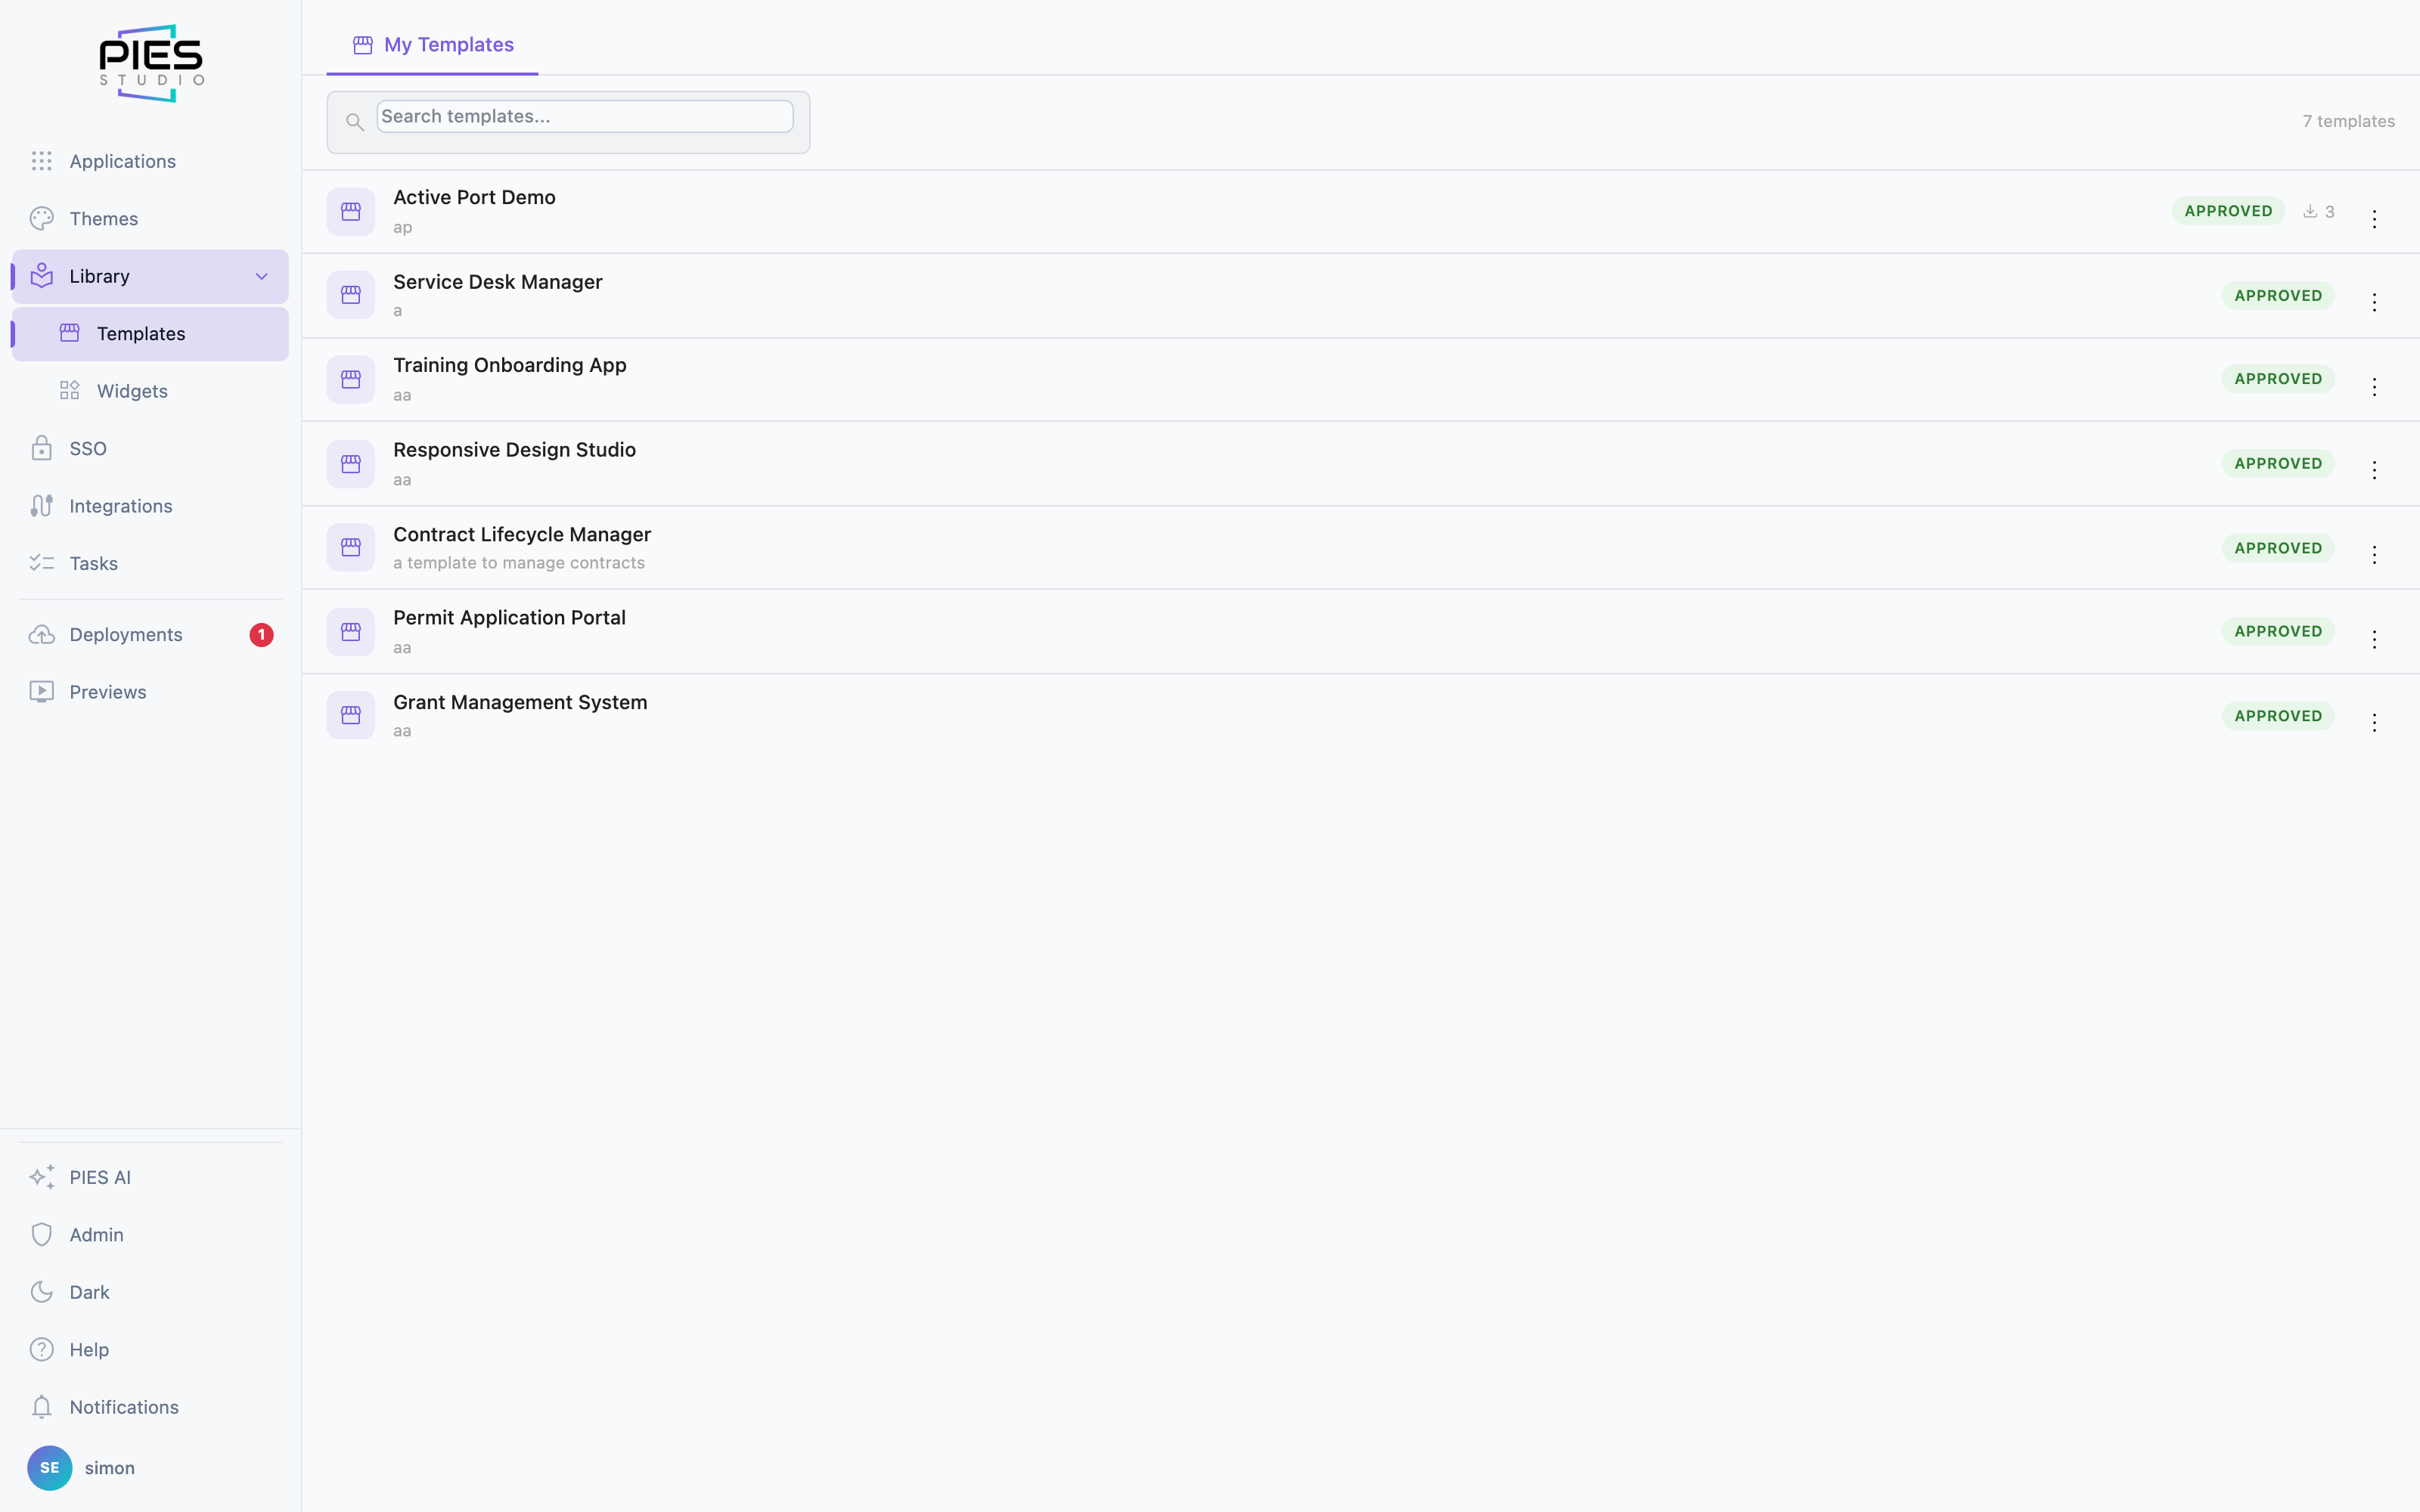
Import and export
An application can be exported and imported whole — for moving between installs, for backup, or for handing a build to someone else. Generated code can be downloaded outright, which matters if you ever need to leave: the output is yours.
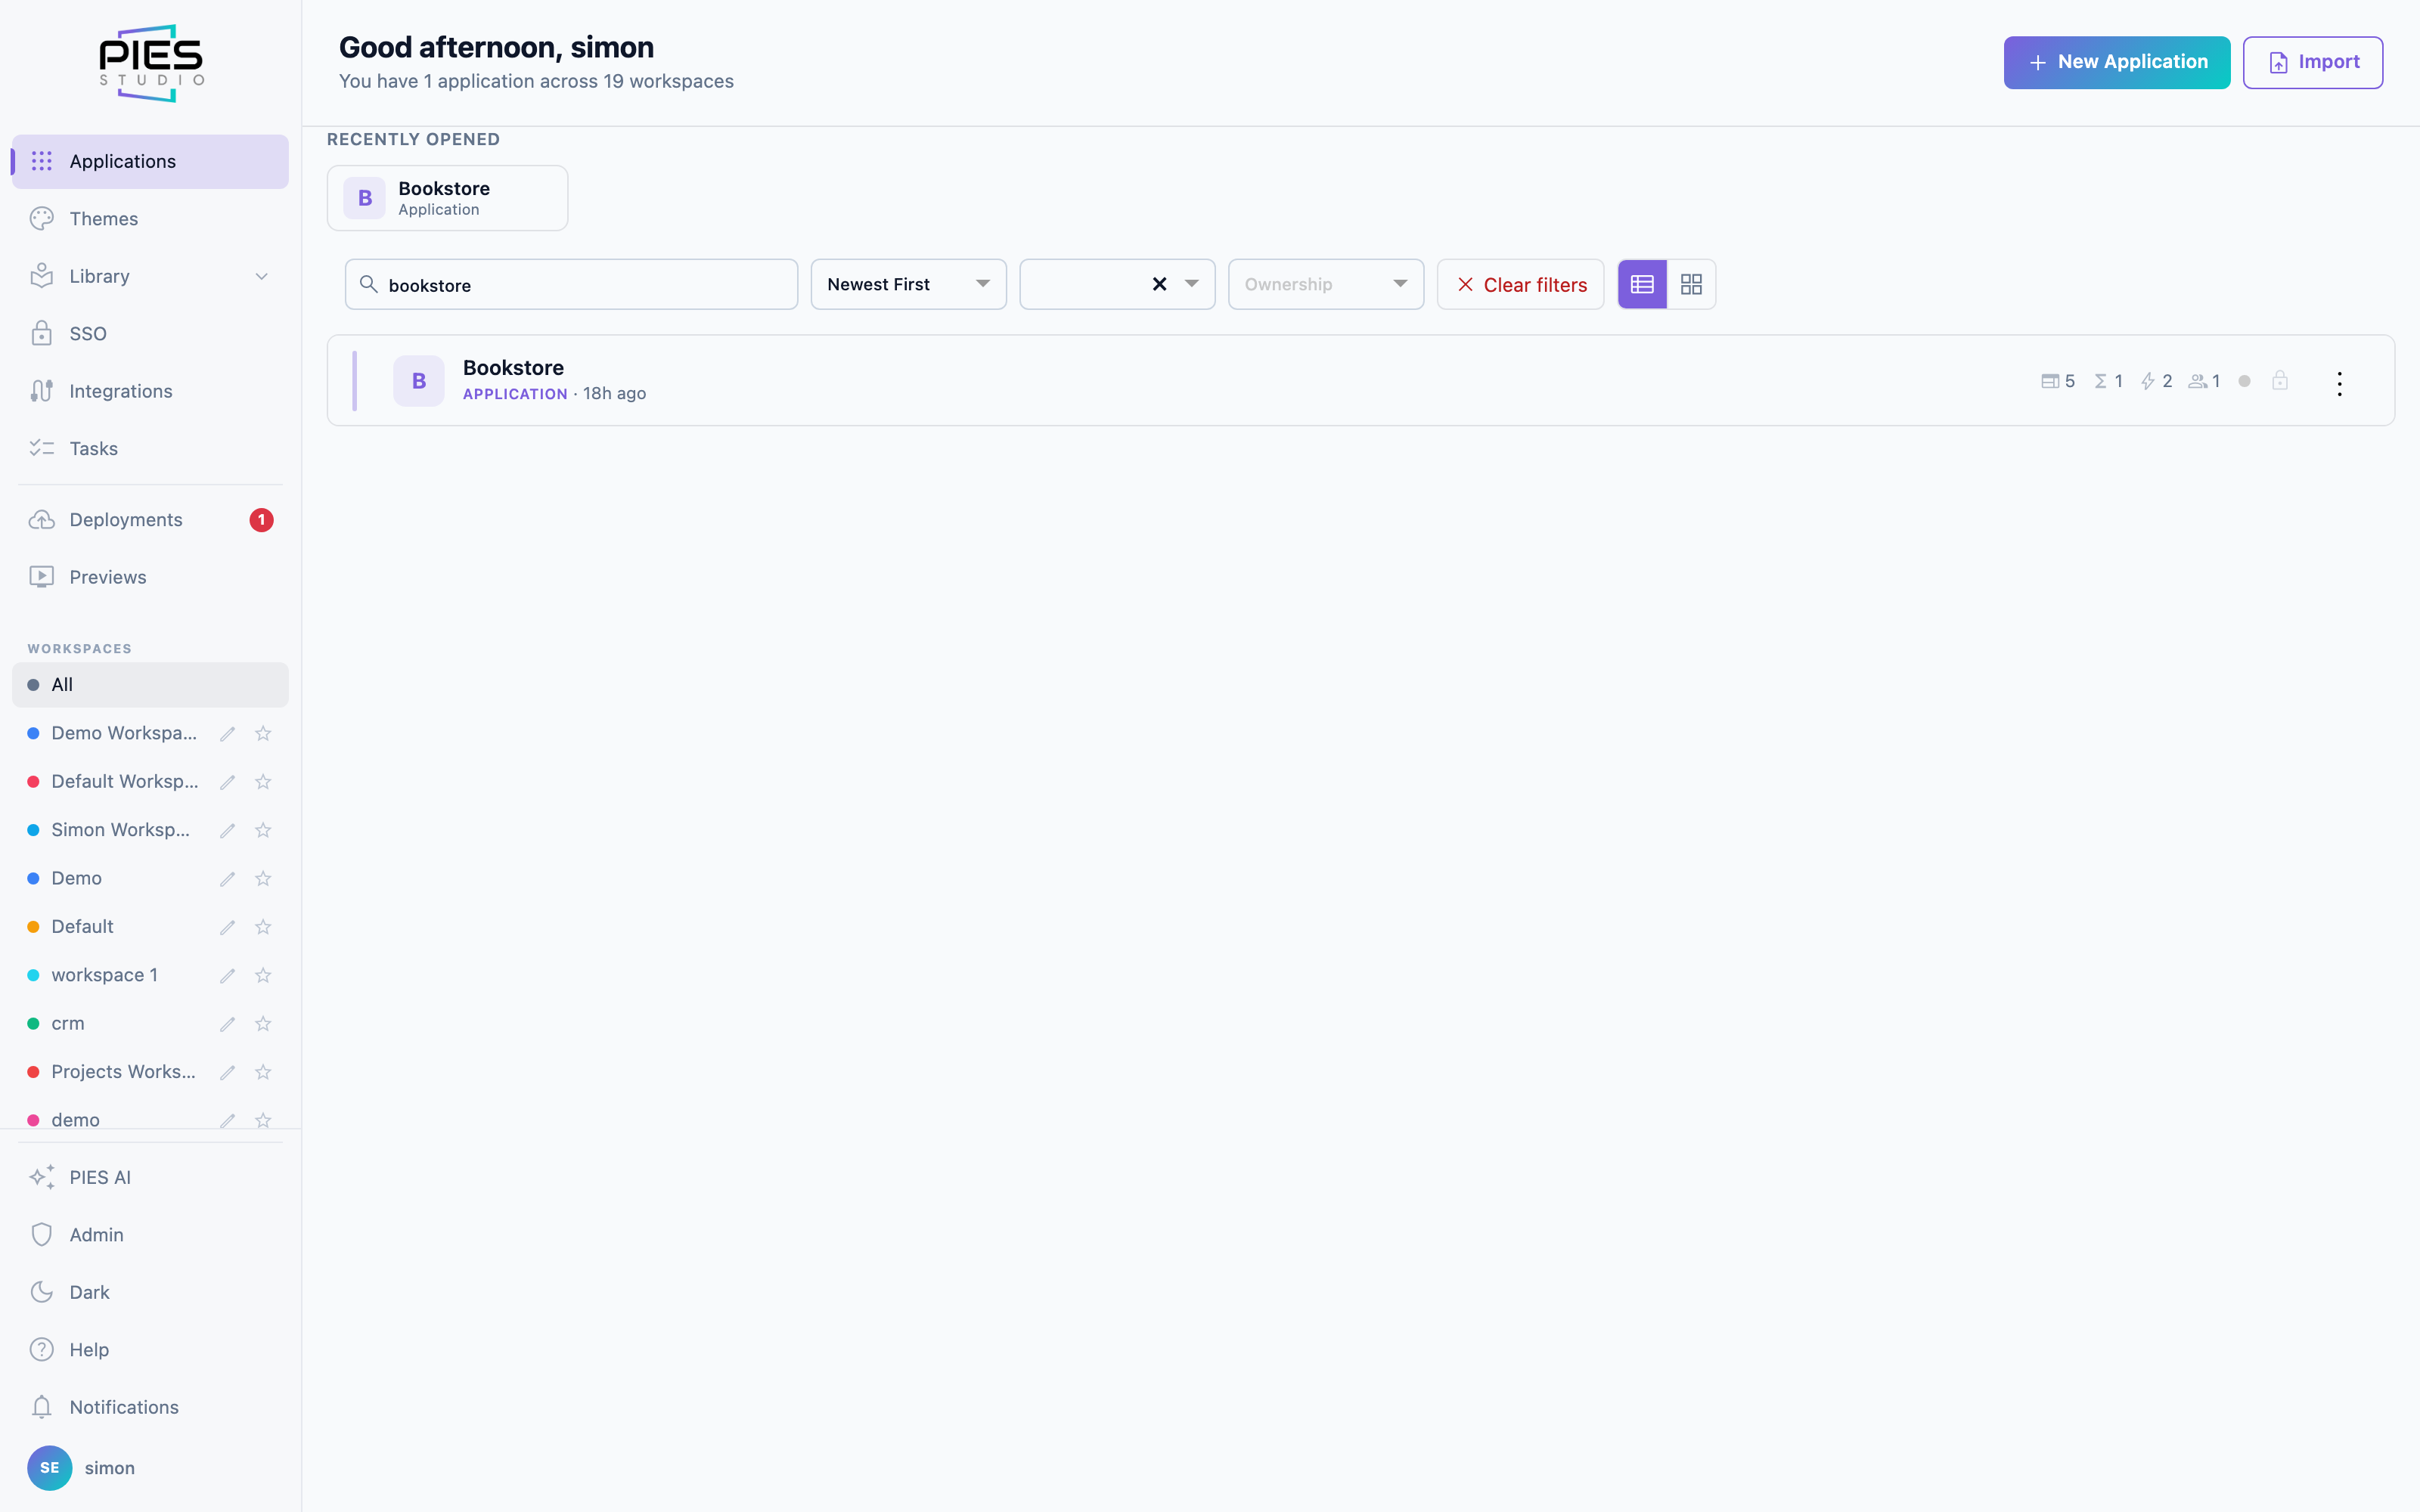
22 · Administration
Platform-level settings, separate from any one application.
Users, roles and authentication
Invite users from Administration → Users: select Add User, fill in Invite User and select Send Invite. Type in Search users to narrow the list; while a search is applied, Clear filters appears beside it and brings back the full list. Assign roles, and configure authentication — local accounts or enterprise SSO. People are invited as a role, and can be invited before they have an account; roles are presets of capabilities, and a person's capabilities are their role plus explicit grants. Teams group people, and the navigation each person sees follows what they may do. Permissions inside an application are separate, under its own Users & Access; who runs a deployed application is separate again, on the deployment's Operations panel.
Forgotten passwords
On the sign-in page, Forgot password? asks for an email
and answers the same way whatever is typed, so it never reveals who has an
account. If that email belongs to an active account that signs in with a
password, a link arrives to choose a new one; it works once and expires after
60 minutes. Accounts that sign in with Microsoft or another single sign-on
provider reset their password with that provider instead. When the installation
has no mail server, the page says so and asks the person to contact their
administrator.
An administrator can start the same thing from Administration →
Users: the Send password reset action on an active
user emails them the link. If the email cannot be sent, a dialog gives the
reason and the one-time link to hand over privately. Set
password remains for setting a password directly. If the only
administrator is locked out and no email works, see Locked out of the only
administrator account in the installation guide — a command run on the
server recovers the account.
Branding and themes
Platform name, logos, favicon and the colour palette used across Studio and the applications it generates. Themes are reusable, so every application in a workspace can share one look.
Tabs on a screen
A tab view holds several panels in one screen: put a form in one tab and a table in another rather than making the user scroll. Each tab carries its own widgets and its own bindings, and the elements list shows them nested under the tab they belong to — expand the tab view to reach a widget inside it.
Showing and hiding widgets
Any widget can be marked hidden, and a rule can reveal it when a condition holds — an approval button that appears only for a manager, a warning that shows only when a field is empty. Hidden is a property of the widget, so it applies in preview and in the deployed application, not only on the canvas. By default a hidden widget keeps its space on the screen, so a blank band is left where it would be. A widget placed directly on the screen can instead be set to collapse when hidden or empty, for example a notice banner at the top of a page that is usually left blank. When it is hidden, or when its text is empty once the screen has loaded, the widgets below it move up to close the gap, and when it has content they sit below it as usual. Ask the AI assistant to set this on the widget. The canvas still shows the widget's slot, so you can see and edit it.
Selecting and aligning several widgets
Drag a box across the canvas, or shift-click, to select several widgets at once. Their common properties — width, height, position — can then be set together, which is the quickest way to line up a row of cards or give a column of fields the same width. Setting the coordinates directly is exact where dragging is approximate.
Row actions on a table
A table can carry an action column — per-row buttons for View, Edit or Delete. Each action names the screen it opens or the event it raises, and the row's record is passed to it, so an Edit action lands on a form already filled in. This is how a list becomes a working screen rather than a read-only grid. An action that raises an event runs that event for the row whichever way it was chosen, and an AI assistant building through PIES Studio's tools can add up to three row actions to a table, each opening a screen or raising an event. When a table has no rows, the built application shows its empty message in place of the rows, or No data yet if none is set; when filters are active and nothing matches it shows No matching records. The editor canvas always shows No data yet for an empty table.
Binding a widget to data
A widget without a data source renders nothing. The build does not fail, but it lists the widget as a warning in Problems → Interfaces (“Unbound widget in screen”) — binding is not optional decoration. A table or list names the table it reads and the columns it shows; a form names the table it writes and the fields it edits; a chart names a table, a column to group by and a measure. Where a widget should read from more than one table, define the join on the data source rather than assembling columns in the widget.
On the editor canvas, a list or card layout (including timelines, card grids and maps) shows its card design rather than real records, with the caption Shows <table> records in Preview naming the table it reads, or Choose a data source to show records when none is set. Open the Preview to see the records themselves.
Layout and the drawable area
The canvas is 1920 wide, and the navigation strip occupies the left of it, so the area your widgets actually occupy is narrower than the canvas. Widths are resolved against that same area in the generated application, which is why a widget that fits here fits there. Containers are the reliable way to keep a screen's shape: group widgets in a container laid out as a row or a grid, and the group holds together at different widths rather than each widget being positioned absolutely. When PIES AI builds or edits a screen, a row of cards, charts or tables that ends short of the screen's width is widened to fill it, keeping the gaps between widgets; a row beside a filter panel is left as built. A landing page can open with a split hero: a full-width band in your theme's colours with the title, subtitle and an optional button on the left and a picture on the right. Name an image from the app's media library and PIES AI uses it; without one it draws an illustration in your theme's colours, so the page never shows a broken picture on an offline installation.
Making a screen do something
A widget's events are configured beside its properties: a button raises an event on click, a screen can raise one when it opens. The event is an ordinary event you can open and edit — see the next chapter. Two patterns cover most screens: a form whose submit button calls a function that saves the record, and a screen whose on-open event loads the rows a table or view displays.