PIES Studio Enterprise Version Setup on Google Cloud Platform (GCP)
This section explains how to create and manage service accounts and private keys using the Identity and Access Management (IAM) Google Cloud Platform (GCP).
Service account and private key.json files are required to push the product docker images to the client docker hub or cloud registry.
Service Account is required to set IAM roles to give specific set of permissions to smoothly perform Cloud-native & Kubernetes related actions.
Private key.json file allows you to connect and authenticate to the cloud console and perform cloud-native actions.
How to create a Service Account
To create a service account, you should have access to Google cloud and a specific IAM role for setting up and performing cloud-native actions.
Enter your Email or phone. Click Next.
Enter your Password and click Next.
You should authenticate with the Google cloud console using a specific email-ID and password. You must have permission to authenticate with Google cloud console & IAM roles.
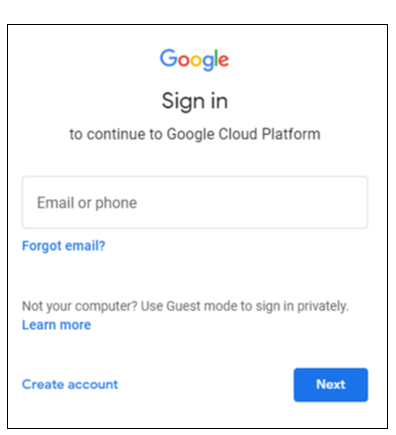
Figure 1: Login GCP
After successfully authenticating with the Google cloud console using a specific email-ID and password, you see the Google cloud home page.
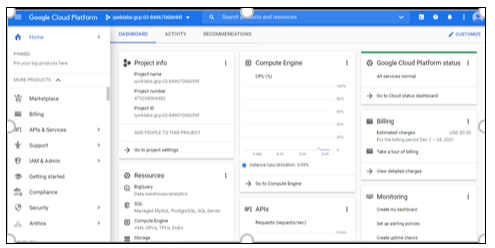
Figure 2: GCP Interface
Select IAM & Admin and click Service Accounts.
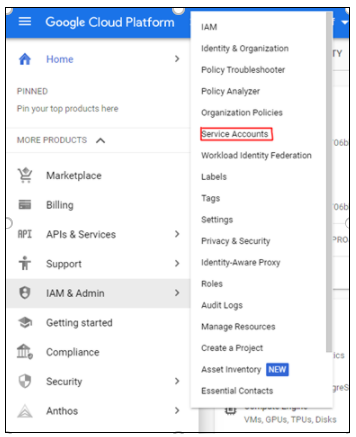
Figure 3: IAM and Admin drop-down list
Click +Create Service Account.
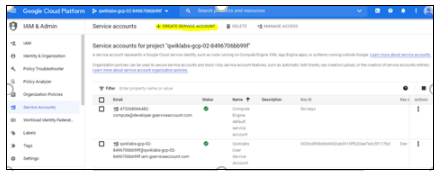
Figure 4: Create Service Account page
Enter the Service Account Name and click Create and Continue.
Click Done.
Service Account Description is optional. Grant service account access and grant users' access are also optional.
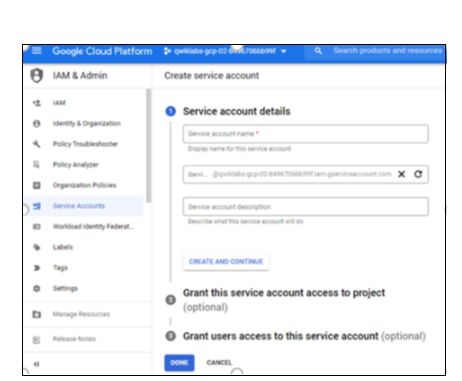
Figure 5: Service Account Creation
Your service account is successfully created.
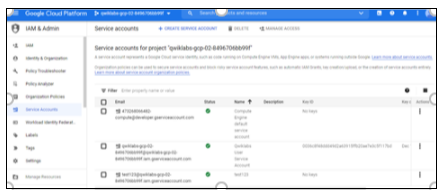
Figure 6: Successful creation of a service account
Permissions
After you create a service account, grant one or more roles to the service account so that it can act on your behalf.
To access docker images from PiES studio, you should grant specific admin permissions to access GCP storage volume. This allows you to complete specific actions on the resources in your project.
The following permissions are required to be given to the Service Account:
Storage Admin
Storage Object Creator
Storage Object Viewer
These IAM permissions are required to pull-push docker images to the client cloud registry.
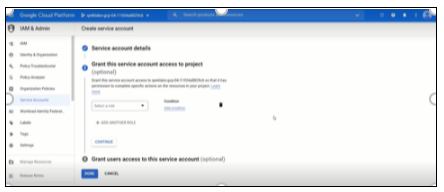
Figure 7: IAM Permissions
Click on the drop-down menu in Select a role. Choose Storage Admin from the options.
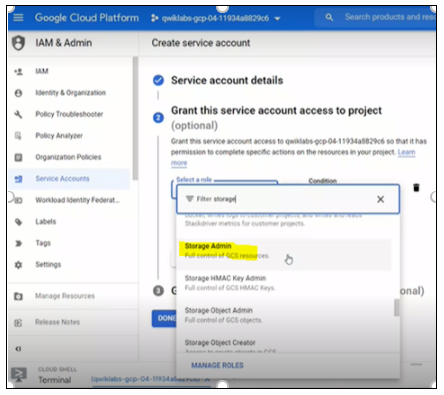
Figure 8: Role selection
Click Add Another Role. Select a role from the drop-down menu.
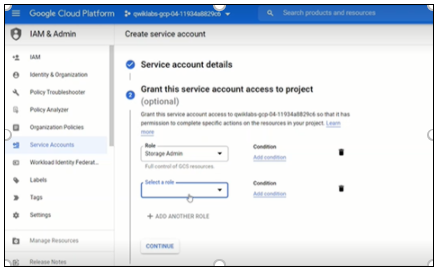
Figure 9: Another role selection
Select Storage Object Admin.
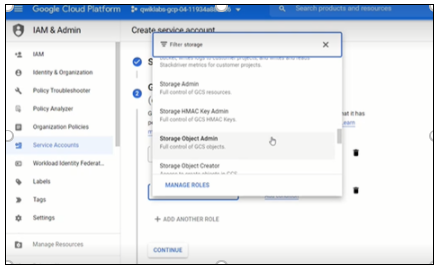
Figure 10: Selected role- Storage Object Admin
Click Add Another Role. Select a role from the drop-down menu.
Select Storage Object Viewer.
Click Add Another Role. Select a role from the drop-down menu.
Select Storage Object Creator. Click Done.
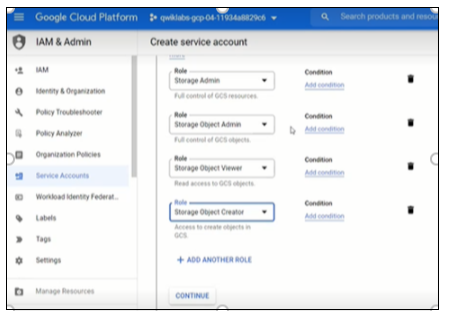
Figure 11: Role created
These permissions are mandatory for GCP access.
If you want to access the resources in the other projects, enable the APIs for the corresponding service account.
Action | Command |
|---|---|
Create a Service Account |
CODE
|
Grant your service account an IAM role on your project |
CODE
|
Allow users to impersonate the service account |
CODE
|
Table 1: Service account commands and their meaning
SERVICE_ACCOUNT_ID - The ID for the service account.
DESCRIPTION (Optional) - A description of the service account.
DISPLAY_NAME - A service account name to display in the Cloud Console.
PROJECT_ID - The project ID.
ROLE_NAME - A role name, such as roles or compute.osLogin.
USER_EMAIL - The email address for the user.
How to create a Private Key
The service account and the role is created. Now, let us create a private key for this account.
This is a one-time-key created for the user. It is highly recommended that you store this key in a secure place. If you lose this key, you need to generate another one.
Click on the three dots given in the Actions column of the service account for which you want to create a key.
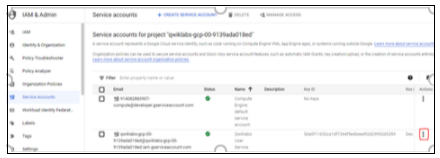
Figure 12: Manage Keys
Select Manage Keys.
Click the drop-down menu of Add Key. Select Create New Key.
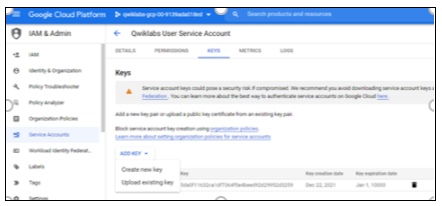
Figure 13: Create new key
Select JSON as key type from the pop-up menu. Click Create.
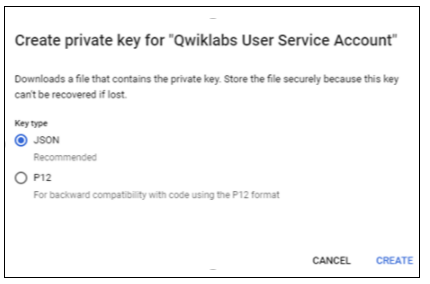
Figure 14: Key type
You will see a pop-up window.
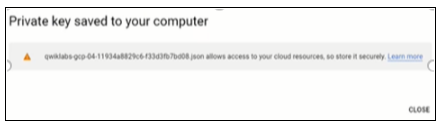
Figure 15: Private key created
Run the following command:
gcloud iam service-accounts keys create key-file \
    --iam-account=sa-name@project-id.iam.gserviceaccount.com
The service account key file is now downloaded to your machine.
After you download the key file, you cannot download it again.
The downloaded key has the following format, where private key is the private portion of the public or private key pair:
{
  "type": "service_account",
  "project_id": "project-id",
  "private_key_id": "key-id",
  "private_key": "-----BEGIN PRIVATE KEY-----\nprivate-key\n-----END PRIVATE KEY-----\n",
  "client_email": "service-account-email",
  "client_id": "client-id",
  "auth_uri": "https://accounts.google.com/o/oauth2/auth",
  "token_uri": "https://accounts.google.com/o/oauth2/token",
  "auth_provider_x509_cert_url": "https://www.googleapis.com/oauth2/v1/certs",
  "client_x509_cert_url": "https://www.googleapis.com/robot/v1/metadata/x509/service-account-email"
}
Store the key file securely because it can be used to authenticate your service account. You can move and rename this file using this key.