Enterprise Product Installation Guide
Preface
This guide explains how to install and configure the enterprise version of the PIES studio on your server. This is a complete guide that includes prerequisites required for the product installation to the deployment of the product. It is a primary source of information on installing the PIES product.
This section includes information about:
Audience
This document is intended for all our enterprise admins and/or System Integrator partners who will be associated with the installation of PIES Studio platform. The users of this installation guide are required to understand their enterprise’s infrastructure setup as well as have an appropriate authorization to install new products.
Conventions
The following text conventions are used in this document:
Conventions | Meaning |
|---|---|
boldface | This type indicates graphical user interface elements associated with an action, or terms defined in the text or the glossary. |
| This type indicates commands as examples within the text. |
Table 1: Text Conventions
Product Installation
Welcome to the PIES Enterprise Installation Guide. This guide covers the following topics:
Introduction
The PIES Enterprise Installation guide outlines the important steps and information regarding PIES studio in an Enterprise installation. The guide includes the minimum requirements and prerequisites for installing PIES studio.
Pre-requisites for product installation
Permission requirements: You must be a part of the administrators group on the server to install the PIES studio.
Minimum requirements:
Requirements | Value |
|---|---|
Operating System | PIES studio supports all cloud provider’s Kubernetes environment including on premises, and pure Docker environment for server-side deployment |
Technical Specifications | CPU - 4 vCPU minimum Memory – 4 Gi minimum Ephemeral storage – 4 Gi |
Autoscaling and production grade Kubernetes environment setup | Vertical pod autoscaling – enable Horizontal pod autoscaling – enable Cluster auto scalar – enable Node auto provisioning – enable Ingress for microservice – enable |
Table 2: Minimum Requirements for Product Installation
Pre-requisites for product installation on a cloud based infrastructure are as follows:
Service Account
A service account is a user account created for providing security context for services running on your server. The security context determines the ability of the service to access local and network resources.
See How to create a service account in GCP for more information.
See IAM Permissions to understand how to grant roles to the GCP service account.
Private Key
Use the private key to sign the generated service account token.
See How to create a private key in GCP for more information.
Docker Installation
Docker installation is one of the important aspect and a mandatory step in installation of the PIES studio.
It helps in pulling or downloading the docker images into the user’s local machine from the cloud registry.
It supports in pushing or sharing the docker images to the central repository.
Docker installation is a default set up for PIES Studio. The default settings give you access to the docker hub or container repository credentials. The credentials will be required to authenticate where docker images are stored. It is good to have a Linux docker so that a user can easily run cloud native and shell script commands.
To install a docker, follow these links:
For Windows - https://docs.docker.com/desktop/windows/install/
For Linux - https://docs.docker.com/engine/install/
Docker installation is mandatory for users who want to install PIES using docker servers or ECS (AWS- elastic container service) or On-Premises docker servers.
Refer to these command descriptions to understand the commands in this document:
Sr. No | Commands | Description |
|---|---|---|
1. |
| This is a default command for a docker. To explore docker, use |
2. |
| This command tags the existing docker image with new URI or a latest version or new name. |
3. |
| This command converts the existing docker file to .tar file which is shareable. |
4. |
| This command will retrieve the docker image from .tar folder without any credentials. |
5. |
| This command will apply the Kubernetes manifest file in to running Kubernetes cluster for on-premises and Cloud Kubernetes service. |
6. |
| This command will pull PIES Product images from GCR repo (authentication using service account and private key is mandatory). Use the URI of GCR repo for installing PIES Studio shared with you. |
7. |
| This command will tag PIES Product docker images with the user's private docker registry. This command is mandatory. It is used to save the docker images and store them for further use. This command is generic for Elastic Container Registry (ECR), Google Container Registry (GCR), or any docker image registry. This command will work on all docker registry. |
8. |
| This command will push the docker images to docker registry with respect to URI of the users private docker registry. This command is generic for Elastic Container Registry (ECR), Google Container Registry (GCR), or any docker image registry. This command will work on all docker registry. |
Table 3: Command Descriptions
Kubernetes Installation
If you are planning to use Kubernetes along with Docker for managing PIES Studio, then you can set up Kubernetes either on Cloud, On-premise or any bare metal server. Some prerequisites are required to avoid any error during product installation. These errors can be running out of disk space, or scheduling pods pending error.
Kubernetes cluster must have:
3 node setup
4 vCPU
10 Gi of memory
Mandatory Requirements:
You should have product docker images for Kubernetes clusters (like RKE, Cloud, or on-premise), it is mandatory to have Product Docker images.
You should have Kubernetes Admin access.
You should have “kubectl” (Kubernetes command line tool) to configure with Kubernetes cluster that is responsible for installing product.
For the private Kubernetes cluster, it is mandatory to have NAT (Network address translation) for inbound and outbound communication of pods and services.
Our Kubernetes manifest files support on-premises and different cloud providers like:
Google Cloud Platform (GCP)
AWS
Azure
Digital-Ocean
IBM
These manifest files also support service providers like Rancher, and services like RKE.
The Kubernetes manifest files are mandatory for product installation. Also, these files are immutable. If container port or service port are misconfigured, then the product will not be installed correctly.
In Production-grad Kubernetes cluster, users must apply the following to manage and handle the traffic coming from end-customer from browser’s side:
Horizontal pod autoscaling
Vertical pod autoscaling
Node-auto provisioning
Cluster-auto scaler
Horizontal and Vertical Pod Auto Scaler files help in product installation in the production cluster.
For more information on Horizontal Pod Autoscaling, see https://kubernetes.io/docs/tasks/run-application/horizontal-pod-autoscale/ .
apiVersion: autoscaling/v1
kind: HorizontalPodAutoscaler
metadata:
  name: $name_of_deployment
spec:
  scaleTargetRef:
    apiVersion: apps/v1
    kind: Deployment
    name: $name_of_deployment
  minReplicas: 1
  maxReplicas: 10
  targetCPUUtilizationPercentage: 50
For more information on Vertical Pod Autoscaling, see https://cloud.google.com/kubernetes-engine/docs/concepts/verticalpodautoscaler
apiVersion: autoscaling.k8s.io/v1
kind: VerticalPodAutoscaler
metadata:
  name: my-vpa
spec:
  targetRef:
    apiVersion: "apps/v1"
    kind:       Deployment
    name:       my-auto-deployment
  updatePolicy:
    updateMode: "Auto"
Microservice Port Number
Microservice port number is the most important thing in deployment. If it is not configured correctly, then the end user or the request-traffic from browser side to the application or website does not connect to the deployed container. As a result, the end-user is not able to access or see app/website.
Microservice Port Numbers for:
pies-core is 8080
web is 80
Deployment
For deployment, you must use our default manifest files for Kubernetes cluster. There are four .yaml files:
The four default manifest files are:
pies-core-service.yaml file - This file is a microservice application used for port forwarding. It is a backend application.
apiVersion: v1
kind: Service
metadata:
  name: pies-core-service
spec:
  type: ClusterIP
  selector:
        project: pies
        application: core
  ports:
  - protocol: TCP
    port: 8080
    targetPort: 8080
pies-core-deploy.yaml file - This is a deployed file where we deploy docker images in Kubernetes cluster. In other words, it is a path to the docker images.
apiVersion: apps/v1
kind: Deployment
metadata:
  name: pies-core-deploy
spec:
  selector:
    matchLabels:
        project: pies
        application: core
  replicas: 1
  template:
    metadata:
      labels:
        project: pies
        application: core
    spec:
      containers:
      - name: pies-core
        image: "docker_image_uri/pies-core:v0.0.0"
        ports:
        - containerPort: 8080
        resources:
          limits:
            cpu: 250m
            memory: 0.5Gi
            ephemeral-storage:  0.5Gi
          requests:
            cpu: 250m
            memory: 0.5Gi
            ephemeral-storage:  0.5Gi
web-deploy.yaml - This is a web application file for pies-core-service.yaml file. It is a front-end application.
	apiVersion: apps/v1
	kind: Deployment
	metadata:
	  name: appbiz-web-deploy
	spec:
	  selector:
	    matchLabels:
	        project: appbiz
	        application: web
	  replicas: 1
	  template:
	    metadata:
	      labels:
	        project: appbiz
	        application: web
	    spec:
	      containers:
	      - name: appbiz-web
	        image: "docker_image_uri/web:v0.0.0"
	        ports:
	        - containerPort: 80
	        resources:
	          limits:
	            cpu: 250m
	            memory: 0.5Gi
	            ephemeral-storage:  0.5Gi
	          requests:
	            cpu: 250m
	            memory: 0.5Gi
	            ephemeral-storage:  0.5Gi
web-service.yaml - It is a web service belonging to the web deployment.
apiVersion: v1
kind: Service
metadata:
  name: appbiz-web-service
spec:
  type: ClusterIP
  selector:
        project: appbiz
        application: web
  ports:
  - protocol: TCP
    port: 80
    targetPort: 80
It is mandatory to use these files to install the product.
Installation
There are two important files for product installation:
docker-compose.yaml
shell script deploy.sh
The docker-compose file executes the local testing and is used by Kompose which is Kubernetes native service to automatically provision Kubernetes manifest files.
Shell Script deploy.sh auto-provisions Kompose and other Cloud-native actions like authenticating with cloud environment using key.json file.
The following command changes the GCR repo location according to the user input in the docker-compose file:
sed -i 's/$your_project_in_google_cloud/web:v1/gcr_repo-location of user/g' docker-compose.yaml
sed -i 's/$your_project_in_google_cloud/pies:v1/gcr_repo-location of user/g' docker-compose.yaml
The following command changes the location of the user’s key.json file in deploy.sh configuration:
sed -i 's/$your_key.json/user-cloud-key.json file/g' deploy.shThe following commands change the location and pull-push the docker image from the user’s docker hub repository:
sed -i 's/$your_project_in_google_cloud/web:v1/gcr_repo-location of user/g' deploy.sh
sed -i 's/$your_project_in_google_cloud/pies:v1/gcr_repo-location of user/g' deploy.sh
The following commands change the configuration in deploy.sh according to the user’s input to perform all installation tasks in their specified directory:
sed -i 's/$your_directry/user's location/g' deploy.sh
sed -i 's/$your_project_in_google_cloud/user's gcr repo location/g' deploy.sh
The following command automatically deploys the product into the running Kubernetes Cluster onto the user's cloud environment:
sudo chmod 777 deploy.sh
sudo ./deploy.s
License Key Activation
This is the most crucial part of the product installation. Once the customer on-boarding process is initiated, a PIES studio license key is generated as part of the process. The license key details are sent through an e-mail to the authorized user(s) within your organization.
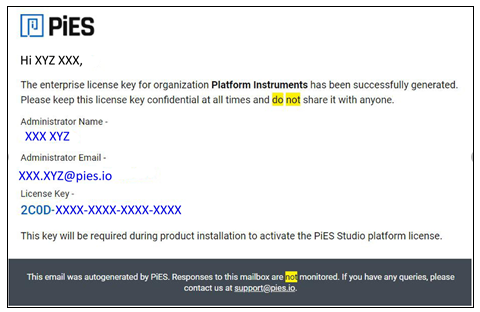
Figure 1: Email layout of a License key
Start the installation process using the installable received from PIES.
The installation process will progress and may take some time.
Prior to completion of the installation, you will be asked to verify your license key.
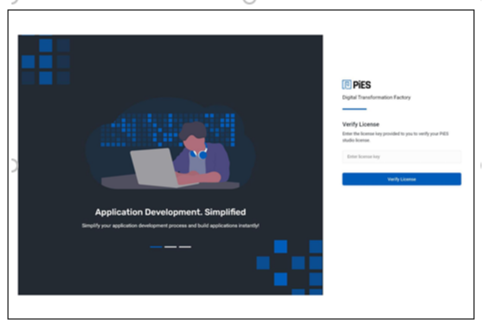
Figure 2: License Verification
You will receive a one-time password for verification.
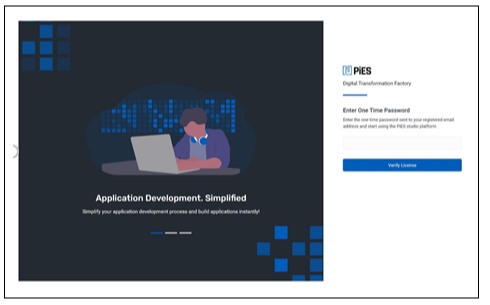
Figure 3: One Time Password
Your license key is verified. You are now ready to set a password and start using the PIES studio.
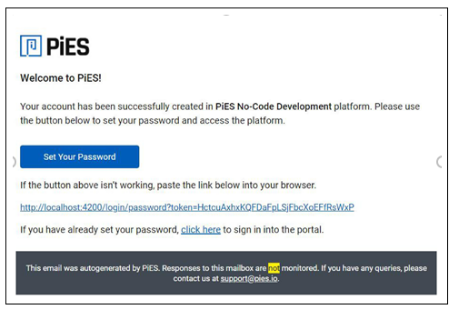
Figure 4: Successful account creation
Product Installation in AWS
You can install our product in your AWS environment in the following way:
Create and manage IAM Users and Groups
Administration Features
The PIES Studio administrator console lets you manage the users and their roles in PIES platform. As an admin, you can perform various tasks related to managing the users, user roles and applications created using PIES Studio. As an admin you can perform the following:
User management : This includes user on-boarding on PIES Studio, password management, and user off-boarding.
Role management : This includes creating and maintaining a unique list of user roles in PIES Studio. You can assign user roles to the on-boarded users, and allow them access based on the roles and their definitions. PIES Studio currently supports two roles namely Admin and Developer.
Application management : This includes managing the applications, and assigning or transferring the ownership of applications.
User Management
The administrator console allows you to delete, edit, or send an email to all the listed users.
These actions can be performed only by the user who has admin permissions.
You can onboard the new users to the PIES Studio in two ways:
Add Users - You can add new users by creating their user credentials within the PIES studio. As an admin you will use the method of user on-boarding when you do not want to integrate PIES Studio with any external identity management solutions like LDAP or Active Directory.
This option should not be used if PIES Studio is already integrated with external identity management solutions.
To add an user:
Enter the name of the workspace.
Select Share Workspace under access control section.
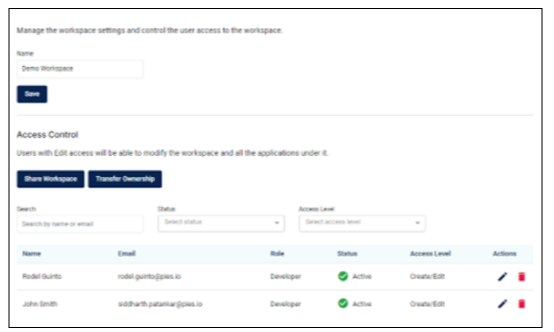
Figure 5: Manage workspace
Enter the names of the users who you want to add from the dropdown menu in the form that opens in a pop-up window.
Choose the appropriate access control option.
Click Save.
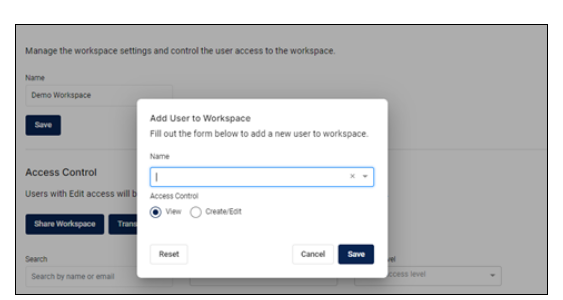
Figure 6: Form for adding a user
Add from Active Directory - As an admin, you will use this method to on-board new users to PIES Studio when you have integrated PIES Studio with Active directory, or equivalent identity management solutions in your organisation.
To add from the Active Directory:
Select the users you want to add or enter the specific user name in the search bar.
Select an appropriate role for the user from the dropdown menu.
Click Save.
If you have installed PIES studio for the first time and you want to add all users, check the box next to Select All Users. Note that, the role assigned will be same to all users.
Any user who has active workspaces and applications assigned to him cannot be deleted or removed from the PIES Studio administrator console.
When any such user is removed from the console, their active workspaces and applications are permanently deleted that cannot be accessed any more. So, before removing any user, ensure that their workspaces and applications are moved to another active user’s workspace.
User Role Management
The administrator console allows you to assign various roles to the on-boarded users. These role definitions help in differentiating access rights to be granted from one user to other user. It also helps in building a role based access control mechanism within the organisation while using PIES studio . PIES studio currently supports two main roles: Developer and Administrator.
Enterprises will be allowed to add additional roles apart from the two standard roles defined in PIES Studio namely - administrator and developer.
The edit option allows you to modify a name to the role assigned to the user.
The access level control allows you to grant the access type to the user.
The access control allows you to create, edit, and view control to the user for various workspaces and applications.
Application Management
The administrator console allows you to manage various applications created by the users within the organization.
Troubleshooting Scenarios
The troubleshooting scenarios mentioned in this section are specific to different cloud providers.
Sr. no | Error Description | Analysis | Corrective Action | GCP | AWS |
|---|---|---|---|---|---|
1. | An end user wants to install PIES studio on their premises, but they select a wrong prerequisite or policy. For example, they have given only admin roles and have not given any other roles or permissions like creator or viewer. | When the end user creates a private key for their service account and sends the JSON key to the PIES studio, the PiES studio pulls the docker images and pushes them in the end user’s service account. During this process, the pushing is not successful because the end user has not given complete or correct permissions while creating the service account and private keys. | In addition to the admin role and permissions, you must give all other roles and permissions like creator and viewer to prevent such an error. |
|
|
Table 4: Troubleshooting Scenarios
We are still working on other troubleshooting scenarios. As we gather them, we will be adding them here.